Implementing Audio Dialogue in AtomCraft
This post explains how to implement interactive music in your game with AtomCraft.
Introduction
In this series of tutorials we have already covered the implementation of sound effects and music. The dialogue lines in your game are just as important and deserve their own post! We will cover the basics of dialogue integration, branching and localization. We will demonstrate how to take advantage of some of the most important AtomCraft’s features to efficiently implement interactive dialogue in your project.
Dialogue Implementation in AtomCraft
For the most part, the integration of dialogue is very similar to the integration of music or sound effects. In ADX2, all these elements are implemented using sound Cues. However, the concept of localization, which will be addressed later, is new and very important.
First of all, there are some key features in AtomCraft that you have to understand in order to make the right decisions during the implementation and successfully create interactive dialogue. Let’s take a closer look.
Streaming vs memory:
When registering your voice-over files in AtomCraft you will have to decide if they are going to be streamed or played from the memory. This choice is usually based on the files size i.e. their duration and sometimes also the number of times they are going to play. For instance, a long cinematic dialogue, which is going to play only once, will most likely be streamed.

Stream vs zero-latency stream:
When streaming audio, there is a small amount of latency before the engine has loaded enough data in the buffer to start the playback. In some cases, it could be very problematic (for example when the dialogue needs to be precisely synchronized with the animation).
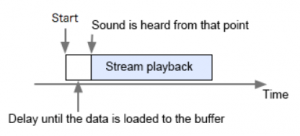
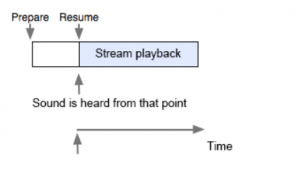
For those situations when perfect synchronization is essential, you can use the zero-latency streaming option. With this method, the data has already been prepared at the time of playback (i.e. the first buffers of data have been loaded) so there is no latency.
Audio Codecs:
In addition to the platform-dependent codecs, ADX2 comes with three proprietary audio codecs called ADX, HCA and HCA-MX. You can learn more about ADX2’s audio codecs in this Post.
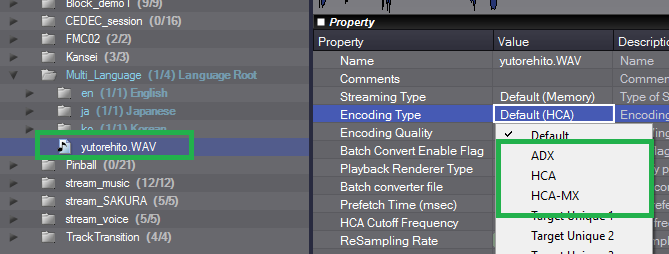
When performing encoding, the sound quality (the compression ratio) for each codec can be specified using a five-level value in AtomCraft:
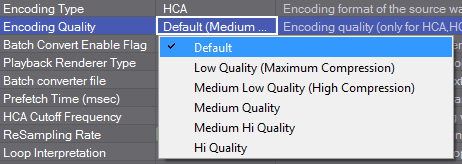
Depending on the type of project, platform and level of quality desired, select the right type of Codec and compression ratio. You can also learn more about the Codecs in this Video Tutorial.
Importing your audio files
The first thing to do when implementing dialogue in your game is to register your audio files in the project. Therefore, let’s see how to import them.
Step 1:
Go to the Materials Panel and right-click on your dialogue folder.
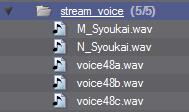
Step 2:
Click on Add material then select your files and click Open.
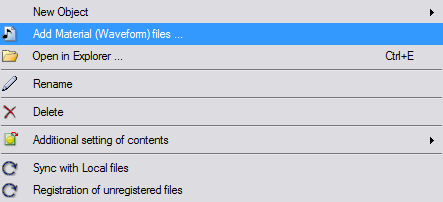
*You can also import them directly from Windows Explorer: when you drag & drop an audio file on a Material folder, a CueSheet or a Cue, the audio file is automatically imported in the Materials Root Folder.
Step 3:
It is now possible to adjust the streaming type. You can also select a codec and set the compression ratio. Simply click on your folder and all the settings of the audio files will be accessible in the middle pane.

Localization
Some projects need to be localized in several languages. To manage different languages in your project, you need to add each one in the language settings and then create a Multi_language folder in the Materials.
Step 1:
Go to the Global Settings in the project tree and open the Language Settings folder. This is where we you can add languages to a project. To add a new language, right-click on the Language Settings Folder, select New Object and then click on Create Language Settings.
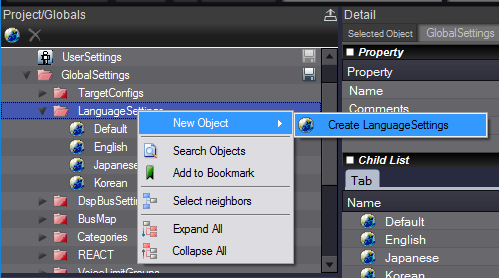
Step 2:
Add the new language. You can either create your own language settings or simply chose a predefined template.
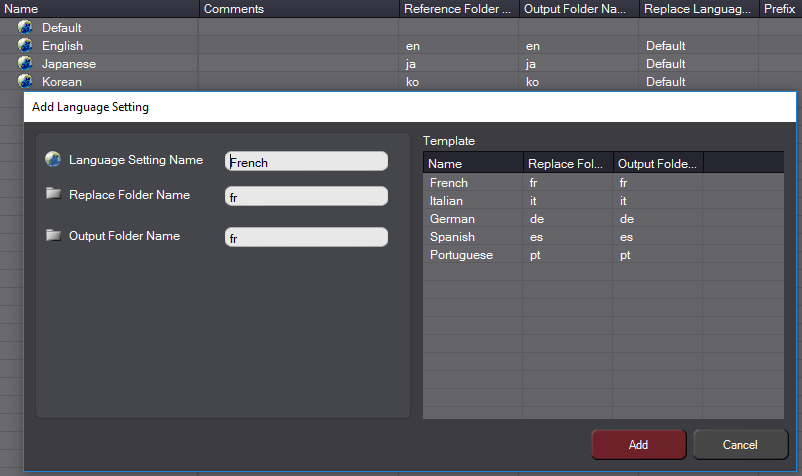
The new language object will now be available. Click on it to view or edit its properties. Note that it is also possible to edit all your language properties directly within the Language Settings Folder.

Step 3:
It is now possible to adjust the language properties in the middle pane. For the reference folder name, put the name of your subfolder for this language. For the output folder name, specify the subfolder in which the binary files are going to be exported for this localized language. Here, you can also specify the default language to use when a file is missing in the localized language. Finally, if your localized file names have a prefix or a suffix, you can specify them here too.

Step 4:
Before we can register audio files for Multi-Language Settings we need to create a multi-language folder. Go to the Materials in the project tree and right-click on the Materials Root folder. Select Creation of folder for localization.
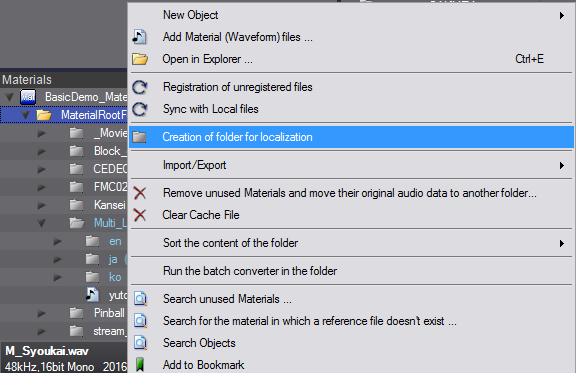
Step 5:
To import your dialogue files, double-click on the Multi_Language folder and simply drag & drop the audio files for each language onto the corresponding subfolder.
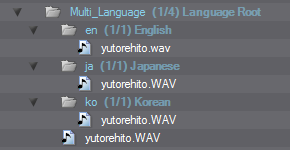
Step 6:
Once the files are registered as localized materials, you can preview them. Select a cue referencing a localized file and choose a language from the LanguageSetting combo box located at the top of the main window.
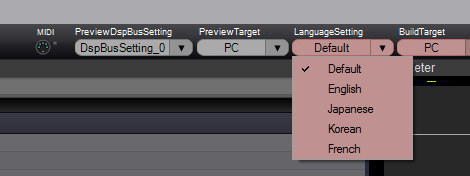
Note: In AtomCraft, it is also possible to specify tracks as being language-dependent. Making a Track language-dependent is useful if the automatic replacement of materials is not flexible enough.
To make a track language-dependent: select it and double-click on Apply Language in the Property panel. The language selector window appears. Select your language and click Ok.
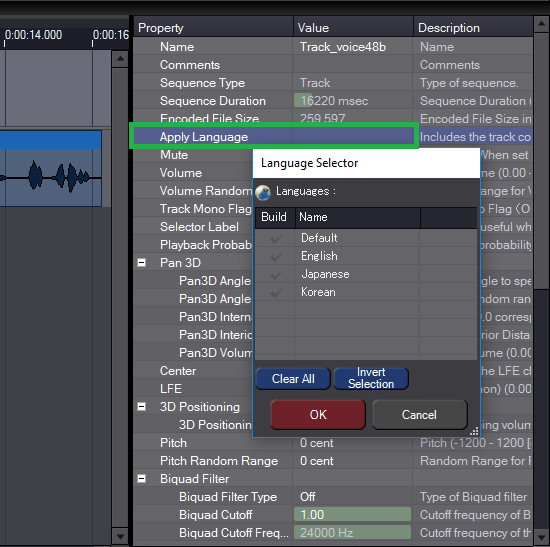
From now on, when we select a language from the LanguageSettings combobox and hit play, each Track will only play in its respective language.

Simple dialogue integration
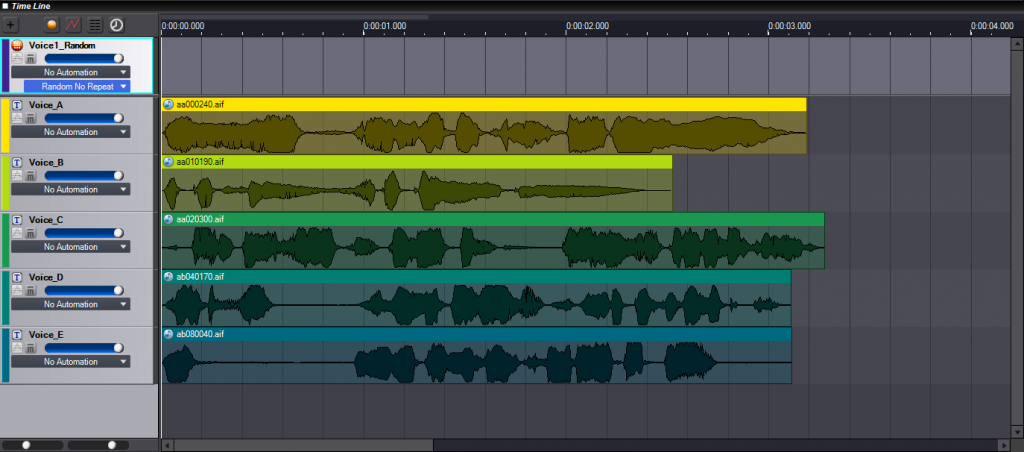
All your dialogue can be effortlessly integrated in your project using Cues like for any other type of sound. Simply create a Cue of the right type, add track(s), add your audio files and adjust the Cue’s parameters. If you are not familiar with the Cue system in ADX2, we recommend that you watch this Video Tutorial to learn more about it.
Dialogue branching
Some games, especially AAA titles, require a more advanced dialogue system. For example, branching dialogue may be needed. In this section, we will explain how to implement this type of dialogue behavior with AtomCraft.
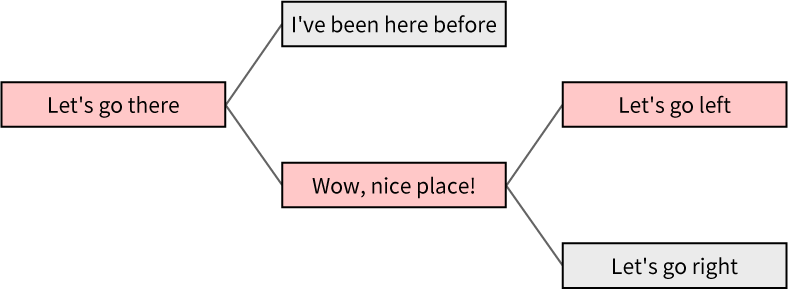
Let’s take this simple sequence where the dialogue needs to change depending on a specific situation.
Step 1:
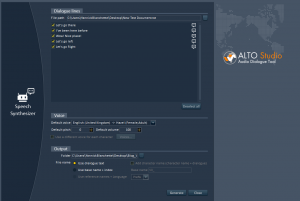
To create our test assets for this branching dialogue sequence, we have used Alto Studio by Tsugi, a game audio dialogue tool that comes with many features including a placeholder speech synthesizer. We simply imported our text and Alto Studio automatically generated all the audio files and named them accordingly.
Step 2:
Once all our dialogue lines have been imported in AtomCraft, we have to decide how many Cues are needed and how we are going to implement them. Each situation is different, but fortunately, AtomCraft is very flexible.
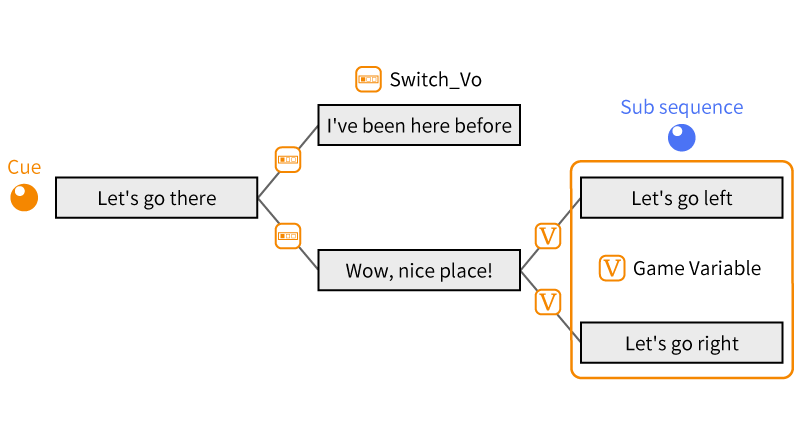
For this example, we have decided to implement the dialogue sequence using only one Cue with one switch and one game variable, as depicted below.
Step 3:
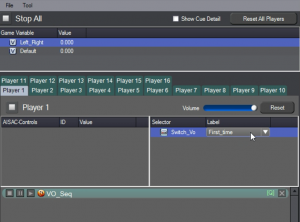
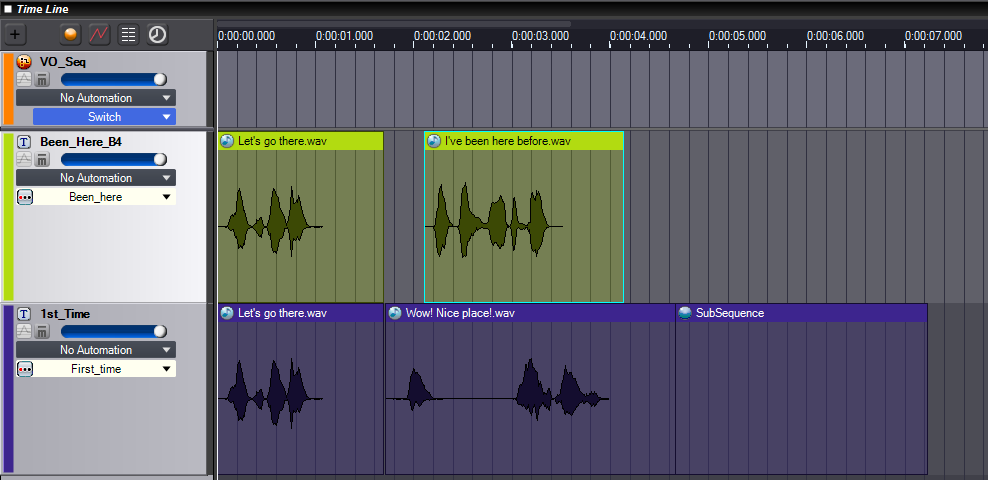
We have created a Cue of type Switch with 2 Tracks. The programmer will decide which dialogue line to play, depending on the situation, by picking the right Selector Label value. To learn more about Selectors please refer to this Video Tutorial.
Here is the Cue behaviour: If it is the first time, the second track will play and we will hear: “Let’s go there! Wow! Nice place!” If the player went there before, the first track will play and this time we will hear: “Let’s go there! I’ve been here before”.
Step 4:
The first section of this dialogue sequence is now ready. However, we still need to find a way to implement the last section of the sequence. Depending on which direction the player is going in, the dialogue needs to end with: “let’s go left” or “let’s go right”.
To implement this behaviour, we used a Sub Sequence and a Game Variable.
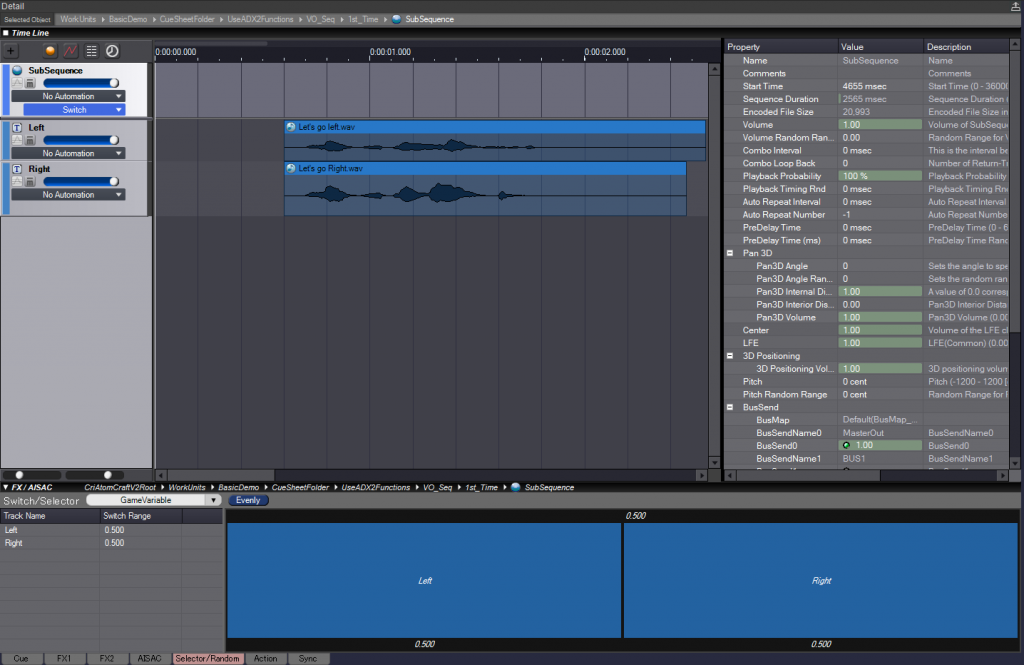
A Sub Sequence has functions equivalent to a Cue. Tracks and Waveforms can be added, edited and randomized directly in the Sub Sequence. It is essentially a whole Cue within a Track.
To create a Subsequence: right-click on a Track, select “New Object” and choose “Create Sub Sequence”.

Thanks to our new Sub Sequence, it is now possible to “branch” our dialogue using 2 tracks: Left and Right.
Step 5:
We decided to use a Variable which will allow the dialogue to follow the direction the player decides to go in. A Variable has a value coming from the game (set by the programmer). In this case, a value between 0 and 0.49 will trigger the first Track and a value between 0.5 and 1.0 will trigger the second Track.
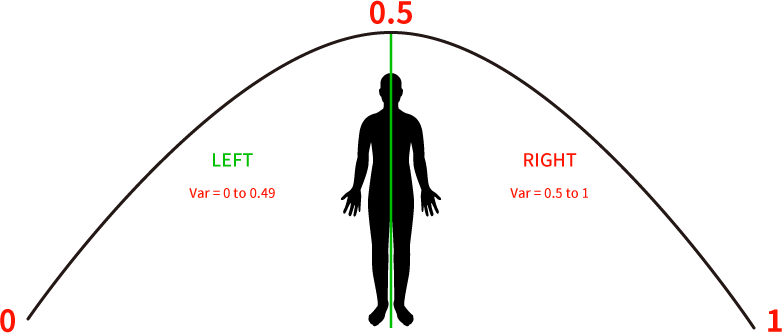
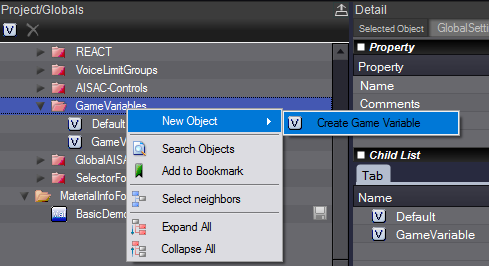
To create a new Variable: go the Global Settings window, right-click on the GameVariables folder, select “New Object” and choose “Create Game Variable”.
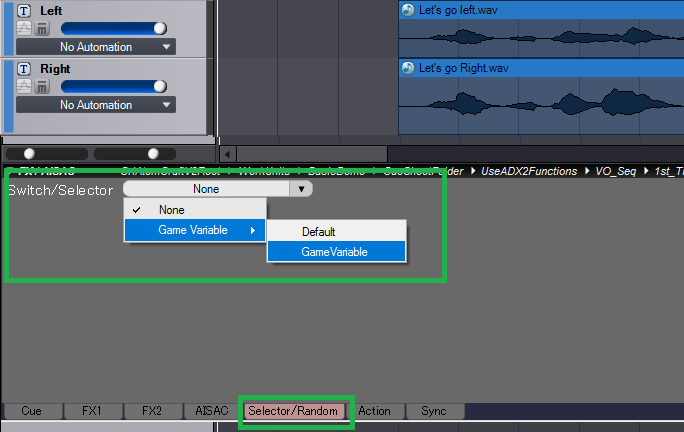
To assign the new Variable to your Sub Sequence: open your SubSequence, select the Selector/Random tab and choose your Variable in the dropdown menu.
Step 6:
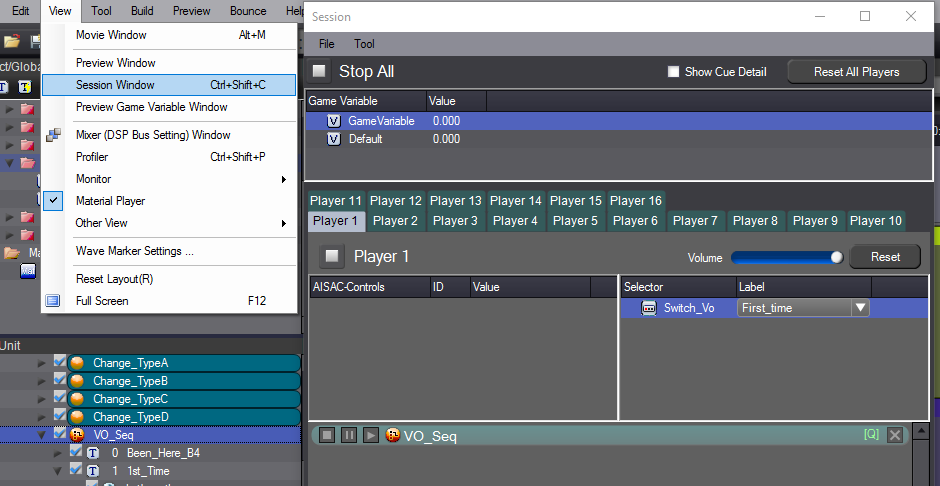
Now, to test your implementation: open the session window and select your Cue. The dialogue lines will play according to the value of the selector and the game Variable.
Here is a Video example (click on the picture to watch the video):
To listen and look at some examples of interactive dialogue implementations, we have created a small AtomCraft project that you can download below:
[Note: this project requires AtomCraft 2.27.01 or higher]
Dialogue and ducking with REACT
The last but very important feature we need to cover is REACT, the ducking system of AtomCraft.
Lowering the volume of a sound when another one is playing at the same time is called “ducking”. A ducking system is an important tool in the game audio mixing process. It allows the game audio engine to control and prioritize what type of sound will clearly be heard by the player when the game action culminates.
The ducking system in ADX2 is called “REACT”. It controls, at run-time, the audio volume dependency between different audio categories. By configuring the REACT settings in Atom Craft, you can automatically adjust the real-time volume balance between categories of sounds depending on the action. A common example of ducking is when a game is gently lowering the volume of the music when dialogue is being played. It allows for more headroom for the voice in the mix and ensures it will clearly be heard by the player.
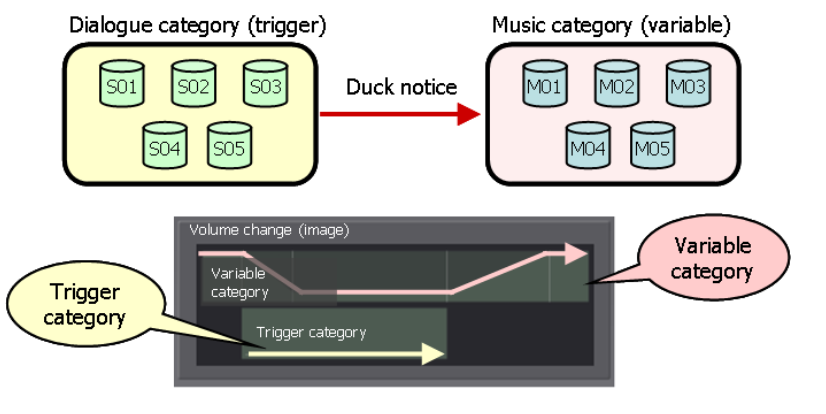
Step 1: Create 2 categories in Atom Craft
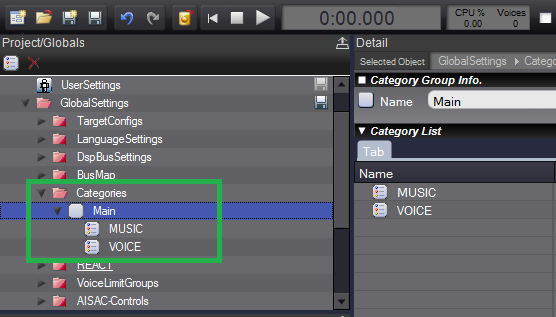
Step 2: Assign the Cues (Changing & Trigger) to your Categories
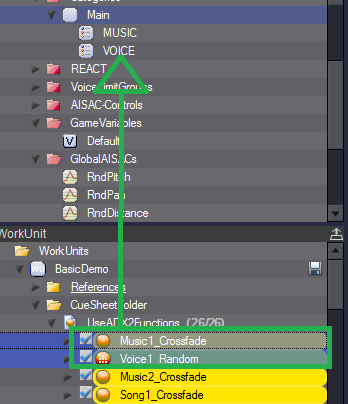
*Drag & Drop your cues onto the right categories
Step 3: Create a new REACT
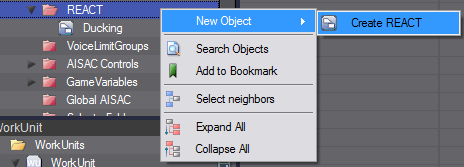
Step 4: Assign the Changing Category (the one that will be ducked)
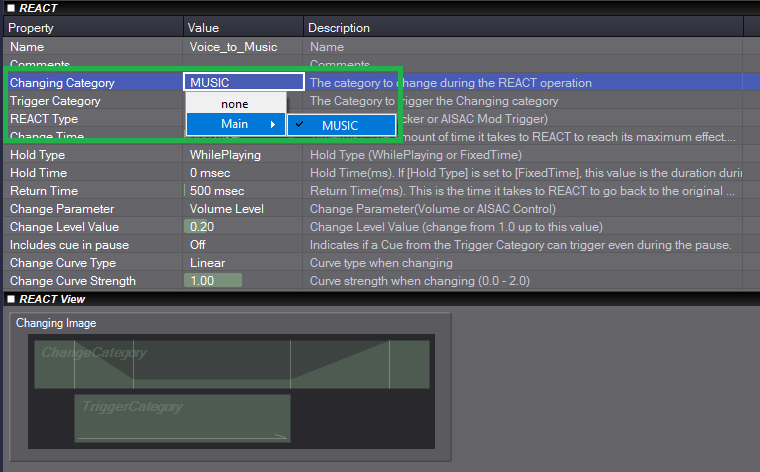
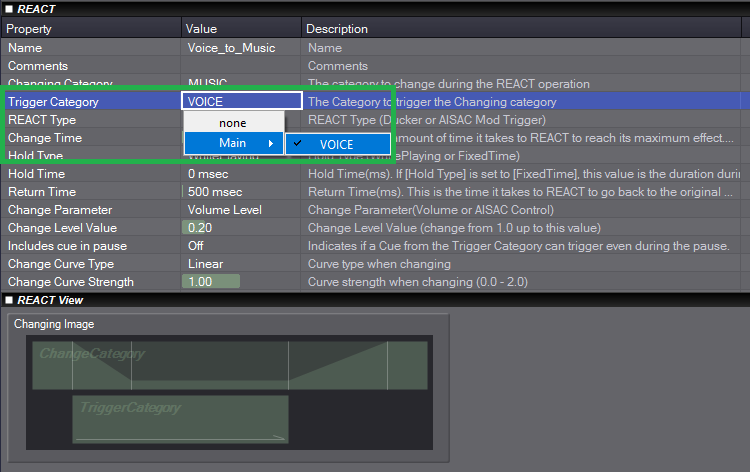
Step 5: Assign the Trigger Category
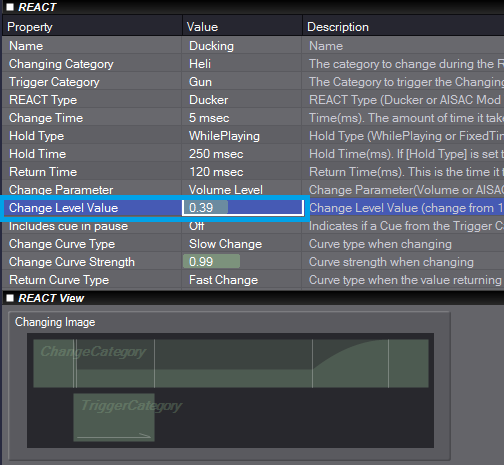
Step 6: Set the volume attenuation ( 1 = no attenuation 0 = mute)
Step 7: Set the Change Time, Hold Time and Return Time of the Ducking
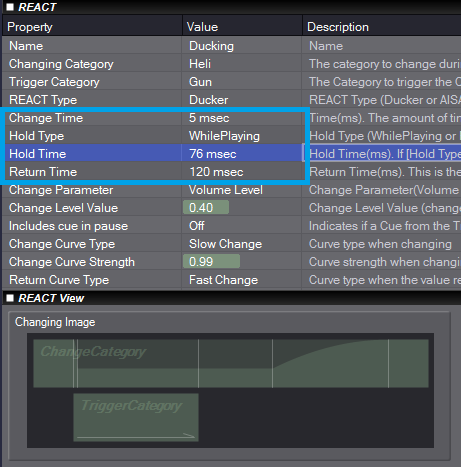
Now, each time a dialogue line is going to play, the game will gently lower the volume of the music!
This concludes our post about the interactive dialogue system in ADX2. Let us know if you want to learn more about a specific ADX2 feature!


