ADX Beginner’s Guide #16 – Session, Preview and Profiler
Having learned everything about generating binary data for our Cues in the previous post, let’s see what solutions Atom Craft offers to test, tweak, and optimize our sounds for the game engine. This will be the last step in our beginner’s journey!
Session Window
The purpose of the Session window is to simulate audio scenarios by playing several Cues together, in order to check if everything sounds as intended before building the data.
To use the Session window, simply drag and drop the Cues you want to play. You will be able to:
- Test the effect of Selectors, Game Variables, AISAC, Blocks, DSP Bus Settings, and Snapshots.
- Check Category volume, and Cue limits.
- Test Cues containing Actions.
- Perform a simple preview of 3D positioning.
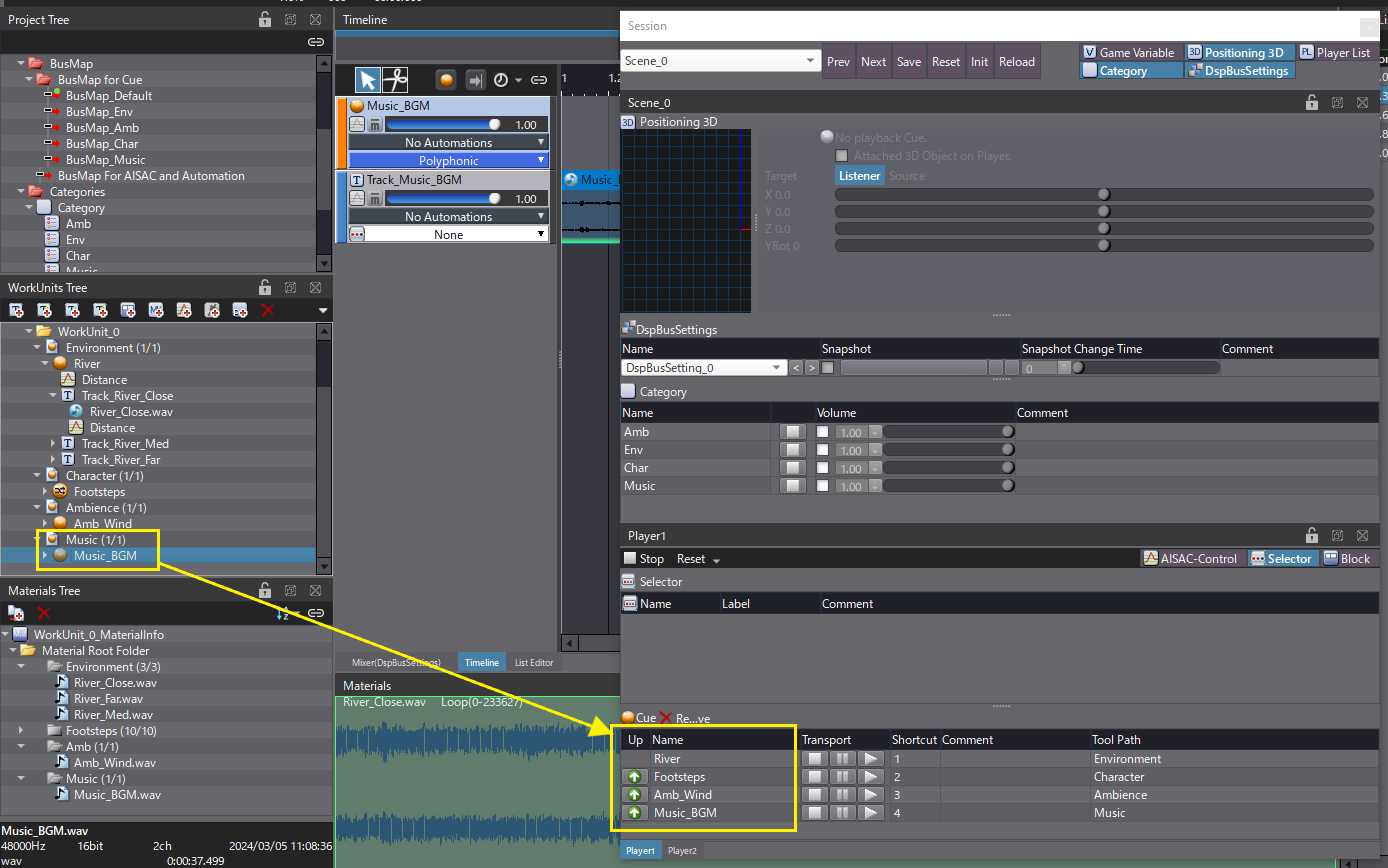
With the ability to play multiple sounds at once, you can create small audio scenes to give you a rough idea of how your Cues will sound and behave when mixed together. This means that, even before the sounds are implemented in the game engine, it is possible to iterate on several audio elements very quickly, without even leaving Atom Craft.
In-Game Preview
The in-game preview is the next step: once the sounds are implemented, you may still want to adjust some of the audio parameters while the game is running. Thanks to the in-game preview function, it is possible to synchronize the game with the Atom Craft project.
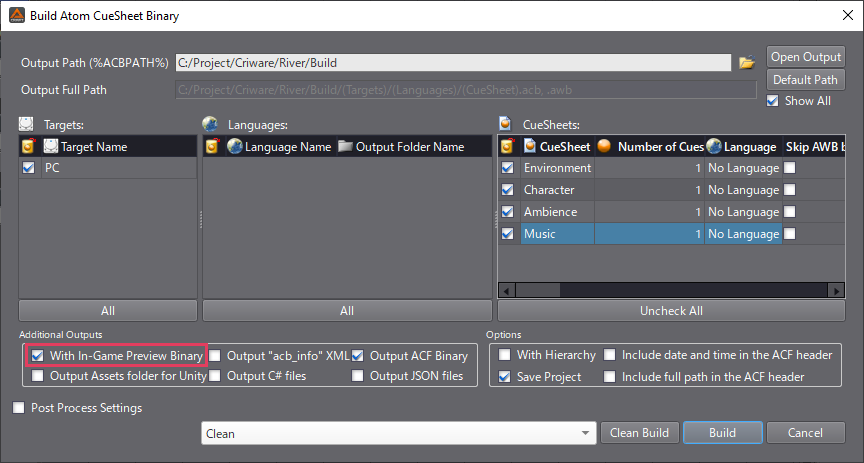
Before enabling the in-game preview, special versions of the ACF and ACB files must be built. Normal ACF and ACBs are optimized and do not include any unnecessary information, such as parameters that are still at default values. The binaries built for in-game preview, on the other hand, include all the parameter values, as well as an extra buffer that can be used to add additional data or update sound materials, and GUIDs for data updates. To build these binaries:
- Go to the menu, select Build, and open the Build Atom Cue Sheet Binary window.
- Select the Cue Sheet you want to export and enable the With In-Game Preview Binary option.
- Once exported, a new folder named “inGamePreview” will be created containing the special ACF and ACB files.
- Load these into the game instead of the normal files to use the in-game preview.
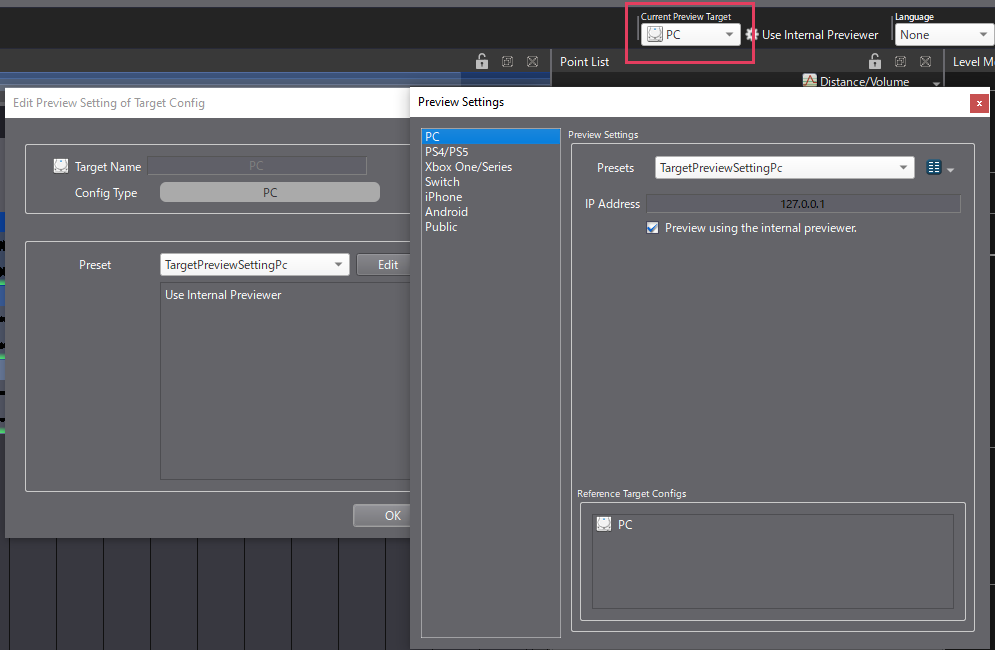
You will need to set the preview settings for the targeted platform:
- Right-click on the platform in the Project Tree and select Edit Preview-Settings.
- Set the IP of the machine running the game.
- If the game and Atom Craft are both running on the same computer, the default settings should work right out of the box. But they will come in handy whenever you need to connect to a game on a console or mobile platform.
- Finally, set the Current Preview Target in Atom Craft’s toolbar.
In order to establish a connection between Atom Craft and the game:
- Run the game on the target platform.
- In Atom Craft, go to View and open the Preview Window.
- Click on the Start In-Game Preview button.
- If the connection is successful, the ACF and ACB files should be displayed in the window.
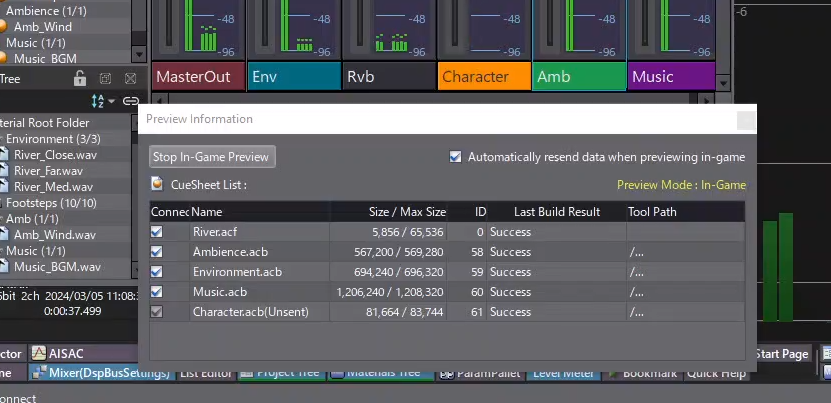
At this point, you should be able to edit Cue parameters, mixer settings, AISAC curves, Materials, etc. all while the game is running. This is a great way to fine-tune the audio of the game as it will be played. Once satisfied with your changes, you can save your project, rebuild the ACF and ACB, and import them back into the game to make them permanent.
Here is an example of an in-game preview with Unreal Engine:
Profiler
A game can have many Cues playing simultaneously, and while the in-game preview is convenient for editing audio parameters at run-time, if there’s a problem while playing a Cue during the game, you need to be able to track what is happening.
The Profiler allows you to collect and visualize information about the sounds being played at run-time. It uses the in-game preview connection mechanism to record logs of everything happening in ADX. These logs are essential for debugging any audio problems.
The Profiler can display the following information:
- CPU usage, and number of voices currently playing.
- Timeline showing the playback status of the Cues and Voices.
- Text log of all events received, such as Cue and Voice started/stopped, Cue Sheets loaded, AISAC Control values sent, etc.
- 3D positions of the voices.
- Loudness and peak meters, in order to check the overall loudness of the game.
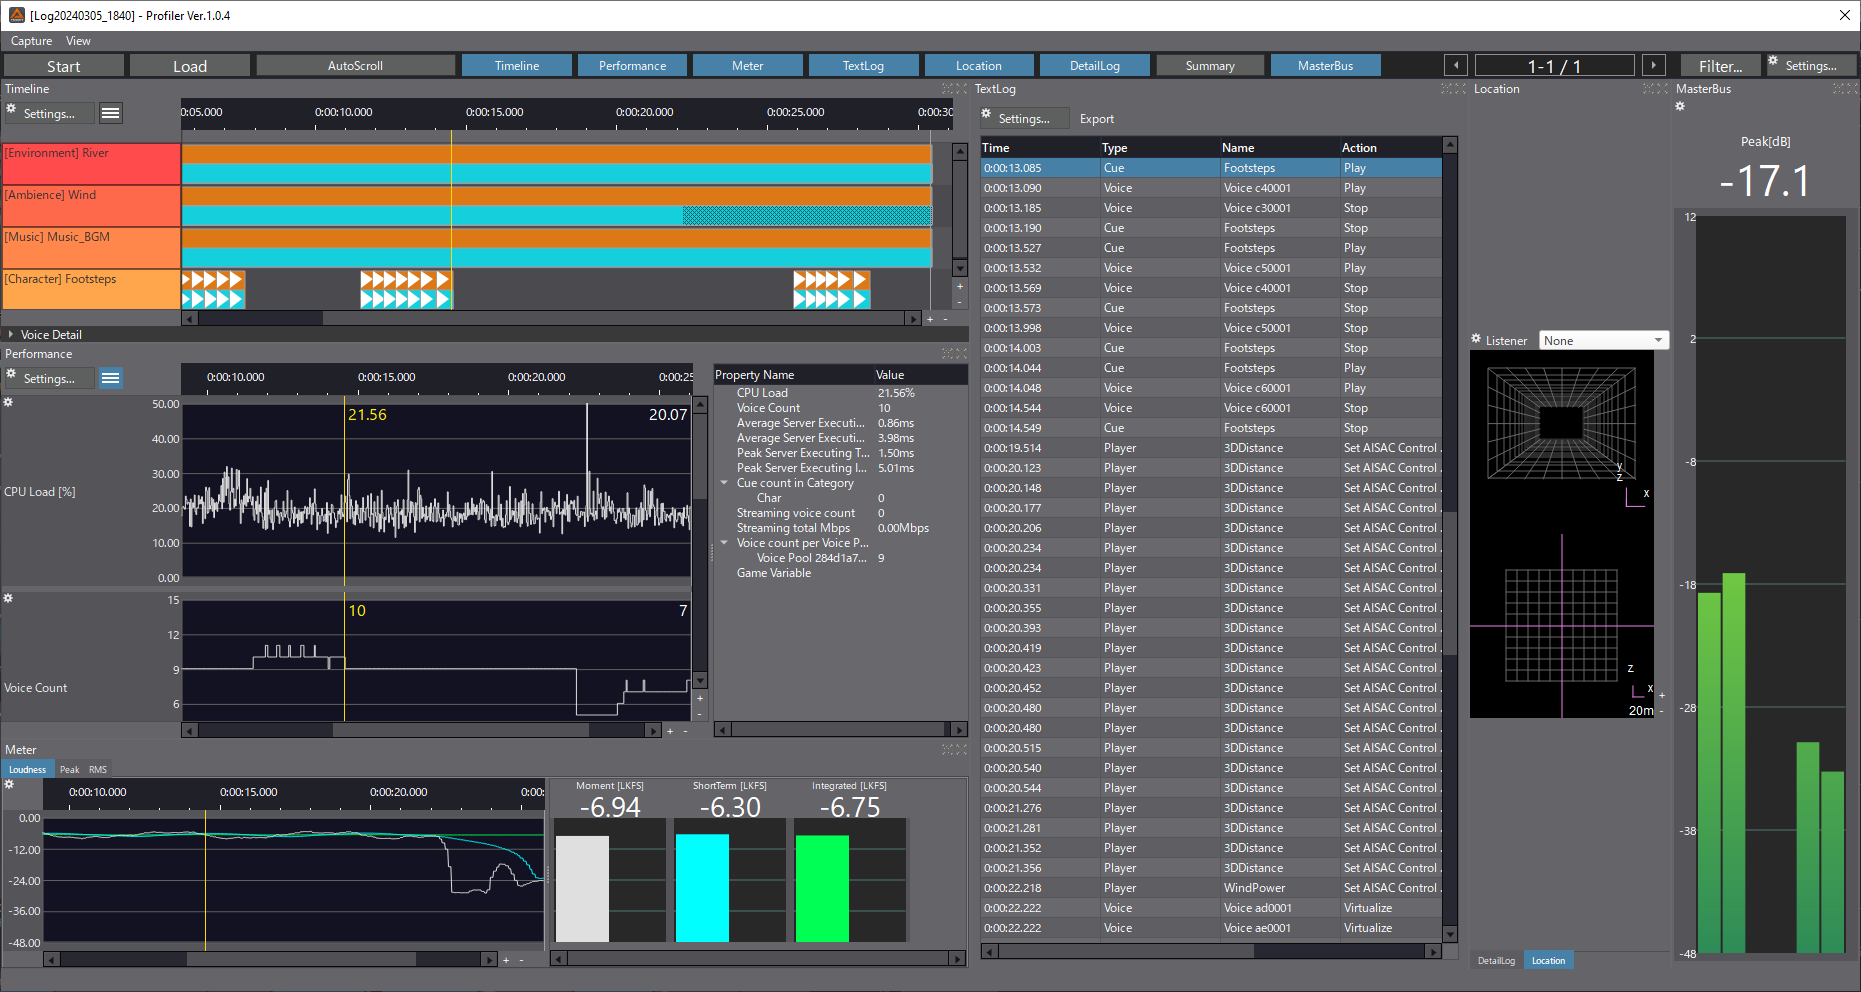
To use the Profiler:
- Start the in-game preview while running the game or use the Session view in Atom Craft.
- Open the Profiler from the View menu.
- Click on the Start button to start profiling.
- When you click on the Stop button, the log will be saved, allowing you to review it later.
- Click anywhere on the timeline, performance graph, or text log to view the information at a specific time.
Here is a video showing the Profiler with the in-game preview in action:
With the Session Window, the In-Game Preview, and the Profiler, you have everything needed to iterate on your sound implementation and polish your game’s audio.
This was the last post of this beginner’s series. We hope that these tutorials inspired you to implement immersive soundscapes with ADX. Armed with this knowledge, you can read our other posts, which have a more practical approach and focus on the implementation of specific sounds.


