
Controlling Lighting in Unity with Data from ADX2
Introduction
In last month’s blog, we created a simple interactive rainy soundscape in Atom Craft 3: https://blog.criware.com/index.php/2018/10/23/creating-a-dynamic-rainy-soundscape-with-adx2/. This month, we will be looking at using amplitude data from the Thunder Cue to control lighting within a Unity Scene, mimicking the effect of lightning within our game. This is a great way to make a virtual environment more dynamic and immersive. Find the amended Atom Craft project and the finished Unity project below, or follow along by downloading the Atom Craft project from the previous tutorial.

ADX2_WeatherControl_v2.zip
(This project was created using CRI Atom Craft Ver3.40.02)
And grab the final project here:
Unity_LightningControlProject.zip
(This project was created using Unity 2018.2.13f1)
Creating a Bus
Our Atom Craft project is mostly ready to go, we just need to create a bus and send the Thunder Cue to it. Follow this tutorial to learn more about bus maps in Atom Craft: https://youtu.be/pDtzqetMWZY.
This will allow us separate control of the loudness of the thunder. To do this:
- Use the Mixer User Layout (ctrl + 5 by default)
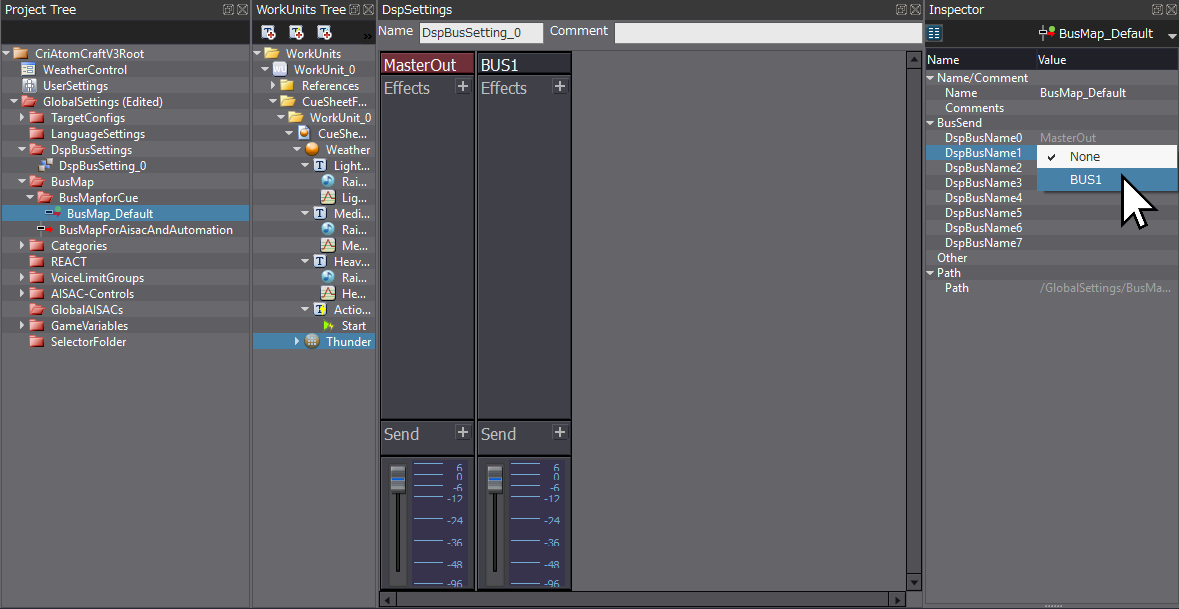
- Select the “DspBusSettings” from the Project Tree
- You should see a blank channel strip as below, where you can now right-click and select “Create DSP Bus”. This will create a new channel next to MasterOut, named BUS1
- Feel free to rename it to be more descriptive, but be sure to keep a note of its new name since we will be referencing it in Unity later

Next, we need to assign it. To do this, simply select “BusMap_Default” from the Project Tree (under BusMap/BusMapforCue), and set DspBusName1 to your newly created bus.
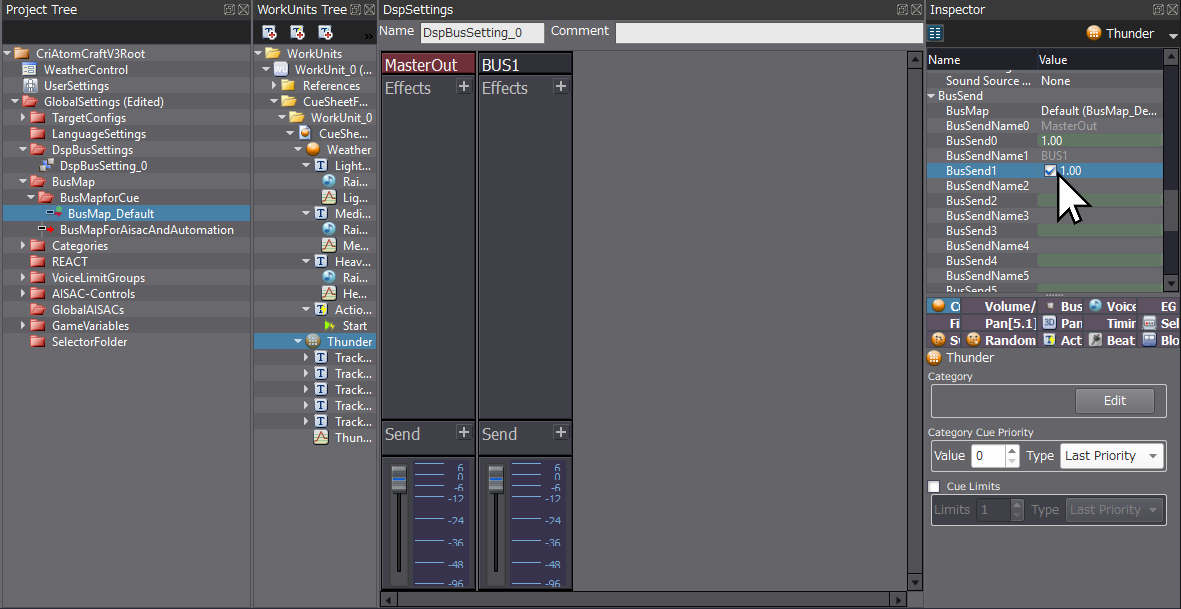
Finally, we need to select the Thunder Cue and tick the box next to BusSend1 in the inspector. Depending on how you might want to process the sound at this point, you could add effects and adjust the send levels to do a bit of mixing. For our purposes, we are simply using the bus as a way of separating the signal of the thunder from the rain. We won’t actually be hearing this bus, we just want to measure its amplitude.
We are now done inside of Atom Craft, and just need to build our Atom CueSheet Binary (ACB). Since we will be implementing this within Unity, make sure the “With Unity Assets” and “With ACF Binary” boxes are ticked before building.
Unity Integration
Open up a new project in Unity, and follow along with this guide to get ADX2 integrated into your new project, linking up the ACF file created during the previous build phase: https://youtu.be/s3mM_lNvW7g.
Setting up the Scene
With our project set up, we want to create a few assets so that we can see the effects of our lightning in action. In the hierarchy tab:
- Right-click and create a 3D Object -> Plane
- Right-click and create a 3D Object -> Cube
- Position the cube so that it is somewhere above the plane.
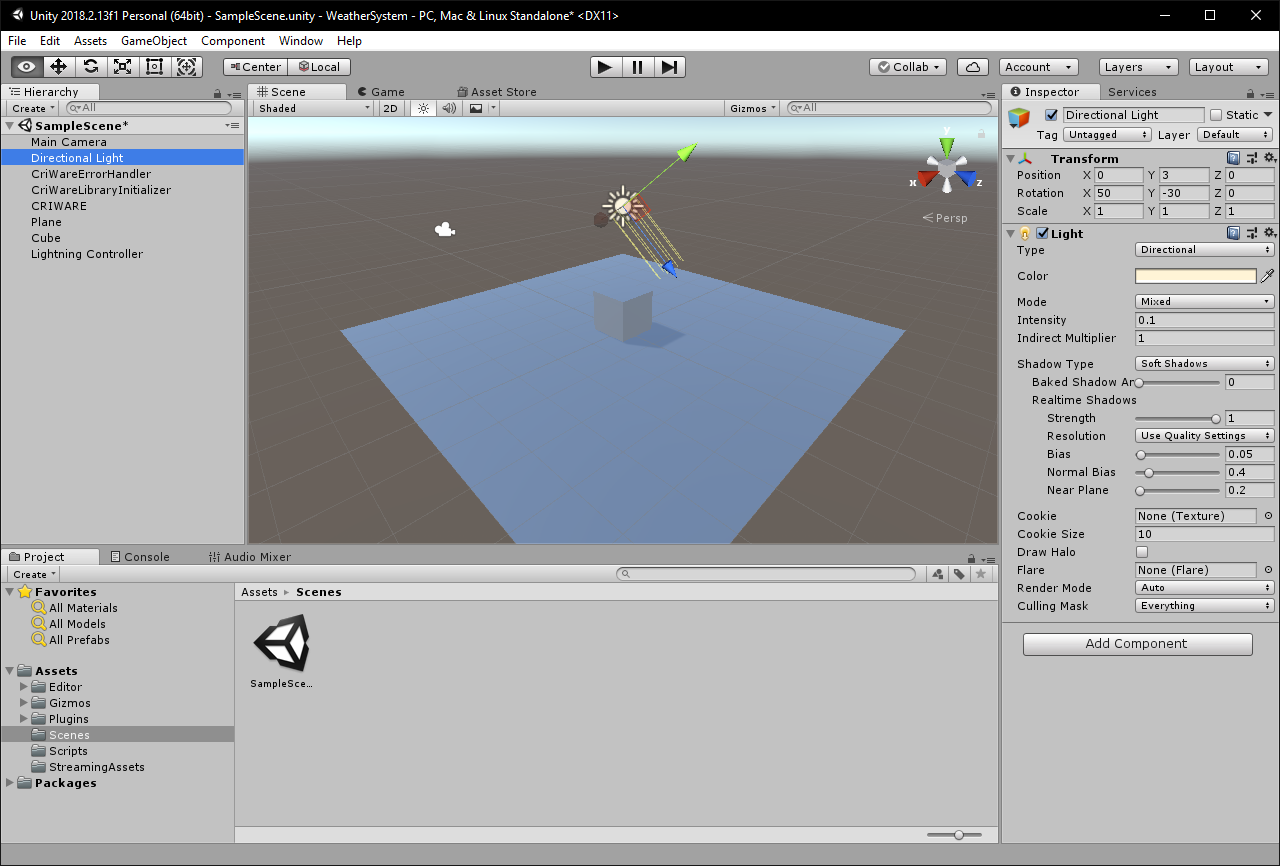
- Click on the Directional Light in the hierarchy, and change the Intensity value of the Light component to 0.1 in the inspector (This will mimic the effect of night-time)
- Create an Empty Object in the hierarchy, and name it Lightning Controller
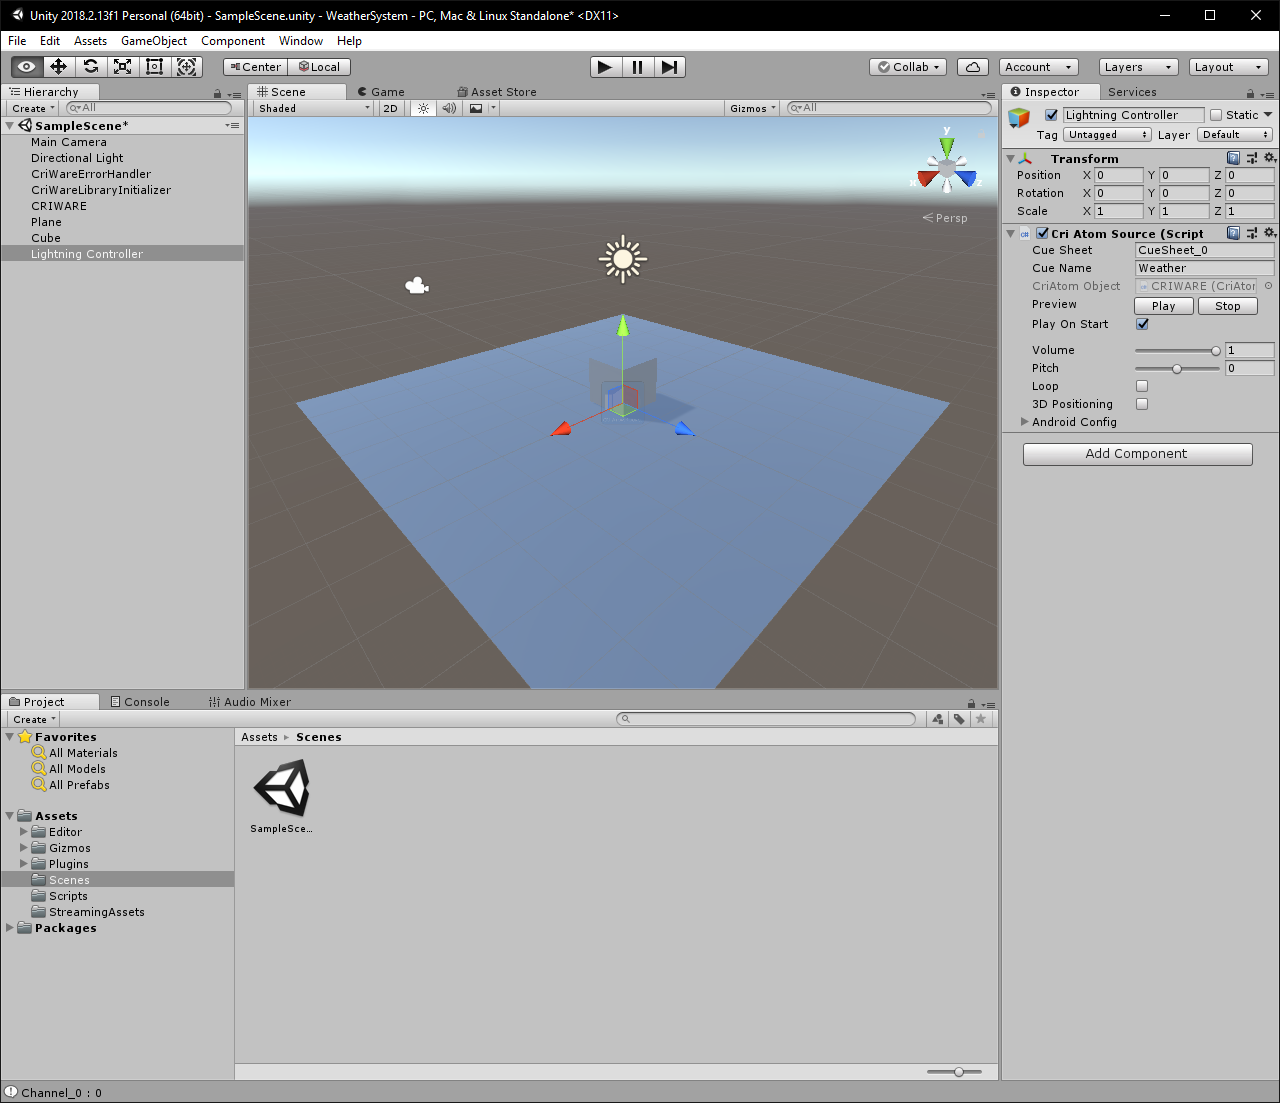
Your scene should now look something like this:
Click on “Window – > CRIWARE -> Open CRI Atom Window”, and follow the instructions in the dialogue box header, linking to the build done earlier if you haven’t already, by ticking “Use Copy Assets Folder” and directing it to the right folder. This process should result in your dialogue now looking something like this:
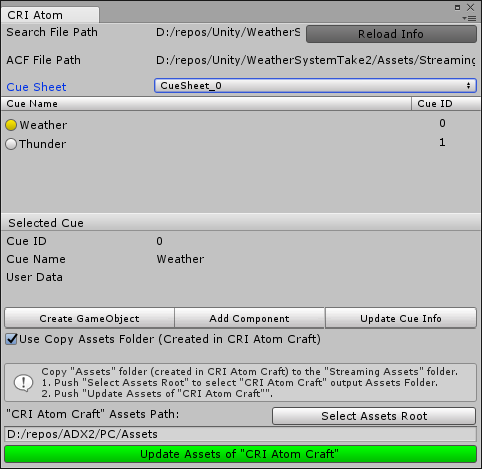
You only need Unity to be in Play mode when you “Reload Info”. After that, you can stop Unity from running, and then:
- Make sure Weather is highlighted in the Cri Atom Cue Sheet as above
- Make sure Lightning Controller is selected in Unity’s Hierarchy tab
- Click “Add Component” from the CRI Atom Window
Now we should have a Cri Atom Source on our Lightning Controller as below. Make sure to tick “Play on Start”, and you can untick “3D Positioning” in the inspector. At this point, you can play the scene, and you should be able to hear the weather that we created in the previous tutorial.
Creating the Lightning
This step is a bit more technical and will require some code. To get started, we can access the LevelMeter.cs script from one of the sample Unity projects in the CRIWARE SDK. The script can be found in the following directory
…CRIWARE\SDK\unity\samples\UnityProject\Assets\Scenes\criatom\script\ScriptSample05_LevelMeter\Scripts
This script changes the size of a cube in relation to the loudness of a song, which is very similar to the use-case we are looking to achieve. In our case, we are instead going to change the Intensity of the Directional Light.
The final adjustments that have been made can be seen in the code snippet below, but we will go through the thought process step-by-step.
using UnityEngine;
using System.Collections;

public class LevelMeter : MonoBehaviour {

    	public Light	skyLight;
    	public int	monitoredChannelId = 0;
	private float	objScaleBaseVal = 1.0f;

	IEnumerator Start() {
		while (CriAtom.CueSheetsAreLoading) {
			yield return null;
		}

		CriAtom.AttachDspBusSetting("DspBusSetting_0");
		CriAtom.SetBusAnalyzer(true);
	}

	void Update() {
		CriAtomExAsr.BusAnalyzerInfo lBusInfo = CriAtom.GetBusAnalyzerInfo("BUS1");

		float lObjScaleNewVal = 0.1f + objScaleBaseVal * lBusInfo.rmsLevels[monitoredChannelId];

		Debug.Log("Channel_" + monitoredChannelId + " : " + lBusInfo.peakLevels[monitoredChannelId]);

        	skyLight.intensity = lObjScaleNewVal;
	}
}
I have stripped out the comments since the code is quite self-documenting, and because it makes it easier to read for the purposes of this tutorial, but feel free to leave them in and spend some time looking over them.
- First, we need to create a new Public variable skyLight, defining it as type Light, so that we can make changes to our Directional Light object. Making a variable Public exposes it in the inspector.
- Next, we need to make sure that we have set AttachDspBusSetting to the correct bus setting, which in this case is correctly set to “DspBusSetting_0”.
- Then we need to “GetBusAnalzyerInfo” from the correct bus, which if you didn’t change it previously, should be named BUS1. If you did rename it, go back to the Atom Craft project to find out what it is named.
- Now we need to pick between RMS and Peak detection, the former of which has been commented out in the original script. Either one should do the trick in this case, so experiment with both of them.
- Finally, we need to update the skyLight intensity, by setting its value to lObjScaleNewVal
Note
- You can also play around with the objScaleBaseVal to change the dynamic range of the light intensity.
- rmsLevels is looking for a channel ID, which means that it is only performed on one channel. This is useful, such as in the demo, when we want to process stereo channels separately.
If we jump back into Unity now, we should find a new Sky Light parameter under our Level Meter script component on the Lightning Controller object. Simply drag the Directional Light object from the Hierarchy view onto the box next to Sky Light, and it should now say “Directional Light (Light)”. Alternatively, you can click on the circle with a dot in (to the right of the box), and it should bring up a dialogue showing all the relevant objects that you can affect.
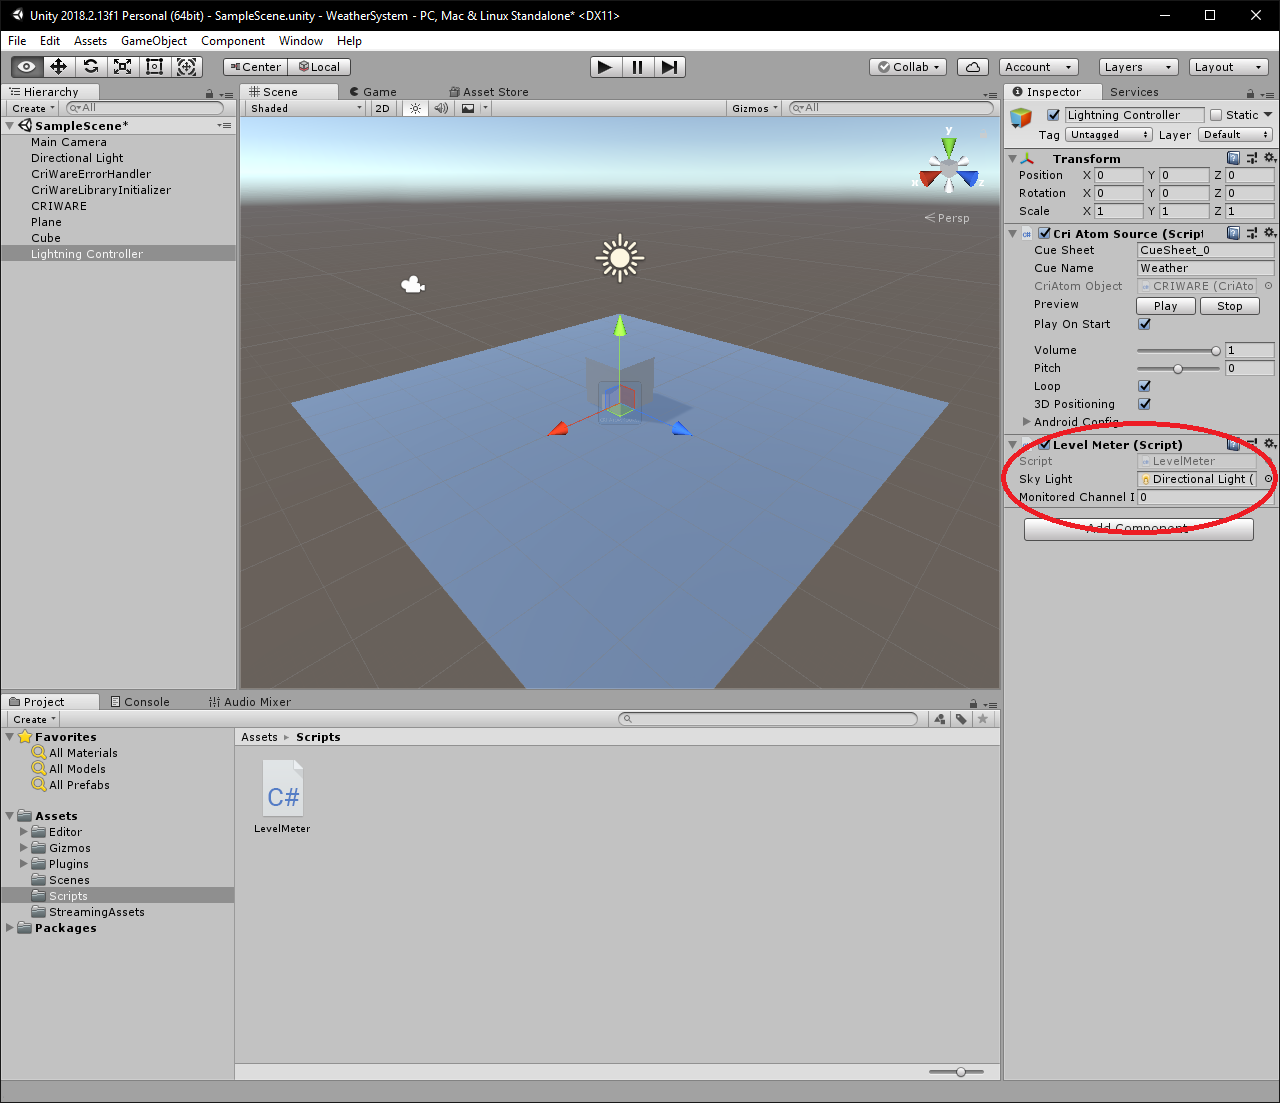
Save everything, and play your scene. You should now have a scene where the light reacts to the amplitude of the thunder, all controlled by CRIWARE.
Conclusion
With ADX2, you are not only limited to controlling the sound from gameplay information, but you can also control gameplay with sound. This opens new creative possibilities and allows sound designers and audio programmers to create fully realised systems with much less effort.