
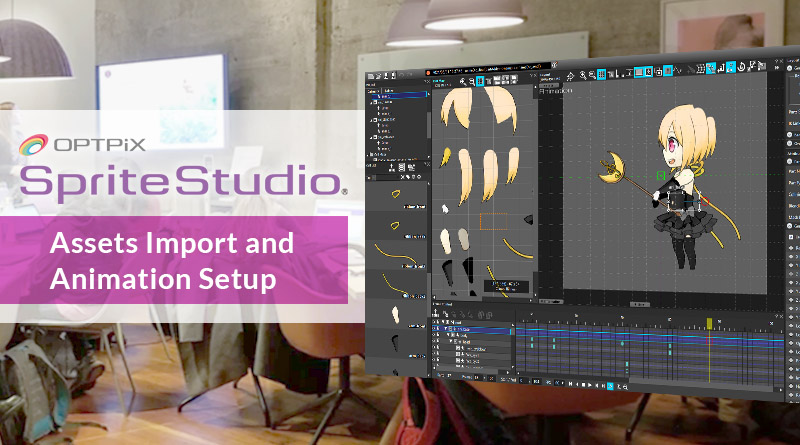
Introduction to SpriteStudio: Assets Import and Animation Setup
Last month, in the first post of this series dedicated to SpriteStudio, we gave an overview of the workflow and features available when working with the tool.
This month let’s dive right into the first step of animation creation: importing our graphic assets and setting them up in SpriteStudio.
There are 3 steps:
- The preparation of the graphic files containing the animation parts.
- The import of these graphic files into SpriteStudio as cell maps, and the definition of the cells.
- The setup of an animation that references the right cells.
In this series, we will create animations based on the little gothic witch depicted below.
1. Preparing the graphic assets
The picture on the left below shows how the character should look. After planning our animation and deciding what the moving parts will be, we draw them and organize them in different graphic files. Of course, you can organize your graphic data as you want, with one big picture containing everything or many small ones containing just a few parts.
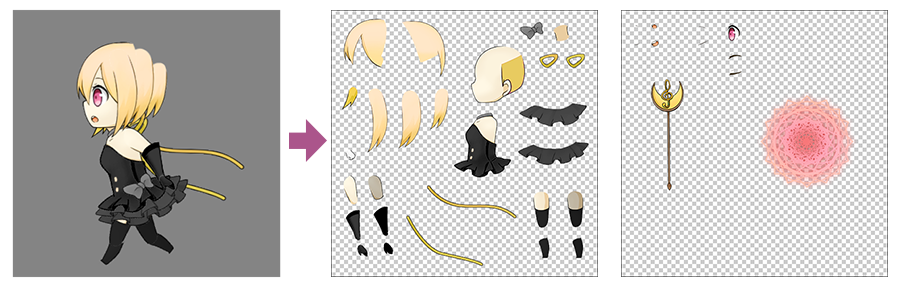
Here we have organized the graphics assets in two files. Since we are planning on changing the facial expression of our character during the animation, we have prepared multiple variations of parts such as eyes and mouth (visible on the second graphic file).
This is only for the character, but of course for a full animation, you may have another graphic file containing background elements and so on…
SpriteStudio accepts many types of file formats such as bmp, gif, jpg, png, tiff, tga, etc… or even Photoshop files (.psd).
2. Import and creation of cells
The easiest way to import your assets in SpriteStudio is to drop the image files you prepared anywhere onto the main window.
Once imported, your graphics files will appear in the ‘References Images’ folder of the project, while the corresponding cell maps are automatically created in the ‘Cell Maps’ folder. The tool will ask you for the names of these files (cell maps are saved on disk as .ssce files).
Note that if the width or the height of one of your graphic files is not a power of two, you may see a warning. Don’t worry about this for now, as it only matters if you want to use your assets to create effects (e.g., particles), or if you are planning to play back your animations using specific run-time player.
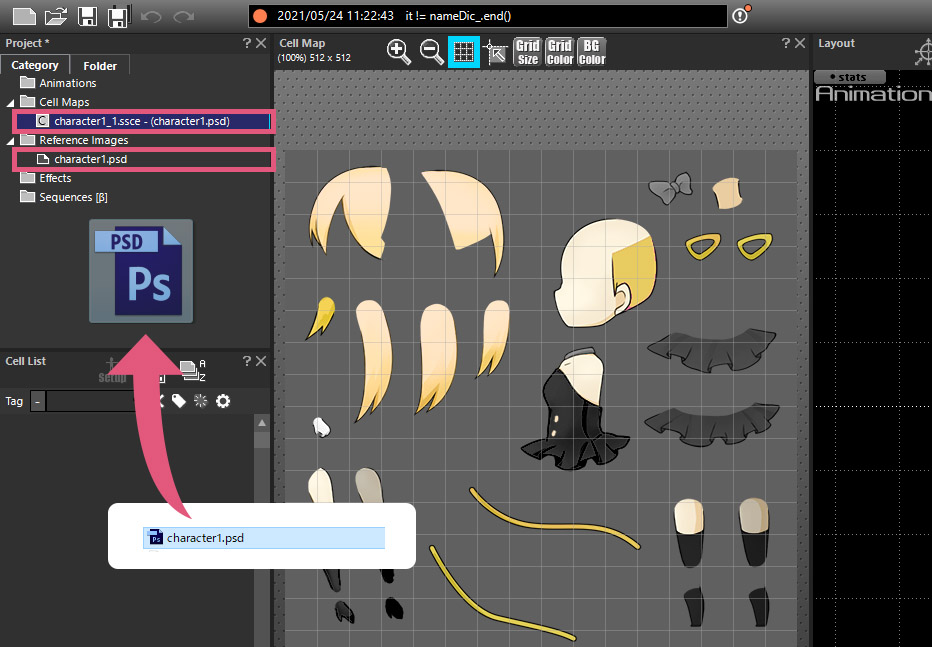
Once your Cell Maps have been created, you can define each cell by selecting it with the mouse, as shown in the video below.
The cells you define will appear in the “Cell List” pane located under the project treeview.
3. Animation setup
You have our cells, so it’s now time to set up the animation itself! Let’s check the workflow in this video.
Here are the steps:
-
First, we create a new animation. There can be several of them in a SpriteStudio project. Right-click on the ‘Animations’ folder in the project tree and select ‘New File(X)’. A new animation file (.ssae) is created and added to the project. A Setup node and an Animation node (called ‘anime_1’) are created.
-
Then we drag and drop all the cells we want to use in our animation on the ‘Animation’ or ‘Setup’ pane (for this example, it does not matter which one is selected).
-
This is also a good time to select the center of rotation of the various animation parts if we haven’t done it when defining the cells (at 00:10 in the video).
-
The position of cells, their size and rotation can of course be adjusted.
-
Finally, we can create a cell hierarchy. For example, for a character we may want to make the arm a child of the shoulder, and the hand a child of the arm. This way, whenever the shoulder moves, the arm and the hand will follow.
This is done very easily by dropping the cells at the right location in the hierarchical tree at the bottom of the screen (you can see it at 00:23 in the video). In this tree, you can easily move the cells around with the mouse and use the Tab and Shift+Tab shortcuts to change the parent-child relationships.
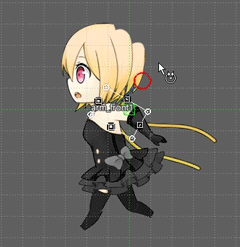
Once all the necessary elements have been placed, our character looks like below:
That’s all for now! In the next blog, we will learn how to create a simple running animation for our little witch by using keyframes!