
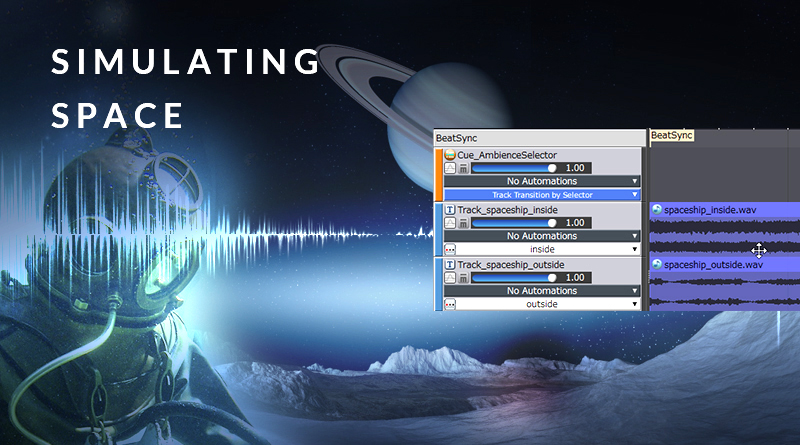
Simulating Space
Introduction
Ambience is an important part of a video game’s soundscape, applying additional context to the visuals and enhancing the player’s overall sense of immersion. Beyond this, it can also imply a set of rules and gameplay mechanics. In this month’s blog, we will look at setting up a state-machine in Atom Craft 3, which will help us to create the effect of stepping out into space. This same method can be applied to any ambience/atmosphere which switches in a binary fashion, such as diving underwater, or perhaps something more esoteric like entering a dream-state.
This project is an extension of the one used in last month’s blog so that we have the sound effects element (in this case a gunshot) already set up. Download the finished product below to check it out.

1902_spacevacuum.zip
This project was created using CRI Atom Craft V3.40.07
Ambience Selector
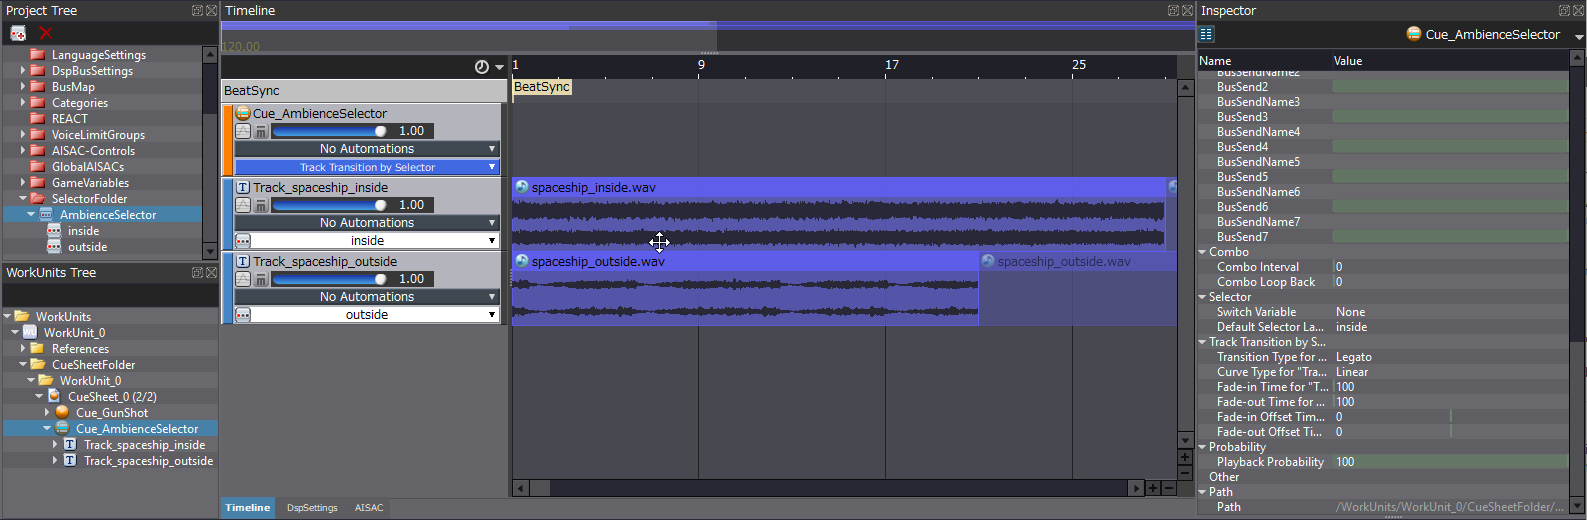
If you want to switch between discrete ambience states, you can use the “Track Transition by Selector” Cue. For example, you might want to switch from being indoors to outdoors, or from being submerged to afloat. This is an efficient Cue type which keeps track of the current playback position, preventing tracks from starting over after each switch.
- Create a new Selector, and name it AmbienceSelector
- Right-click AmbienceSelector and Create Selector Label x 2
- Name then “inside”, and “outside” respectively
- Create Track Transition by Selector Cue, and in the Inspector:
- Set Name = Cue_AmbienceSelector
- Set Fade-in Time for “Track Transition by Selector” = 100
- Set Fade-out Time for “Track Transition by Selector” = 100
- Right-Click Cue_AbmienceSelector and Create BeatSync Parameter, and in the Inspector:
- Set BPM = 960 (not essential, but it results in a more responsive transition speed)
- Create ambience tracks for inside and outside layers
- Click the Selector tab on the left-hand panel of the Timeline View and match the Selector for each respective track
This can now be auditioned in the Session Window. Listen to the way that the ambiences transition, and experiment with different transition lengths and curves to hear their effects. A dream-state might require a slower transition, whereas jumping into water would likely want to be a lot quicker.
Effects Switching
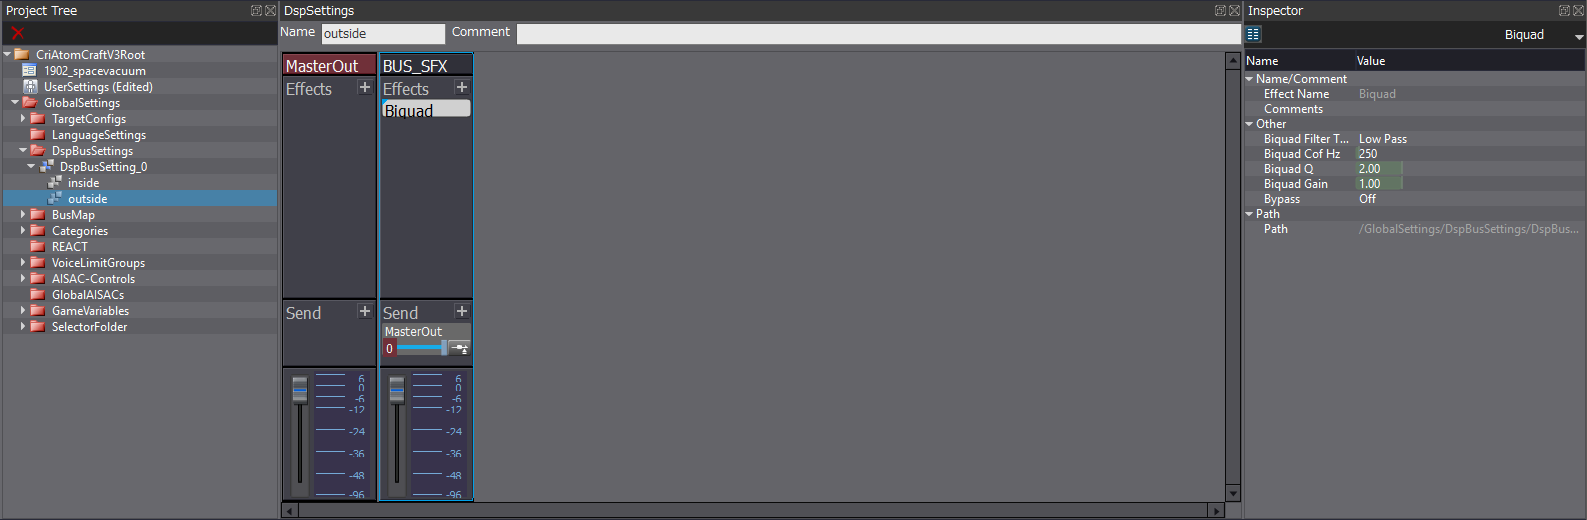
To sell the effect of stepping into space, we are going to use a low-pass filter effect. Snapshots offer a handy way of dealing with this, by allowing us to set up several mixes which can be switched between on the fly.
- Head to the DspSettings view and Create DSP Bus
- Set Name = BUS_SFX
- Apply Biquad Effects
- Send this Bus to MasterOut
- Select BusMap_Default and set DspBusName1 = BUS_SFX
- Select Cue_GunShot, then in Inspector
- Enable BusSend1
- Set BusSend0 = 0.00
- Right-click DspBusSetting_0 and Create Snapshot x 2
- Name them “inside”, and “outside” respectively
- Select “outside” Snapshot and in Inspector
- Set Biquad Cof Hz = 250
- Set Biquad Q = 2.00
This can also be auditioned in the Session Window in conjunction with the Selector switch, and we can adjust the Snapshot Change Time to preference (setting this to 100 will match our Selector transition times). However, in order to achieve this, we have to manually change both the Snapshot state and the Label state in order to hear the intended outcome. We can set up a quick prototype in UE4 to facilitate this.
Implementation
As with the Atom Craft project, we can simply jump into the UE4 project from last month to get started. All we need is a Trigger Box (labelled OutsideSpace below) which we can walk in and out of, and to drag our Cue_AmbienceSelector into the level. Select this AtomSound and disable Auto Activate under Activation in the Details Tab.
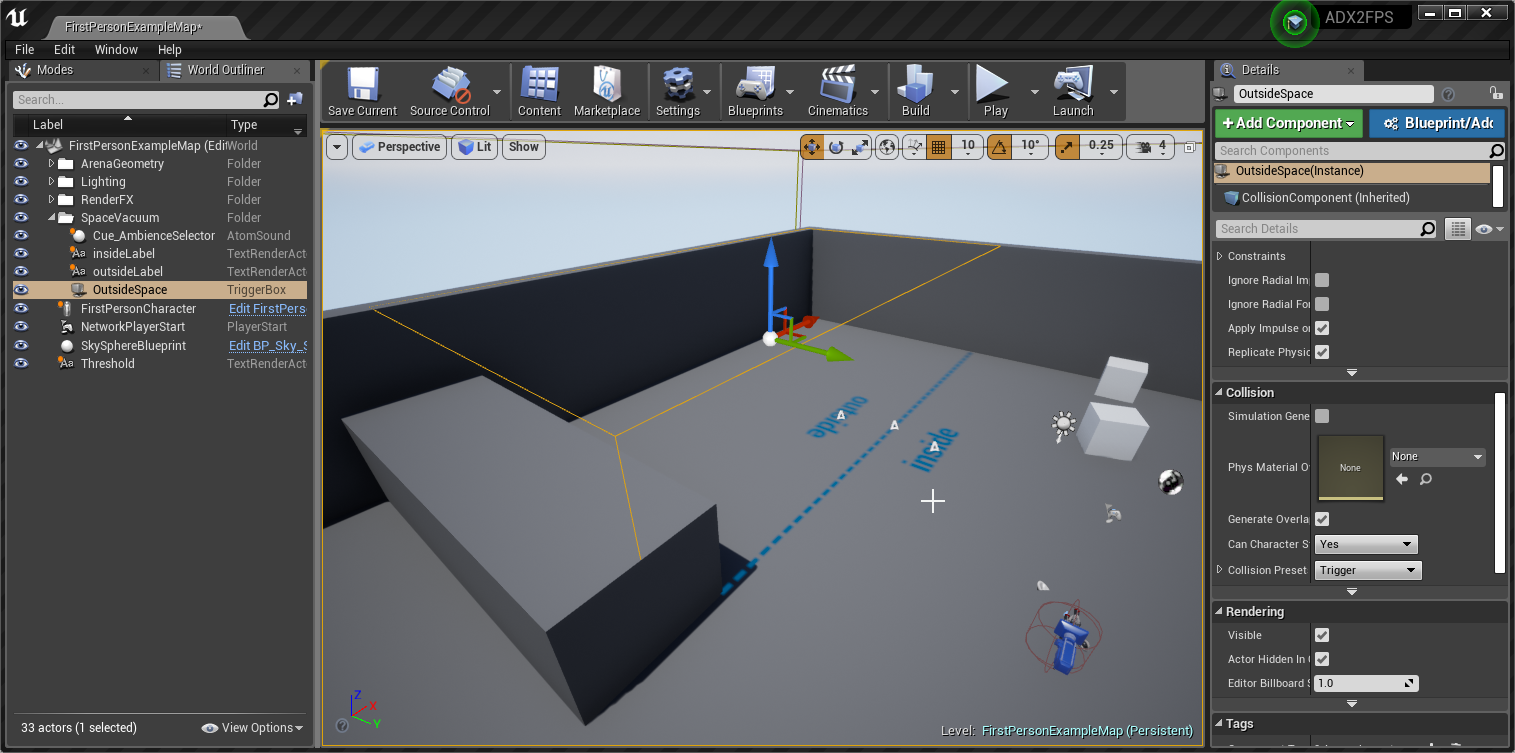
Next, from the Blueprints menu at the top, select Open Level Blueprint. The Blueprint below represents some simple logic for the level, which:
- Plays the Ambience Cue when the game starts
- Sets the default ASR rack to a variable called DefaultASRRack (this is just for neatness)
- Sets the Selector Label relative to the Trigger box
- Applies a DSP Bus Snapshot relative to the Trigger box
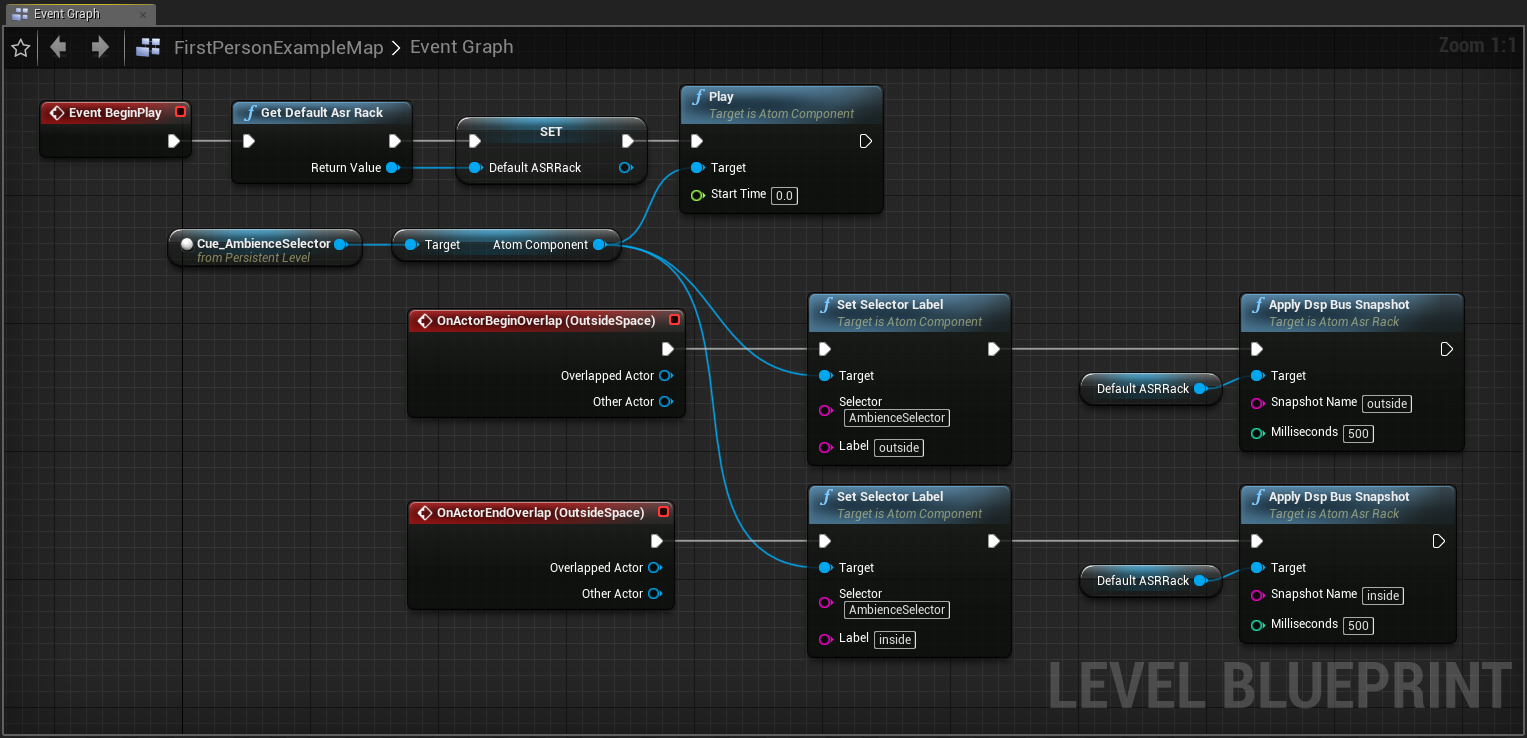
This blueprint is self-documenting and does exactly what you’d expect. When the player enters the Trigger Box that we set up, the Selector and Snapshot update to “outside”, and then back to “inside” when the player leaves. It’s a very rough system, but a good one for testing the “feel” in a deeper context than that which can be achieved using Atom Craft’s Session Window alone.
Conclusion
ADX2 has many great features which can be used together to create complex interactive systems. Better still, they are easy to implement and further experiment with.