
Sonifying Ammo Count in UE4 with ADX2
Introduction
Effective sound design is not just about finding a sound to fit its respective action, it is also about imparting subtle cues to the player. In designing sound for UI, it can be a massive boon to highlight, or even altogether replace these elements with informative audio cues. For example, one such UI element that is prominent in many shooting games is the ammunition counter. In these types of games, it can be helpful to give the player some sort of feedback on how low their ammo count is before they need to reload. This reduces the need for the player to look away from the action, and as a positive consequence, adds some dynamic timbral variation.
This month we will be looking at sonifying the ammo counter of a first-person shooter game, using ADX2 and simple template in UE4.

AtomCraft_1901_dynamicammo.zip
This project was created using CRI Atom Craft V3.40.07
UE4_ADX2FPSDynamicAmmo.zip
This UE4 project was created using V4.21.1
Setting up in Atom Craft
There are many different types of weapons and items which require ammunition, from single-shot bolt-action rifles, to continually firing aerosol spray cans. Although not always entirely realistic, manipulating or adding to the sound of a weapon that is in need of recharging or replacing can benefit gameplay, especially if it makes sense in context.
For the sake of simple illustration, I have chosen to focus on creating a weapon that shoots one bullet per trigger. This will require two distinct layers – the main part of the gunshot, and a clicking sound to indicate that the player’s clip is about to run out. To set this up in Atom Craft:
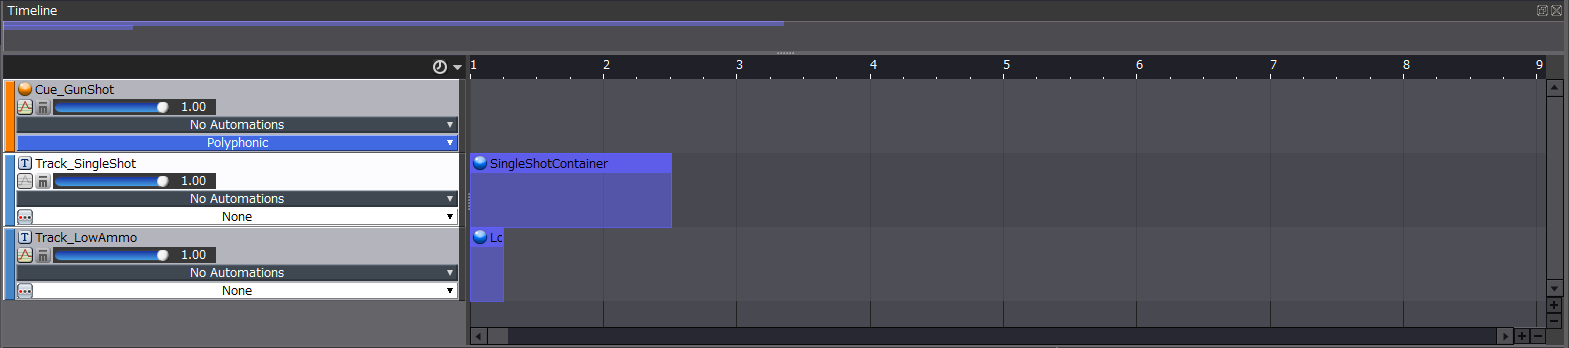
- Create a Polyphonic Cue_GunShot Cue
- Add Tracks to this Cue with the following Random no Repeat Sub Sequences:
- SingleShotContainer
- LowAmmoContainer
- Drop the relevant materials onto their respective Sub Sequences
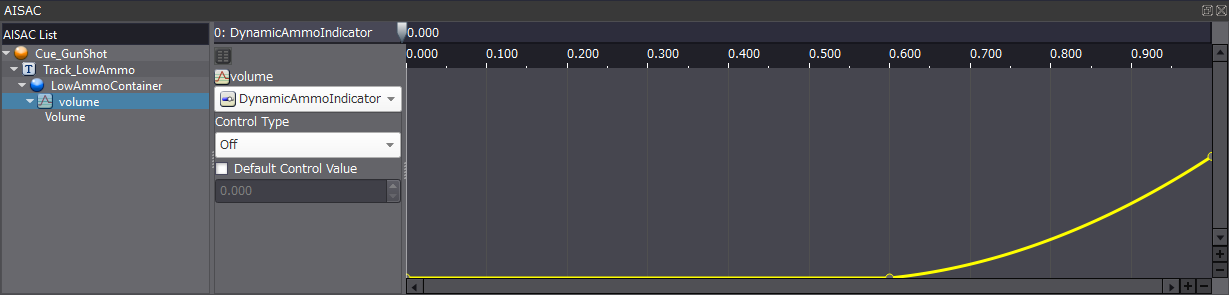
- Create an AISAC Control named DynamicAmmoIndicator
- Add this AISAC to LowAmmoContainer as a Volume Graph Type
- Create a curve as illustrated below
We can now test how this sounds in the Session Window by dragging in the Cue_GunShot Cue and activating the DynamicAmmoIndicator AISAC. This doesn’t mimic gameplay, however, since the AISAC is not automatically increasing each time we playback the Cue. In order to test how this behaviour will sound and feel, we need to jump into UE4. We can finish this section off by building the Atom CueSheet Binary for this project.
Setting up in UE4
Integrating ADX2 into UE4 is a straight-forward process, and I recommend following the SDK documentation for this part as it is easy to follow and kept up-to-date.
To facilitate quick prototyping, and for the sake of brevity, I have created a First Person Blueprint template project and set up a rudimentary ammo counter that displays on the player’s gun. I have also imported/converted CueSheet_0 and Cue_GunShot into .uassets for use inside of UE4. This means that all of the actual implementation and logic for this blog can be followed solely inside the FirstPersonCharacter Blueprint, which can be accessed from the Content Browser in the directory:
Content→FirstPersonBP→Blueprints→FirstPersonCharacter.
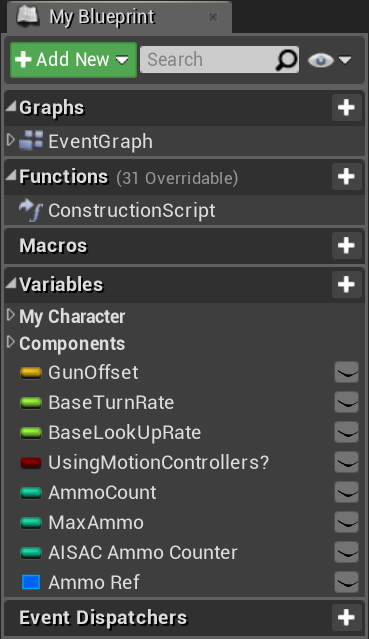
The first thing we need to do is create some variables:
- AmmoCount: integer to store how much ammo we have left
- MaxAmmo: integer to set how much ammo we get when we reload
- AISAC Ammo Counter: integer to count through our DynamicAmmoIndicator AISAC
- Ammo Ref: Reference to our GUI ammo widget that displays AmmoCount
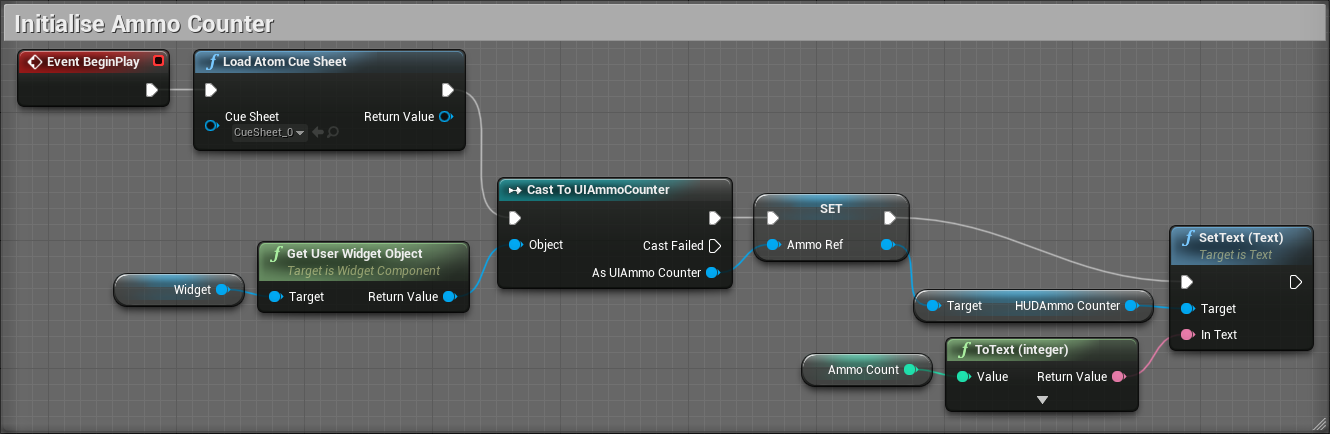
Our Event BeginPlay action loads our Cue Sheet for use within in the blueprint. The rest of the logic for this part simply initialises the UI ammo counter and sets it to the current AmmoCount value.
We then define some logic for when the player clicks their left mouse button. First, we check in the player has more than 0 in their AmmoCount. If they do, we subtract 1 from their AmmoCount, add 1 to the AISAC Ammo Counter, and update the player’s UI ammo counter. This then continues further to play the character animation and spawn the projectile.

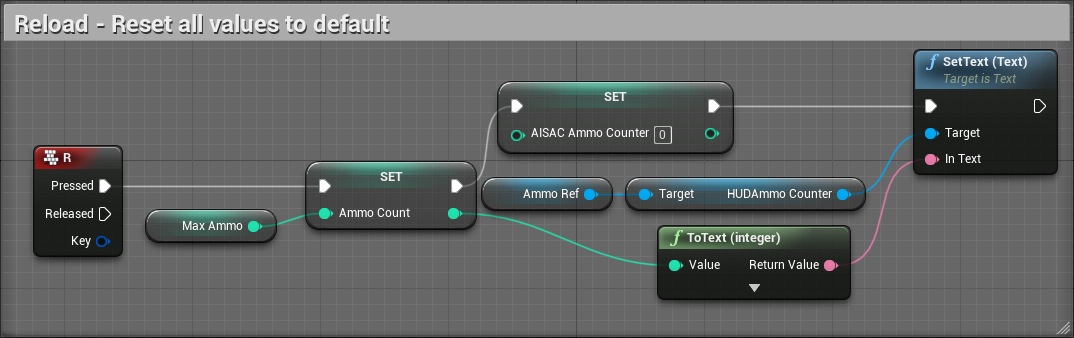
We then need to some very simple reload logic, so that we don’t have to restart the game every time we want to test our blueprint. All we need to do is create an action that sets AmmoCount and AISAC Ammo Counter to their default values when the player presses a key (in this case “R”). This is purely for testing purposes, as a more fleshed out game would have more advanced reload logic and animation which you could even synchronise various reload sounds too.
The final part of our audio system involves actually playing our sound back. The execution for this is taken after our calculations, animations, and projectile spawning have occurred. This just replaces the default action included in the template, which plays a sound back using the Unreal audio engine.
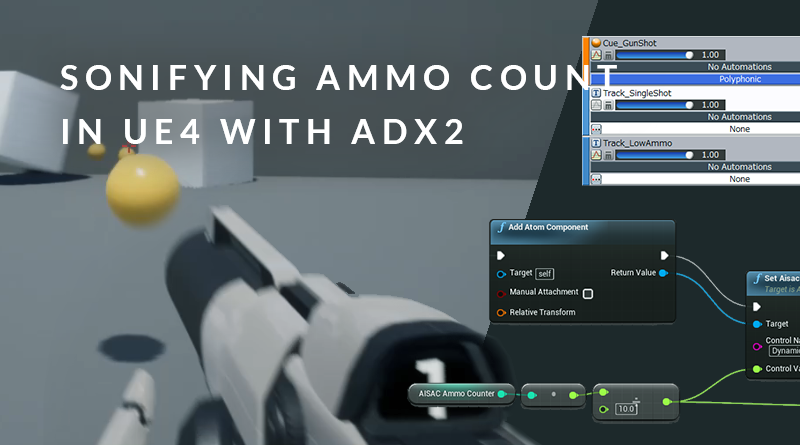
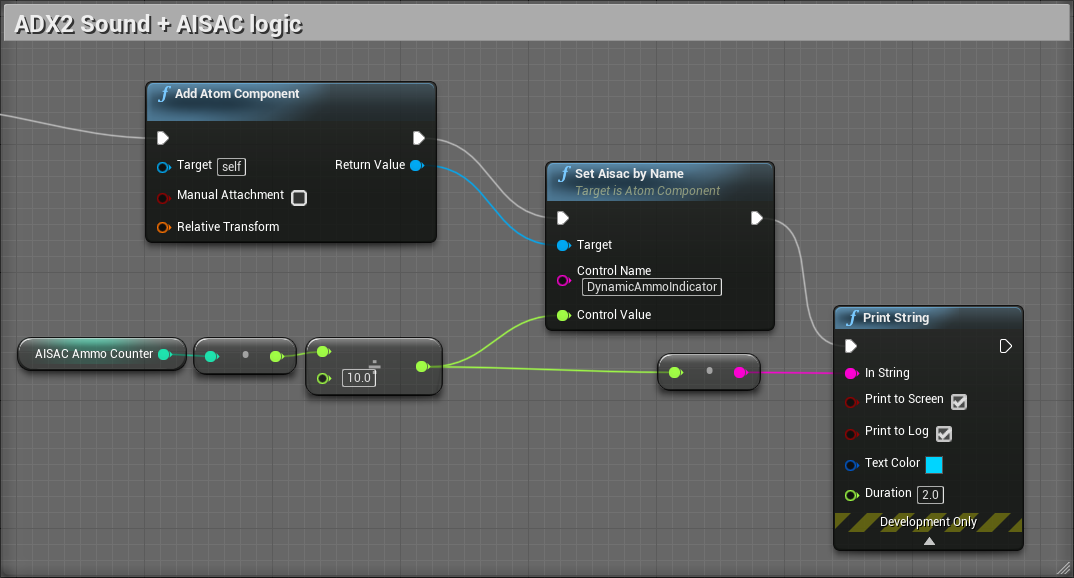
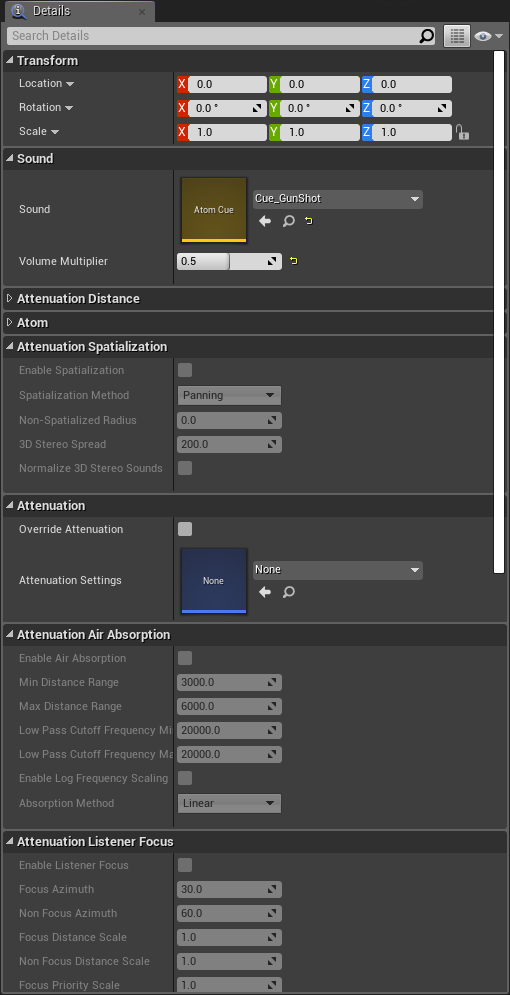
First, we place our Add Atom Component action, which we can click on to access more information in the Details tab. Here we can assign Cue_GunShot under the sound property. We can also choose to Override Attenuation here, to set custom values for spatialisation. This component will play our sound back.
Next, we Set AISAC by Name, targeting the relevant Atom Component, and setting its Control Value to AISAC Ammo Counter divided by 10. This is because our AISAC scales from 0 to 1. The final part isn’t essential, but it is helpful for debugging. We can create a Print String action to print its given input to the screen, in this case, the AISAC Ammo Counter. We can use the information against our Atom Craft project to decide if we want to make changes to any aspect of our AISAC.
Conclusion
And that’s it! Once you have a working project set up, it becomes much easier to test new ideas. I hope that this has helped to illustrate how you can use ADX2 for creating dynamic information-driven playback. Perhaps you can think of other non-weapon systems that would benefit from this approach, such as a space-ship running low on fuel, or a torch running low on batteries.