
ADX Beginner’s Guide #6 – DSP Effects and Snapshots
After covering Atom Craft’s audio mixer in our previous post, let’s see how we can insert DSP Effects on the busses to process the sounds of the Cues, and how we can switch between different mix configurations using Snapshots.
DSP Effects
Atom Craft comes with a suite of audio effects plug-ins ranging from standard mixing tools to spatial effects and sound design processors:
·Reverb
·Delay
·Echo
·Surrounder
·I3DL2 Reverb
·Multi-Tap Delay
·IR Reverb
Filtering effects:
·Biquad Filter
·Bandpass filter
·3-Bands Equalizer
·32-Bands Equalizer
Modulation effects:
·Chorus
·Flanger
·Phaser
·Pitch-Shifter
Dynamic effects:
·Limiter
·Compressor
Distortion effects:
·Distortion
·BitCrusher
Analysis effects:
·Amplitude Analyzer (can be used with the Compressor and Limiter for side-chain effect)
Routing effects:
·Matrix
·Headphones Virtual Surround
Third-party effects from McDSP are also available as a separate purchase and custom plug-ins can be developed with the CRI ADX Audio Effect Plugin SDK.
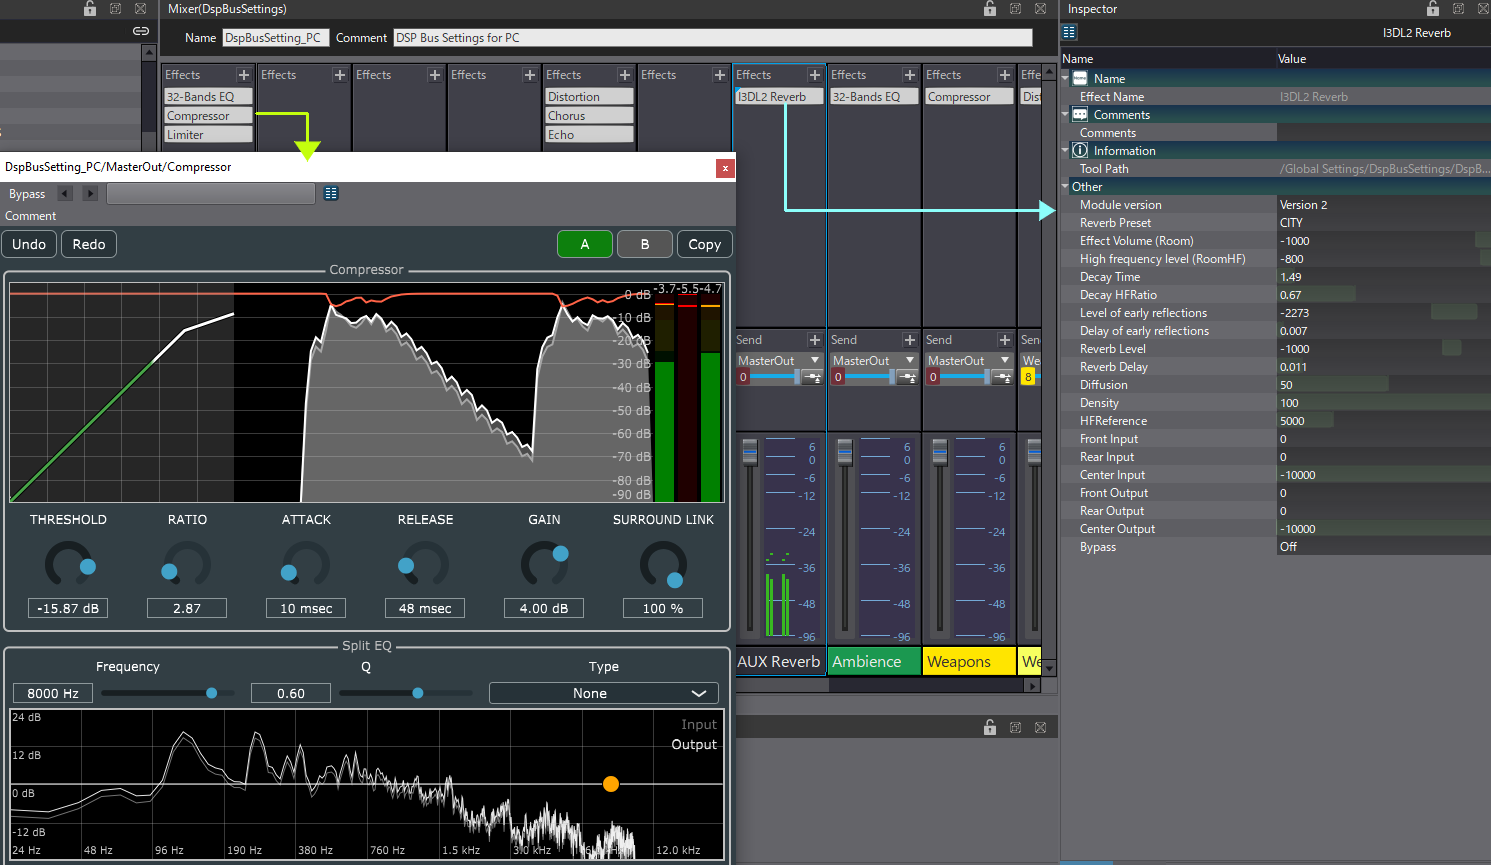
Here is how to insert an effect on a DSP Bus:
- In the Mixer view, click on the + button in the Effects section of a bus.
- Select the effect you want to add.
- Some effects, such as the 32-band Equalizer, Matrix, Surrounder, Compressor, Limiter, and IR Reverb have a specific GUI for editing their properties. Otherwise, most plugin parameters will be accessible from the Inspector.
Effects can have a big impact on performance, so it is always good to use them moderately, especially plug-ins processing the signals in the frequency domain, such as some types of reverberations and or pitch-shifters.
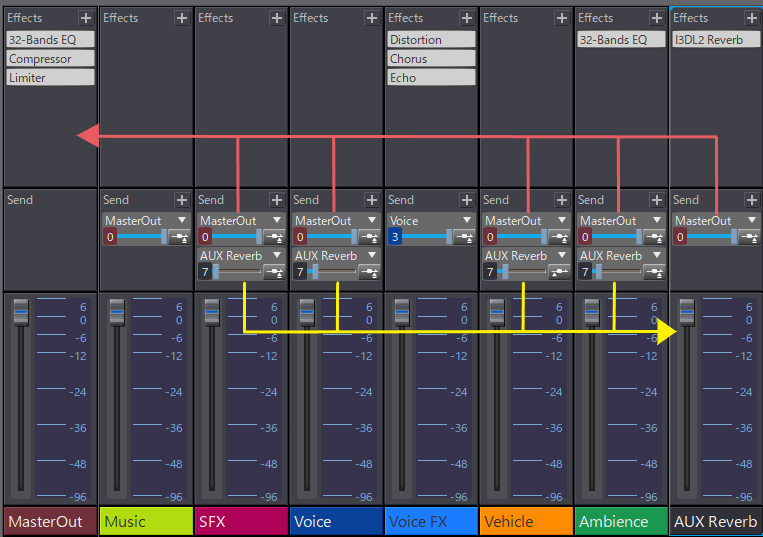
This is why it is often better to have general-purpose FX busses that can be re-used for several types of Cues. For instance, instead of having one Reverb on the Ambience bus, one on the Voice bus, and another one on the SFX bus, it is more efficient to create one Reverb bus and use a Send from the other busses to add reverberation to the sounds. To achieve this:
- Create a Bus named AUX Reverb and insert a Reverb effect.
- Then, in the Send section of the Ambience, Voice and SFX busses, click on the + button to add a Send to the AUX Reverb bus.
- Adjust the Send level accordingly.
Now, every sound that goes through these busses will be processed with the same Reverb instance, saving on CPU. The global amount of reverberation that goes back to the MasterOut can be adjusted by using the fader of the Aux Reverb bus.
Snapshots
Mixes are not static and should change depending on the game situation. For example, you may need to transition between different rooms in the game (e.g., with different reverb levels based on their sizes), or to switch between gameplay states (such as exploration and combat).
Snapshots allow you to gradually interpolate between two states of the DSP Bus Settings. Fader, send, and effect parameter values are changed smoothly over the specified duration. Each snapshot contains the same DSP Bus Setting parameters but with different values.
To use the Snapshots:
- Select the DSP Bus Setting you want to make a Snapshot for.
- Right-click, select New Object, and then Create Snapshot.
- In the Mixer view, adjust all the faders, sends, and effect parameters to your liking.
- Create another Snapshot with different values.
- Now, when you select the Snapshots, you will see the mixer change its configuration.
In the game, the Snapshots will be triggered by code based on the situation (i.e., the player enters a new room, an enemy is encountered, etc.). The API is also needed to specify the transition time, although you can test different values in the Session window.
This concludes our two-part guide about basic mixing in AtomCraft. We will meet other concepts such as Categories and React later, that will help us mix our game effortlessly. In the meantime, check our next post in which we will look at AISAC, a system that can be used to control sound parameters in real-time from the game, allowing for truly interactive audio!