
ADX Beginner’s Guide #1 – New Project
This is the start of our new beginner’s guide to ADX. If you’re unfamiliar with game audio middleware, or how ADX can improve the sonic experience in your game, be sure to check this short introduction before you start!
Learning a new software takes time and sometimes requires changing the habits we have developed with previous tools, but this series will get you up to speed in no time, starting by the creation of an AtomCraft project in this post.
Creating a new project
When you launch AtomCraft for the first time, you will be taken to the Start Page, which lists your projects and displays the Criware blog. From there, you can click the New button to begin the project creation process (if you are already in the main AtomCraft view, you can simply go to File > New Project). In either case, the following window will appear.
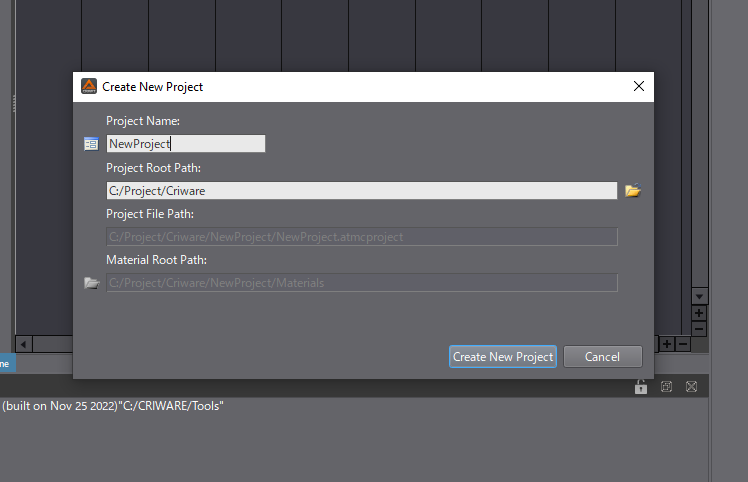
- Start by specifying your Project Name. Project names should not contain any spaces.
- Then select the Project Root Path. A subfolder using the project’s name will be automatically created under that path after clicking on the Create New Project button.
- All the necessary files will be generated, including the .atmcproject which is the human-readable project file format used by AtomCraft.
The next window will let you create your first WorkUnit. In AtomCraft, WorkUnits are objects that store and organize your content, like sound banks, assets, and events. You can create several WorkUnits to divide your content by type of sounds or tasks, in order to allow multiple designers to simultaneously work on the same project (as a specific WorkUnit can only be edited by one person at a time).
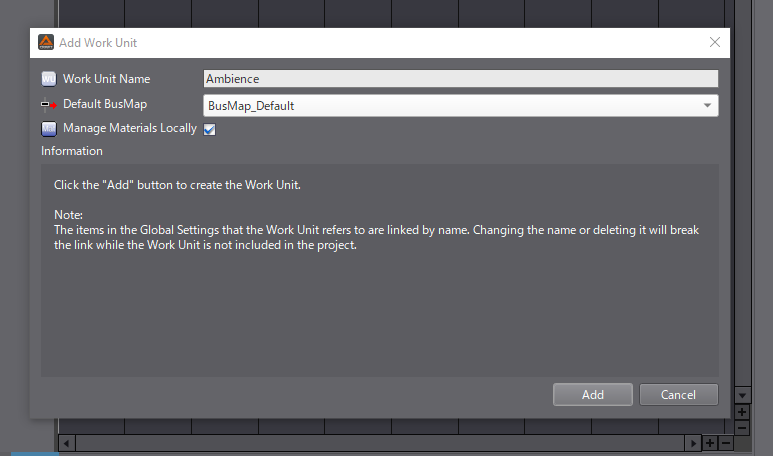
- Choose the WorkUnit Name.
- Assign the Default BusMap, which will be the default bus routing for the objects within the WorkUnit. Note that only BusMap_Default is available during the project creation process. However, you will be able to assign your own custom BusMaps later.
- The third option lets you choose if your raw sound assets – called Materials in ADX – will be managed Locally at the WorkUnit level or Globally at the project level. If Manage Materials Locally is checked, the Materials will be located in an individual folder and can only be accessed by that WorkUnit (there can be only one Materials folder per WorkUnit). Otherwise, the Materials will be stored in a global folder and will be accessible from all the WorkUnits managing their Materials globally.
- A click on the Add button will create the WorkUnit in the project and a hierarchy of folders under it.
The AtomCraft interface
Once your project created, your main window should look like the picture below. AtomCraft provides a DAW-like interface, which makes the design of interactive audio much more intuitive.
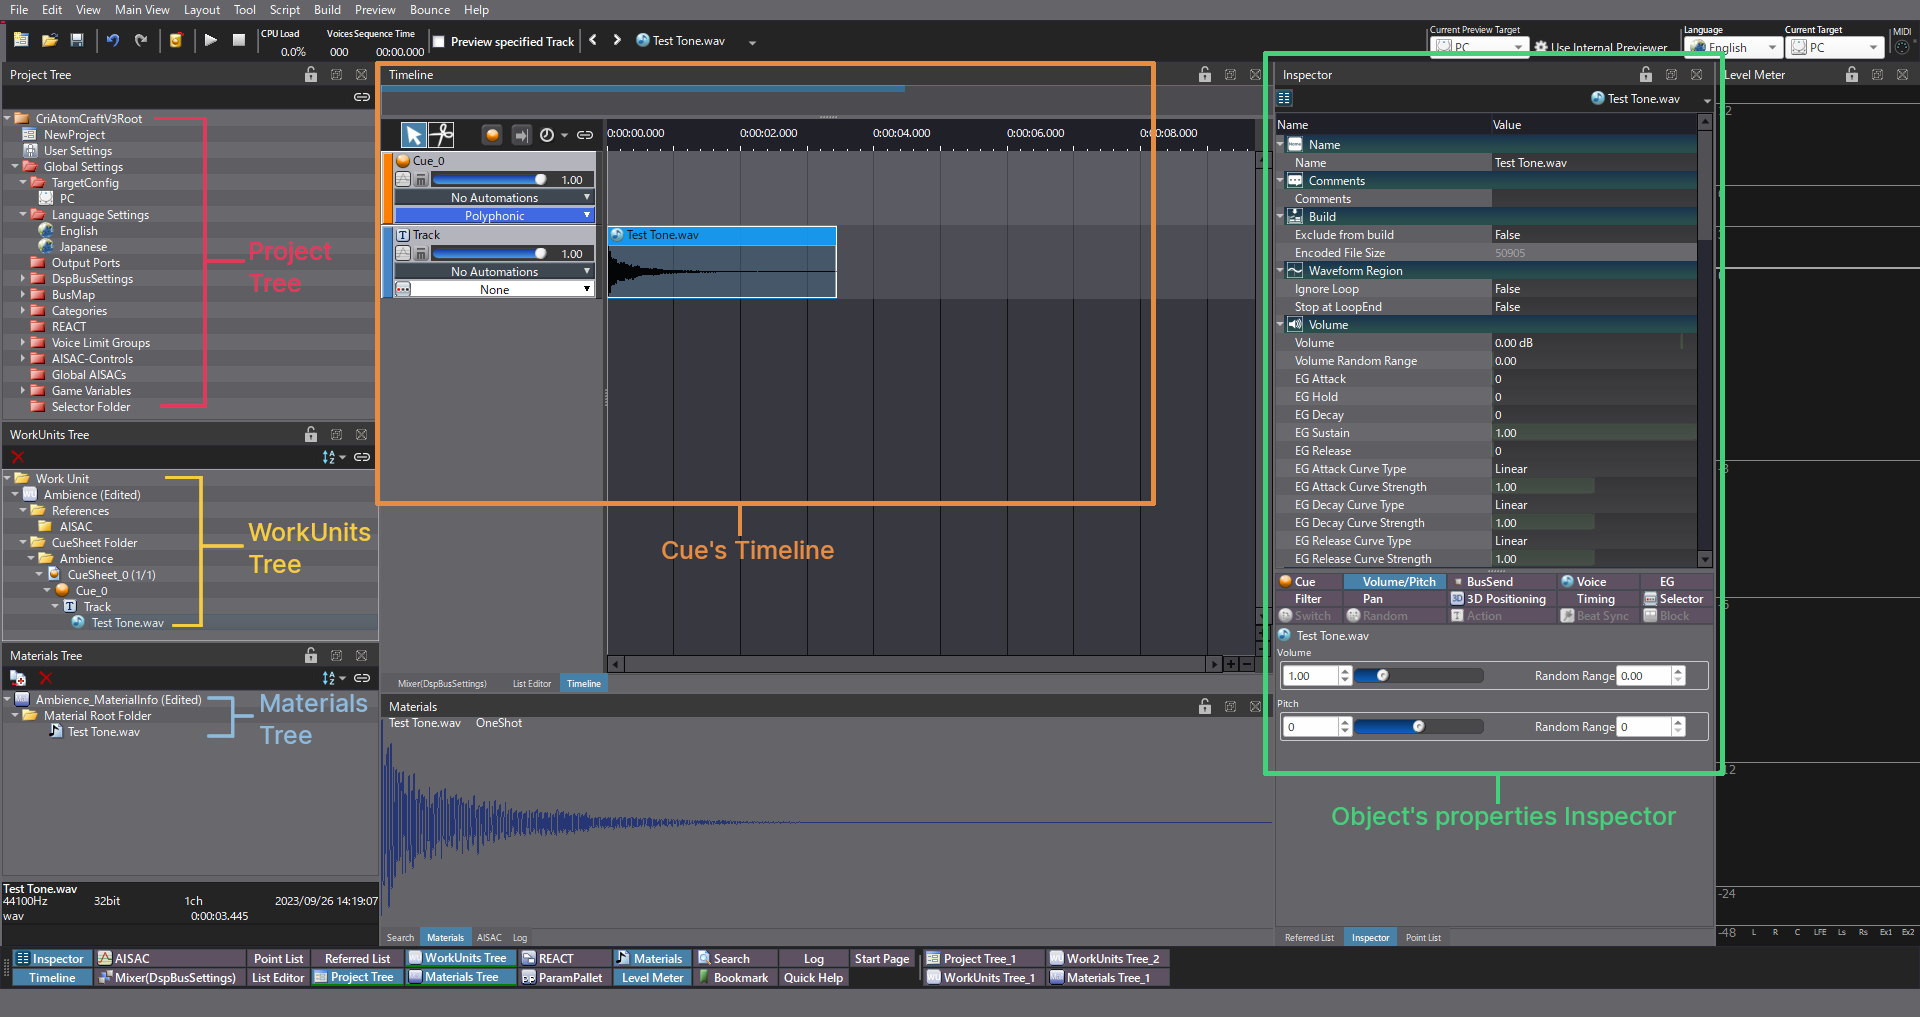
Here are the five main parts of the UI:
- Project Tree: This tree is used to manage project settings – such as platform, languages, build settings… – and objects that are used globally in the project.
- WorkUnits Tree: This tree shows all your WorkUnits, and it is where you will create your hierarchy of sound banks (Cue Sheets in the ADX terminology) and events (Cues).
- Materials Tree: This tree changes dynamically to show the materials within the selected WorkUnit. This is where you will import your raw sound assets. You can organize them in different folders.
- Timeline: Each Cue has its own DAW-like timeline, which allows you to define how the sounds will be sequenced during playback. The sounds are encapsulated in Waveform Regions, which are the basic audio objects placed on the various Tracks of the Timeline. Sound editing operations (move, trim, fade…) can be used like in a DAW, and parameters can be controlled with automations too.
- Inspector: Finally, the Inspector allows you to edit the properties of any selected object. For example, by selecting a Cue in the WorkUnit tree, you can change its volume, pitch, voice behavior, spatialization settings…
This is the default layout, but note that AtomCraft offers a fully customizable interface where all views can be docked and moved around.
First steps in AtomCraft
Now that the project is created, let’s adjust some of its settings.
For instance, if you are working on a multi-platform game, you will have to create a specific configuration for each targeted platform:
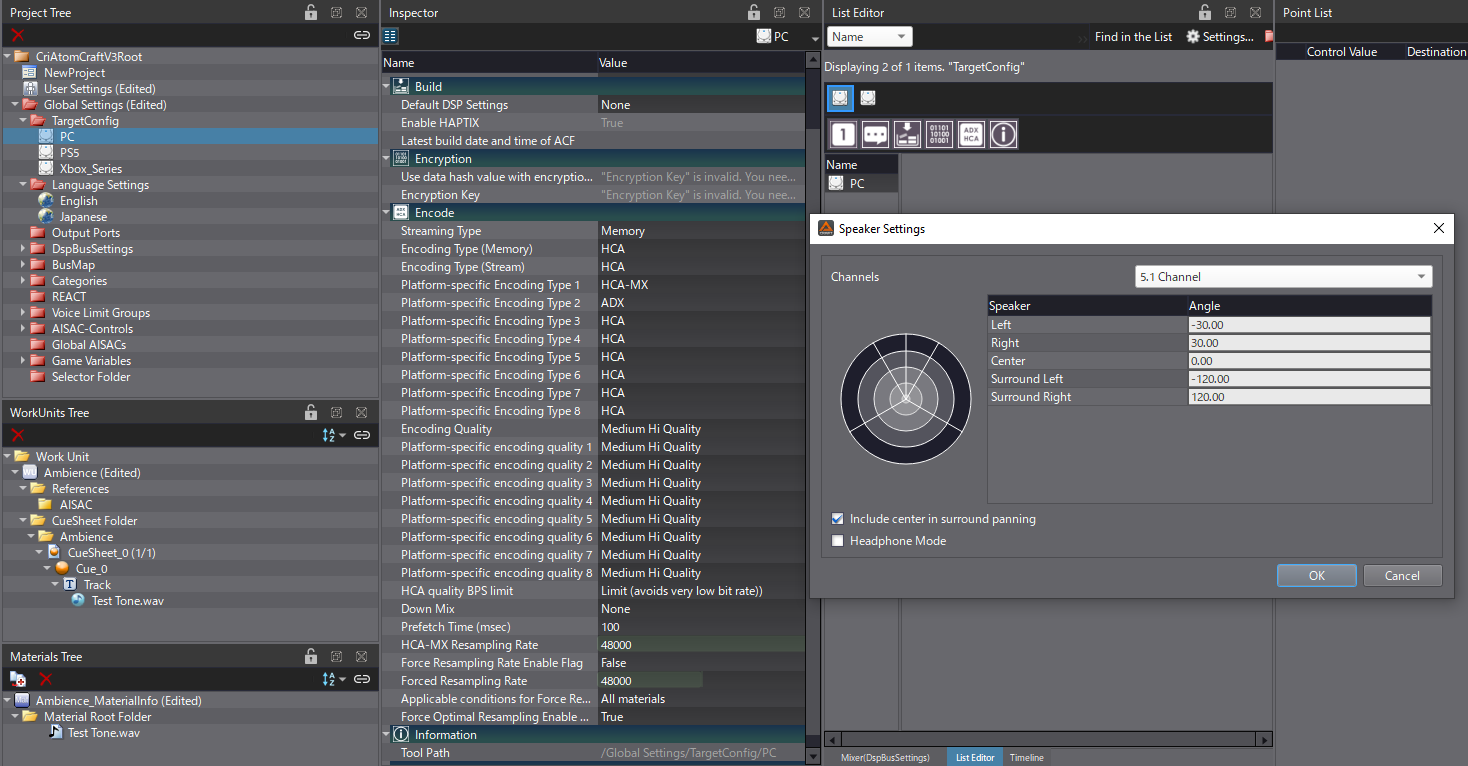
- In the Project Tree, right-click on the TargetConfig folder and add as many platforms as you need. AtomCraft support the most common platforms: PC, PlayStation 5, Xbox Series, Nintendo Switch, iOS and Android.
- You can change the global encoding settings of your assets for each target platform as well. ADX can use CRIWARE’s proprietary codecs (ADX, HCA and HCA-MX) for high-fidelity, high compression, and low CPU-load, or the ones provided by console manufacturers.
- Speaker settings – for the relevant platforms – and remote connection settings for in-game preview can also be set.
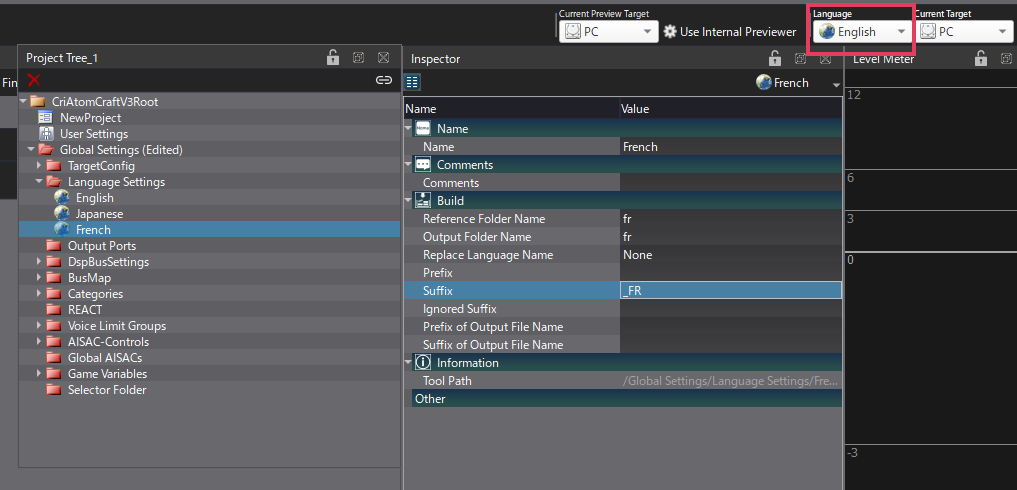
Finally, you can add language settings if your game is multilingual. AtomCraft will create a dedicated folder structure for your materials and the system will switch to the right assets based on the language. Various naming schemes are supported with prefix and/or suffix.
- The Language Settings folder is just under the TargetConfig folder.
- Right-click to add a new language setting. AtomCraft comes with some presets for the most common languages, but you can also create your own.
- Once this is done, whenever you switch languages in AtomCraft, you will be able to preview the assets for the selected language.
From there you should be able to start creating content for your game. This content takes the shape of Cues, which is exactly what we will talk about in our next post.