

Ghostly Creature
With Halloween just a couple of days away, it is the perfect time for some spooky and eerie sound design! In this post, we see how to implement a ghostly creature sound in AtomCraft.
Asset Creation
For a ghostly creature, we want something that will sound breathy and ethereal. Recording your voice will get you started in no time:
- Favor long whispers and/or exhalations.
- Pitch down the recording for a more monstrous feel.
- Slightly equalize the low and high-end so it doesn’t sound too boomy and harsh.
- Prepare a dozen variations.
Once the variations are ready, import them into AtomCraft’s Materials folder.
Implementation
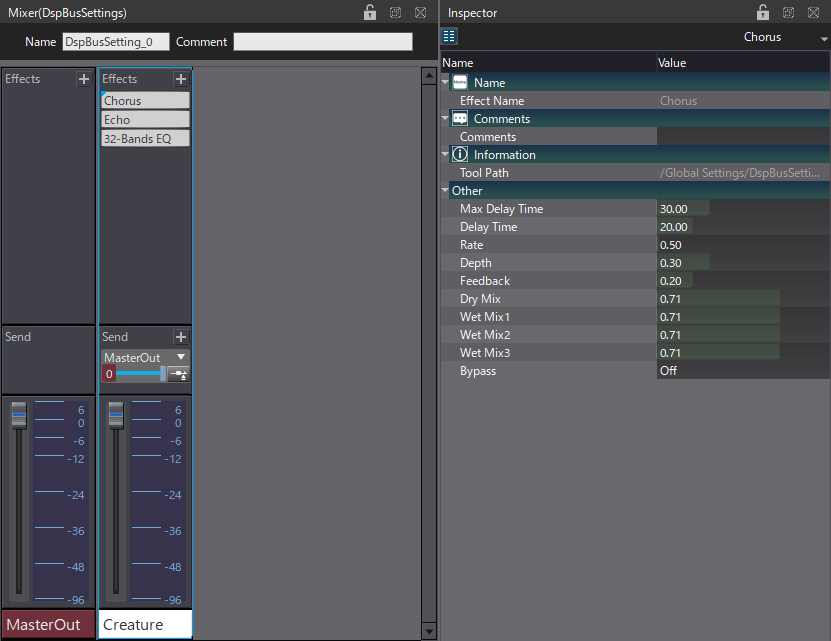
As this sound relies on an effect chain, we will start by setting up our bus on the Mixer panel.
- Create a new DSP Bus called “Creature”.
- Add the new bus to the BusMap_Default.
- Add Chorus, Echo, and 32-Bands EQ effects on the bus.
- Set the Rate of the Chorus around 0.5 Hz, the Delay Time of the Echo at 150 ms, and use the EQ to smooth down any unwanted harshness.
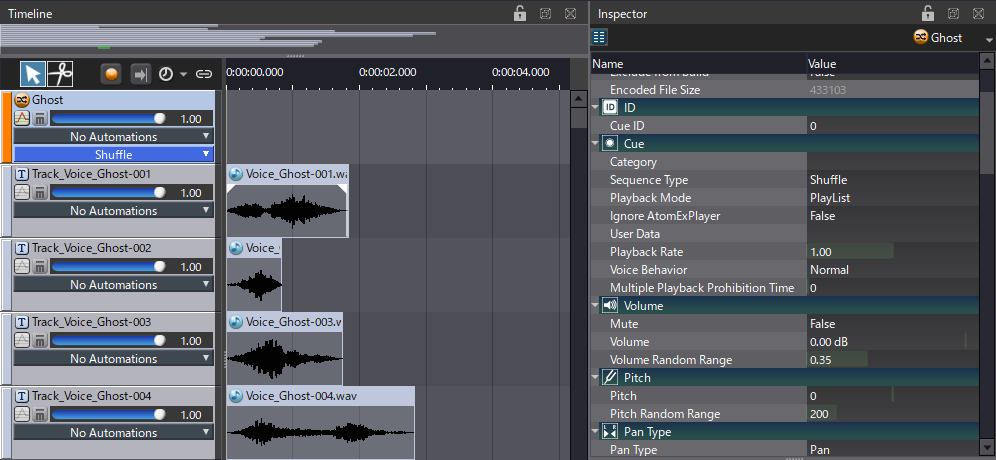
We can now start preparing the Cue:
- Create a Cue of type Shuffle.
- Change its Playback Mode to Playlist.
- Set the Volume Random Range to 0.35 and the Pitch Random Range to 200 cents.
- In the Bus Send section of the Inspector, deactivate the MasterOut send and activate the Creature send.
- Drag and drop your materials on the Cue to create all the necessary tracks.
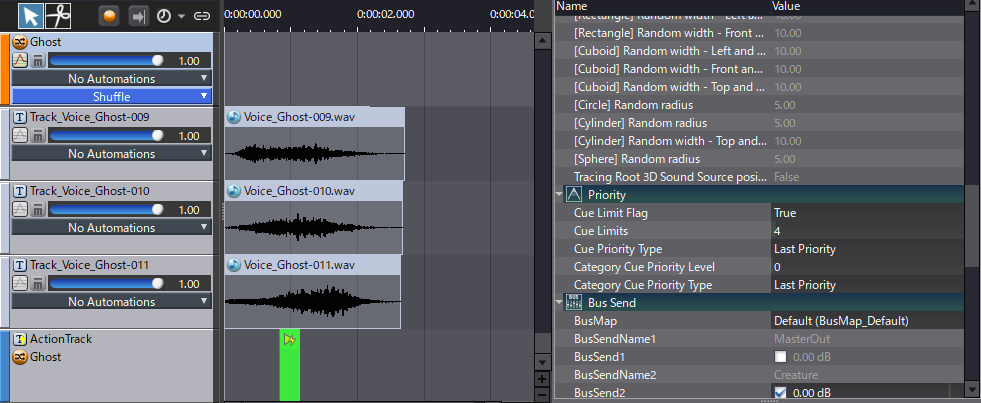
When triggered, the Cue currently plays one sound after the other. We need a way to retrigger the sounds more often.
- In the same Cue, create an Action Track.
- Add a Play action between 800 and 1000 ms on the timeline.
- Drag the Cue itself onto the Action track’s header to make it the target of the Play action.
- Finally, to prevent the Cue from retriggering too much, set its Cue Limit Flag to True and its Cue Limits to 4 in the Inspector.
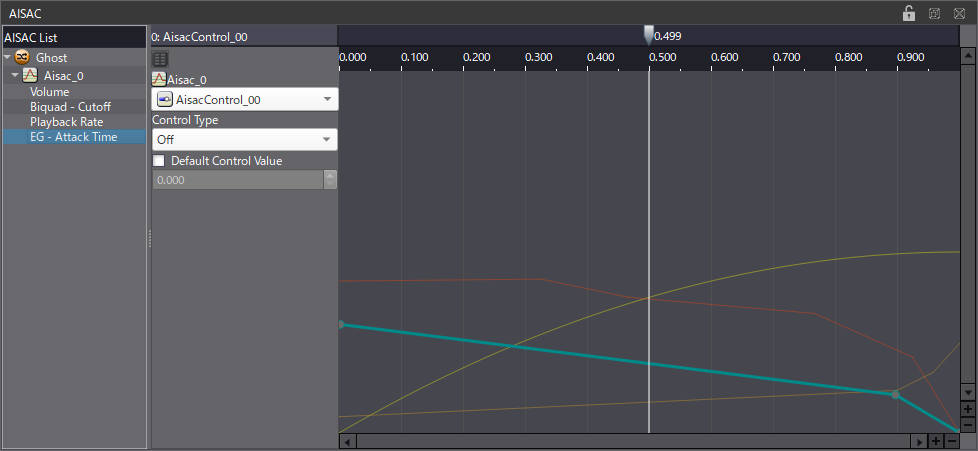
The Cue should now sound more organic, with many whispers being layered. The next step is to use an AISAC to make the sound more reactive.
- In order to control the tracks’ filter, it needs to be activated for each track. In the List Editor, select all the tracks and change the Biquad Filter Type to High Pass. Also, adjust the Filter Q to 1.10.
- Now create an AISAC at the Cue level to control the Volume, Biquad – Cutoff, Playback Rate, and EG- Attack Time parameters.
- For the Volume graph, opt for a curve of fade-in type.
- Set the Biquad – Cutoff graph to start at -0.16 and end at -1. Adjust the points in between to have the desired effect.
- The Playback Rate graph should go from 0.18 to 1.
- The EG – Attack Time graph should be set to decrease from 600 to 0.
This AISAC configuration results in a lighter and smoother sound when the AISAC is low. For higher values, a bigger sound will be produced, as more whispers will be retriggered.
This Cue can now generate ghostly whispers dynamically to scare your players! You can check all the implementation details and customize them by downloading the project below.
 AtomCraft_Project_Ghost.zip