
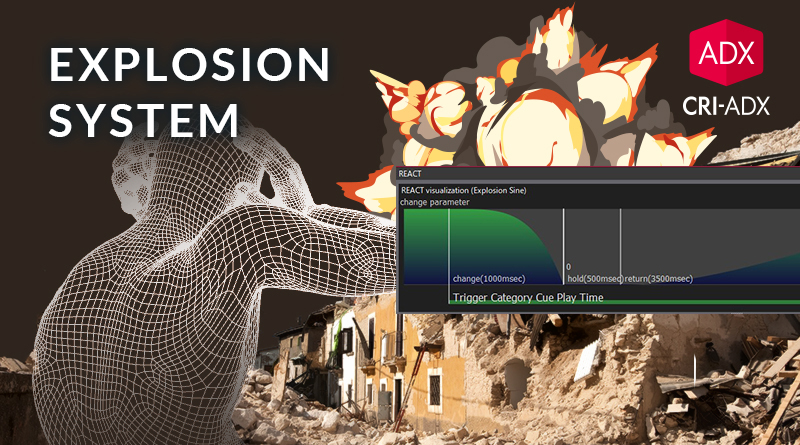
Explosion System
In this post, we explore how REACT can be used to automatically adjust the volumes and effects of a group of sounds when triggering an explosion.
Explosions
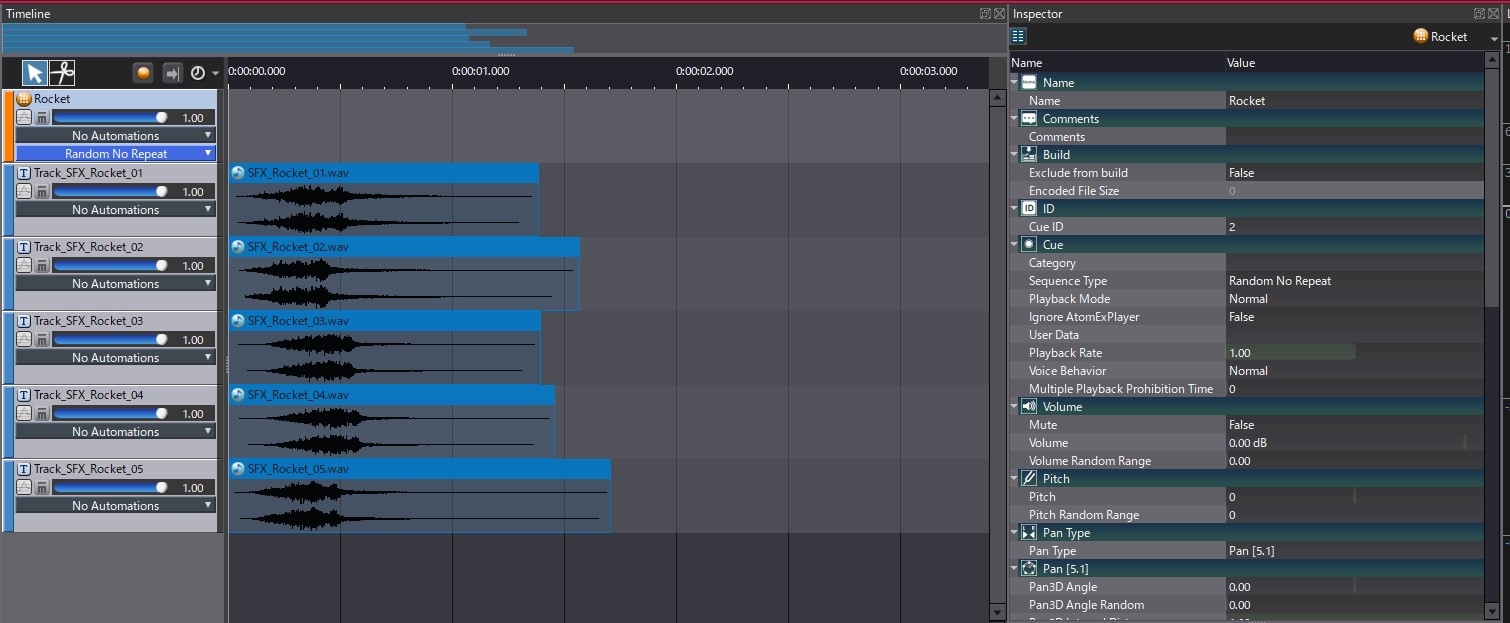
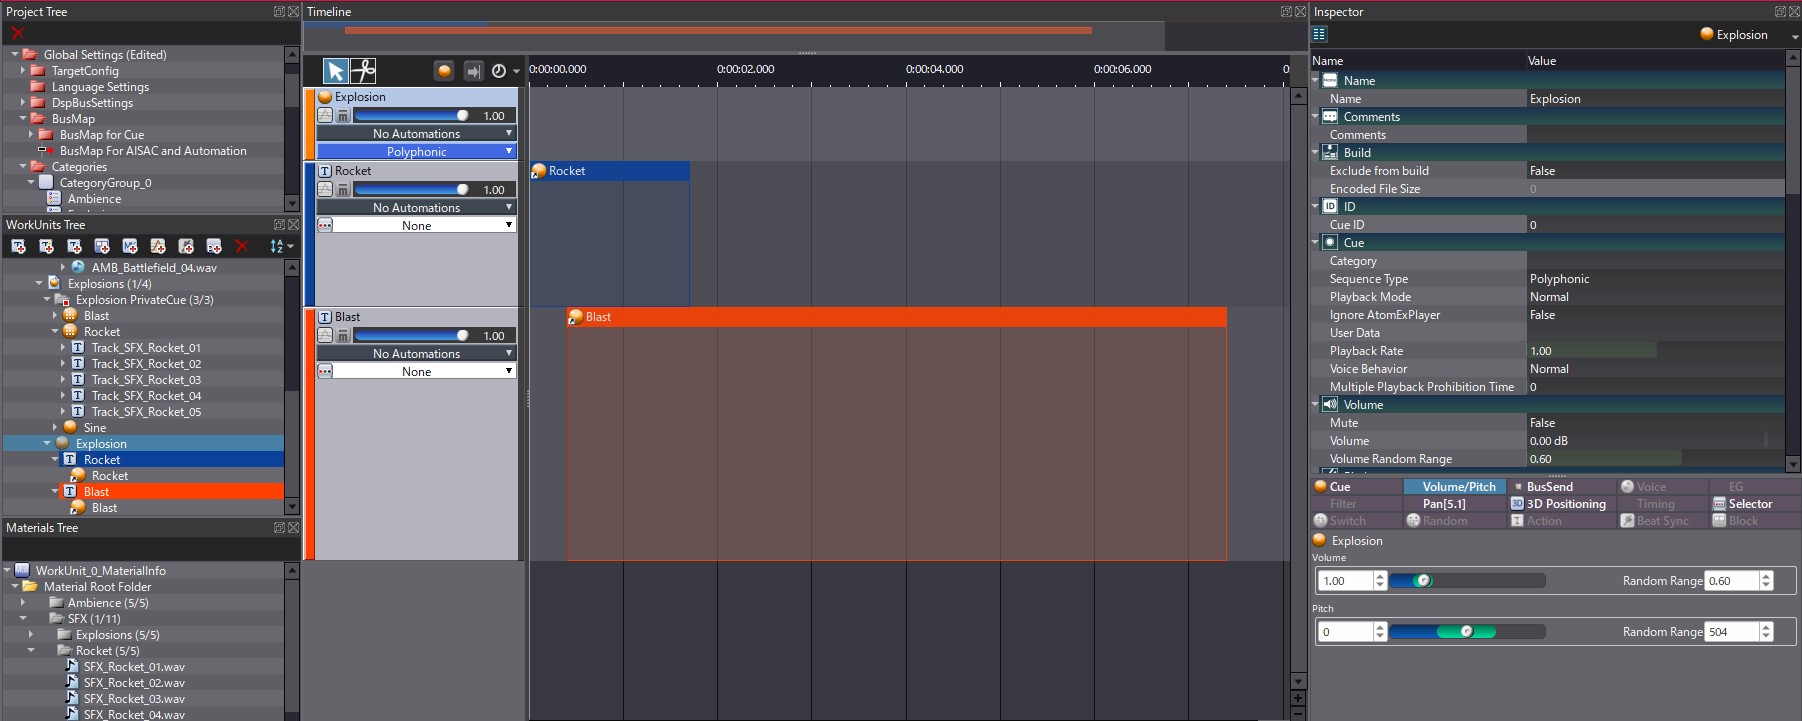
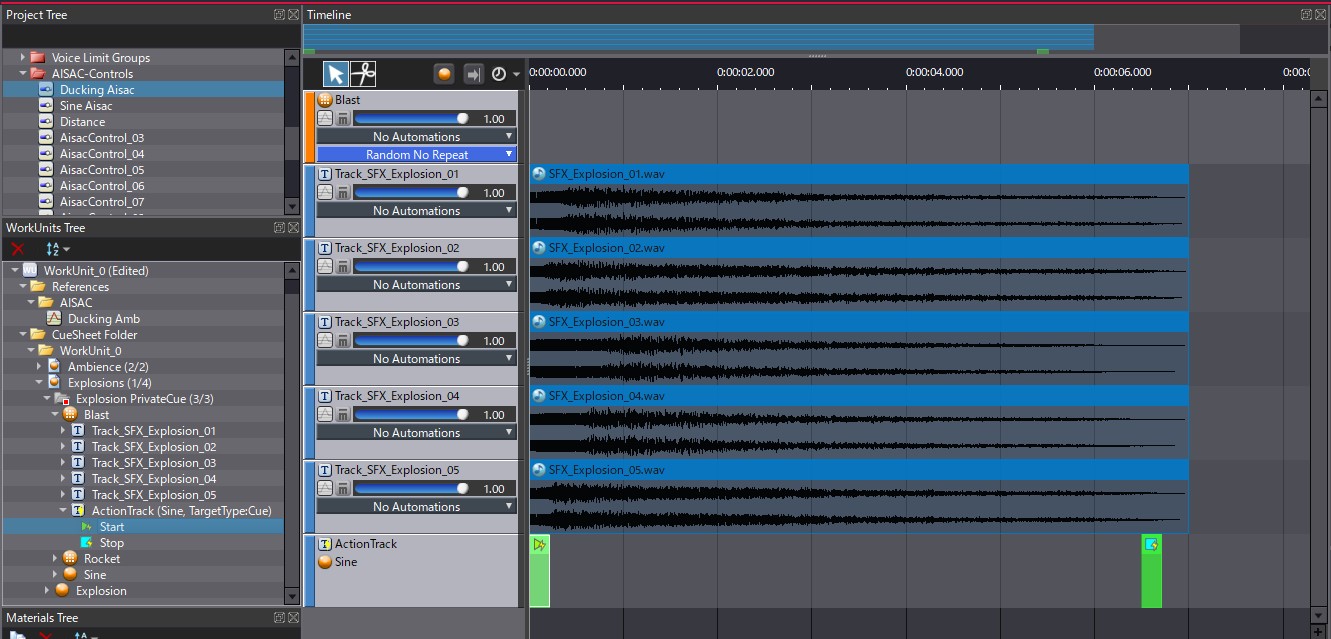
For this example, the explosions are designed as a combination of two layers: a rocket sound at the start, quickly followed by an explosion blast. The Rocket and Blast layers have their own Random No Repeat Cues; each of them containing several samples.
The parent Polyphonic Cue is created by simply dragging & dropping the Rocket and Blast Cues on different Tracks, which creates Cue Links. Once this is done, we just need to adjust the timing of the Blast region on the timeline, to make it start about 400ms after the Rocket region.
To get even more variation when triggering the Cue, random ranges are also assigned to the Cue’s Volume and Pitch parameters. Then, the Blast’s Playback Timing Random parameter is set to 300ms, allowing us to slightly randomize its playback time.
Ambience
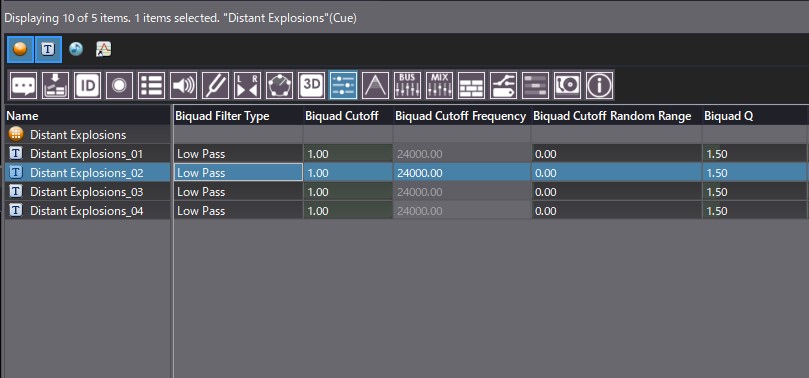
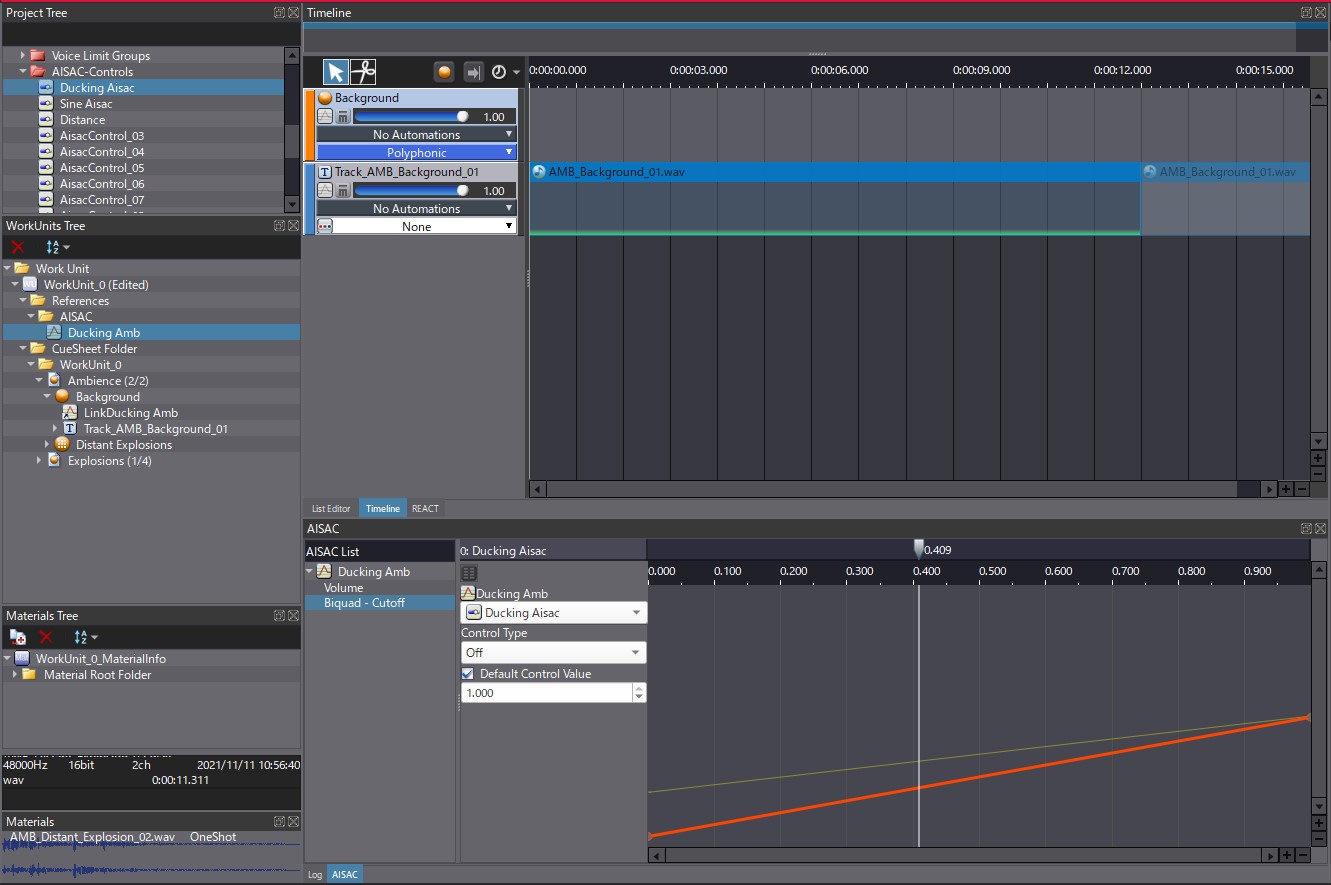
Now that we have created a satisfying explosion Cue, let’s design the background ambience, which will allow us to showcase the effect of the REACT system. This ambience is also made of two layers. The first one is a simple Cue containing a looping sample, acting as the ambience bed. The second layer is made of several distant explosion samples put in a Random No Repeat Cue. Since we want to play the ambience layer continuously, the Playback Mode is set to PlayList: each time a sound has played, it will jump to the next one and so on… In both Cues, the lowpass filter is activated in the Filter section of each track.

Ducking with REACT
With the Cues all set up, it’s time to configure REACT to apply a ducking effect on the ambience when an explosion is triggered. First, let’s assign Categories to the Cues. Categories are used to organize Cues and to control them in batch. For example, REACT uses Categories to determine which sounds are triggers and which sounds should be affected when the triggers are played. In this case, we create an Ambience and an Explosion categories. We drag & drop our two ambience Cues on the Ambience Category in the project tree, and do the same with the Blast Cue for the Explosion Category. This means that only the Blast sound will trigger the ducking, and not the Rocket sound.
We can now create a REACT object, that we call Explosion Ducking. The Changing Category is set to Ambience, and the Trigger Category to Explosion. The REACT Type is set to Ducker (this should be the default). For the Change Parameter, we select an AISAC and rename it Ducking AISAC, while we set the Change Level Value to 0.
Once all this configured, you can adjust the timing of the REACT to your liking. For this type of sound, we recommend having a fast Change Time (around 100 ms), a Fixed Hold Time of 1 or 2 seconds, and a longer Return Time of about 3 to 5 seconds, depending on how long are your explosion sounds.
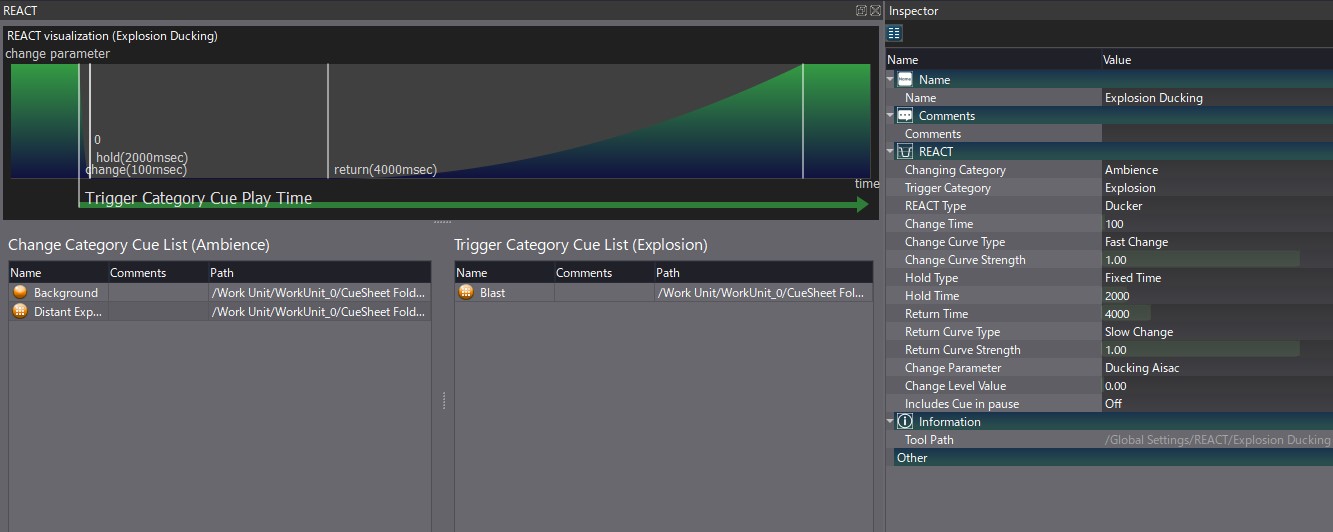
Finally, we have to assign the Ducking AISAC to the Ambience Cues. For both the Background and Distant Explosion Cues, we create an AISAC that controls the Volume and the Biquad cutoff. The amount of attenuation after each explosion will be determined by the curve we draw for the AISAC.
To test this automatic ducking system, go to the Session window, and start your ambience Cues. You should hear their level decrease once an explosion Cue is triggered, and progressively come back after that.
Boosting sounds with REACT
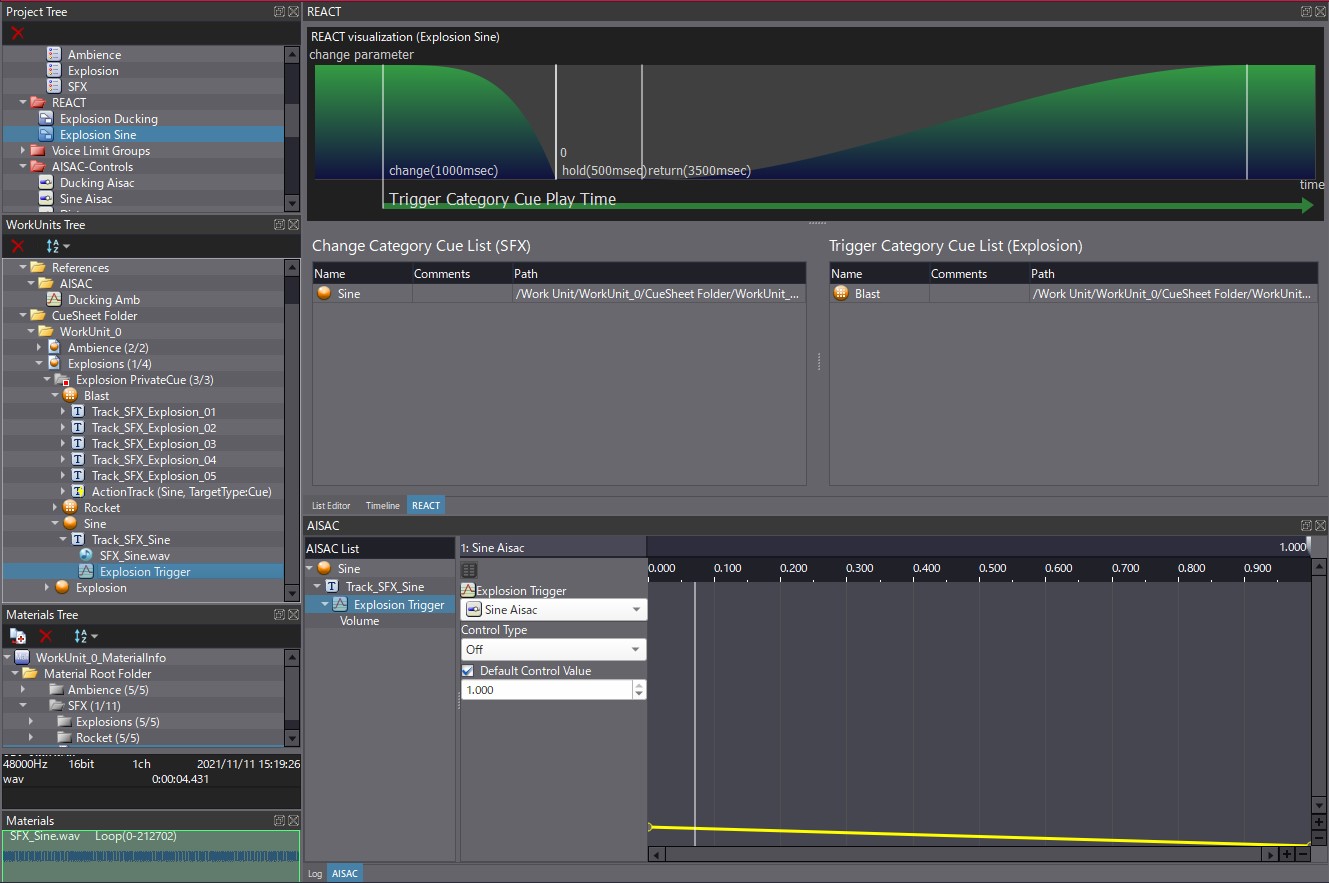
It is also possible to amplify other sounds with REACT. For example, we may want to add a sine tone after for a couple of seconds. We create a simple Cue with a looping sine wave that we assign to a new Category called SFX. This Cue should only be played when an explosion occurs. To ensure that, we can use an Action Track in our Blast Cue that will start and stop the Sine Cue.
The steps are:
- Create an Action Track on the Blast Cue
- Drag & drop the Sine Cue on the Action Track to create a target
- On the Action Track, create Start and Stop Actions aligned with the beginning and the end of the Materials in the Blast Cue.
Using the same process than previously, we create a new REACT object where the SFX category will be changed by the Explosion Category using an AISAC-Control named Sine AISAC. The Change Time of the REACT object should be longer in this case (around 1 second) while the Return Time should be shorter because we don’t want the Sine wave to last too long.
Finally, we just need to create the AISAC that will be driving the volume of the Sine Cue. However, instead of lowering the volume when the AISAC approaches 0, we increase it. Each time an Explosion is triggered, the Sine wave will come and leaving smoothly, reinforcing the sound.
REACT is a great to automate sound changes based on what Cues are triggered in the game. How will you use it in your game?
 Explosion_System_Project.zip