

Advanced Footsteps
In this post, we will learn how to design a footsteps system in AtomCraft, with a focus on advanced control and the generation of variations. Note that we implemented a simpler footstep system in one of our previous blogs, so do not hesitate to refer to it if you are just starting with AtomCraft or need a refresher!
Setting up the surface Cues
This time, for each type of surface (e.g., metal, wood etc.) in the game, we will separate our footsteps samples into 2 parts: heel and toe. These two sets of samples will be added to their respective Random no Repeat Cues that we will reference from a Polyphonic Cue. This allows for the creation of many sound variations from a relatively small set of samples, which comes especially handy in mobile game environment.
Let’s follow the steps for the Concrete surface, for instance:
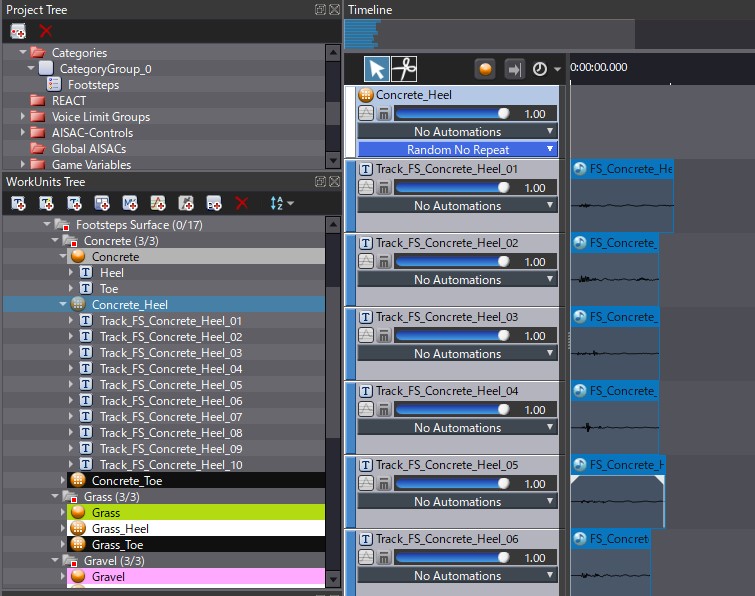
- Import your Concrete_Heel samples into a Heel Random no Repeat Cue
- Do the same for your Concrete_Toe samples into a Toe Random no Repeat Cue
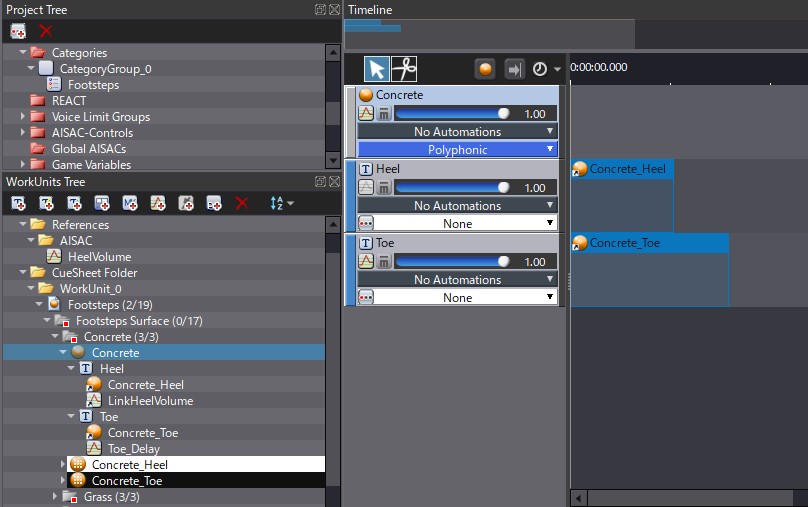
- Create a Polyphonic Cue called Concrete
- Drag & drop the Heel and Toe Cues onto their respective tracks in the main Concrete Cue
- Assign Random Ranges to the Concrete Cue’s Volume and Pitch parameters to create even more variations
Each time the Concrete Cue is triggered, both the Heel and Toe components of your footstep will be played, and they will sound slightly different.
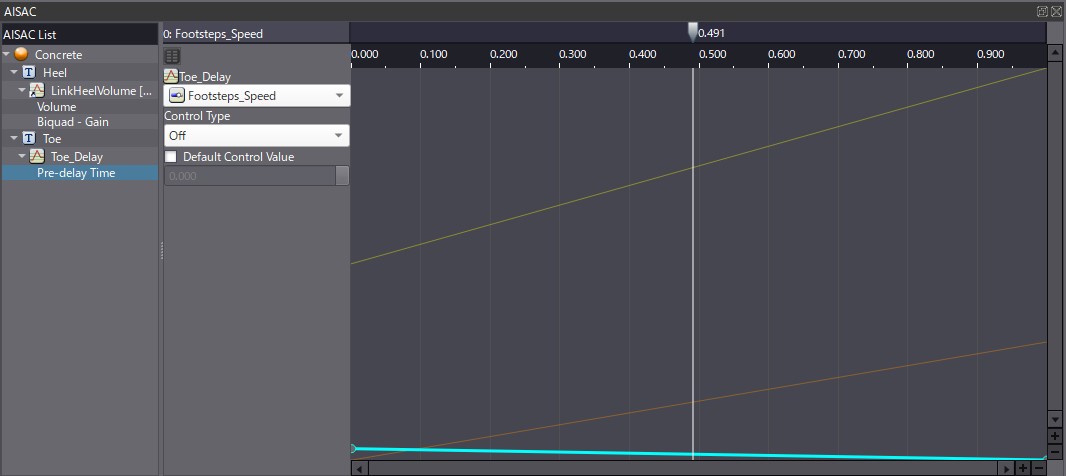
Of course, we don’t want them to play at the exact same time, so an AISAC is used to control the delay between the Heel and Toe. This will allow the sound to match the walking speed of our character.
- On the Toe track of your Concrete Cue, create an AISAC
- Select the AISAC Control that will be linked to the Footstep Speed
- For the AISAC Graph, select Pre-delay Time.
- Depending of the surface, the Pre-delay Time curve should be set between 400 and 600ms when the AISAC value is at 0, and between 0 and 50ms when the AISAC at 1
Now the playback will change based on the walking speed. At maximum speed, which should correspond to fast running, there will be almost no delay between Heel and Toe. Note that we also use the Footstep Speed AISAC to increase both the Volume and Low-end of the Heel track to make it louder when running.
Global Footstep Cue
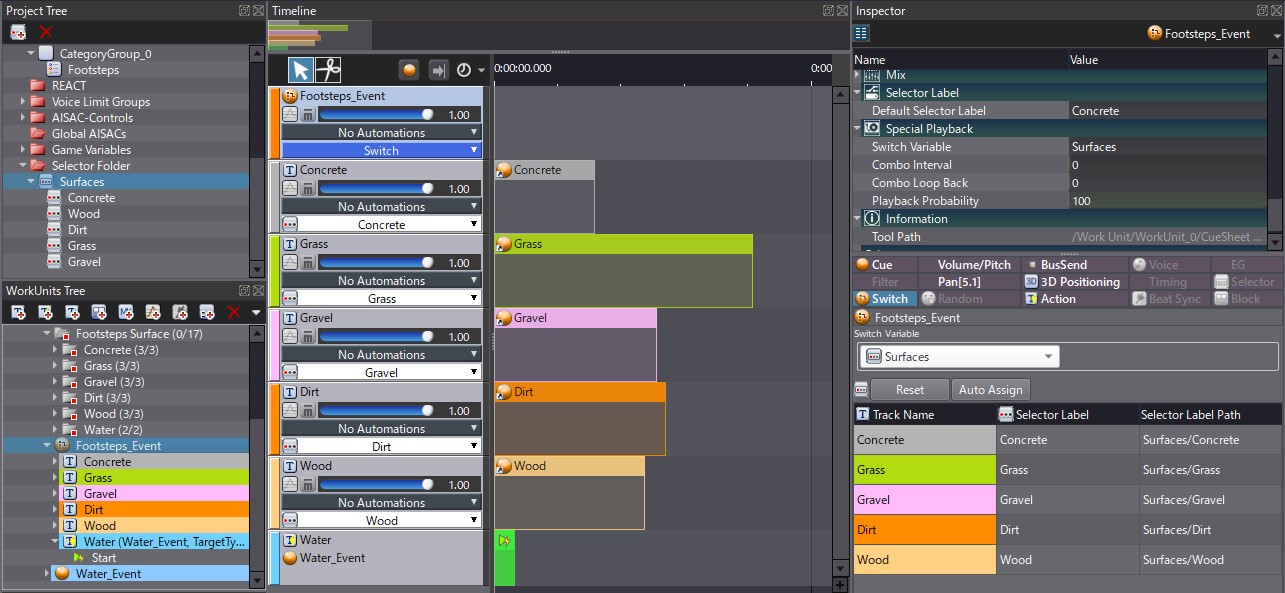
After setting up the Cues for all our surfaces, we create a Switch Cue. It will make it possible to change the sounds played based on the surface, using a Selector.
- First create a Selector called Surfaces
- Then add Labels for each surface you want to use, such as concrete, wood, grass, dirt…
- Now create a Switch Cue called Footsteps_Event and assign the Surfaces Selector as Switch variable
- You can select any Label you want for the Default Selector Label
- On the Switch Cue, create one Track per surface and drag and drop your Cues (Concrete Cue, Wood Cue, Grass Cue…) onto their respective track
- Finally, assign a Selector Label to each Track
Now you can switch between the various surfaces with your Selector.
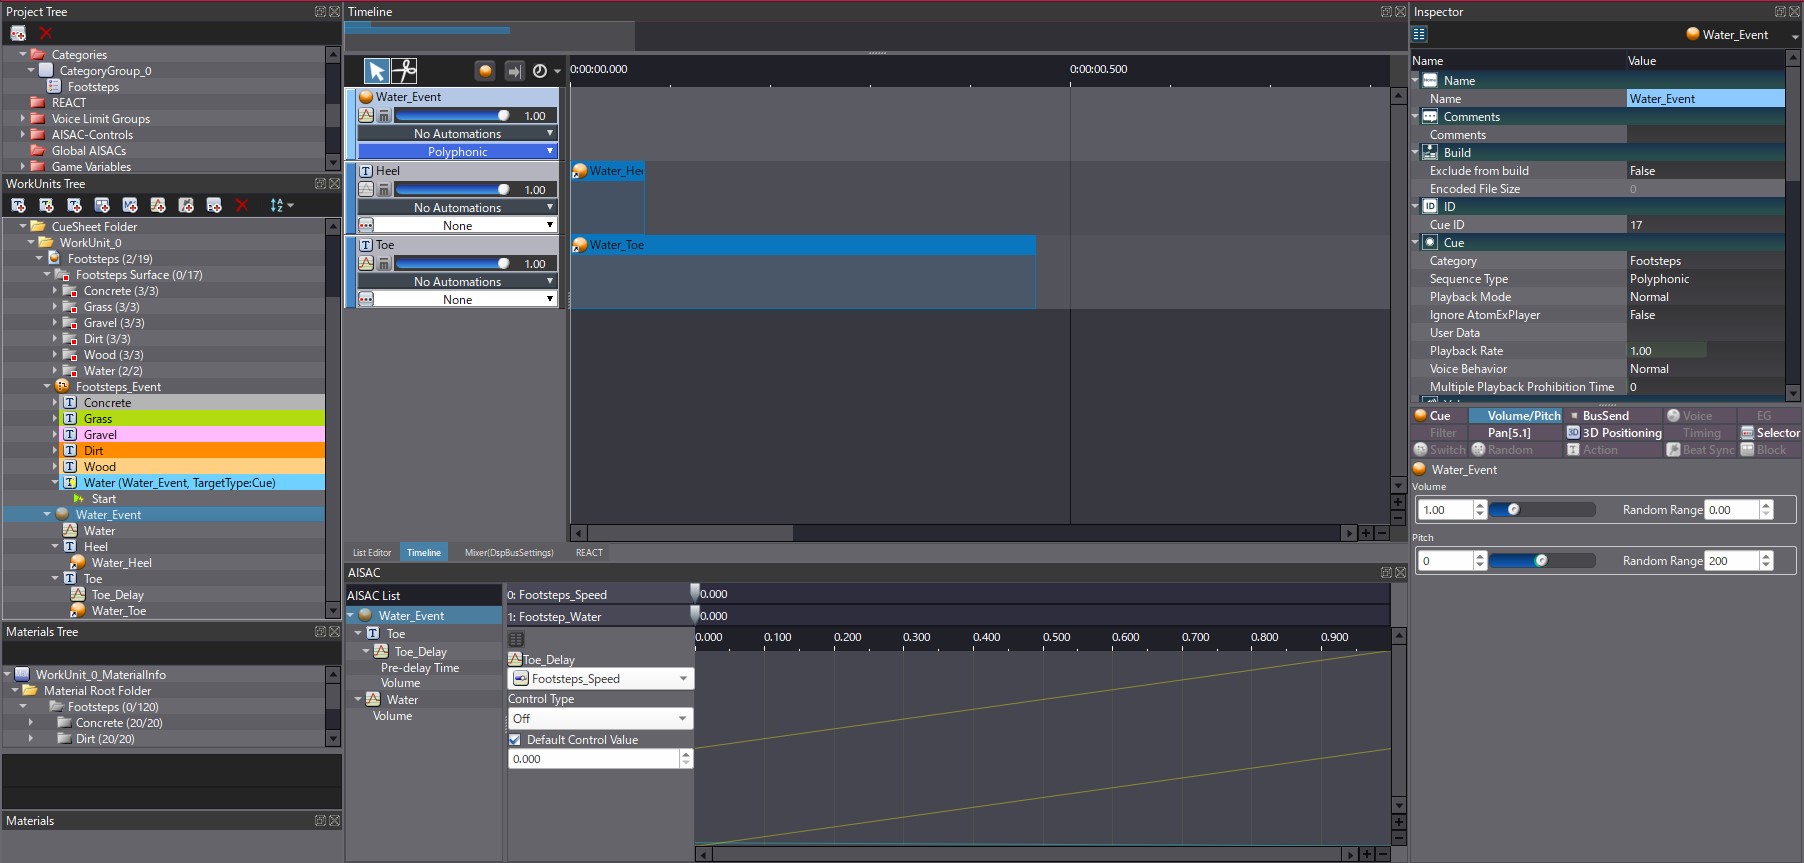
Water layer
Lastly, we will add a Water component. Rather than a surface, it is a layer added on top of the sound. This can be useful in a game with changing weather where you still want to hear the basic surface in addition to the water.
A Water Cue is created in the same way than the previous surfaces (including the timing of the Heel and Toe parts controlled by an AISAC). However, instead of choosing the Water as a Surface with our Selector, we will layer it on top of the other Surfaces with a dedicated Water AISAC controlling the Volume of the Water Cue.
With this system, you can control the “wetness” of the surface depending of the amount of water your character is walking in. In our example, we add an Action Track to play the Water Cue at the same time as our Footsteps_Event Cue. This makes it easier to test, but in your game you might want to trigger the Water Cue only when the character’s feet hit the Water.
 Advanced_Footsteps_Session