
Dynamic Ambience System
In this post, we are going to design a complete ambience system in Atom Craft. Simply by using a couple of AISACs, we will be able to control many sound parameters at once and create a fully dynamic scene. By the end of the post, we will have designed the suburban ambience shown below, which includes birds, traffic, and rain, and varies based on the time of the day.
Background Ambience
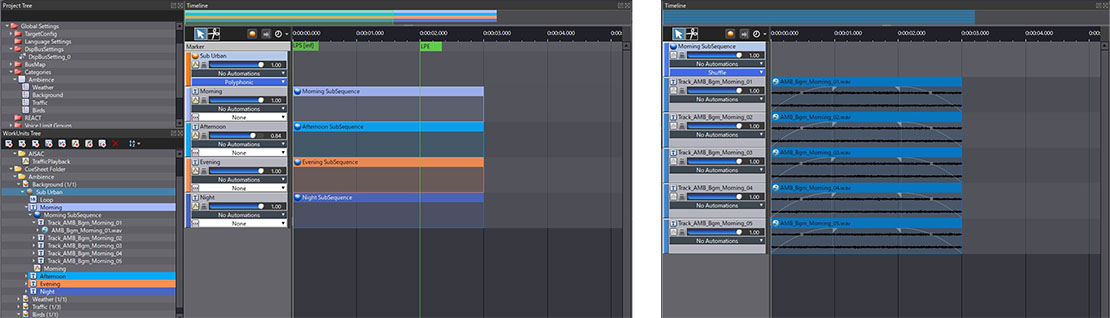
We start by designing a background ambience, which consist of four different layers – one for each time of the day: morning, afternoon, evening, and night. In order to do that, we create a Polyphonic Cue, add a Track for each layer, on which we insert a SubSequence. We will use an AISAC representing the time of day to fade between the different layers.
Each SubSequence is of type Shuffle, with five 3-second loops that crossfade between each other to avoid repetition. We assign 1-second fade-ins and fade-outs to each loop, then in the main Cue we create a Sequence Loop of 2 seconds, so that when a loop fades out the next one will start to fade-in.
Here is the breakdown:
- Create a Polyphonic Cue
- Add 4 Tracks and name them “Morning”, “Afternoon”, “Evening”, and “Night”.
- For each track, create a SubSequence and set its type to “Shuffle”.
- In these 4 SubSequences, create a track for each of the loops (there are 5 of them).
- Select the edges of each Waveform Region and drag them to create 1-second fade-ins and fade-outs.
- Once every track of your main Cue is ready, create a “Sequence Loop” with the “End Time” set to 2000ms.
- Play each track individually to ensure that everything is looping seamlessly!
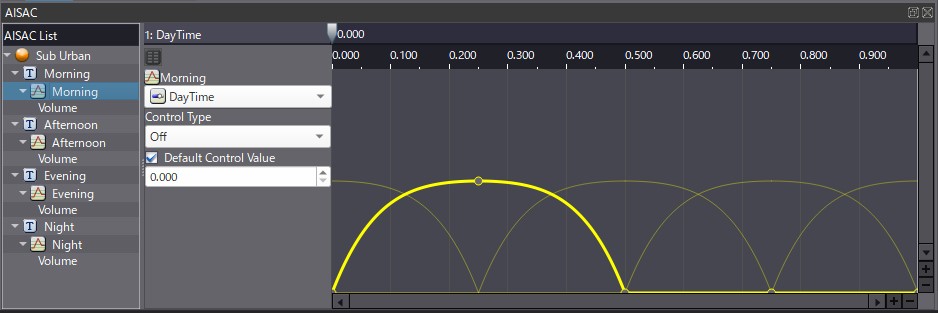
Now we will manage the transition between each Track based on the time of the day.
- In the Project Tree, rename an AisacControl as “DayTime”.
- In our Polyphonic Cue, assign the DayTime Aisac to each track in order to control their volume.
- Then, for each period of the day, create curves that will crossfade between each other.
- Now, when you play this Cue, you will be able to transition between different ambiences, based on the time of the day (i.e., the value of the AisacControl).
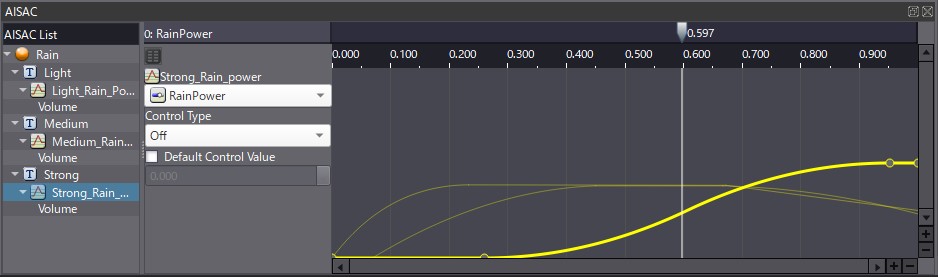
Rain
We will now create a very basic rain system, consisting of three loops; “Light”, “Medium”, “Strong” that will also be driven by an AISAC. The rain system is also implemented as a Polyphonic Cue, with each Track’s volume controlled by our AISAC. The difference here is that the Waveform Regions are set to loop by themselves, instead of using a Sequence Loop.
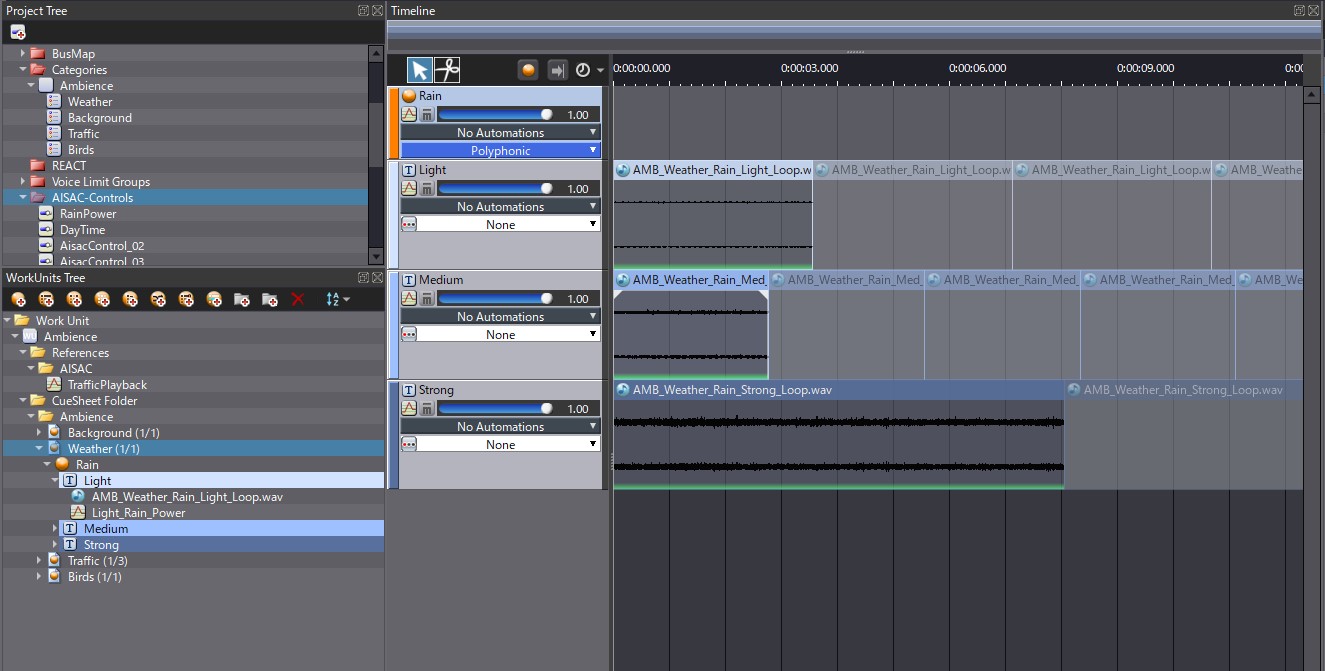
- Select the Rain loops in the Materials Tree, and in the Inspector set the “Override Loop Information Flag” to “True”. Make sure that the “Loop Type” is also set to “Loop”.
- Create a Polyphonic Cue named Rain
- Add 3 tracks: “Light”, “Medium”, “Strong”.
- Drag and drop each loop on the corresponding Track.
- As for the Background Cue, assign an AisacControl (this time call it “RainPower”) that will control the volume of each Track.
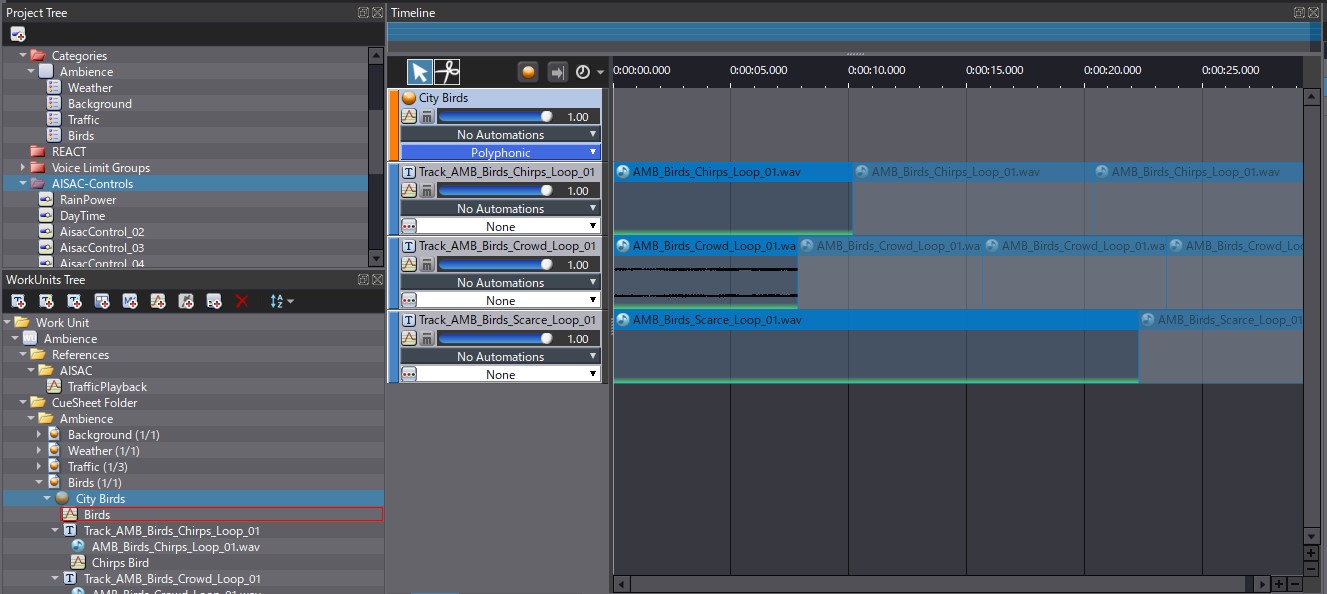
Birds
Now that we have designed the two main layers of our ambience, we want to add an environment sound that will be driven by both the “DayTime” and “RainPower” AISACs.
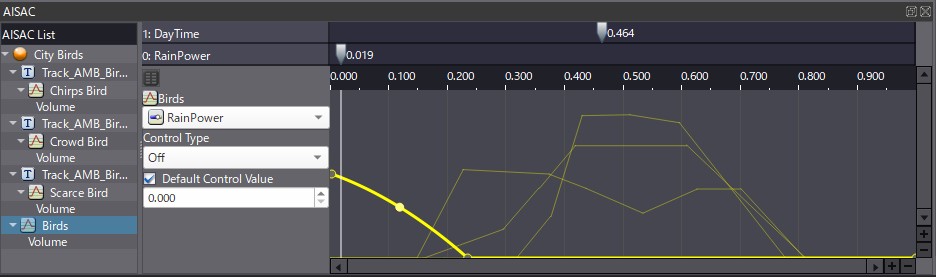
Our bird sound is made in the exact same manner than the Rain sound: a polyphonic Cue with 3 Tracks containing different looping Wave Regions. This time, we want the bird tracks to react differently depending on the AISAC values.
By increasing the RainPower for example, the whole Cue will quickly fade-out because birds tend to be quieter when it is raining. With the DayTime AISAC, we will put the focus on different layer for each moment of the day. While they will be quiet at night, you will only ear scattered bird sounds during the morning, that will slowly increase for the two other layers, until the birds all fall asleep again at the end of the day.
Traffic
Finally, let’s add some vehicle traffic that will also react to our AISACs. We will add a “Wet Traffic” layer when the value of the RainPower AISAC increases, while the DayTime AISAC will control the amount of traffic we will ear during the day.
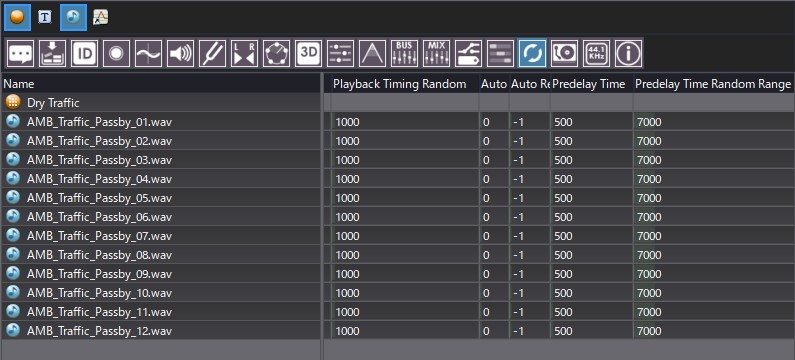
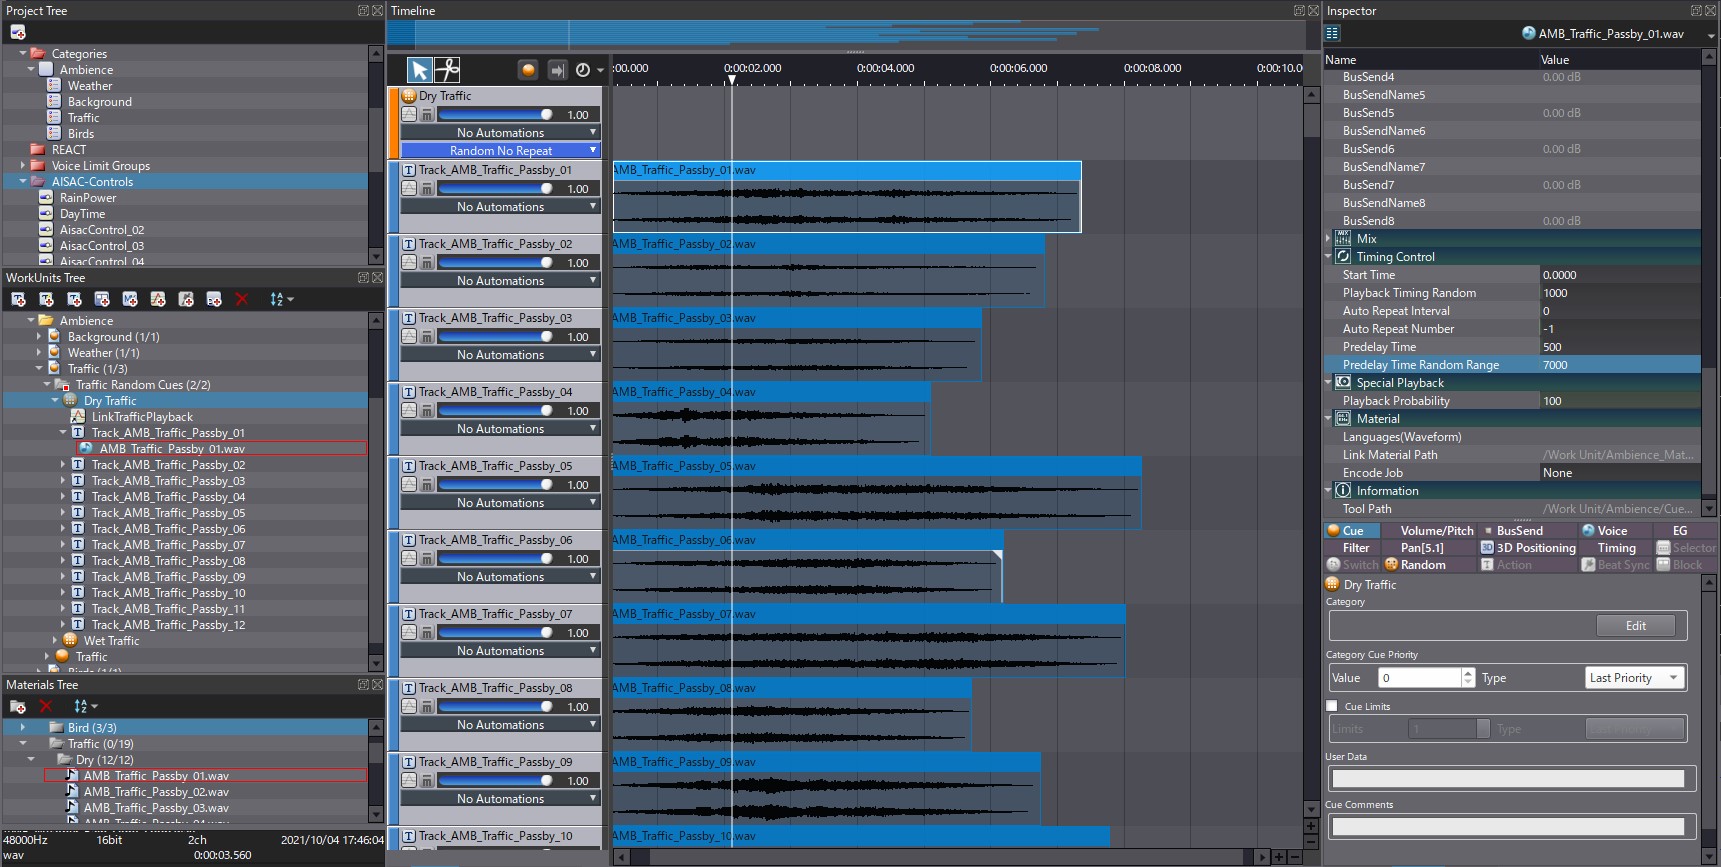
First, we need to create two Cues of type “Random no repeat”, one for “Dry Traffic” and the other for “Wet Traffic”. By adjusting the “Pre-delay Time” of each Cue with the DayTime AISAC, we can control the number of vehicles at day and at night. These two Cues are then added to a Polyphonic Cue, where the amount of dry and wet traffic is determined by the value of the RainPower AISAC.
Here is the breakdown:
- •Create two Random no repeat Cues
- Set their “Sequence Type” to “Playlist”.
- Drag and drop one vehicle passby per Track.
- Select your Cues in the WorkUnits Tree and then in the List Editor show the Waveform Regions.
- Select the “Timing Control” settings and adjust the values of the “Playback Timing Random”, “Predelay Time” and “Predelay Time Random Range” parameters; this will ensure that there is a random amount of silence between each playback.
-
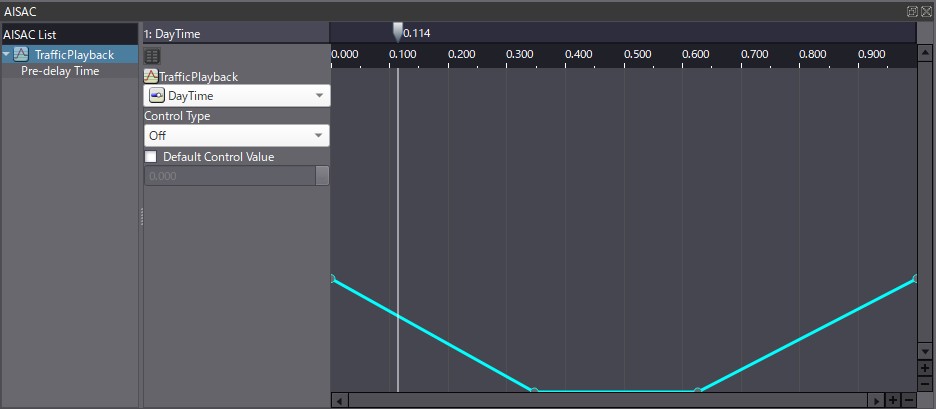
- Now set the DayTime AISAC to control the “Pre-delay Time”.
- Increase its value during nighttime but leave it to 0 during the day.
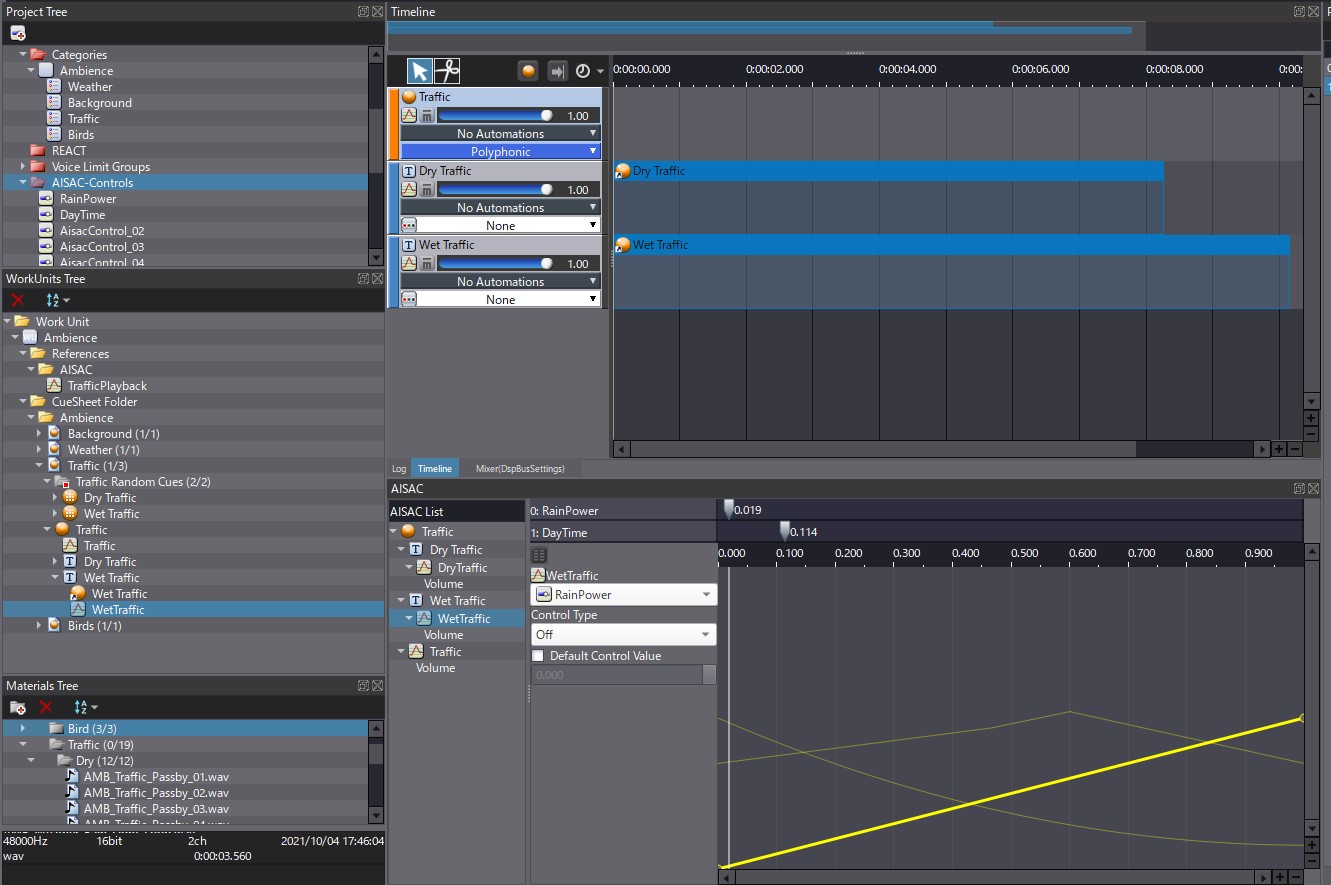
- Now create the main Polyphonic Cue and drag and drop your two Random no Repeat Cues on two different Tracks.
- Set the RainPower AISAC to control the volume of each Track.
- If you wish, you can also control the volume of the whole Cue with the DayTime AISAC to have a quieter traffic during the night.
Once everything is set up you can test all of your Cues in the Session Window and see how everything is reacting to your AISAC controls. This will allow you to make some final adjustments.
We are providing the corresponding Atom Craft project below.
 AtomCraft_Project_Dynamic_Ambience_System.zip