
Exporting your SpriteStudio Animation
Over the course of this SpriteStudio introductory series, we learned how to prepare our graphic assets and set up an animation project, use keyframes and curves to create a basic 2D animation, add particle effects and mesh deformations, and finally use mask and instancing effects. Here is the result of our hard work:
![]()
The time has come to reap the fruits of our labor and to get our animation out of SpriteStudio, and in the world!
Once you are satisfied with the way your animation looks in the tool, there are several ways to export it, depending on how you are planning on using it: as data that can be played back in real-time, as a final movie/animation, as a sequence of pictures or as a sprite sheet.
Playing the animation in a game engine
If you are making a game, you can use the SpriteStudio SDK. It contains tools and a C++ library that will allow you to convert the project files to binary data and then play it back on your target environment.
There are also SpriteStudio integrations for the most popular game engines: the SS6Player is available for Unity, Unreal Engine, and Cocos2d-x. It is important to note that the SpriteStudio SDK and the various integrations are open-source and available on GitHub.
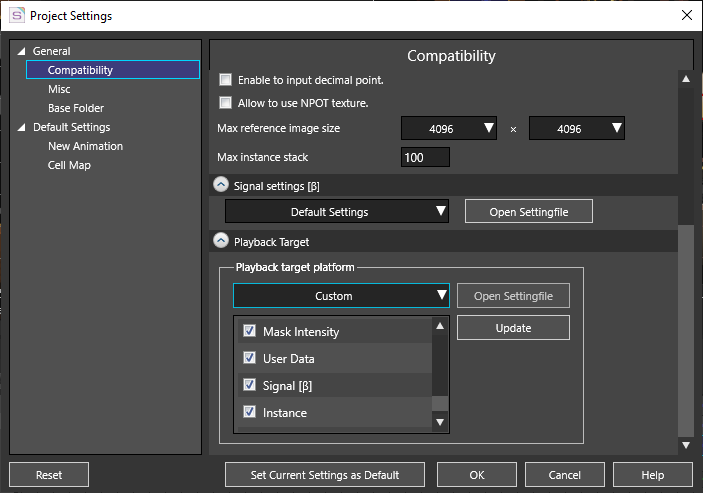
You can go to Compatibility section of the “Project Settings” window (accessible via the Project menu) to set the properties that your playback system will support (e.g., mask intensity, instancing etc…). A number of targets are pre-configured (e.g., for SS6Player versions for Unity, Unreal etc…) and you can select ‘custom’ to create your own.
Generating a sprite sheet
Another way to export your animation to a game is to generate a sprite sheet. This was a popular way to prepare animations in the early days of game development and it is still very useful in some cases, especially when memory and CPU resources are low (e.g., for mobile game development).
A sprite sheet packs all the animation’s frames into a single, larger image. It is associated with a document / script describing the position of the individual frames in the image as well as other properties. In SpriteStudio, you can use the “Make Sprite Sheet” command of the Animation menu to create a sprite sheet.
Several options are available. Among the most interesting ones are the algorithm used to perform the packing, and if frames should be trimmed, which allows to save memory, as seen in the picture below.
![]()
SpriteStudio can output a sprite sheet as a .plist file and a .png image (for Cocos2d-x), or as a .lua file and a .png image (for the Corona SDK). Of course, nothing prevents you from getting the files in these formats and writing code to modify them slightly and/or import them in your own engine / application.
Rendering the animation
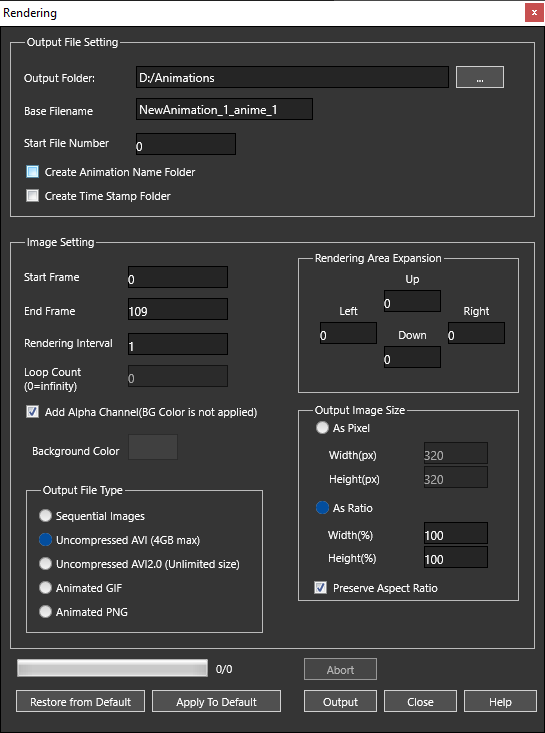
If you simply want to export the final animation, the tool gives you the choice between several formats: uncompressed AVI, GIF, and animated PNG. You can also export a serial-numbered sequence of regular PNG files. All this can be set in the “Rendering “ window of the Animation menu.
This concludes our introduction series to SpriteStudio. From rock-solid 2D animation features to advanced effects, SpriteStudio has a lot to offer to the animator. But don’t take our word for it, request a trial version, and give it a whirl!