
Tips for using Sequence Marker Auto Generation in Atom Craft
Introduction
In previous blogs, we have looked at embedding markers within Materials to allow looping of our audio. In this month’s blog, we will look at other ways to make use of markers in Atom Craft. We will also look at embedding them within our wave files and retrieving them using Atom Craft’s Sequence Marker Generator.

This project was created using CRIWARE SDK for Unity V3.00.01 and Unity V2019.2.10f1
Atom Craft Setup
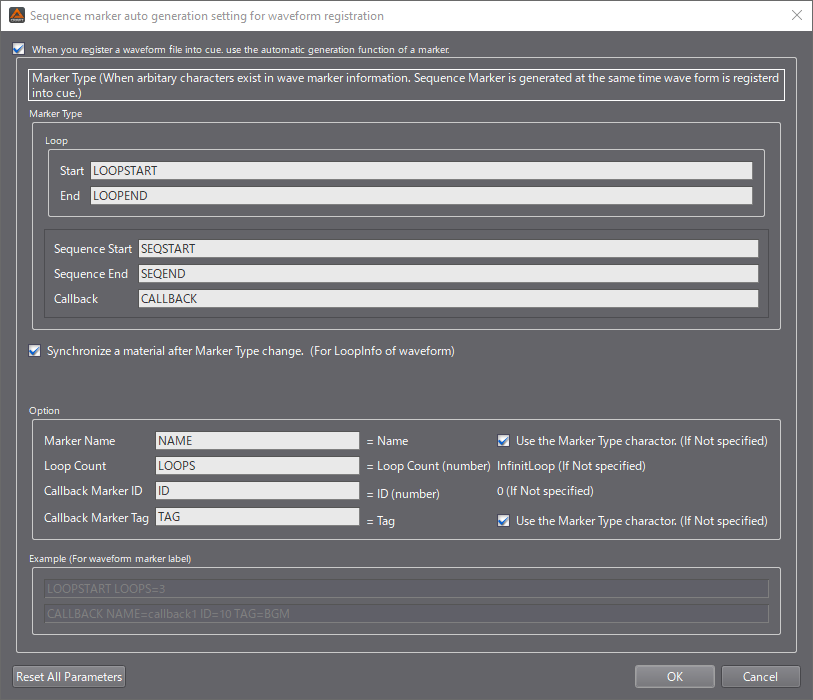
Setting up Atom Craft to automatically generate markers is straightforward. Simply navigate to View -> Sequence Marker Auto Generation Setting for Waveform Registration and tick the box at the top of the window. This window also details the naming conventions for creating markers, which we can refer to when embedding markers in our DAW. We can then click OK when we are done.
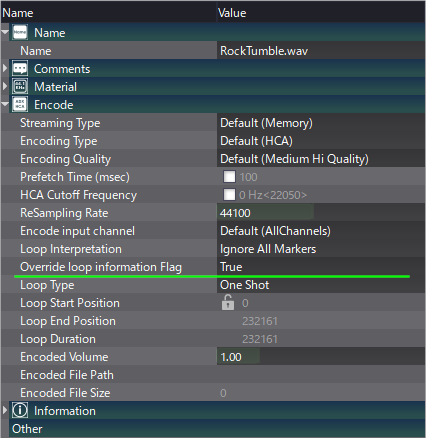
Also, Atom Craft interprets markers for looping purposes by default, so make sure to set Override Loop Information Flag in the Inspector to “True” on any Materials where you don’t want this behaviour.
Markers in Reaper
If using Reaper, all we need to do to create markers is line up our playhead cursor and press M. Pressing Shift+M will automatically bring up the naming dialogue when creating a new marker, or we can double-click on any existing markers to rename them. We can then use the Sequence Marker Generator window in Atom Craft, or the documentation, as a reference for naming.
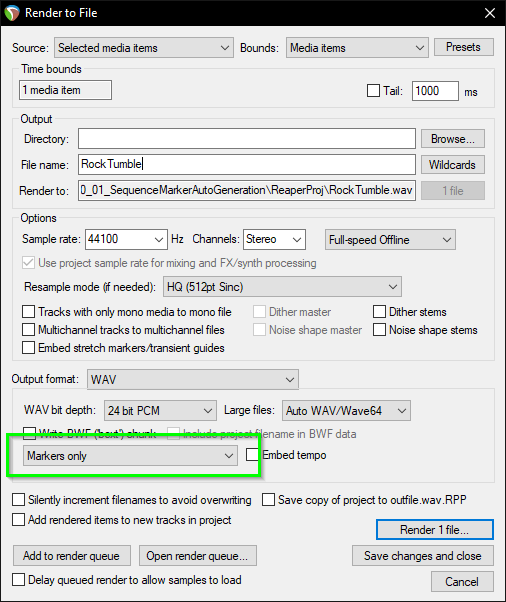
Then we can drag-select the items we want to render, open the Render dialogue, and ensure that we select “Markers only” in the dropdown near the bottom of the window.
Random Start Offset
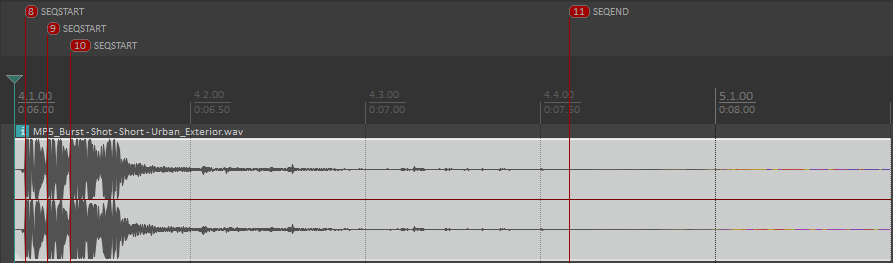
If we use several Sequence Start Markers in our Cues, ADX2 will randomly pick playback from one of these starting points. We can use this feature to randomise our playback slightly, without having to render multiple versions of the same thing.
We could use the Randomize Start Offset feature, but this might accidentally cut mid-way through a transient. So, to have better control of our playback, it makes more sense to use markers. It also helps that these can be tweaked right from within our DAW.
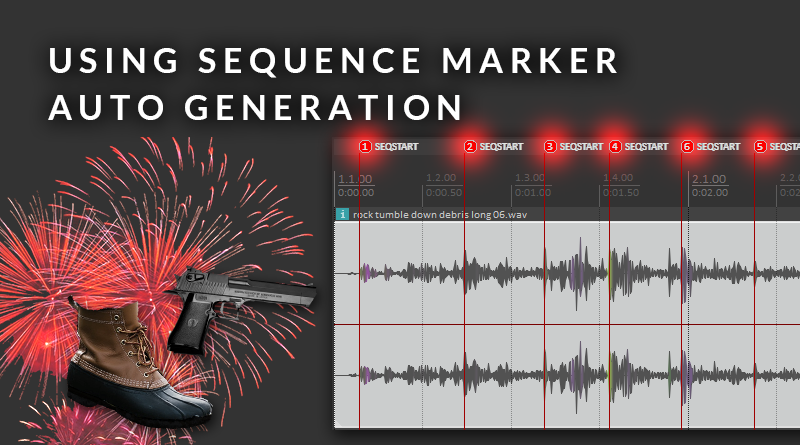
The example below shows a burst-fire shot with a Sequence Start Marker before each transient.
Granular Playback
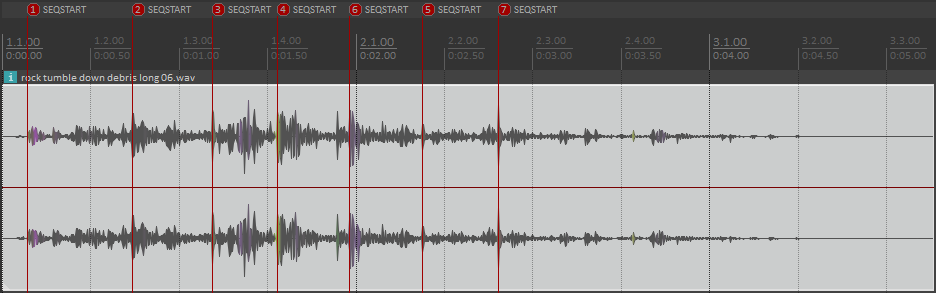
Expanding on the previous topic, we can also create a granular playback engine by embedding multiple Sequence Start markers within our audio, and controlling playback using a short envelope.
The granular aspect of this topic was covered in greater detail in one of our previous blogs, which you can check out below:
The example below showcases a granular rock and gravel sound.
Callbacks
Another fantastic feature in ADX2 is the ability to run Callbacks from within Cues. This feature can be used to trigger things like gameplay events or animations.
In the prototype that I have put together below, I used a sample which has sets of firework explosions coupled together. I used the example from the Sequence Marker Generator window in Atom Craft, to come up with “CALLBACK NAME=callback1 ID=1 TAG=BF”, with the numerical values were incremented at each marker. Since the explosions were coupled, I denoted “BF” for “Big Firework” and “SF” for “Small Firework”. This decision was made so that it would be easier for me to read in my DAW, but feel free to be more descriptive in your Tag naming.
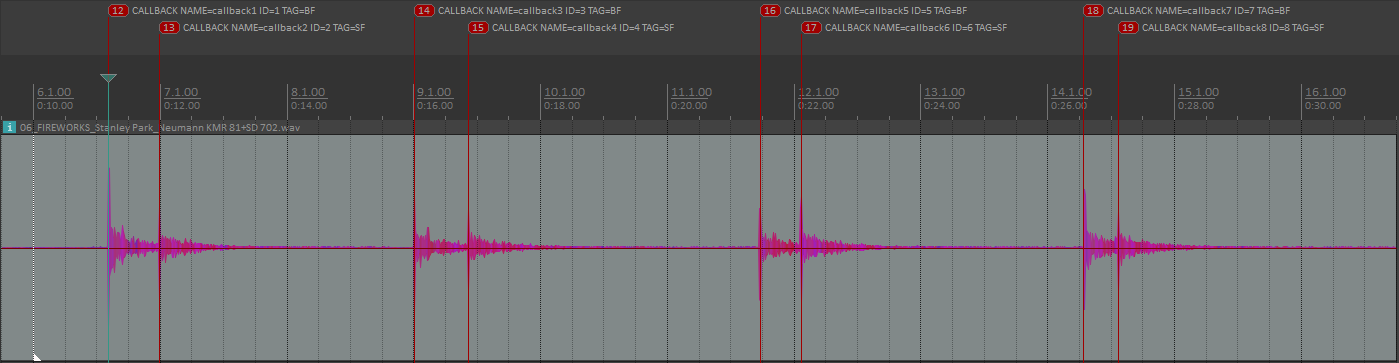
The SetEventCallback function needed to register Callbacks can be accessed via CriAtomExSequencer. However, this callback returns all related marker information as one line of characters. So, to save some time, we can save the following script to our Unity project, and access it by typing using CriWareExtensions; at the top of our code.
Once the extension is in place, the rest is easy to implement. In our start method, we set our event callback, and then check if the retrieved value for our Marker’s Tag is “BF” or “SF”. These callbacks then trigger corresponding particle effects systems.