
Granular Synthesis in ADX 2
Introduction
Although the main focus of ADX2 is as an audio implementation tool, it can also be used as a creative sound design tool. This month we will be looking at how to use the randomisation and enveloping features of Atom Craft to create interesting new sounds using granular synthesis. If you are not familiar with the concept, granular synthesis is essentially just chopping up pre-existing sounds into smaller chunks (referred to as grains), randomising their order, and then playing them back in quick succession to form new audio content.
To follow along, you can get the materials here, but feel free to use your own sounds instead:

This project was created using CRI Atom Craft Ver3.40.04
To begin, I have created a new project and dropped an audio file containing a variety of crunchy glass textures into the Materials Tree.
Creating the Granular Container
First, we need to create a container for our grains and apply an envelope so that each grain is contained. To do this:
- Create a Cue, and name it GrainContainer (the type of Cue is not important in this case)
- Drag the material onto GrainContainer Cue
- Create Sequence Start Markers for each of the transients on the waveform display (use the Start Position in the Inspector for more accurate results)
- With the shards waveform selected, click on the EG tab in in Inspector and set:
- EG Attack = 25
- EG Decay = 25
- EG Sustain = 0
- EG Attack Curve = S Curve
- EG Decay Curve = S Curve
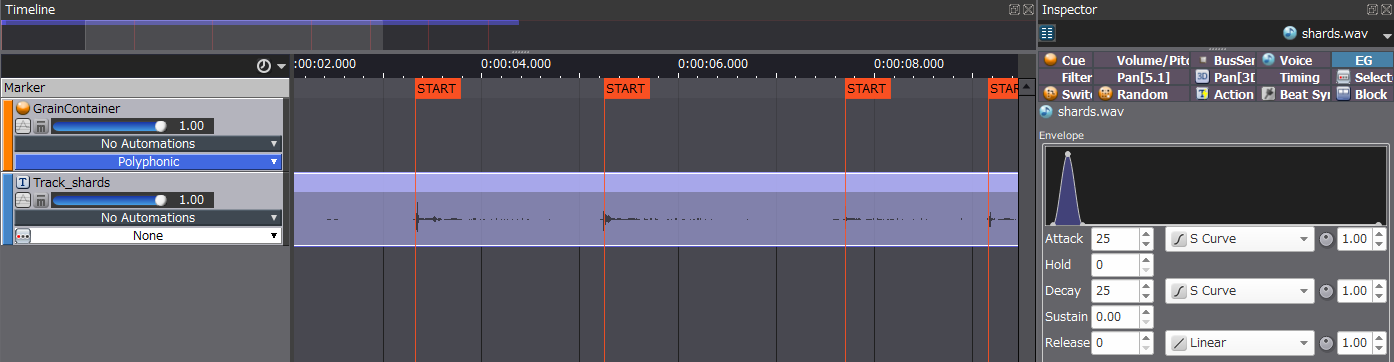
This will give us 7 short grains for playback, which will be randomly selected between by default. You can also do this step in your audio editor of choice by cutting up the sounds, enveloping them, and putting them in a Random Cue. However, this method can be great for quickly trying sounds that are already in your library, and for rapidly experimenting with different envelope lengths and curve shapes.
Creating the Granular “Engine”
Next, we want to play the sounds back in quick succession:
- Create a “Polyphonic” Cue, and name it GrainEngine
- Drag the GrainContainer onto a new track in the GrainEngine Cue
- Select the GrainContainer Cue on the Track and in the Inspector set:
- Playback Timing Rnd = 15
- Auto Repeat Interval = 5
- Auto Repeat Number = 50
- On GrainContainer Track, select “No Automations” tab and click Add -> Volume
- Draw a volume envelope, giving it a quick attack and slower release

You should now be able to play your sound back and hear the initial form of the granular engine. If your sound ends sooner than the length of your envelope, you can set the Auto Repeat Number higher. Granular synthesis can be quite experimental, so adjust your settings until you find something that works.
Limiting Voices
If you played back your sound from the previous step, you would have noticed that the Voices would go up to 50 for one sound! This is reflected by our Auto Repeat Number, and is happening because even though we only have very short grains, the whole audio file is still being read after the decay of each grain. To fix this, we can do voice limiting, which is a good practice for granular synthesis even if we are using grains which have been made short in an external audio editor.
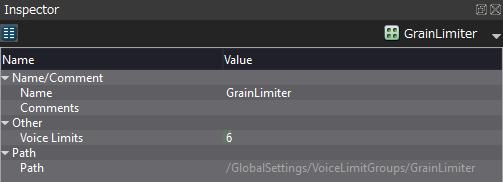
- In the Project Tree, right-click VoiceLimitGroups and make a new VoiceLimitGroup
- In the Inspector set:
- Name = GrainLimiter
- Voice Limits = 6
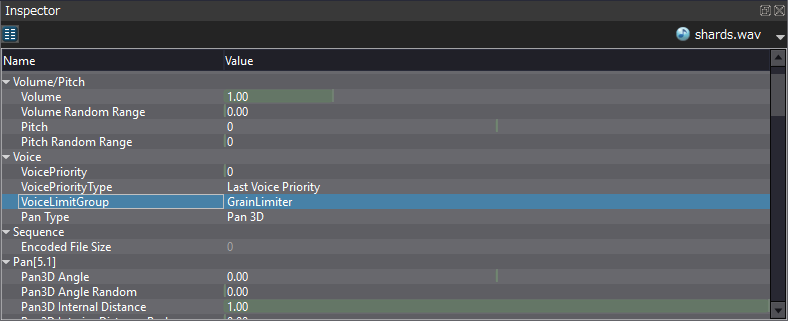
- Next, go back to GrainContainer Cue and set all VoiceLimitGroups to GrainLimiter in the List Editor
- An optional final step is to go to GrainEngine Cue and set Voice Behaviour to “Voice Stop (at volume 0)” in the Inspector. This will further cull any voices when they are no longer heard
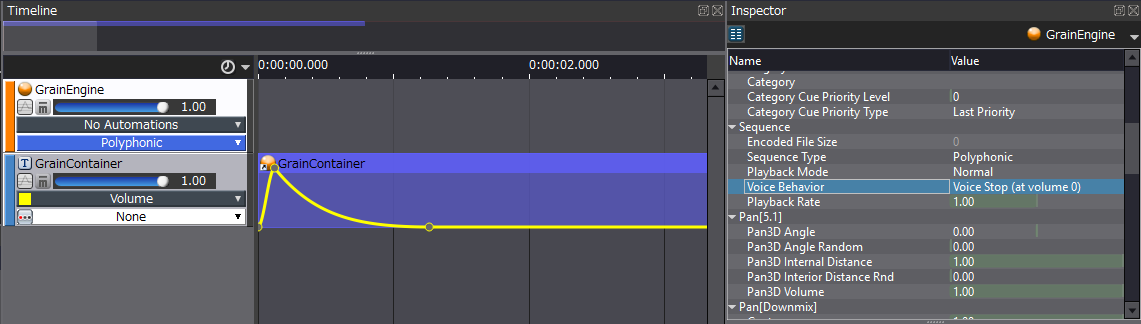
Now you should be able to push play as many times as you want on this Cue, and Voices won’t go above 6 (and it shouldn’t sound like it is being cut off either).
Adding Effects
The last step is to add some randomisation and processing to the sound since it is quite dry and flat sounding. You can get as creative as you would with any sound in this step, but there are benefits to using granular synthesis, due to the process of playing back individual grains rather than one solid waveform.
- Select the GrainContainer Cue on the Timeline, and set:
- Pitch Random Range = 250
- Pan3D Angle Random = 90
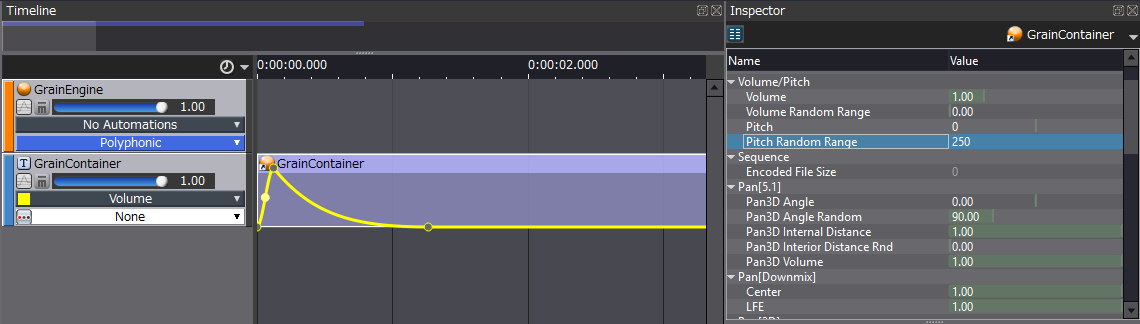
Since we are manipulating each grain, the sound becomes more chaotic and spatially diverse than a regular sound would with these settings. You can also set up a bus and do some processing such as reverb and distortion, to make the sound more cohesive.
Conclusion
This has been a brief introduction to granular synthesis using ADX2. All of the settings indicated are merely suggestions, and it is recommended that you try setting different grain lengths, playback intervals, and voice limits from the ones prescribed. Even changing the shapes of the envelopes can create entirely different textures.