
Using ADX2’s In-Game Preview with Unity
Introduction
In-Game Preview is another powerful feature of ADX2 that allows you to preview and edit various audio parameters while your game is running. This is an essential tool for mixing, as it will enable you to hear your sounds playing back in context, under the effects of various gameplay related controls that you may have set up. In this blog, we will have a look at setting this up in Unity for a native PC build. The approach for deploying to various platforms will be slightly different, but still just as intuitive.
Atom Craft Setup
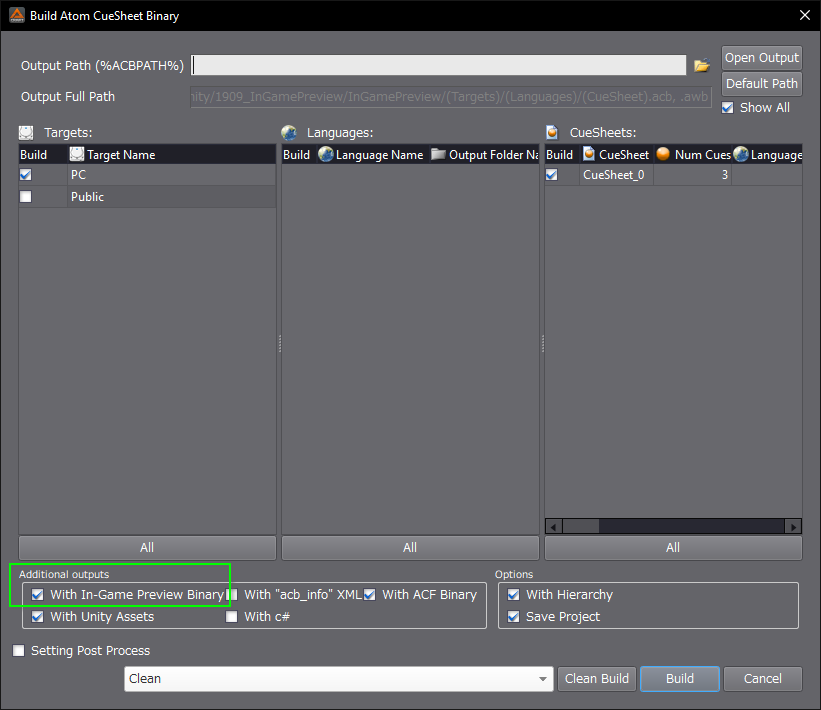
To get our Build ready for In-Game Preview, all we need to do is toggle the appropriate option in the Build menu. For testing purposes, I have created a Cue for ambience, fire, and a one-shot click sound.
If you are running In-Game Preview for a different platform, or on PC over a network, you can change the settings by right clicking on the relevant Target Config in the Project Tree and selecting “Edit Preview-Settings…”. If running In-Game Preview on the same computer as Atom Craft, the default settings should be fine as is.
Unity Setup
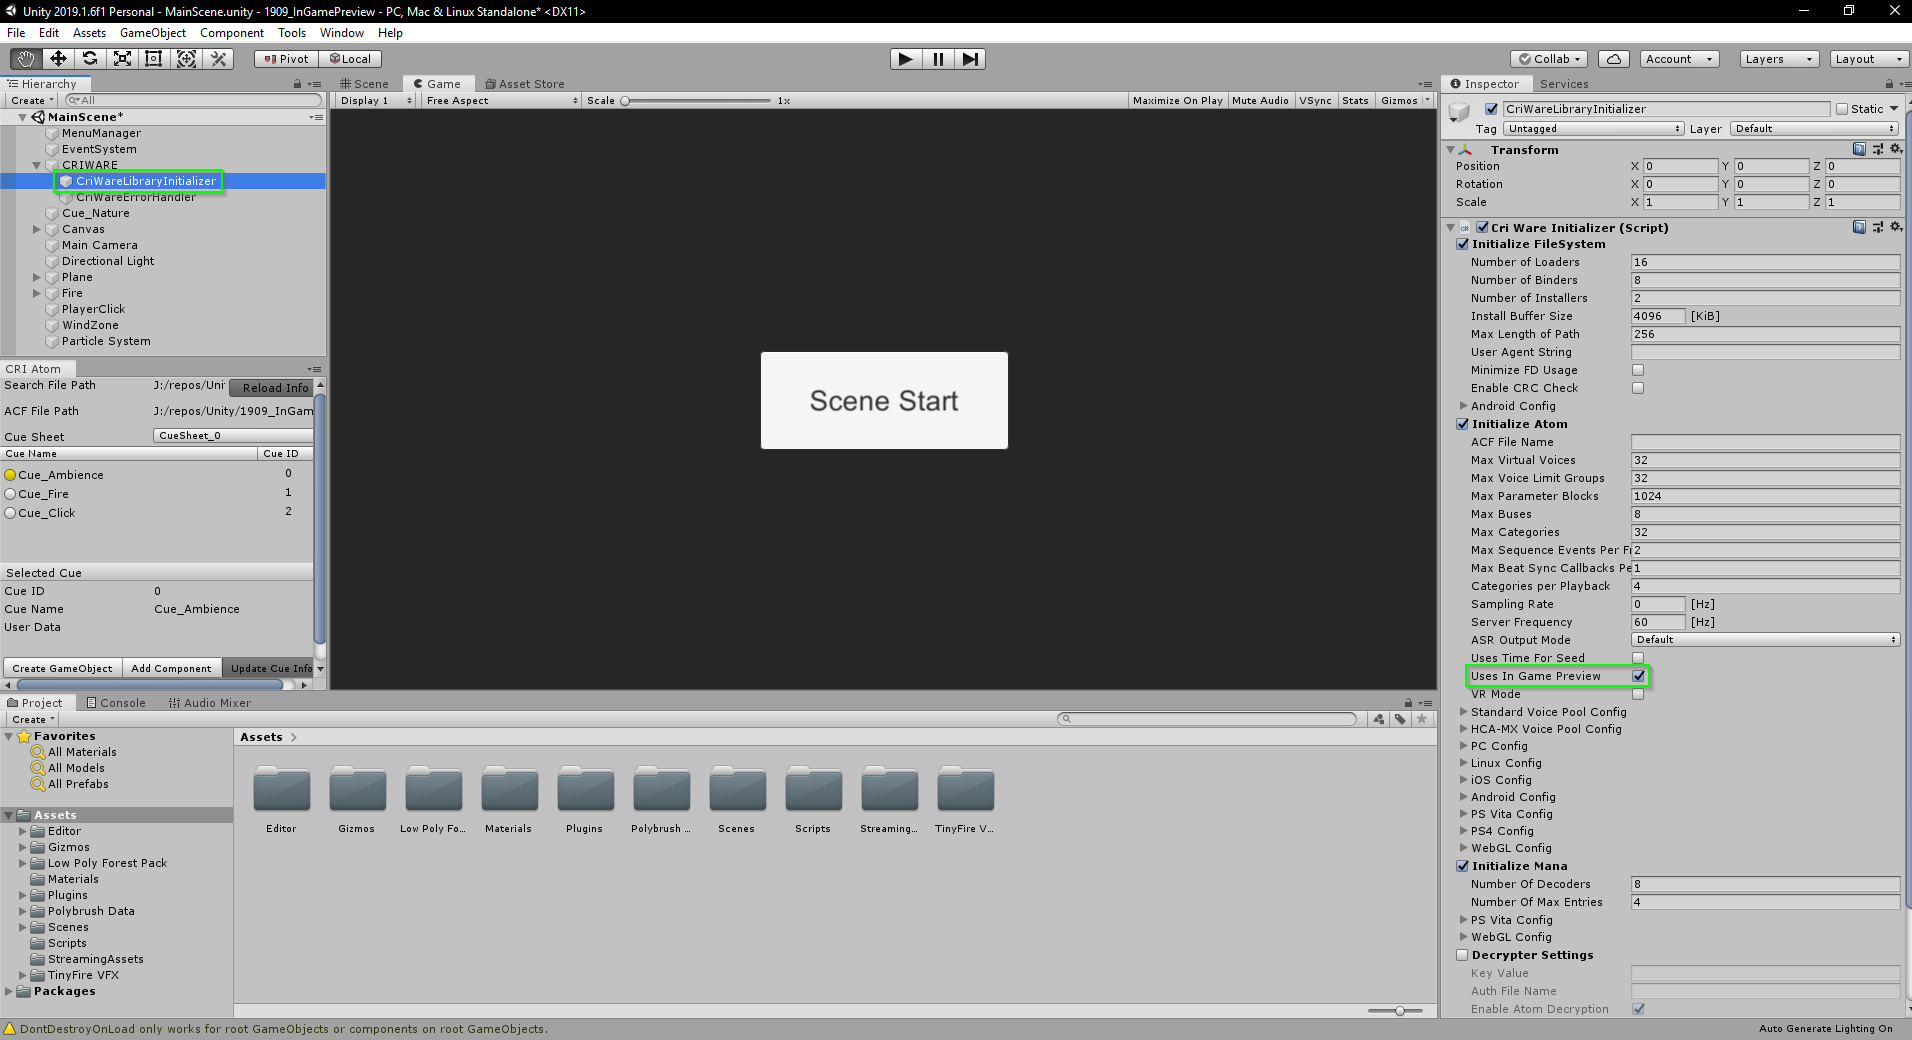
In Unity, the setup for In-Game Preview is just as simple. Assuming your project already has the Criware Unity plugin installed with preliminary installation completed, select the CriWareLibraryInitializer object in the Scene Hierarchy and tick the “Uses In Game Preview” toggle box in the Inspector.
Next, when linking to the ADX2 build data from within Unity, make sure to direct it to the /inGamePreivew/Assets folder rather than the root. The files created for In-Game Preview are slightly different, and the regular build data cannot be modified in this way.
Beyond that, all you need are Cues which can be triggered after running In-Game Preview from inside Atom Craft.
In-Game Preview
To initiate In-Game Preview, make sure that you have the Atom Craft project which corresponds to the build data inside of Unity open. Then, run the game in Unity and inside Atom Craft select Preview → Start In-Game Preview, or simply press F10.
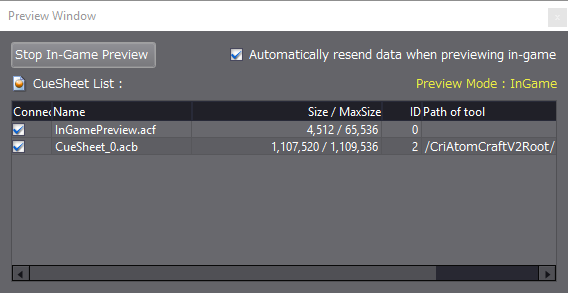
A Preview Window should now appear, confirming that a connection has been made. You can verify this further by triggering Cues in your game and watching the level meter inside of Atom Craft.
Saving Changes
Finally, to save your changes, rebuild the project inside Atom Craft and select ‘Update Assets of “Cri Atom Craft”’ inside of the Cri Atom window inside Unity. When you want to switch back to a regular build of the project not intended for In-Game Preview, simply adjust the Assets Path accordingly.