
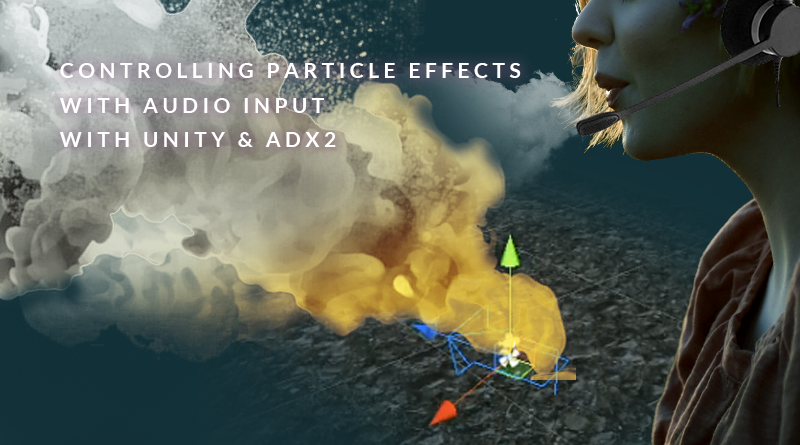
Controlling Particle Effects with Audio Input with Unity & ADX2
Introduction
Sound in games is often a reactive one-way system, where the player’s interactions with the world result in sounds being triggered. ADX2 allows the designer to push the boundaries by offering some powerful audio input functionality. This means we can turn the tables by creating sounds which control the world instead. In this month’s blog, we will look at an approach for manipulating particles in Unity using a microphone.
MicrophoneInput.cs
This project was created using CRIWARE SDK for Unity V2.99.00 and Unity V2019.1.6f1
Particle Setup
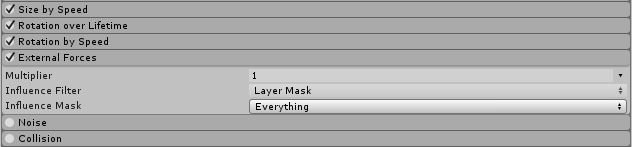
We can control any type of particle created by the Particle System by enabling the “External Forces” setting in the Inspector. This will result in our particle system being affected by Wind Zones, which is a handy feature that allows us to apply a directional force to our particles.
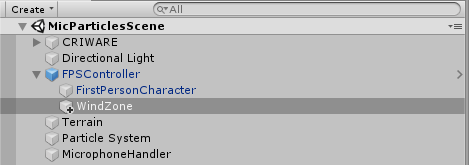
Next, we need to create our Wind Zone. In my example, I have attached the Wind Zone to my player controller. By doing this, the directionality of the smoke can easily be controlled by approaching the particle source from different angles. If the Wind Zone is selected during gameplay, you will be able to see the directionality of the Wind Zone (as in the video example), as well as the force applied via the Main attribute. This is all we will need to get started with particle control.
Microphone Input
Unlike in previous months’ blogs, we won’t need to build any audio data in Atom Craft. Instead, we can simply load the CRIWARE plugin package into Unity to make use of its microphone API.
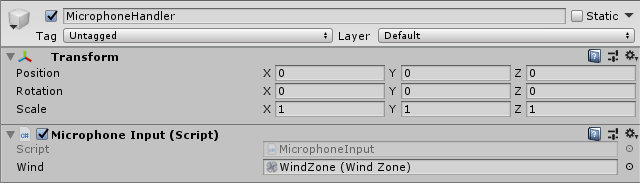
- First, let’s select GameObject → Create Empty, and name it “Microphone Handler”
- We can then drag our new object into our scene
- Select Add Component → New Script in the Inspector, and call it “MicrophoneInput”
To manage the bulk of the microphone input, we can copy from the InputCapture.cs file included in the ScriptSample07_InputCapture project that comes with the CRIWARE SDK for Unity. This script provides some handy boilerplate code that handles a lot of safeguarding from errors, such as trying to access a microphone that doesn’t exist etc.
I have kept the script largely the same, only removing the code related to drawing the waveform with the Line Renderer and adding in the code necessary to control the Wind Zone (see the script attached to the start of this blog).
Variables
    CriAtomExMic mic;
    bool isRecording;
    float[] micdata = new float[512];

    public WindZone wind;
The global variables defined at the top offer a good overview of what is being achieved, and how the edited script differs from the example one.
- First, we create the variable “mic” to access the CriAtomExMic class
- Next, we create the Boolean “isRecording” to keep track of our recording state
- Then, we create the buffer “micdata” for our microphone data and define its size
- And finally, we create a public variable for our Wind Zone, where it can then be attached to our script in the Inspector
Update
    void Update()
    {
        if (isRecording)
        {
            if (Input.GetKeyUp(KeyCode.F)) {
                wind.windMain = 0;
                StopMic();
            }
        }
        else
        {
            if (Input.GetKeyDown(KeyCode.F)) {
                StartMic();
            }
        }

        if (mic == null) {
            return;
        }

        while (true) {
            // Get audio input data
            uint numSamples = mic.ReadData(micdata);
            if (numSamples == 0) {
                break;
            }
        }

        // Control the strength of the wind with microphone input data
        for (int i = 0; i < micdata.Length; i++) {
            wind.windMain = Mathf.Abs(micdata[i] * 250);
        }
    }
The revised update method is straight-forward. Instead of using a separate UI overlay as in the example, we are going to control the on-off state of the microphone using the “F” key. If the “F” is pressed, we call the StartMic function defined by the example code, which handles creating and assigning the microphone. If the “F” is released, we call the StopMic function, which stops and disposes of the microphone instance, freeing up the system resources.
The “if (mic == null)” works as a failsafe, preventing weird potential behaviour from occurring as a result of trying to access some data if no microphone has been detected. If there is a microphone, the script continues to read audio data into our buffer.
The last part of our update method is where the fun happens! Here we are looping through our buffer, controlling the strength of our wind via windMain with the scaled value of our microphone input. The absolute (Mathf.Abs) value of our input data is taken since these values will otherwise oscillate between positive and negative values (which would result in our wind force periodically reversing).
Conclusion
Of course, this system could use a lot of tweaking to ensure, for example, particles are only affected if they are within a certain distance of the player. However, even with a conservative amount of code, we can already start to flesh out some sophisticated input-driven control! This can be especially handy for VR, as headsets usually have microphones integrated into them, and interacting with the world in this way can significantly enhance immersion.