
Introduction to Game Audio Connect
Creating audio assets for games can sometimes be cumbersome due to a lot of back-and-forth between the game audio middleware and the DAW. Thankfully, AtomCraft can integrate smoothly with Steinberg’s Nuendo 11 (or later) via the Game Audio Connect feature, drastically improving the implementation workflow. In this post, we examine how it works and how it can save you a lot of time!
Configuration
Installing Python
In order for Nuendo to be able to send audio files to AtomCraft, Python first needs to be installed. At the time of this writing, AtomCraft ver. 3.46.09 supports Python version 3.7, 3.8 or 3.9. If you use a more recent version of AtomCraft, please check the latest compatibility list in the documentation.
- Download a version of Python compatible with AtomCraft from https://www.python.org/
- During the installation, check “Add Python to environment variables” in the advanced options.
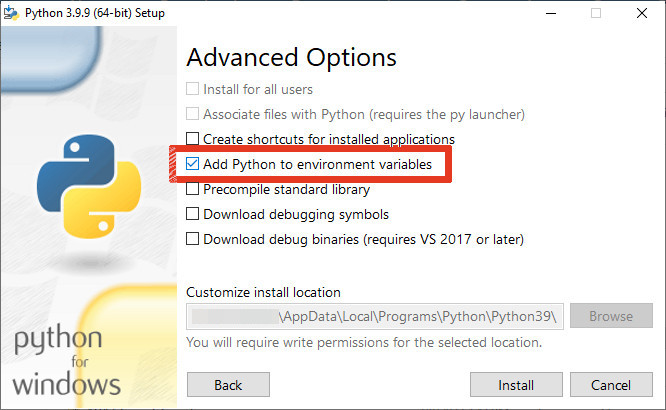
If you forget, you can do it manually by assigning your installation path to the PYTHONHOME and PATH environment variables.
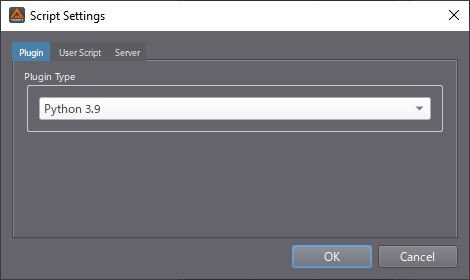
- In AtomCraft, open the script settings by calling the Script > Script Settings > Plugin menu command.
- In “Plugin Type” select the version of Python you just installed.
2. Configuring AtomCraft
To enable the Nuendo integration in AtomCraft, follow these steps:
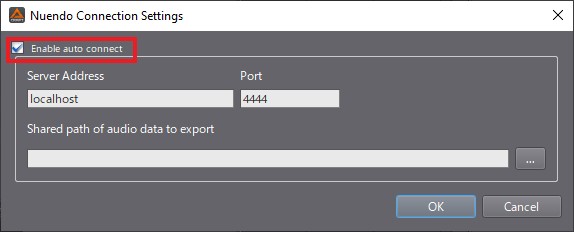
- From the AtomCraft’s menu, select the File > Nuendo Connection Settings command.
- Check the “Enable auto connect” option.
- If you use Nuendo and AtomCraft on the same machine, leave “Server Address” to localhost and “Port” at 4444.
- “Shared path of audio data to export” should stay blank, as it is only required if Nuendo and AtomCraft are running on different machines.
3. Configuring Nuendo
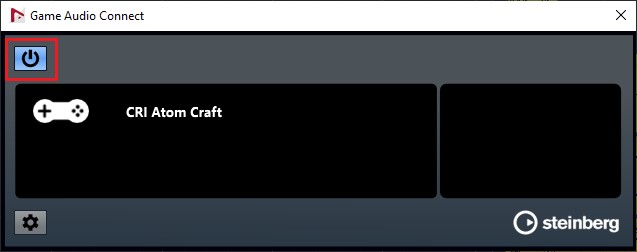
To enable the Game Audio Connect feature in Nuendo:
- Select the Project > Game Audio Connect menu command.
- Click on the upper-left button to activate Game Audio Connect.
- “CRI Atom Craft” should be displayed in the window.
Now everything should be ready. If you run into any issue, make sure you check the AtomCraft documentation (from the menu, Help > CRIAtomCraft Help, then look for “Integration with Nuendo”).
Exporting individual Events from Nuendo
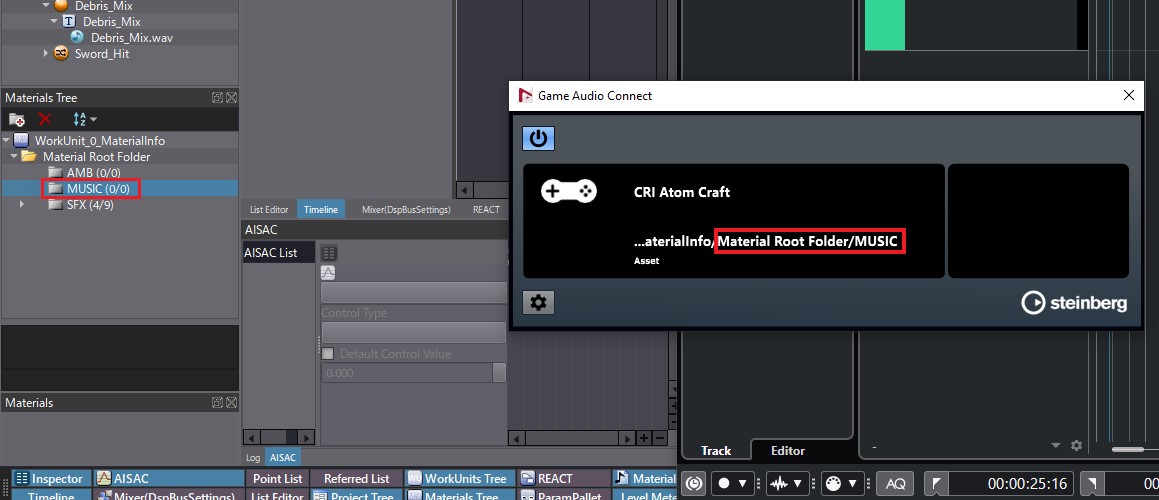
Before exporting anything from Nuendo, the destination Material folder must be selected in Atom Craft. The path of this folder will be reflected in the Nuendo’s Game Audio Connect window. It can be changed at any time, simply by selecting another folder in the AtomCraft’s Materials Tree.
Once this is done, it is possible to export selected events from Nuendo to AtomCraft. Events in Nuendo correspond to the audio or midi blocks on a track. In the case of MIDI events, they can be sent through the Nuendo signal path and rendered as audio files before being sent to AtomCraft.
The first way to export the events – which is well adapted for non-layered sounds on a single track – such as Footsteps or Foley – is described below:
- Select one or multiple Events using Shift+Click or the Lasso.
- From the menu, call the File > Export > Selected Events command.
- Configure the export settings.
- Make sure to check “Use the Project Audio Folder” in the File Path.
- Export.
Alternatively, you can also:
- Select one or multiple Events.
- Drag and drop them directly onto the Game Audio Connect window.
Note that if you use the drag and drop method, it will use the most recent settings of the “Export Selected Events” window.
Once the export initiated, the Material Importer window will be displayed in AtomCraft, listing the files to be imported. By selecting a Cue Sheet or a Cue in the WorkUnits Tree, it is possible to automatically create either new Cues or new Tracks that will reference these new Materials.
Exporting Mixdown and Cycle Markers
To export multi-layered sounds (such as explosions, debris, weapons, ambiances et..) that span several tracks, the Audio Mixdown command can be used.
- In Nuendo, set your left and right Locators to select the range to export.
- Then select the File > Export > Audio Mixdown menu command.
- In the export window, make sure to check “Insert iXML Chunk”, so Nuendo will write the project’s path into the file’s metadata.
- Adjust the other export settings as necessary.
- Export.
The Material Importer will appear in AtomCraft as previously.
Designing sound for games often require to create several variations for a particular sound. But you don’t want to export those variations one by one so by using Cycle Markers you can create ranges for multiple variations and export them in one go.
- Create a Marker Track in Nuendo.
- Add a Cycle Marker on that track to delimit each one of your variations.
- Rename them accordingly.
- Select File > Export > Audio Mixdown from the menu.
- Make sure to check the “Insert iXML Chunk” option.
- In the Export Range section, click on the Cycle Markers tab and select the variations to export.
Nuendo will create one file for each Cycle Marker, and they will all show up automatically in the Material Importer in Atom Craft.
Opening Nuendo projects from Atom Craft
The Game Audio Connect feature works both ways. While implementing game audio assets in AtomCraft, it may become necessary to modify the original audio content. This means re-opening the project and retrieving the sound in the DAW, which is time-consuming. The Nuendo’s integration makes it possible to open a project and locate an asset directly from AtomCraft.
- In AtomCraft, right-click on the Material or Waveform Region you want to edit.
- Click on “Edit in Nuendo”.
If the audio files were exported with the “Insert iXML Chunk” option checked, this command will automatically open the Nuendo project and show the corresponding sound on the timeline.
It is then possible to modify the sound in Nuendo and re-export it as described previously. The Materials in AtomCraft will be replaced and the Cues that reference them will of course also play the right audio content.
Thanks to Game Audio Connect feature, less time is spend simply managing files and projects, and more time is available for sound designing and implementation, allowing you to provide the best audio for your game!