
Time for Action!
In this blog we will introduce the different Actions available in AtomCraft.
Introduction
In AtomCraft, “Actions” are commands inserted on Tracks that allow you to play, stop, or mute another Cue or even modify its parameters during playback. Actions can be used as a way to control the mix but also as a powerful sound design and implementation tool. For instance, it is possible remotely stop a Cue or to set a Selector Label at a specific point on the timeline of another Cue.
The Concept
The concept is simple. A special Track called an Action Track is created in the main Cue (A), associated to a Target Cue (B) and then an Action is added on the timeline allowing the main Cue (A) to control Cue (B).

In the example above, a “Start” Action is added to Cue A. It triggers the playback of Cue B when its position is reached on the timeline.
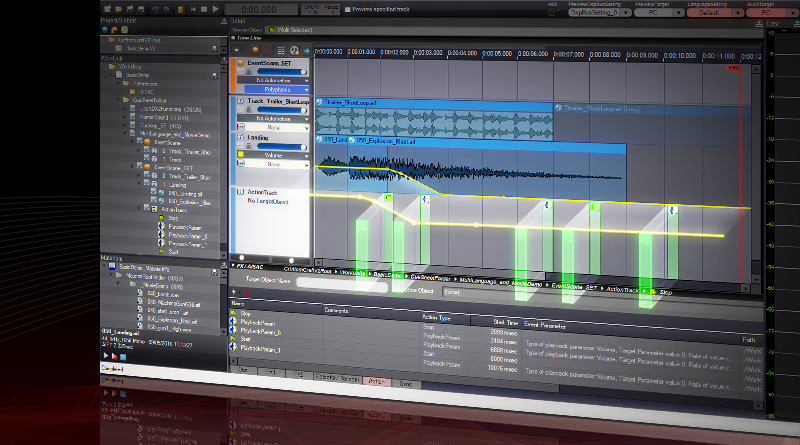
Available Action Tracks
There are two types of Action Tracks:
- ActionTrack
- PlayerActionTrack
The ActionTrack allows you to insert 5 types of Actions on a timeline:

The PlayerActionTrack allows you to create a Player Fader Action:
![]()
The ActionTrack
An ActionTrack is a special Track on which we can insert different Actions.
To create an ActionTrack: Select your Cue, click on the + icon, select New Object and choose Create Action Track from the menu.

Once created, the ActionTrack will look like this:

Now, to add an Action on the timeline: right-click on the timeline, select New Object and choose the desired Action from the menu.

The Actions
Let’s take a look at the Actions we can use.
Stop Action: Will stop the playback of the target Cue.
Start Action: Will start the playback of the target Cue.
Mute Action: Will mute or unmute the specified Track from the target Cue.
Set Selector Label Action: Will change the Selector Label of a Cue at a specific time. To learn more about Selector Labels, please watch this movie tutorial.
Parameter Action: Will change the value of a specific parameter of the target Cue or Track, over a certain time and following a given curve.
The following settings can be adjusted:

- The Target Parameter value lets you specify the new value of the parameter in the target Cue.
- The Rate of value change lets you set the time it will take to reach that value from the current value.
- The Curve Type lets you define the type of curve (Linear, slow, fast, S Curve, etc.) the value will follow.
- Finally, the Curve Strength indicates how the pronounced the curve shape is.
Many types of parameters can be updated with this Action and we will now review them.
Volume:
The volume of the target Cue or Track can be modified at a specific point on the timeline.
A good example of usage of this feature could be the creation of a specific ducking system between two Cues at a specific moment: for instance, lowering the volume of the ambiance sound or the music in a section where the character whispers something important.
Pitch:
Similarly, the pitch of the target Cue or Track can be updated from a given point on the timeline.
Playback Rate:
Changing the playback rate modifies the speed at which the audio of the target Cue or Track will play.
BandPass Filter:
The bandpass filter’s low and high frequency cutoffs of the target Cue or Track can also be modified at a specific point on the timeline.

Biquad Filter:
It is also possible to modify the cutoff frequency, Q factor and gain of the Biquad filter associated with the target Cue or Track at any given time on the timeline. For example, you can muffle a sound at given time in another sound.

Pan3D:
The six surround panning parameters of a Target Cue can also be automated by using Parameter Actions. This has the same effect as the surround panning automation in a DAW.

A good example of usage for this feature could be to lower the volume of the LFE send of a target Cue at specific moments during the playback of a new Cue.
BusSend:
The send level of each bus of a target Cue or Track can be modified at any given time on the timeline.

AISAC Control:
Finally, it is also possible to set or modify the value of an AISAC Control for the Target Cue. An AISAC control is a variable that is used by the programmer to control an AISAC curve with a value coming from the game (i.e.: speed, distance, velocity, RPM, etc.). AISAC controls 0 to 15 can be updated from events on the timeline.

The PlayerActionTrack
As for the PlayerActionTracks, they can only contain Player Fader Actions as shown below.


A bit of background on how things happen at run-time is required here. The programmer implements the audio playback by creating and configuring Players. A Player can play multiple Cues at the same time if they share the same parameters.

Therefore, the Player Fader Action can be used to Fade In or Fade Out a Cue automatically, based on the timeline in AtomCraft.

How To Implement Actions – Step by Step
Step 1: Select your Cue

Step 2: Add an ActionTrack and add your Action (the procedure is detailed higher in this post)


Step 3: Assign the Target Cue
Simply Drag and Drop the Target Cue on the Action Track you have just created.

Step 4: Test and Fine-Tuning
Now, it is time to test our Action Track. In order to do this, we will need to use the Session Window: click on the View menu and then select the Session Window.

To test our 2 Cues we need to drag & drop them on the Session Window and hit play to ear the result. In our example, we will hear the music being muted as soon as the playback of the Voice1 Cue reaches the Mute Action.

If you want to see an example of this implementation in AtomCraft, we have created a small project that you can download below:
![]()
[Note: this project requires AtomCraft 2.27.01 or higher]
The Project
Once you have downloaded, unzipped and opened the project, you will find different Cues divided in subfolders.

Each Folder contains its own Target Cue and Trigger Track(s).

For instance, to try the Mute ActionTrack:
- Play the Target Cue to start the music track.
- Play the Mute Track to Mute the music track.
- Play the Unmute Track the Unmute the music track.
To test the Selector ActionTrack, you will need to use the Session Window. You can open the Session Window with the Ctrl+Shift+C shortcut.

- Drag & Drop the 3 Cues onto the Session Window.
- Choose a Selector Label.
- Play the Trigger Track to start the music.
- Play one of the Trigger Track to change the Selector Label.
This concludes our post about Actions in AtomCraft. Let us know if you want to learn more about a specific ADX2 feature!