


ADX Beginner’s Guide #12 – Interactive Music with AISAC and Selectors
In episode 11 of this beginner’s guide, we explored dynamic mixing with REACT, which helps us balance the different audio components of a game.
Of course, one type of audio component – on which we focused until now – are the sound effects (ambiences, character Foley etc…). But in this post and in the next, we will examine another important component: music, and more specifically, interactive music.
Indeed, ADX offers many features to implement interactive music systems: we will start by using AISAC or Selectors, to focus on Block Playback in the next post.
Using AISAC
One of the easiest structures to grasp in interactive game music is the layering and stacking of musical elements to change the overall musical intensity. Each layer can represent different instruments that are gradually incorporated into the music, or a series of stems that become more elaborate as the game progresses.
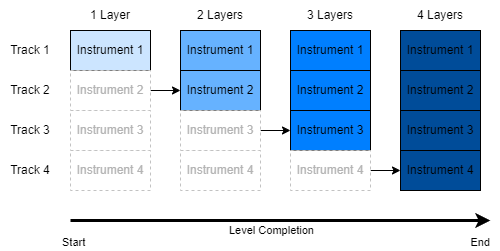
Adding instruments gradually to the music is a good way to create a sense of progression. For example, it can add intensity as the player completes a level. It can also provide directional cues as the character approaches a place of interest.
One of the easiest ways to do this in ADX is to set up a Cue, with each track corresponding to an instrument, and then use an AISAC to progressively blend them into the music. Later, in the game, you can link the percentage of completion of a level to the desired AISAC Control to change the music in real-time.
To do that in AtomCraft:
- Prepare your music assets as to have one sound for each instrument. Of course, once layered, everything should be synchronized.
- Create a Polyphonic Cue with the required number of Tracks.
- Add an instrument on each Track, trying to sort them from softer to louder.
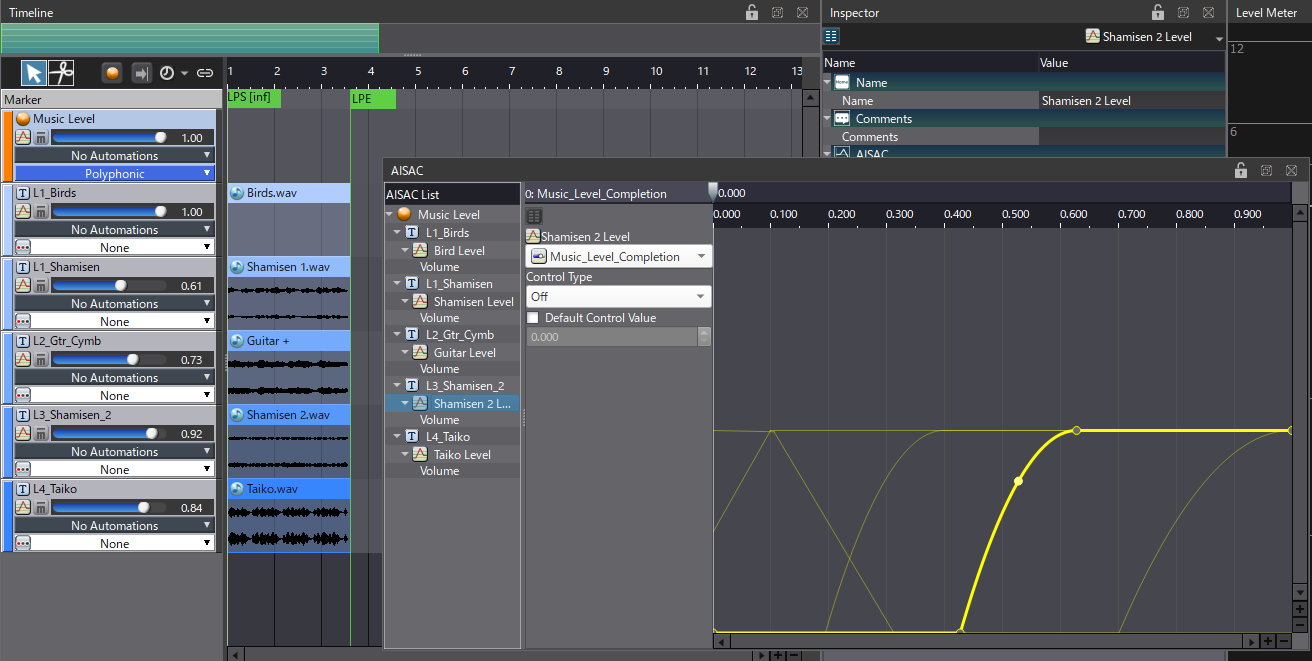
- Create an AISAC on each track with a Volume graph.
- Draw the curves so that the Tracks enter the music one at a time as the AISAC control value increases.
The instruments will progressively appear to create a complete ensemble as the player reaches the end of the level. Of course, for more complex pieces, you may also want to remove some instruments to make room for others. This technique works best when the progression is relatively slow so that the player doesn’t notice that the music is evolving.
Here is how this type of structure using AISAC could sound:
Using Track Transition by Selector
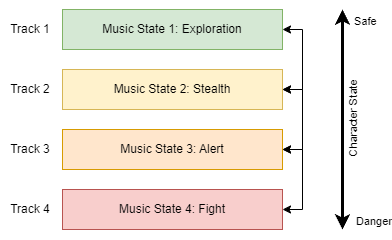
In an infiltration game, the character will go through different states during gameplay, such as stealth, alert, combat, etc. To musically differentiate each of these states, you can use a similar structure when implementing the music. In this case, though, the use of AISAC is not the best choice because you can usually jump from one state to another in any order (and the AISAC implementation we just saw is dependent on the order of the layers).
Therefore, in this scenario, we will use a Cue of type Track Transition by Selector. This type of Cue allows us to have a different version of our music on each Track, each corresponding to a specific state. A Selector can then be used to switch between each state/Track.
Unlike the AISAC method, a Track Transition by Selector Cue can be bound to tempo. This means that when transitioning from one state to another, you can force the transition to start on a precise beat. In addition, a crossfade can be set to smooth the transitions between Tracks.
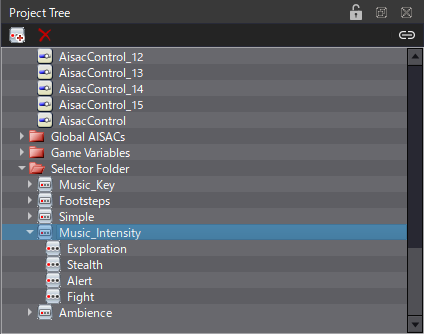
To implement this, we first need to create a Selector:
- In the Project Tree, create a Selector.
- Select it and create a Selector Label for each game state (exploration, stealth, fight, etc.).
As for the assets, you should prepare a variation of the music for each state. Of course, the stealth variation should be softer than the fight variation etc. Once the assets are ready, you can create the Cue:
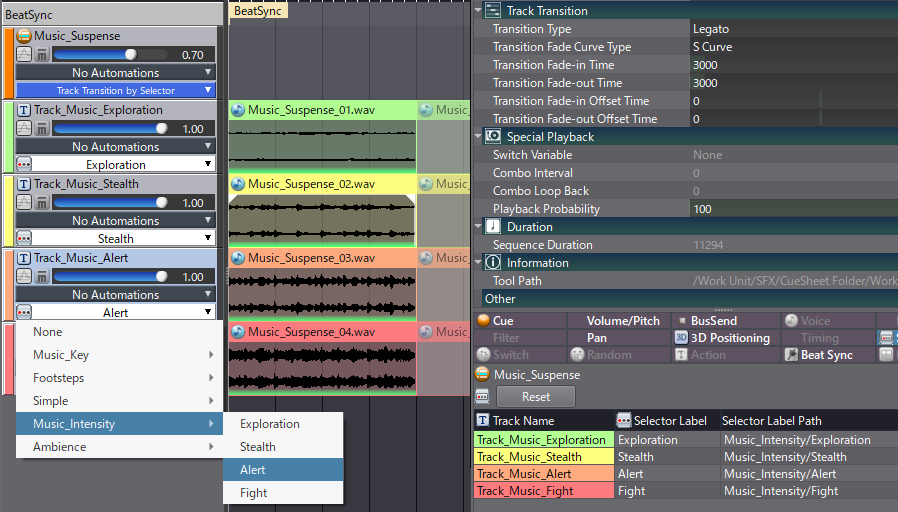
- Create a Cue of type Track Transition by Selector.
- Create enough Tracks to match the number of states.
- Then, on the Track header, set the Selector label for each state.
- Drag and drop the Material of each state onto the corresponding Track.
- Select the Cue and set the appropriate crossfade settings in the Track Transition section of the Inspector.
Finally, we need to link the tempo to the Cue.
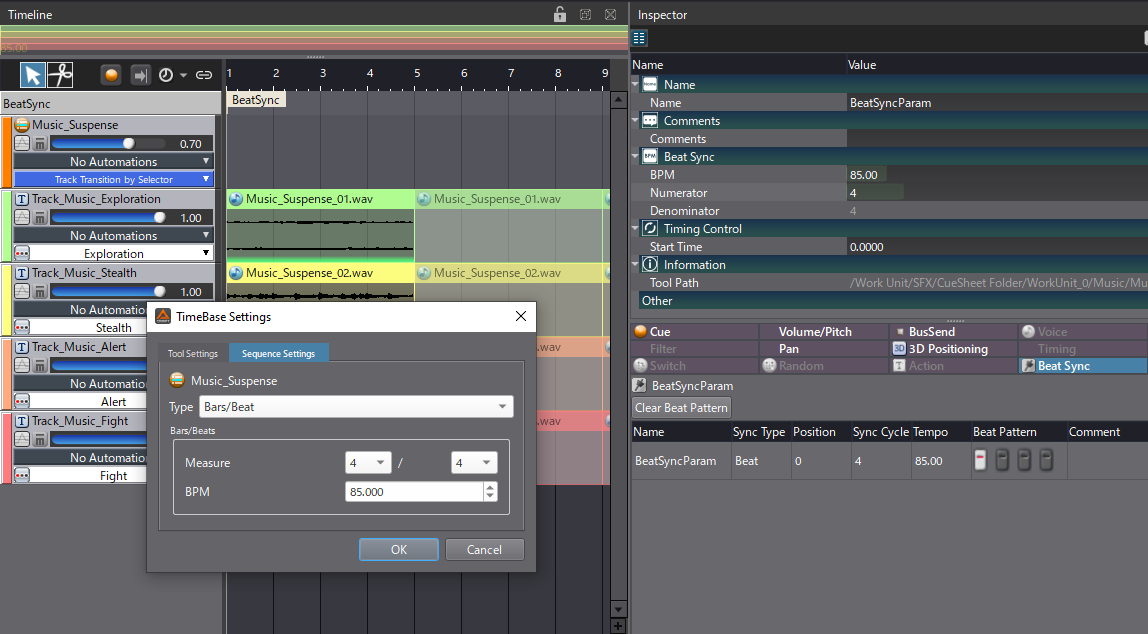
- On the timeline, just before the ruler, click on the clock button to Edit the TimeBase of the sequence.
- In the Sequence Setting tab, change the Type to Bar/Beat and set the BPM. The timeline’s grid should be updated accordingly.
- Then, right-click in the timeline and create a BeatSync Parameter.
- Select the BeatSync on the timeline and, in the Inspector, set the BPM. Then change the Beat Pattern to your liking: this setting lets you choose on which beats the transition can be triggered. For example, if you only want the transition to happen on the next bar, you should only select the first beat.
With everything set up, you should now be able to smoothly transition between each music state on the beat.
With the two structures described above, we can already implement some great interactive music. In the next episode, we will discover yet another structure with Block Playback.