

ADX Beginner’s Guide #9 – Advanced Spatialization
In this post, we will reply on what we learned about the basics of 3D sounds in the last episode, and see how we can use AISAC with 3D positioning for a more natural spatialization.
We recommend reading our introduction to AISAC before starting with this post.
Using AISAC for realistic attenuation
In the last post, we relied on basic volume attenuation to simulate the distance between the listener and the sound source. In the real world though, sound attenuation is more complex than a simple volume reduction when moving away from a sound source. The frequencies are not attenuated at the same rate based on the environment. To simulate this, we need to change some of the properties of the Cue based on the position of the 3D sources sent by the game engine. Luckily, this is exactly the type of thing AISAC was created for!
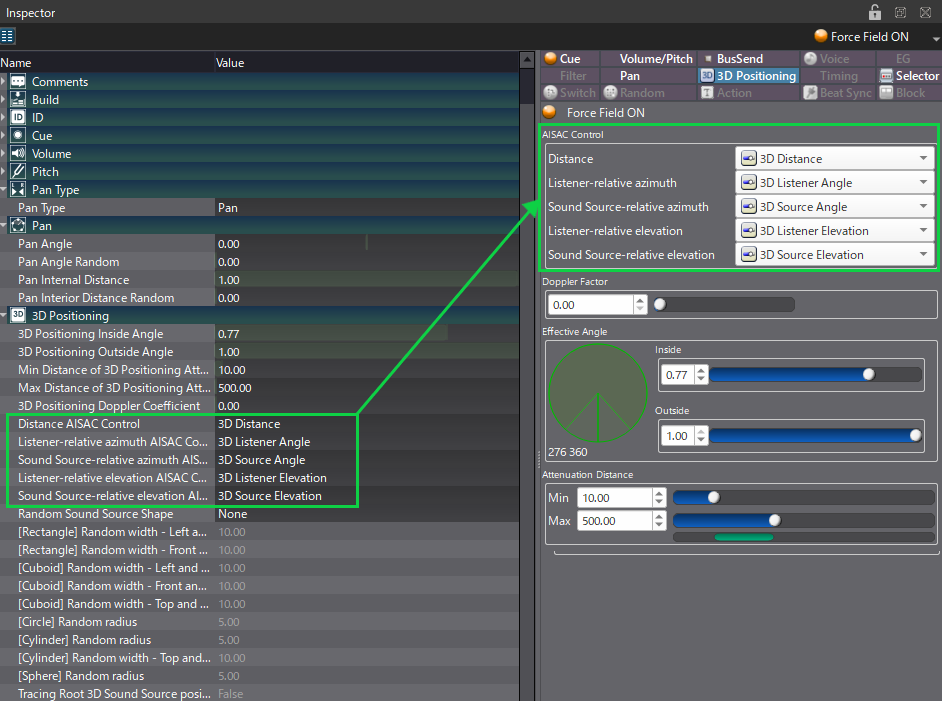
- You can assign which AISAC Control to use to control the attenuation in the 3D Positioning section in the Cue’s Inspector.
- The parameters that can be linked with an AISAC Control are:
- Distance: the distance between the listener and the sound source.
- Listener-relative azimuth: the direction of the listener relative to the sound source (e.g., if the sound source is behind the listener).
- Sound Source-relative azimuth: the direction of the sound source relative to the listener (e.g., if the listener is behind the sound source).
- Listener-relative elevation: the elevation of the listener relative to the sound source (e.g., if the sound source is above the listener).
- Sound Source-relative elevation: the elevation of the sound source relative to the listener (e.g., if the listener is above the sound source).
Once the AISAC Controls are assigned to their respective parameters you can start creating one AISAC for each parameter in your Cue:
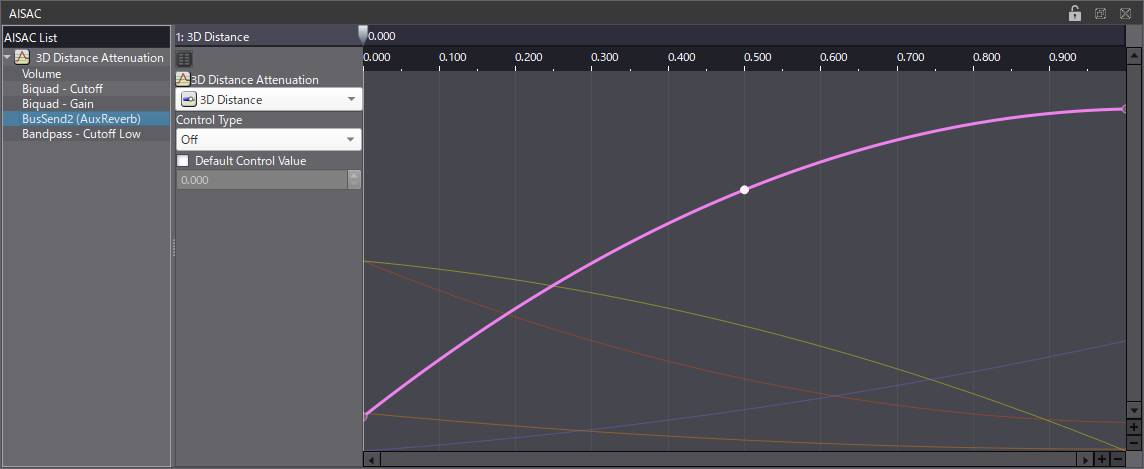
- The Distance is probably the AISAC where you will need to create the largest number of AISAC graphs:
- Volume should fade logarithmically to 0.
- Set the Biquad Filter on the Tracks to High-Shelf and add the Biquad Filter Gain and Cutoff graph to the AISAC. Both graphs should also decrease progressively
- Depending on the sound, adding the Bandpass – Cutoff Low graph with an increasing curve may lead to a more natural attenuation.
- Finally, to create more contrast between the direct sound and the reverberated sound as it moves away, the graph for the Bus Send to the reverb DSP Bus should also go up.
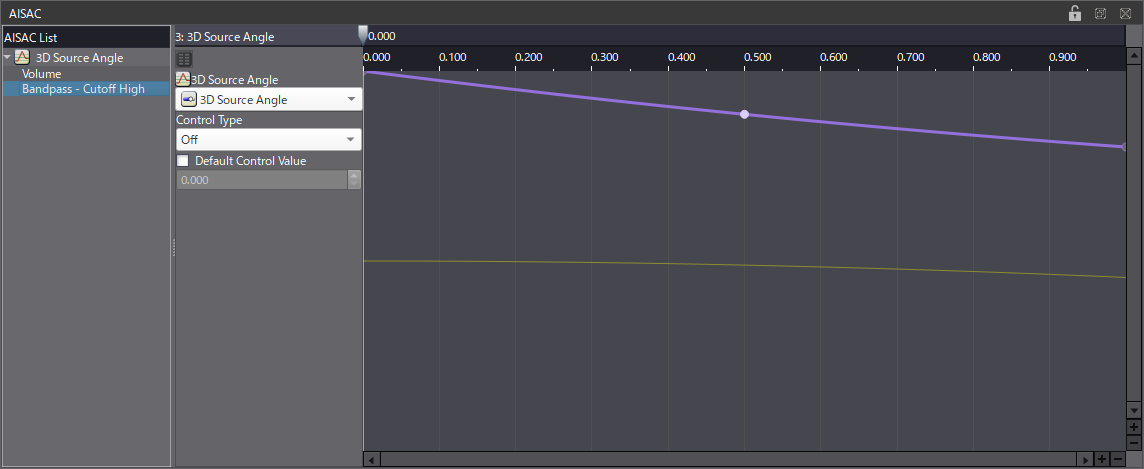
- For the direction and elevation of both the listener and the sound source, the configuration is simpler:
- Create a slightly decreasing Volume graph.
- And a similar graph for the BandPass – Cutoff High.
With everything set up, the attenuation and positioning should be more realistic.
Here the example from our last post, this time when using AISAC:
Using 3D positioning in conjunction with AISAC gives you all the creative options you need to create immersive soundscapes. In the next post, we will learn all about Categories, which make it easy to organize and process our Cues by groups.