

Bullet Time
Popularized by “The Matrix”, bullet time is a classic visual effect in action movies and games. Time is temporarily slowed down so the hero can perceive and react to events with greater accuracy and agility. Of course, sounds should also slow down during bullet time, so let’s see how to implement this in Atom Craft!
Assets Creation
In addition to your regular sound effects, we will need to prepare a few assets to implement the bullet time effect:
- A one-shot sound that will be played when the bullet time is activated.
- Another sound for when it ends.
- An ambience that will play during the bullet time.
It is also recommended to create special versions of your assets to differentiate them and improve their sound (i.e., not only pitch-shifting them). This can involve adding or removing layers to the sound and applying special filtering or other effects.
For instance, in our demo project, we created a slow-motion version of the gunshots that we used only during the bullet time.
Implementation
This effect can be easily created with a REACT object:
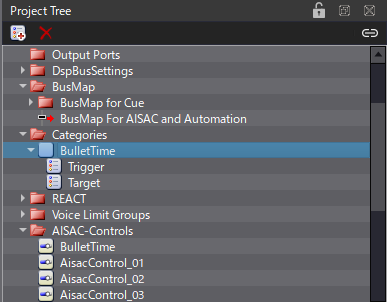
- Start by adding a dedicated Category Group for the bullet time.
- Create two Categories: “Trigger” and “Target”.
- Assign all the sounds that will be affected by the bullet time to the Target category (usually Foley, weapons, ambiences, environmental sounds, etc.).
- Finally, create an AISAC Control called “BulletTime”.
Now we can use these Categories and the AISAC to configure the REACT object:
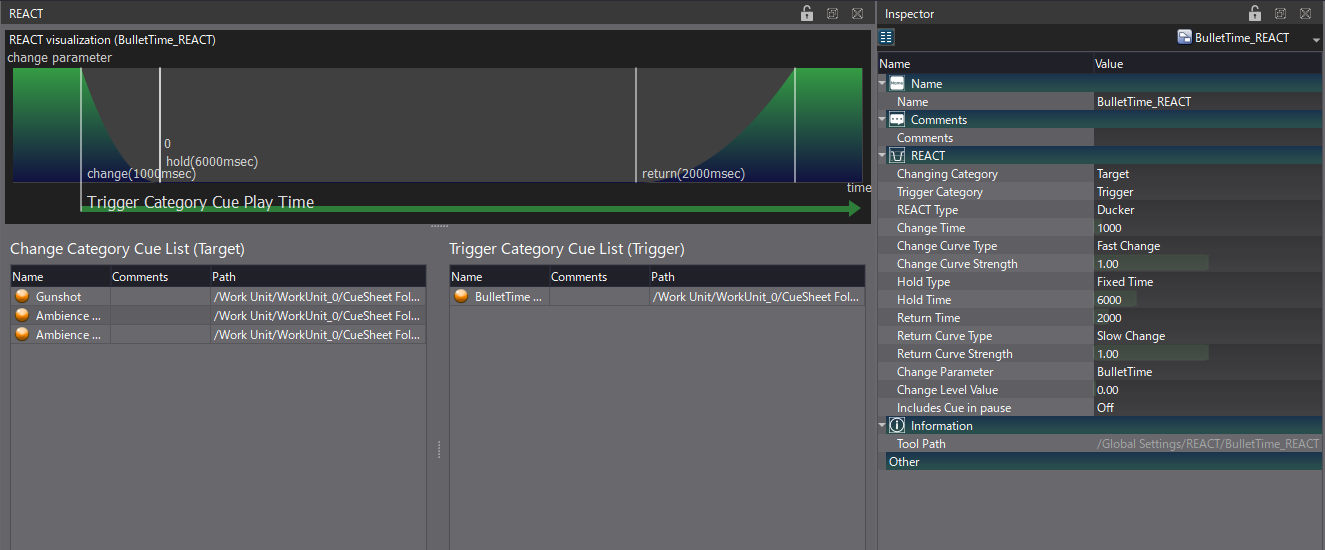
- Create a new REACT object of type Ducker.
- Set “Target” as Changing Category and “Trigger” as Trigger Category.
- Change the Hold Type to Fixed Time.
- Set Change Time at 1000 ms, Return Time at 2000 ms, and Hold Time to 6000 ms.
- Select the “BulletTime” AISAC as the Change Parameter and set the Change Level Value to 0.
Once the REACT object is ready, we need a Cue to Trigger the bullet time effect:
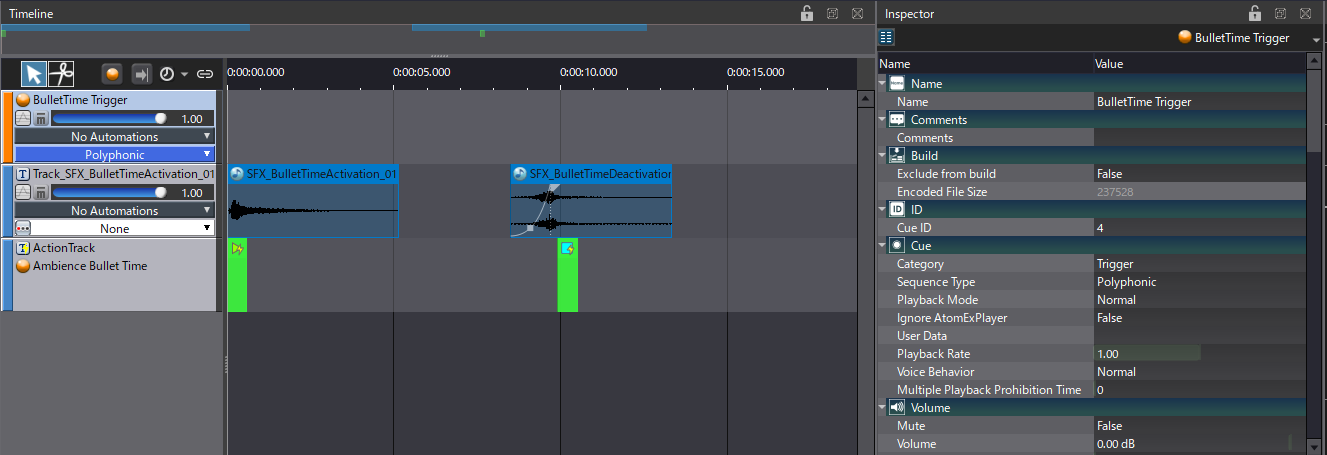
- Create a first Polyphonic Cue that only contains the bullet time ambience.
- Then, create a second Polyphonic Cue, and assign it to the Trigger Category.
- Insert a Track and place the Activation SFX at the beginning of the timeline.
- On the same Track, place the End SFX at the time corresponding to the Hold Time value.
- Create an Action Track, and set the bullet time ambiance Cue as the target.
- Add a Start Action at the beginning of the Cue, and a Stop Action a bit after the End SFX.
- Set the Fade Time of the Stop Action to 1000 ms.
The Cue should now be able to trigger the REACT object. We still need to use the AISAC system to apply the bullet time effect to the targeted Cues. In our example, these are just an ambiance Cue and a gunshot Cue. For the ambience, we will simply pitch down and fade the sound, while for the gunshots, we will crossfade the sound with the bullet time variation we prepared, in addition to pitch-shifting and filtering. Of course, you can make the bullet time affect other types of Cues if you wish.
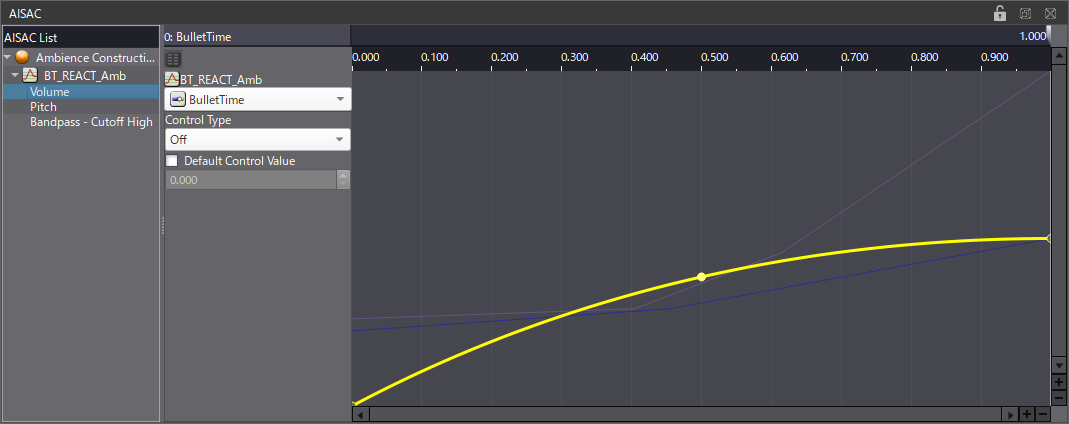
- For the ambience, create an AISAC at the Cue level.
- Add Volume, Pitch, and Bandpass – Cutoff High graphs, and make the curve decrease when the AISAC value goes to 0.
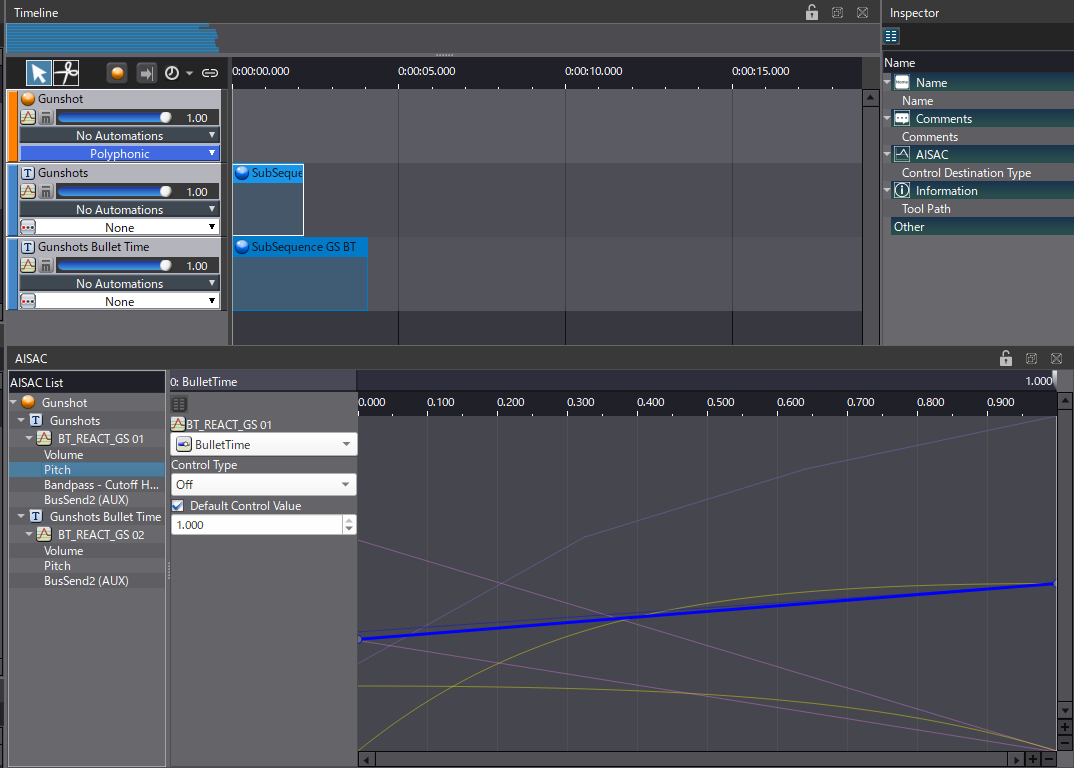
More work is needed for the gunshot Cue:
- First, if it’s a Random cue, you should move the tracks into a Sub Sequence.
- Then, create a second Sub Sequence and place the special versions of the gunshot’s assets into it.
- Now we can use an AISAC on each Sub Sequence and make them crossfade with a Volume graph.
- On the original Sub Sequence, also add a Pitch, and Bandpass – Cutoff High, to pitch down and muffle the sound as the AISAC goes to 0.
- You can also slightly adjust the Pitch of your special assets, or increase the send level to a dedicated Reverb Bus, in order to add more depth to the gunshots.
When the triggering Cue is played, the REACT object should automatically control the AISAC and create the bullet time effect. As usual, the project is included if you want to try it out for yourself.
 AtomCraft_Project_BulletTime.zip