
Boulder Trap
Dungeons and caves in games are often filled with deadly traps, such as a massive rolling boulder triggered by careless adventurers, ready to crush anyone in its path. In this post, we will see how to implement the sound of this classic trap in Atom Craft.
Assets Creation
We need to record several layers of rocky material that will allow us to create a continuous, chaotic sound.
- Record stones of different sizes sliding on concrete, dirt, or gravel.
- Record movements in gravels or small pebbles.
- Finally, create a rumble sound in the low frequencies that will be used to add additional weight. This can easily be synthesized.
- Create loops for each layer.
For our example, we will use four layers, but feel free to create more or less depending on your needs and memory budget. Once you are done, render the sounds and import them into Atom Craft. Set the Override loop information Flag of each material to True.
Implementation
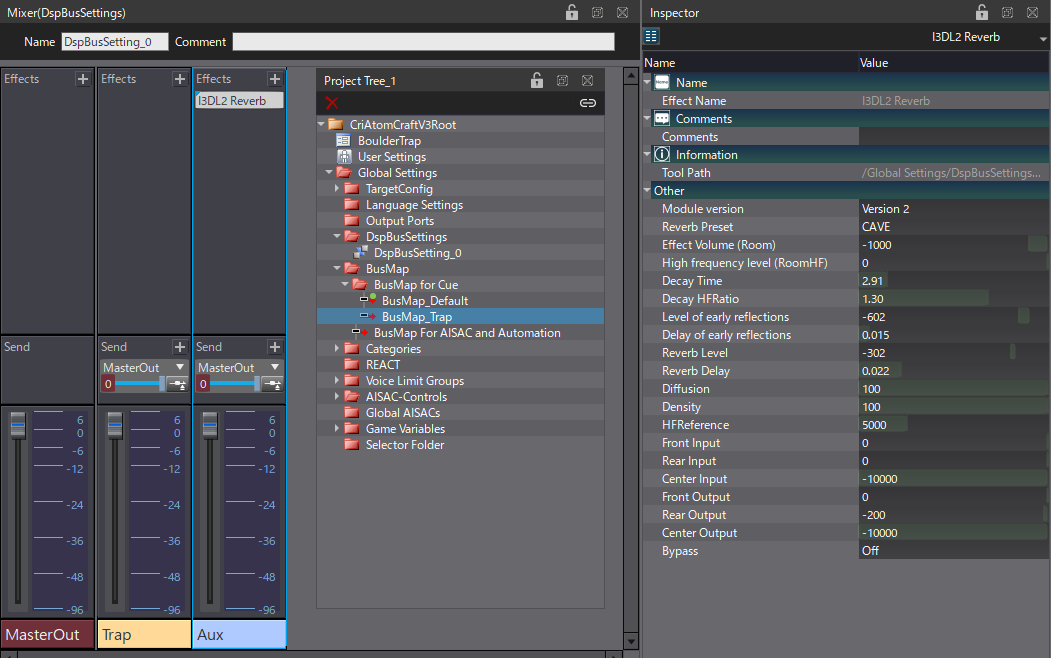
We will start by configuring the DSP Bus Settings.
- In the Mixer view, create 2 buses: Trap and Aux.
- On the Aux Bus, insert the I3DL2 Reverb as an effect, and change the Reverb Preset to Cave.
- Create a new BusMap and assign the Trap and Aux Buses.
- Add the Aux bus to the BusMap For AISAC and Automation.
- Finally, select your Cue Sheet and assign it to the BusMap you just created.
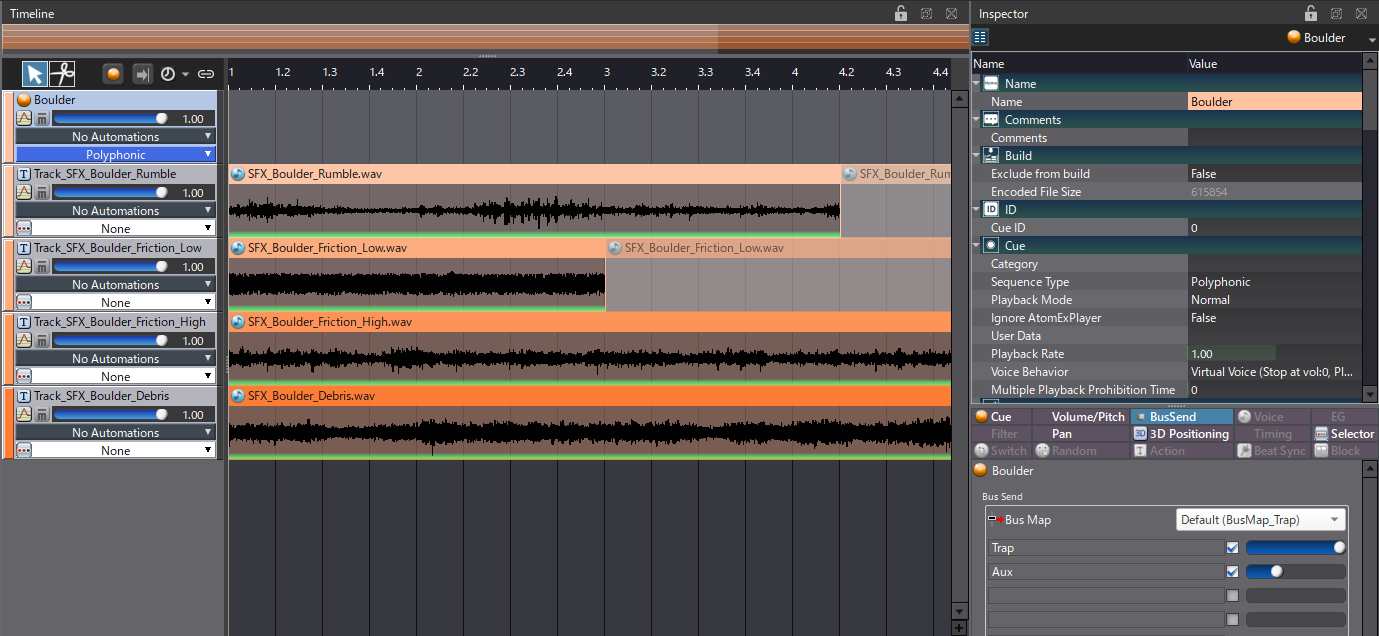
Now we can start creating the Cue.
- Create a Polyphonic Cue.
- Set its Voice Behavior to Virtual Voice.
- Activate the Bus Send for the Aux bus and set the Send to 0.3.
- Drag and drop all your layers on the Cue to create the corresponding Tracks.
- For all the Tracks, change the Biquad Filter Type to High Shelf.
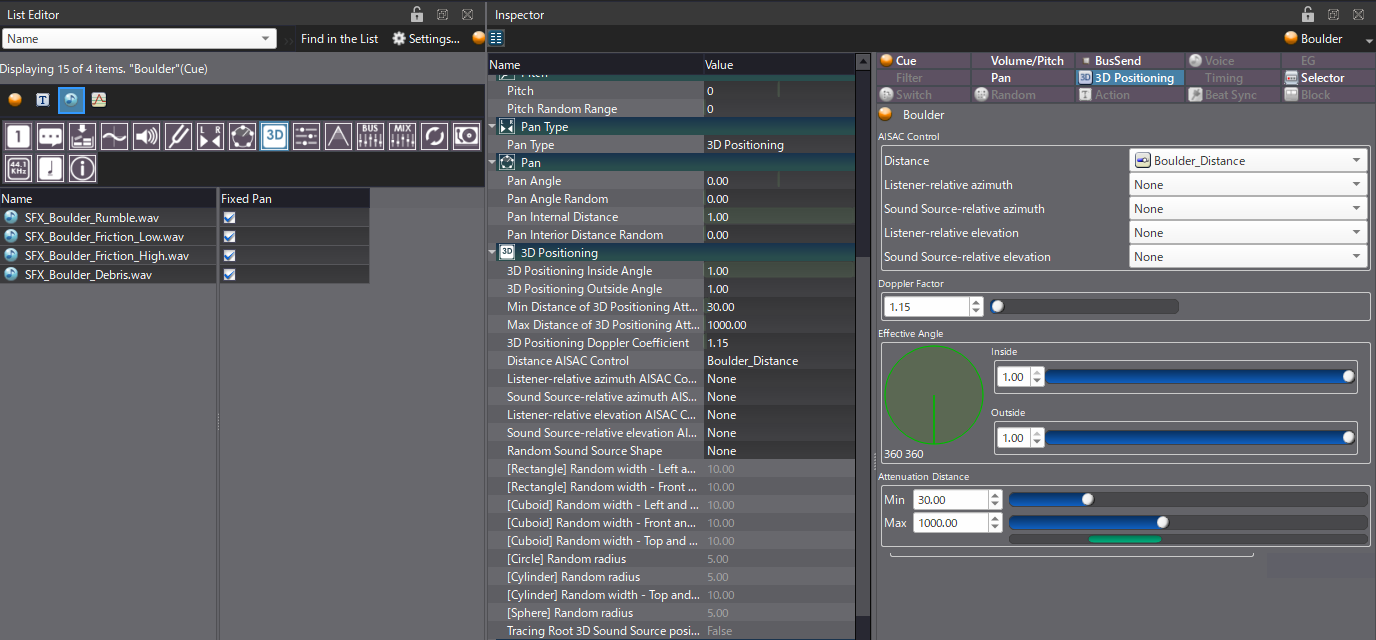
To enable spatialization as the boulder moves around the player, let’s switch the Cue to 3D.
- First, rename an AISAC Control to “Boulder_Distance”.
- Change the Cue’s Pan Type to 3D Positioning.
- Then, assign Boulder_Distance to the Distance AISAC Control.
- Change the Doppler Coefficient to 1.15.
- Set the Min Max Distance of 3D Positioning Attenuation somewhere between 30 and 1000.
- Finally, in the List Editor, select all the Waveform Regions of the Cue, and enable the Fixed Pan property. This will allow us to change the Spread of the positioning.
We can now create the AISAC for distance attenuation.
- At the Cue level, create an AISAC with 3 graphs: BusSend (Aux), Pan – Spread, and Bandpass – Cutoff High.
- The BusSend should rise as the distance increases.
- The Spread should decrease to 0.2 so that when the object is far away, its positioning is more focused.
- The Bandpass is used to slightly decrease the high-frequency content when the boulder is far.

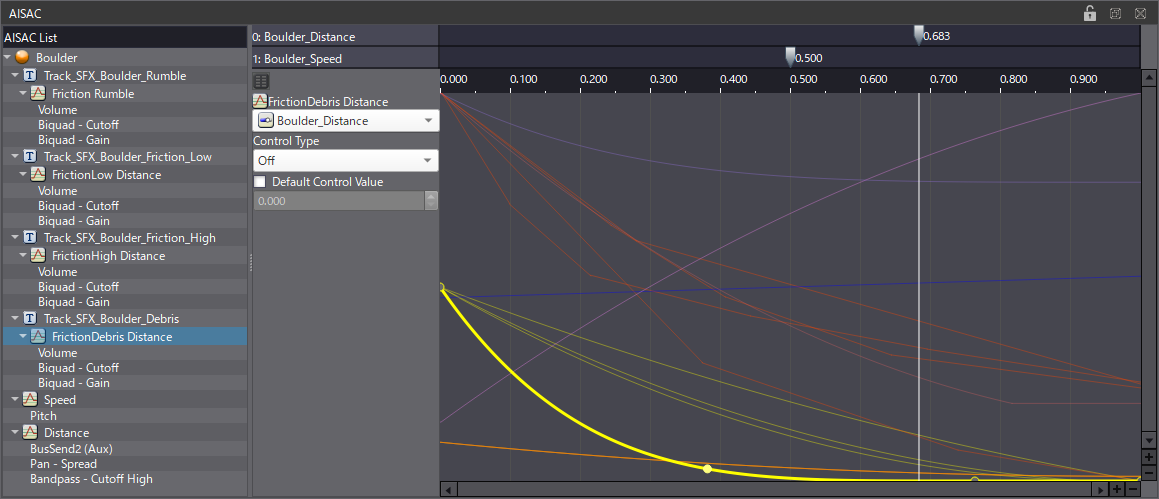
- On the first Track, create an AISAC with Volume, Biquad – Cutoff, and Biquad – Gain graphs. These three curves should go down as the distance increases.
- Then, copy and paste this AISAC onto the remaining Tracks. Make sure to slightly modify the graphs for each Track so that the layers appear progressively as the distance decreases. This will create a more natural roll-off.
The Cue should now work properly in 3D. For the final touch, you can add another AISAC Control to drive the Pitch of the Cue, so that you can change the speed of the boulder.
With all this, you should have the perfect trap for your haunted dungeon or magic cave. To see how we did it, download the demo project below.
 AtomCraft_Project_BoulderTrap