
Using the Doppler effect
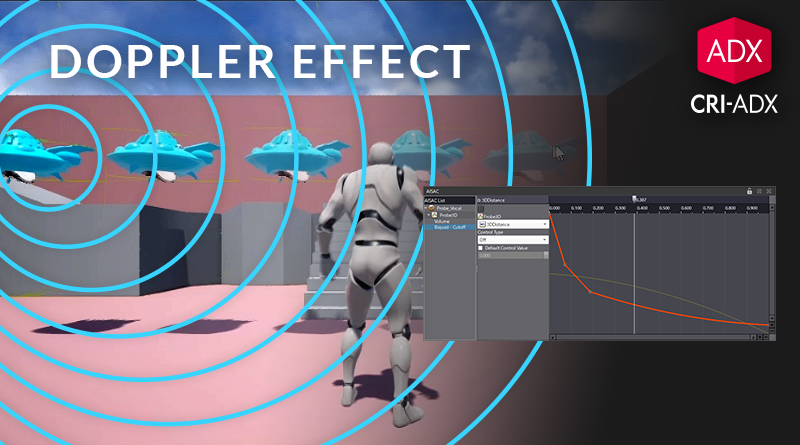
The Doppler effect can be used to emphasize the sense of speed when a 3D sound source is in motion. In this post, we will see how to set this effect in Atom Craft and use it in a simple Unreal project.
Atom Craft
We will use a droid probe moving back and forth to demonstrate the effect. We designed two sounds, one for the engine, and the other for its vocalization.
- The engine is a simple loop with enough tonal components to effectively showcase the doppler effect.
- The vocalizations consist of randomized bleep sequences.
Once the sounds are generated, we can import them as Materials in Atom Craft and create the Cues:
- For the engine, set the Override loop information Flag property to True.
- Drag and drop the engine Material on a newly created Polyphonic Cue.
- Then, for the vocalizations, create a Shuffle Cue using all the variations and set the Pitch Random Range to 200.
- Set the Playback mode to PlayList.
- Finally, in the List Editor, change the Playback Timing Random to 3000 and the Predelay Time Random Range to 500 in order to get random vocalization timings.
The Cues also need to be switched to 3D. Since they will be triggered from the same source, the exact same settings can be used for both Cues:
- Select a Cue and change the Pan Type to 3D Positioning.
- Set the Min Attenuation Distance to 1.50, and the Max Attenuation Distance to 20.
- Then, set the 3D Positioning Doppler Coefficient between 1 and 3 (values above 1 will produce an exagerated Doppler effect).
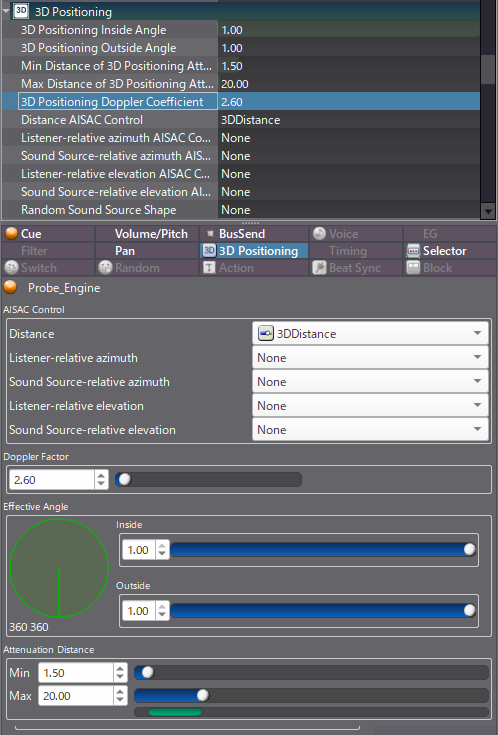
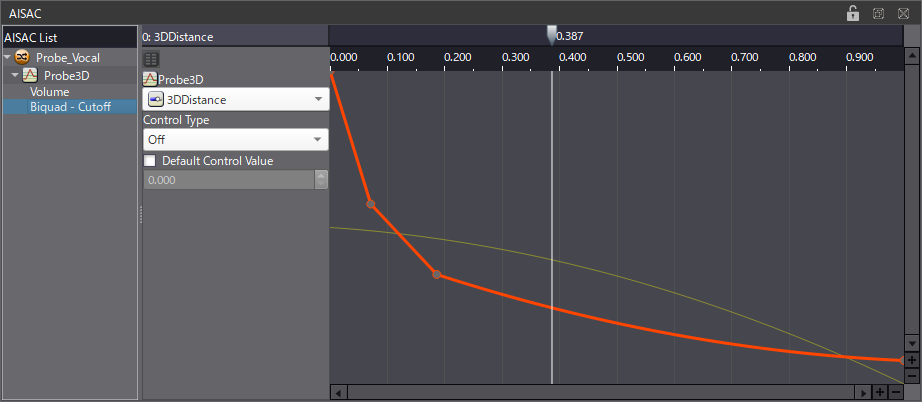
Optionally , an AISAC can be assigned to the 3D Distance parameter. In that case, be sure to create a Volume graph and a Biquad – Cutoff graph in each Cue to achieve a more convincing effect.
With the Cues ready, build the Atom CueSheet binary. This example does not require any specific settings, so simply make sure to tick Output ACF Binary.
Unreal Engine
In Unreal, drag and drop the .acb and .acf files in the content browser to create the Unreal assets. The two Cues will appear in the browser.
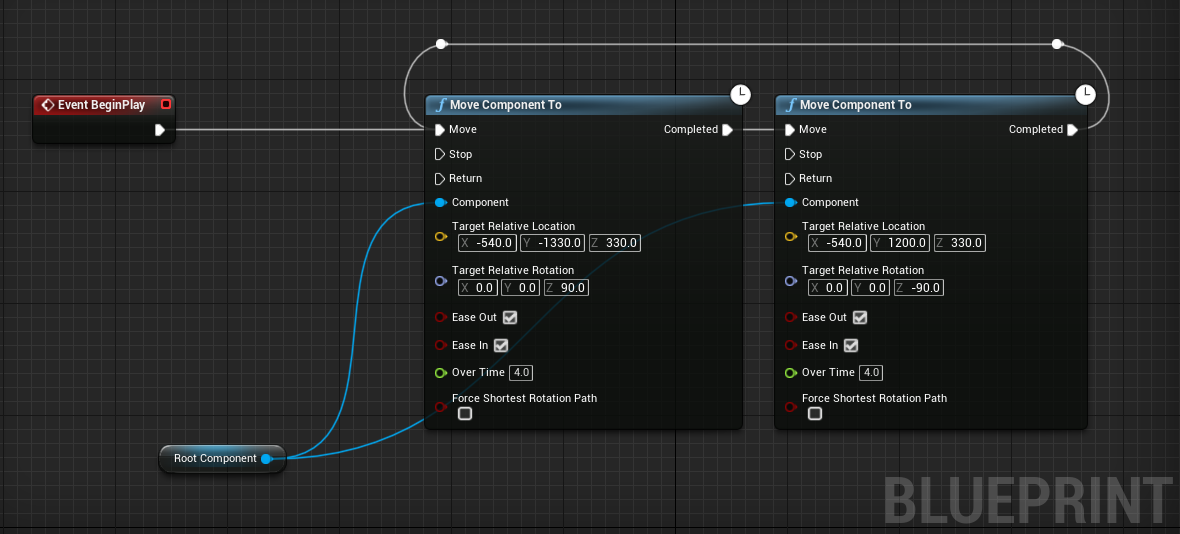
We prepared a Blueprint for a Pawn, in order to make the probe move back and forth, by following these steps:
- Create an Event BeginPlay
- Connect the event to a Move Component To.
- Set the probe’s targeted coordinates in Target Relative Location.
- Connect the Completed pin to a new Move Component To.
- This time, set the Target Relative Location to the origin point of the probe.
- Finally, connect the Completed pin to the first Move Component To, in order to loop the movement.
Now the probe is moving as expected and just needs to emit sounds:
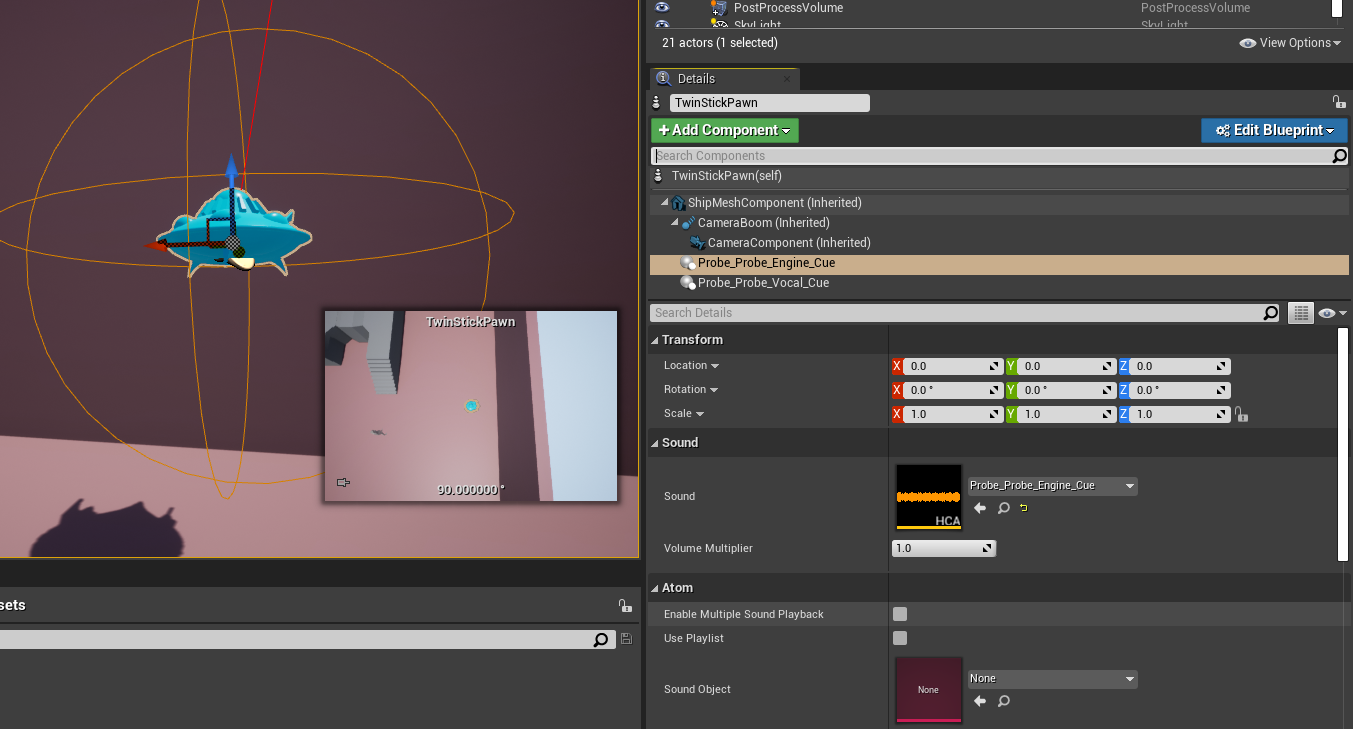
- Select the two Cues in the content browser, then drag and drop them onto the Pawn component.
- It will create two new Atom Components with our two Cues automatically loaded.
Play the level, and you should hear the Doppler effect when the probe is moving.
Implementing the Doppler effect is quite simple, but it can make your levels sound more convincing, so do not hesitate to use it!
 AtomCraft_Project_Doppler.zip