
Responsive Engine Synthesis with ADX2 and UE4
Introduction
One of the biggest differences between video games and more traditional sorts of linear media is the added level of interactivity. In most cases, we can account for this non-linearity by randomly playing back from a pool of samples, which helps to add variety and keeps the gameplay from feeling too repetitive. However, sometimes we need a much more nuanced control over our sound. Fortunately, ADX2 has some really powerful features which can be leveraged to fulfil this need.
In this month’s blog, we will look at crafting a motor sound in Atom Craft, and plugging it into UE4’s Rolling Template to be controlled by the ball’s velocity.

Atom Craft
The system that we need to make in Atom Craft is a straight-forward one. All we need is a looping material, which will provide a constant hum, and some AISAC curves to control the playback parameters of this loop. To get the Atom Craft project sorted we need to:
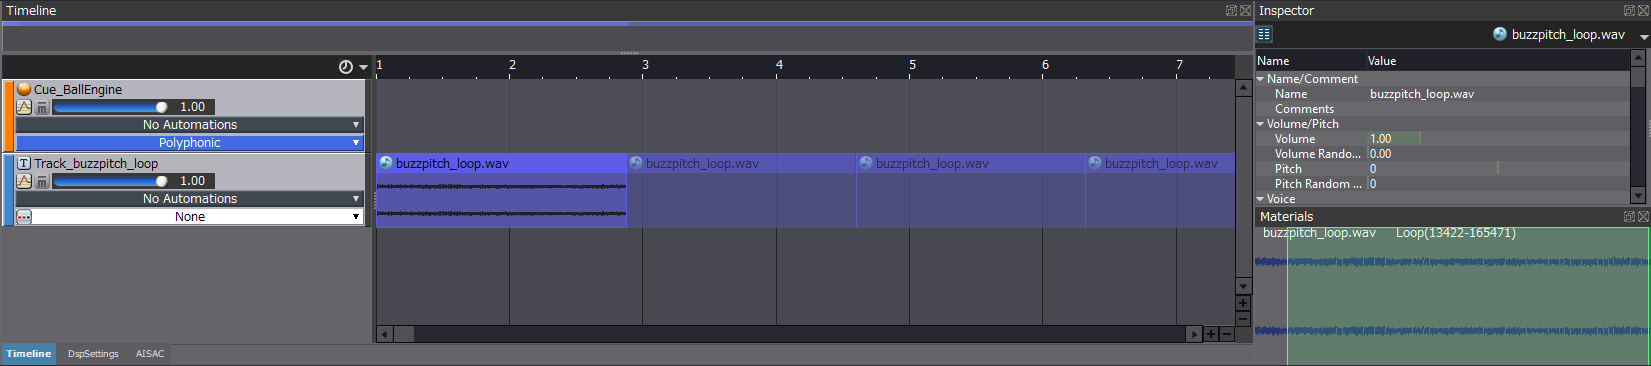
- Create a Polyphonic Cue and name it Cue_BallEngine
- Drag the loop onto the Cue, and it should be ready as is (the looped area is indicated by the transparent green block around the waveform in the Materials window)
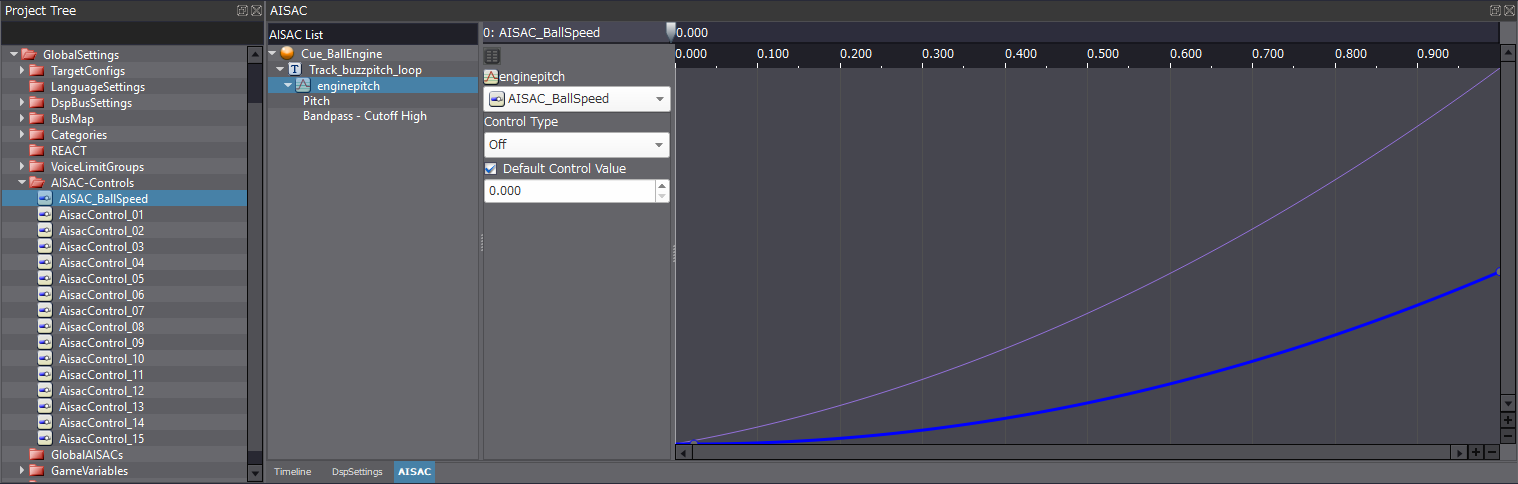
- Rename AisacControl_00 to AISAC_BallSpeed (for easy reference) under AISAC-Controls in the Project Tree
- Attach an AISAC curve to the loop track, and:
- Set the Name to enginepitch
- Set the Control to AISAC_BallSpeed
- Tick Default Control Value and make sure it’s set to 0
- Right-click the enginepitch AISAC and:
- Create Graph → Pitch
- Set this curve approximately as below
- Right-click the enginepitch AISAC again and:
- Create Graph → Bandpass Filter → Bandpass Cutoff High
- Set this curve approximately as below
This can now be tested out in the Session Window. Since the Bandpass Cutoff starts all the down at 0, it is effectively acting as a volume control as well, so be sure to adjust the AISAC value to hear it after pushing play. The addition of just two effects makes for a much more responsive sound that can’t easily be achieved with just sample playback alone. Once you are finished testing, you can finish off by building your CueSheet Binary.
UE4
Integrating ADX2 into UE4 is a straight-forward process, and I recommend following the SDK documentation for this part as it is easy to follow and kept up-to-date.
Since this effect is only being explored due to the consequence of interactivity, it makes sense to test it out within a game. We will use the Rolling Template included in UE4 since it is a really simple template with all the physics already set up. We just need to access these values and control our AISAC with them.
For simplicity, we can create our script in the Physics Ball blueprint. This blueprint can be accessed from the Content Browser under Content → RollingBP → Blueprints → PhysicsBallBP. Taking a look around the blueprint, the only scripting that exists by default is for movement and jumping. The rest is up to us. To get started, we first need to:
- Create Cue_BallMovement Component in Components Tab, then in Details Tab
- Set Sound to Cue_BallEngine
- Uncheck Auto Activate
- Create 2 variables: DelayedValue, and DeltaTime
Then we need to tell UE4 to:
- Play the Sound when the level starts
- Update the AISAC_BallSpeed Control Value every frame
- Get the value for the AISAC from the velocity of the Ball
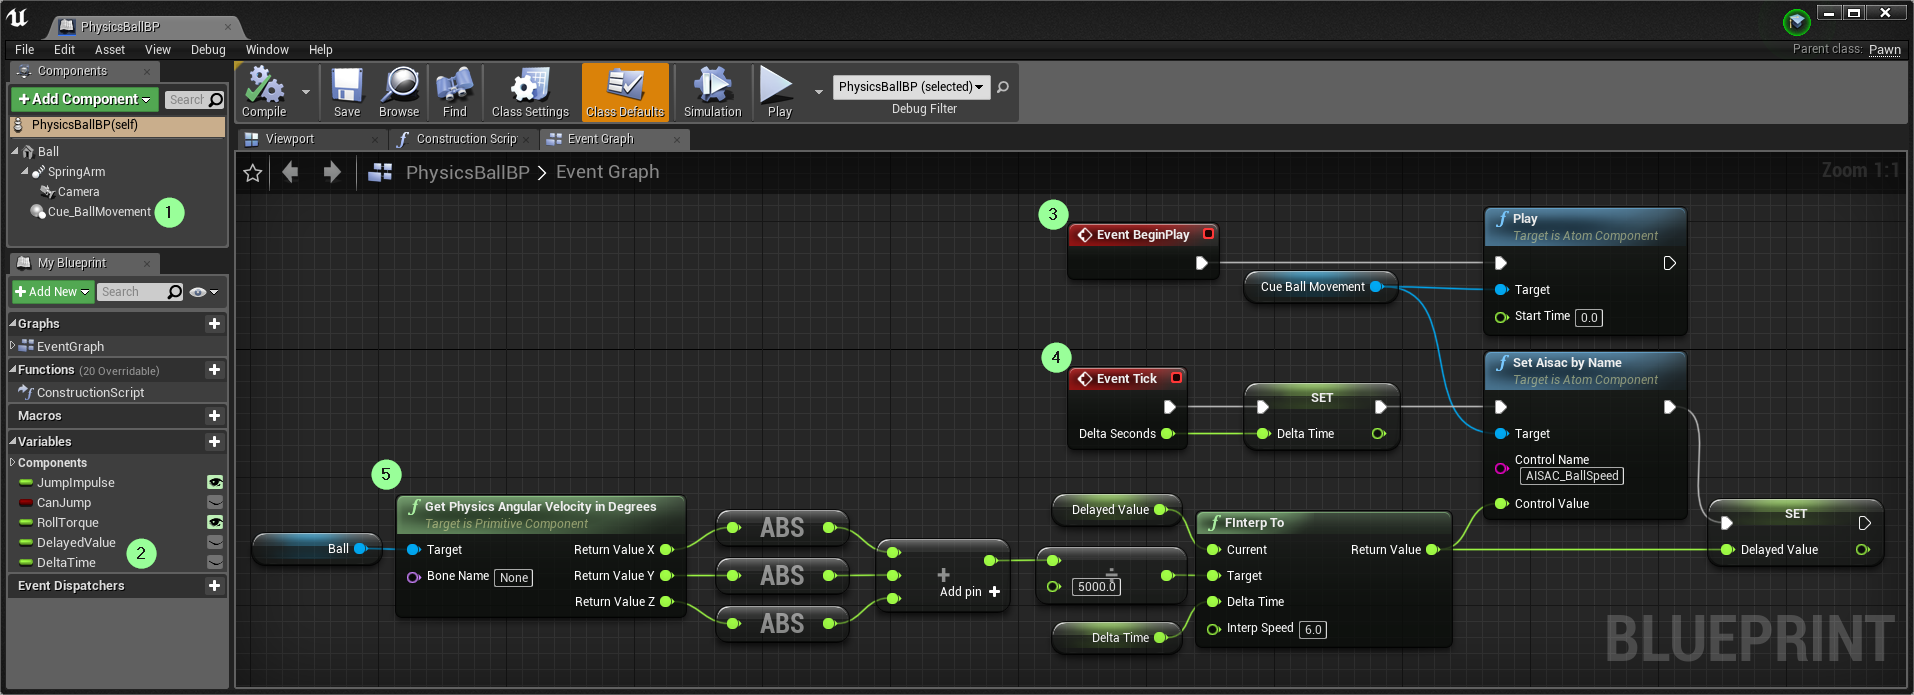
Step 5 may look a little daunting, but I will break it down.
The Get Physics Angular Velocity in Degrees Action is calculating how fast the ball is spinning, and outputting that value as a Vector. If you right-click this pin, you can tell it to Split Struct Pin, which instead outputs X, Y, and Z values. This is done so that all of the values can be added together to find the maximum velocity regardless of how the ball is spinning. This is also why the ABS (absolute float) action is used, which essentially just turns negative numbers into positive numbers.
The last step involves the FInterp To action, which is simply smoothing the transition between values (interpolating) so that if the ball stops suddenly, the audio doesn’t create sudden unwanted noise. It also helps to create a more natural feel. This does add a bit of latency, but with the right value, and the addition of an impact sound, it should be largely diminished. The Interp Speed pin controls how sensitive this process is, where higher values result in more abrupt transitions. The Target pin is receiving its value scaled down by 5000 since the AISAC responds to values between 0.0 and 1.0. This part is quite experimental, and a debug action can be used to determine what the output value is and how best to scale it. Play around with different Interp Speeds and Target scaling to hear the effects these have.
Conclusion
Pitch control in ADX2 is a powerful feature that can offer more than just subtle variation to randomised sample playback. Used in the right way, pitch control can unlock new creative and interactive potential for your games. This could also just be one small part of a system, with scope to become even more impressive with additional layering and effects processing.