SpriteStudio Advanced Animation (1/2)
In the previous post of this SpriteStudio introduction series, we have learned how to make basic animations using keyframes. More complex animations can be achieved by using the new features available in SpriteStudio version 6.0 and higher.
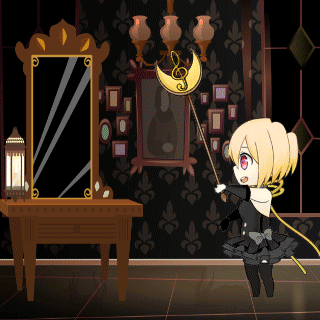
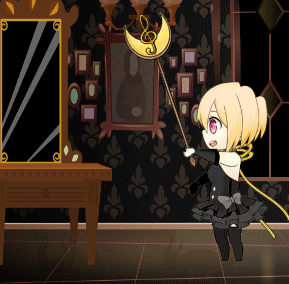
In this post, we will use the “Bone and Mesh” feature to bend the magic wand of our little witch, and then we will emit some magical particles thanks to the “Effects” feature. You can see the result below.
Mesh Deformations
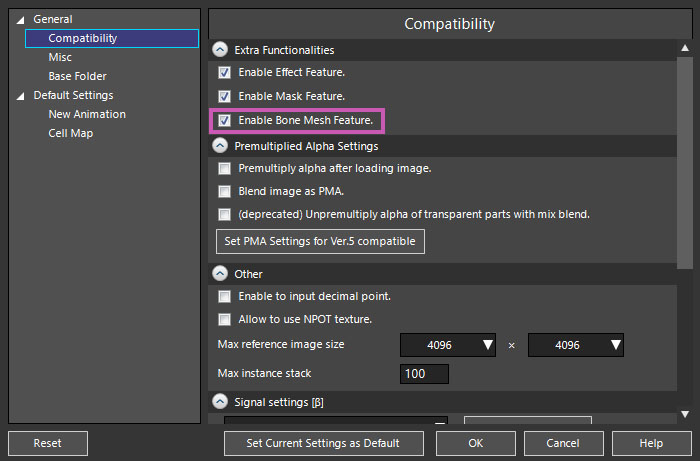
Mesh deformations are made possible by the “Bone and Mesh” feature. To use this feature, it must first be enabled in the “Compatibility” pane of the “Project Settings”, like shown below.
Once the setting is enabled, it becomes possible to assign a mesh and add joints to an animation cell.
The video below shows the whole process.
At the beginning of the video, the magic wand cell is cut out and the mesh is assigned using the automatic mode in the Mesh Editor window.
Then, from 00:16, we add the Joint and Bones in the setup window and drag and drop the magic wand cell onto it. We adjust the positions of the bones on the wand, and to make it easier to distinguish the 3 bones, we change their colors (to red, yellow, and blue).
At 00:50, we press on the Auto Weights Calculation button, and the weights associated to the mesh are automatically calculated and added. This is a very convenient function than can save you a lot of time. In some cases, it will even be sufficient, but in our case, after checking the movement (at 00:58) , we found that it was not smooth enough and the wand was not bending in a natural way.
So at 01:18, we went back to the setup window and adjusted the weights manually. Once this was done, as you can see at 01:46 on the video, the movement was much smoother and felt natural.
The Bone and Mesh feature is very useful. It can be used to deform objects in a way that is simply not possible by just interpolating between attribute values from one frame to another.
Particle Effects
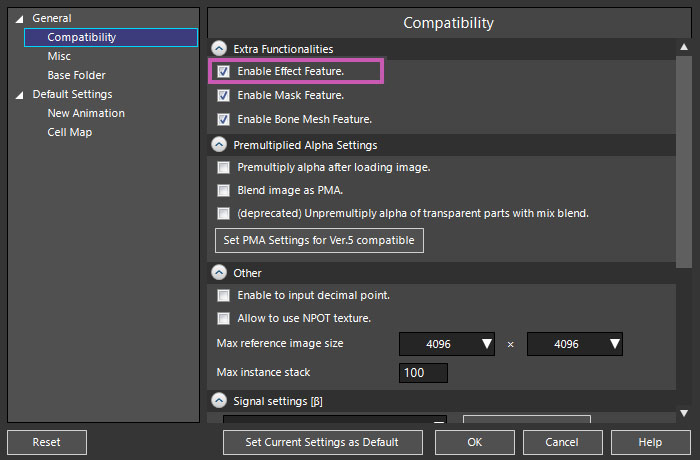
In order to add particle effects to a SpriteStudio animation, the “Effects” feature must be enabled in the “Compatibility” pane of the “Project Settings”, as shown below.
Like for the mesh deformations, we prepared a video that demonstrates how to emit particles from the magic wand.
Let’s check the steps! First, we start by adding a new Effect. Then, in the Effects Editor window, we select the cell map that will represent a single particle (from 0:05 on the video).
Both the particles and emitters offer many settings that you can adjust at will to create different particle effects. For example, you can add gravity to the particles, a delay, and so on… The Effects Editor window displays a preview of the particle effect, so it is very easy to try different settings.
At 0:24 in the video, you can see that after switching back to timeline window, we create an effect part that references the effect we just designed. Now we just need to adjust the position, angle, and timing of the effect part, so that the particles are emitted from the tip of the magic wand at the right time and in the right direction.
Finally, we added a room background to complete the animation and achieve the look that you could see at the top of this post.
Coming next
Next time, we will examine two other advanced features that can be used to create amazing animations in SpriteStudio: “Mask” and “Instance”. The masking feature can hide part of a cell, while instancing plays an animation in a cell part.
By leveraging these two features, we will be able to create an improved version of our animation, in which a secondary animation will be displayed in the magic mirror.