
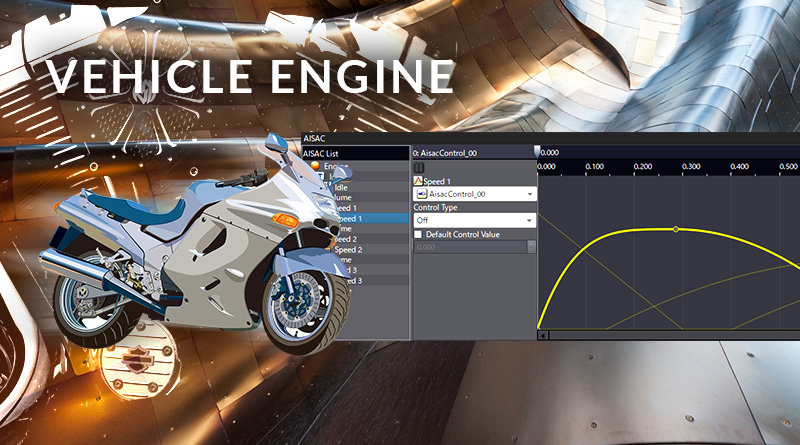
Creating a Vehicle Engine in Atom Craft
Vehicles are a common feature of modern games, from racing games where the player is placed directly in control of a car to games where busses and motorbikes merely form part of the backdrop. There are as many approaches to designing vehicles as there are games that feature them. In this blog, we will showcase a reasonably simple engine with a whole bunch of power built-in. We will trigger playback like any other sound and control RPM is by a single AISAC.
 2021-03_Engine.zip
This project was created using CRI Atom Craft Ver.3.44.13
Cue Creation
For our Materials, we will use separate loops sustained at incremental RPM values. These can be looped from actual recordings of cars or synthesized from scratch. You can access our more stylized synth loop samples in the project files linked above. To get started, let’s:
- Create a Polyphonic Cue, and name it “Engine”
- Create Tracks for idle state, and subsequent speed states
- Drag all relevant Material loops onto this Cue
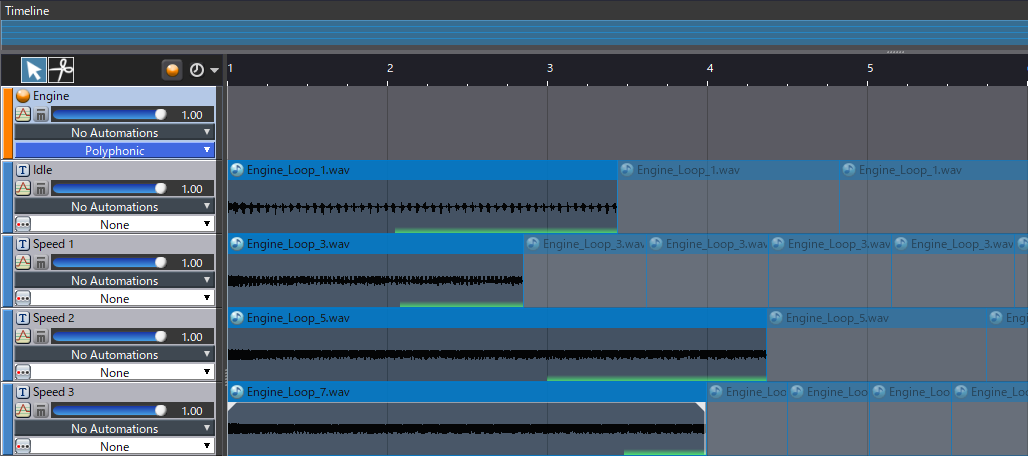
We can perform additional optimization by setting the Cue’s Voice Behaviour to “Virtual Voice Retrigger”. Since we won’t simultaneously be playing all 4 tracks, and it doesn’t matter where we start in the waveform, we can prevent silent voices from using resources.
AISAC Volume – Cross Fade
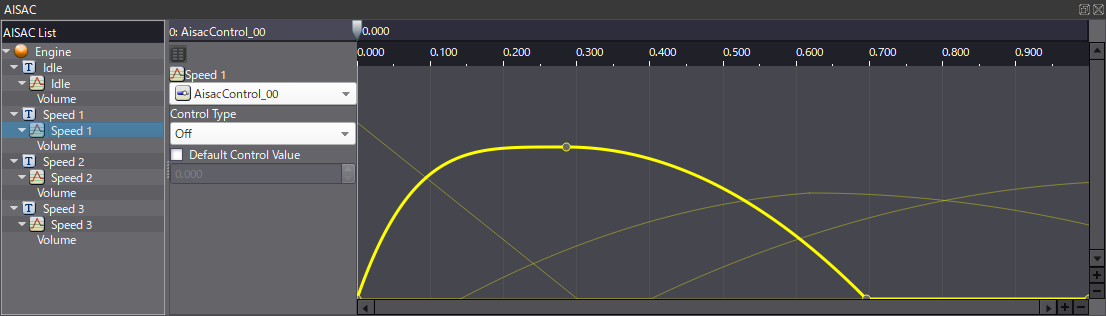
Apart from sourcing the audio, this part is the most creative part of the design process. We need to create natural modulation between each Track so that it sounds like a convincing RPM increase. The first thing we need to do is fade our volume between tracks. To do this, let’s:
- Rename AisacControl_00 to “EngineRPM”
- For each Track in Engine Cue
- Right-click → New Object → Create AISAC… and set
- AISAC Name = respective Track name
- AISAC Control = EngineRPM
- AISAC Graph = Volume
- Finesse each curve as appropriate
- Right-click → New Object → Create AISAC… and set
AISAC Pitch
Volume automation alone can sound a little unnatural, so let’s sell the effect further by applying pitch modulation. We can either apply this globally within the Cue, to individual tracks, or both!
- In the AISAC List, right-click Engine Cue → Create AISAC and set
- AISAC Name = “Whole Engine”
- AISAC Control = EngineRPM
- AISAC Graph = Pitch
- Create a linear curve with destination values of -600 to 600 cents.
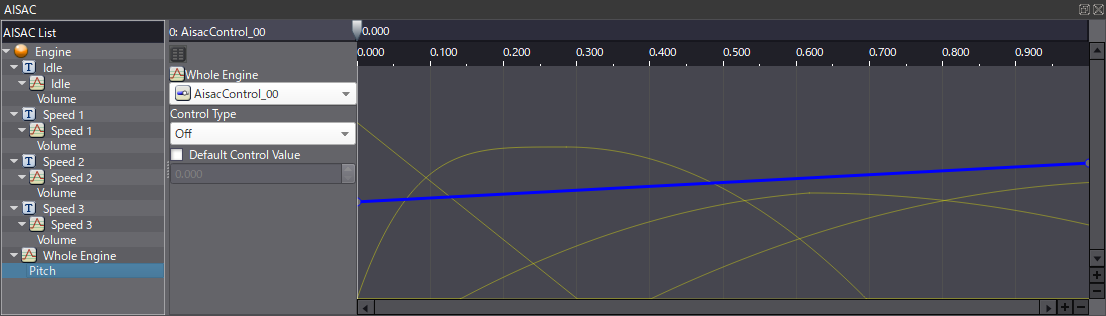
We can also add a pitch curve to our Speed 2 Track, gradually increasing beyond to a destination of 1200. Or, we could even add a Pitch AISAC with an Auto Modulation Control Type to add some subtle looping jitter. ADX2 is really flexible in this regard!
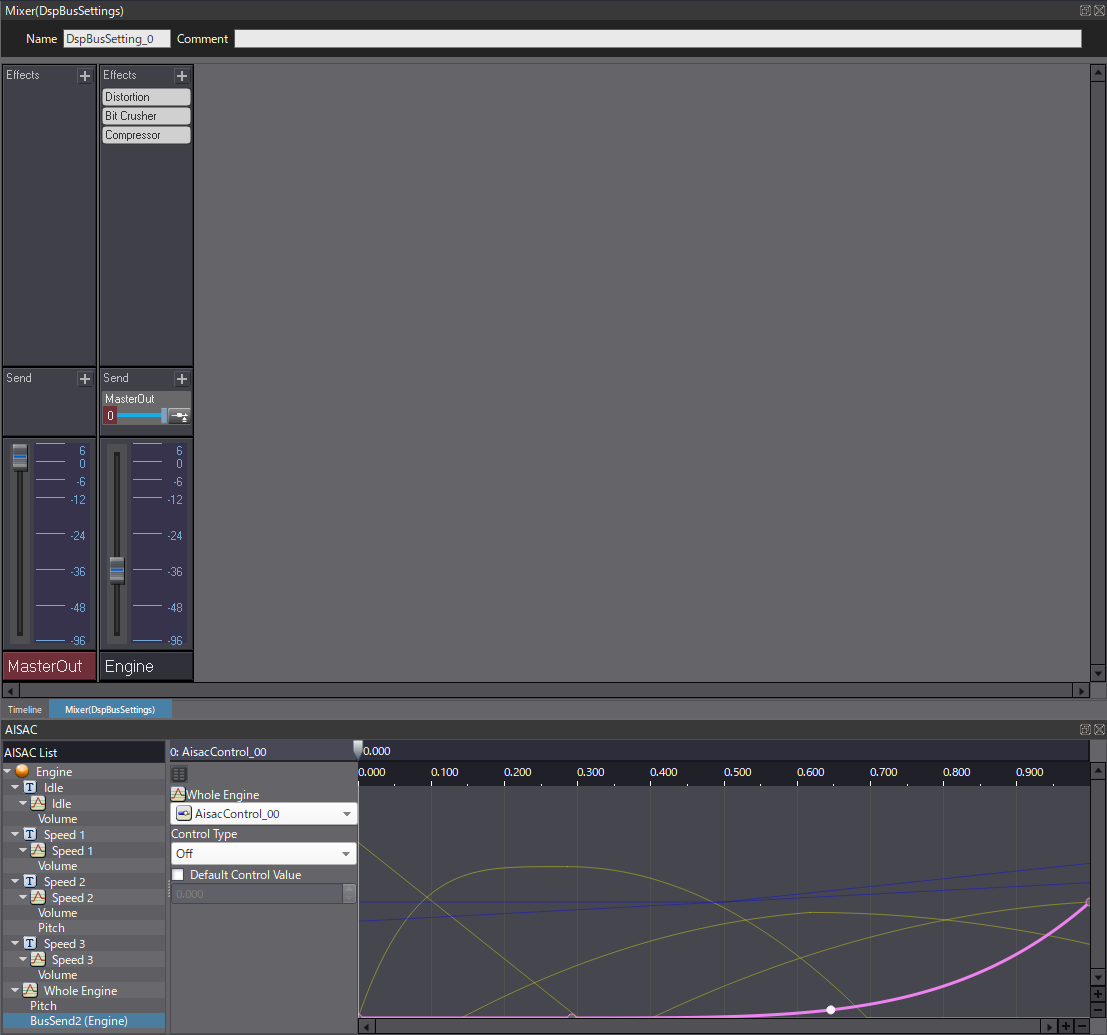
AISAC Bus Send
To add a little more power to the top end, we can set up a Bus with DSP effects to gradually receive more signal via a Bus Send AISAC.
- On DspBusSettings_0, right-click → Create DSP Bus and name it “Engine”
- Set Send to MasterOut
- Set fader Volume to -9 dB
- Add Distortion, Bit Crusher, and Compressor Effects
- In BusMap For AISAC and Automation, set DspBusName2 to Engine
- In Engine AISAC, right-click Whole Engine → Create Graph → Bus Send → BusSend2 (Engine)
- Create a Slow Change curve that ends on 0.5
With these settings applied, we can go back and adjust the DSP effects’ parameters to fine-tune what it sounds like when our Engine has high RPM. This stage also requires some creativity, but the main goal is getting it to sound a little dirtier.
We can test our final product in the Session view, but it may sound a little staggered with manual slider control. Once this Engine is implemented and controlled by a smoothed in-game parameter, it sounds really convincing!