
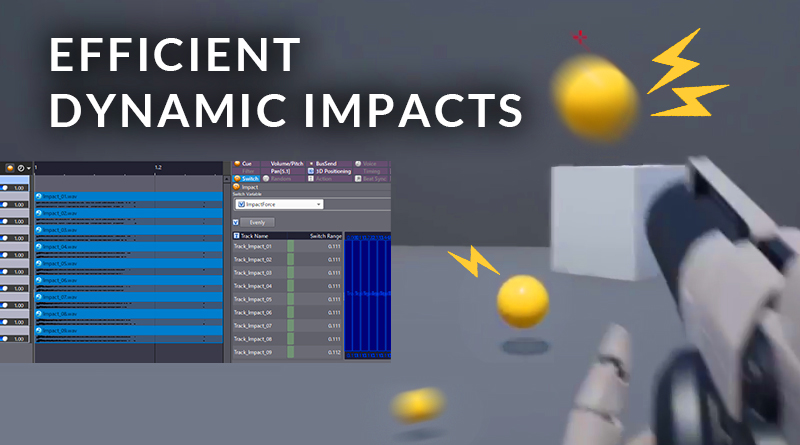
Efficient Dynamic Impacts with ADX2 and UE4
In a previous blog, we looked at creating dynamic impacts in Unity. The aim was to design a highly responsive surface scrape and impact system for a marble run game. Since that use-case only involved one ball, we could use a more sophisticated AISAC layering approach, affording a higher number of voices. However, this isn’t very efficient when dealing with loads of simultaneous interactions.
In this blog, we will look at playing impacts based on relative velocity but using ADX2’s Game Variable feature. This feature works similarly to the Selector Label system but with numbers rather than text. This approach is far more intuitive when deriving gameplay information from numbers, such as a velocity.
 2020-12_DynamicImpact.zip
This project was created using CRI Atom Craft Ver.3.44.13 and UE4.25
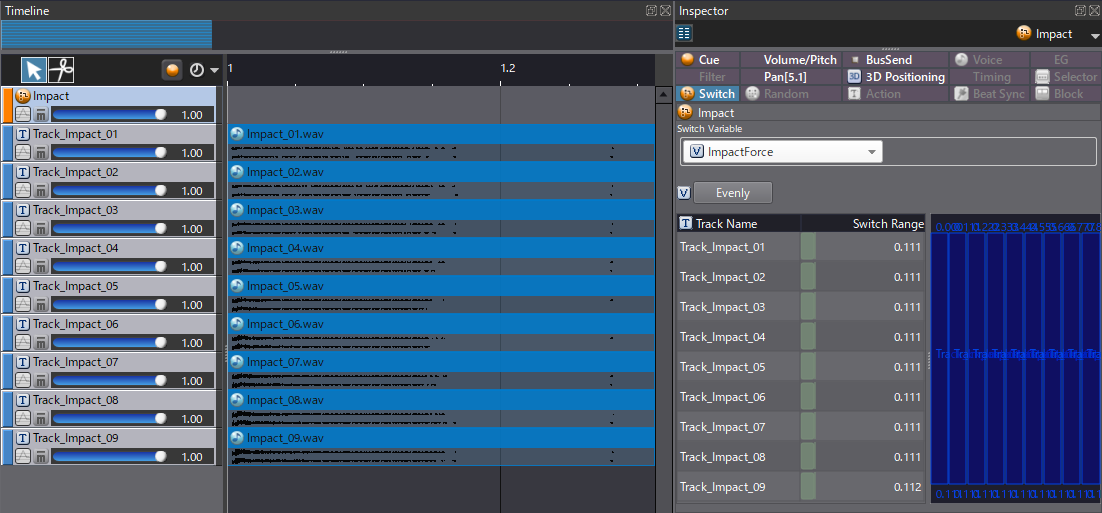
Design in Atom Craft
To create a similar dynamic range, we will need more samples. However, the quantity will change depending on the project requirements. For this demonstration, we have used 9, to show that even by playing one voice at a time, we can still create a convincingly nuanced range. To begin, lets:
- Create a new Game Variable called “ImpactForce”
- Create a new Switch Cue named “Impact”
- Drag in the relevant Waveform Materials
- In the Inspector with the Switch Tab highlighted
- Set Switch Variable = ImpactForce
- Select the “Evenly” button to assign the ranges automatically
- Open up Session Window and test playback
- (Open up the Game Variable tab and enable ImpactForce)
- Build project files for importing into UE4
Implementation in UE4
To test our system out, let’s create an FPS template project. After setting up ADX2 on the engine-side and importing our build files, we can implement our audio.
All the logic we need to implement can be done on the FirstPersonProjectile Blueprint. Since the velocity and actor location is being used to add an impulse to the collided object, we also have all the gameplay information we need.
From the Get Velocity, we can convert this Vector to a normalized float value using Vector Length. Essentially, this gives us the absolute velocity. We can then divide this by getting the Max Speed of the projectile to determine a relative velocity. Using Max Speed avoids the need to do arbitrary scaling since if the projectile hits at its maximum speed, it will play the most intense sample. It also conveniently means we return a value between 0 and 1. We can then use Atom’s Set Game Variable by Name function, copying the name we set in Atom Craft, “ImpactForce.” And finally, we can spawn our sound using the actor’s location already provided before destroying the projectile. The correct sound will automatically play thanks to the Game Variable setting.
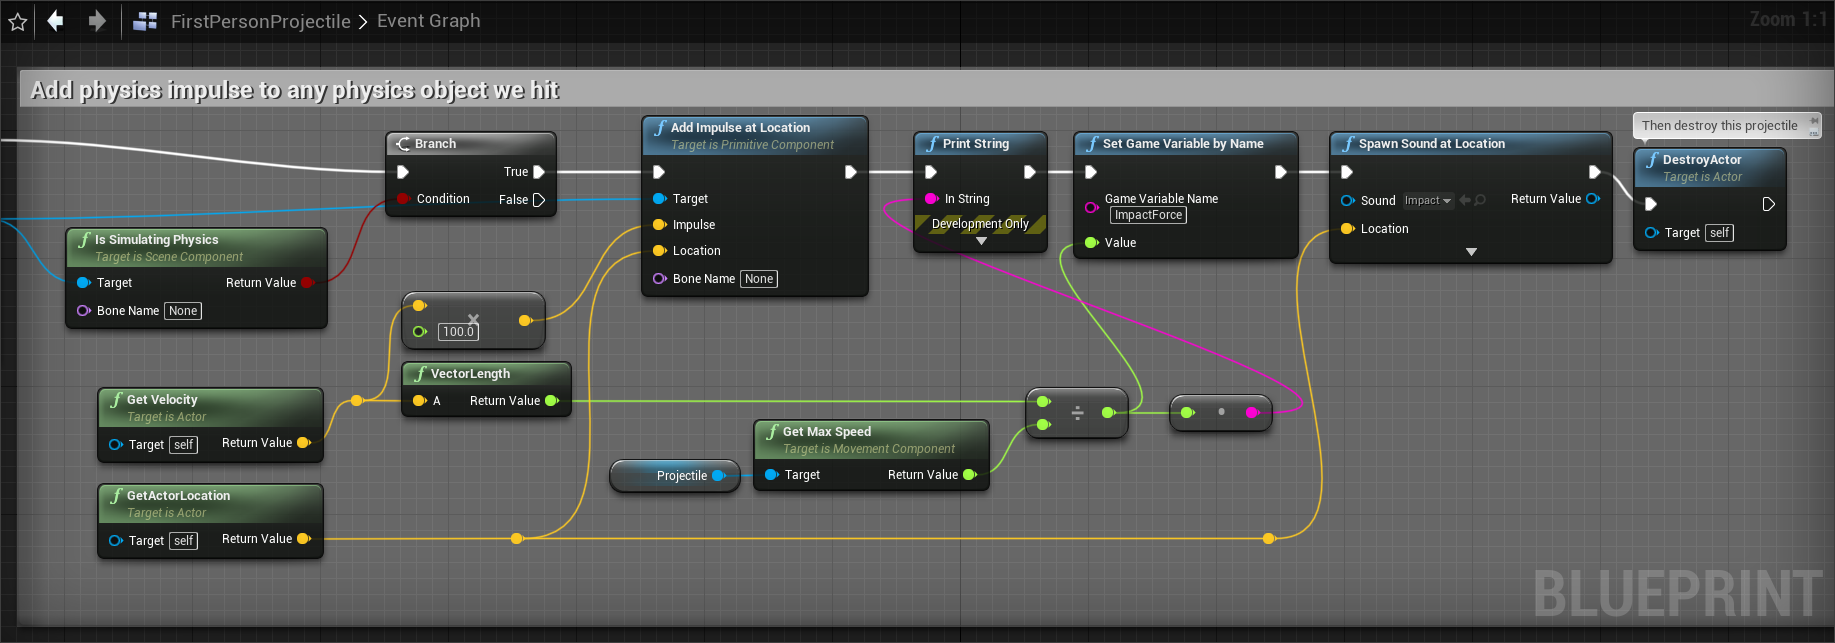
We can then experiment with different velocities by changing the Initial Speed in the Projectile component’s Details tab. Shooting at boundaries and from different distances will have a natural reductive effect on the projectiles’ velocities. These effects are demonstrated in the demo video at the top.