

Creating a Gibberish Generator with ADX2 and UE4
Introduction
As the video games medium has evolved, so has the complexity of the stories they try to tell. Usually, this story is told literally through expositional dialog and character interactions. Practically hiring voice actors and recording all the dialog can cost a lot of money and prove prohibitive for smaller developers. There are, fortunately, a few ways that we can attempt to address this.
In this blog, we will create a gibberish generator. It will parse a string and convert each character to a short sound. This approach won’t necessarily produce the most natural-sounding chatter, but it’s a good starting point and avoids silence when a character is speaking. You can find some wave files in the project linked below for testing, excluding letters that sound similar such as k and q (where c has been provided). We can duplicate tracks for these.
 2020-11_GibberishGenerator.zip
This project was created using CRI Atom Craft Ver.3.44.13 and UE4.25
Atom Craft
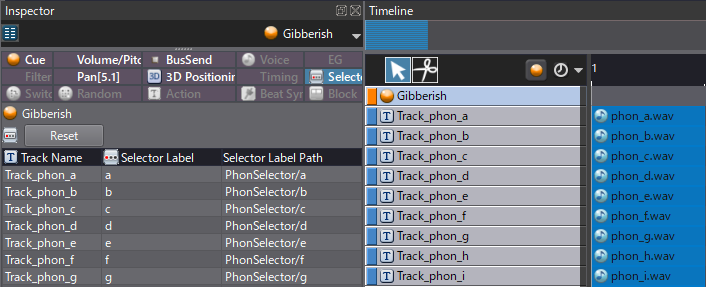
There are two ways we can approach this. We can either create a Cue for each phoneme or create one Cue with a Track for each phoneme, using a Selector to play the correct one. Let’s opt for the latter since it will allow us to create new characters (we can duplicate the Cue and swap the Materials out). It will also make our project easier to read. To set this up, lets:
- Create a Selector named “PhonSelector”
- Create 26 Selector Labels, named according to the alphabet
- Create one more Selector Label named “stop”
- Create a Polyphonic Cue named “Gibberish”
- Drag all Materials onto Cue
- Set Selector Label for each Track according to name
- e., for Track_phone_d, set Selector Label to d
- Additionally, set Gibberish Cue’s Default Selector Label to stop
- Build project files for importing into UE4
UE4
With ADX2 setup and the relevant build files imported, let’s start creating our playback system. To briefly summarize, we need to:
- Parse a string into an array of characters
- Loop through each character
- Play the correct sound
- Wait before playing the next sound
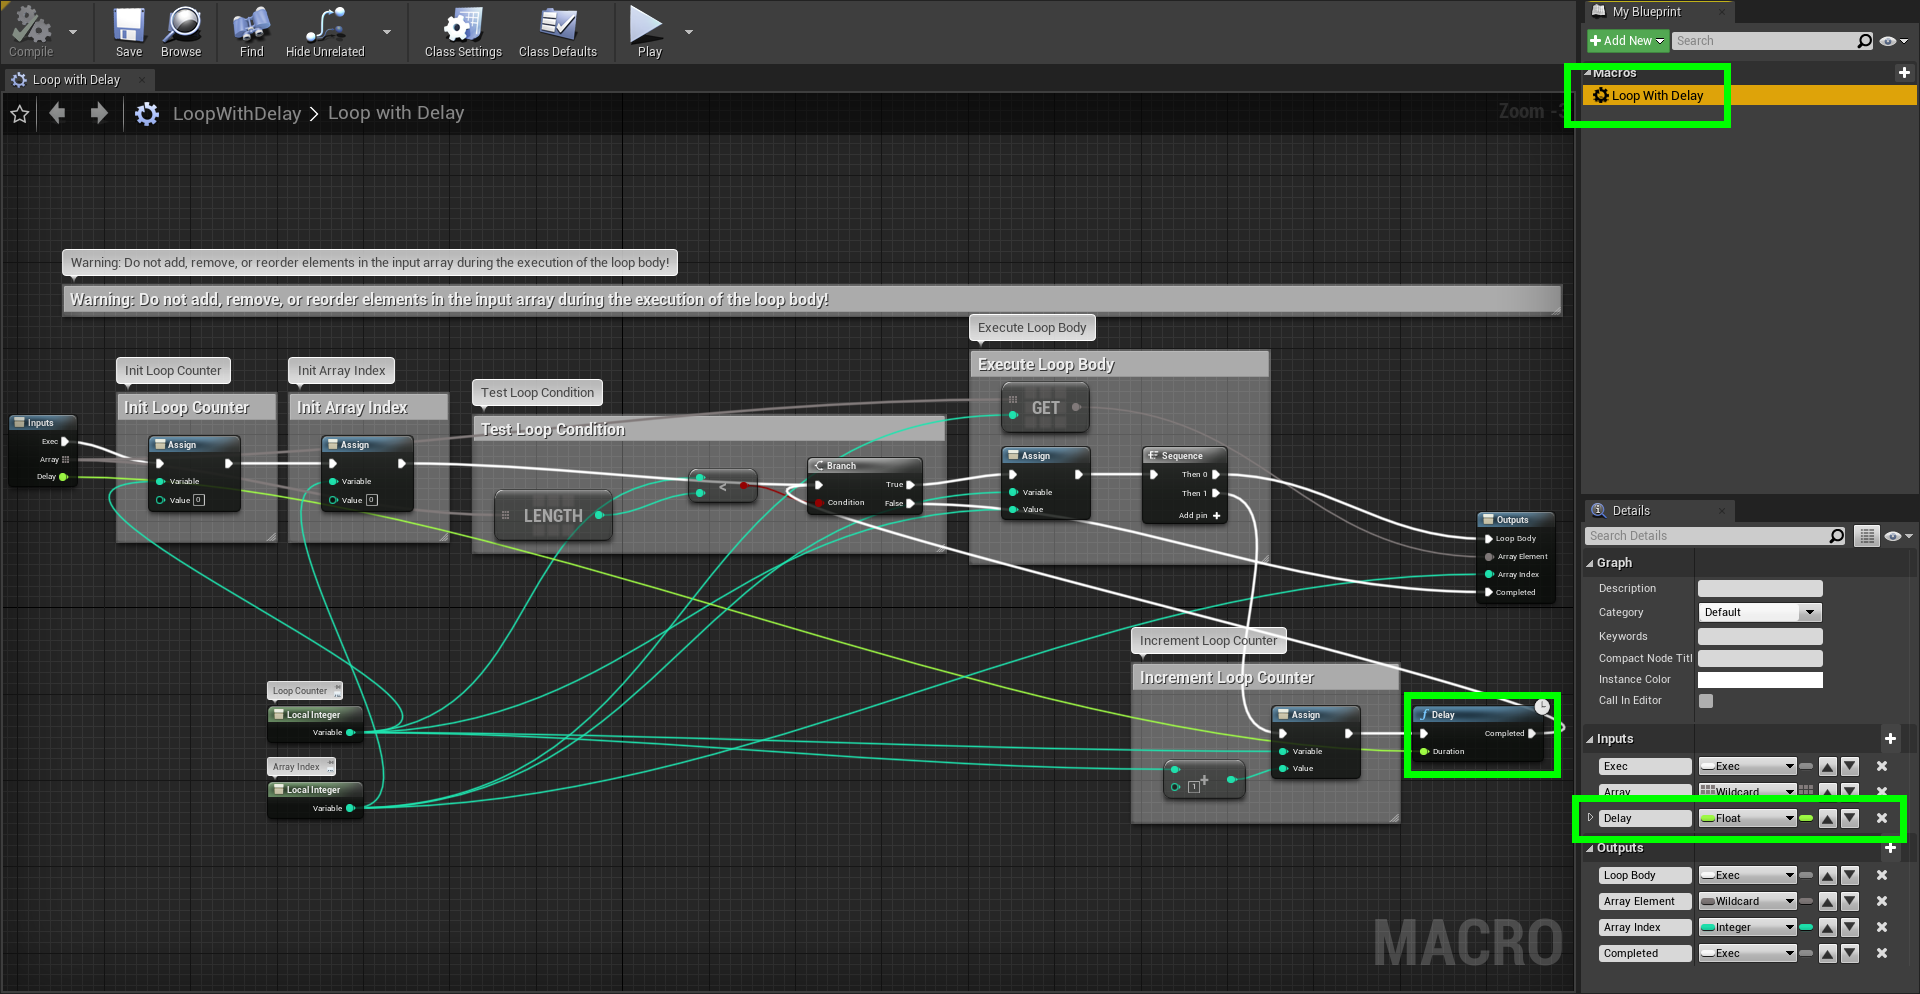
The default loop functions in Blueprints don’t have a wait function, so we will first need to create our own. In the content browser, right-click → Blueprints → Blueprint Macro Library, and name it “Loop with Delay.” We should also open it up and rename the Macro itself to “Loop with Delay” under the Macro’s tab. This name is how it will be referenced as in other Blueprints.
We can create a For Each Loop, double-clicking to open it up, and copying all of the content into our Loop with Delay Macro. Next, we need to copy the Inputs and Outputs setup to mirror the For Each Loop, adding one more float input for our delay. Finally, we need to insert a Delay function into the loop, linking it with our delay input float.
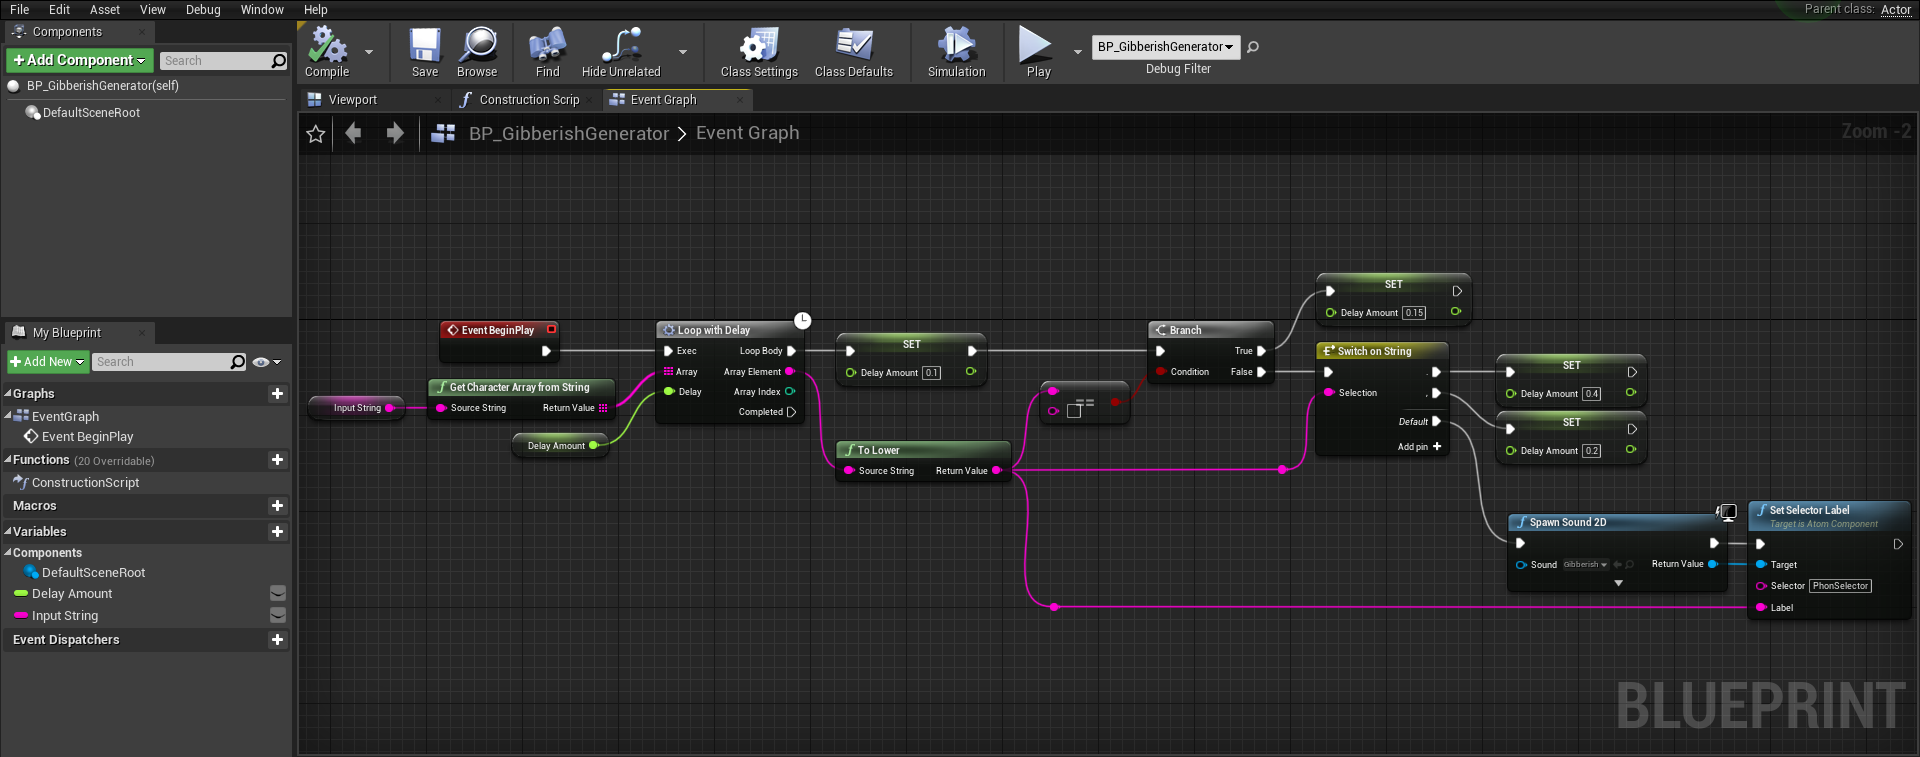
For our actual generator, in the Content Browser, let’s right-click → Blueprint Class → Actor and name it “BP_GibberishGenerator.” We will need two variables, a float named “Delay Amount” and a string named “Input String.”
On whatever Event type makes sense (in this case, Event BeginPlay for testing purposes), we can trigger our Loop with Delay function, using Get Character Array from String to create our character array to loop through.
We first check if the character is a space (the bool check below looks empty, but space has been specified), in which case we don’t play anything and delay for a little bit longer. Next, we check if it is either a comma or a full-stop. In either case, the outcome is similar to before, don’t play anything, but pause for even longer. The effect of these instances is to create a more interesting rhythm. For this to work, we need to put a Set Delay Amount function at the beginning of the loop body to ensure it resets to 0.1.
In any other case, we play the Gibberish Cue and set the Selector Label to the corresponding letter. If an unfamiliar character is played, the default “stop” Selector Label will be picked.
To generate some text, we can select the Input String variable and change the Default Value in the Details panel.