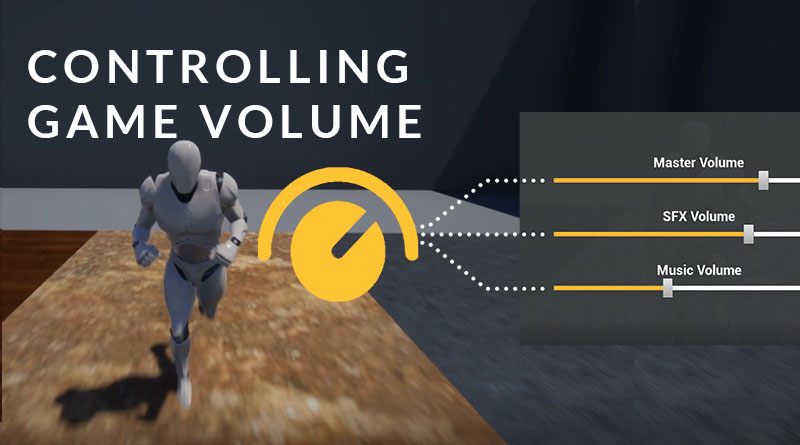
Controlling Game Volume in UE4 with ADX2
Once we have successfully implemented and mixed the audio for our games, we will likely want to offer the player the ability to adjust their volume. For example, in a competitive shooter, the player might want their music to be quieter, or if playing an adventure game, they might wish to have the dialog a bit louder. In this blog, we will cover the different methods that ADX2 offers for applying broad-stroke changes to the volume.
To test this system, we will be extending on our footstep blog, only adding in some Music and Ambience Cues with relevant Materials.
 2020_08_GameVolume.zip
This project was created using CRI Atom Craft Ver.3.43.09 and UE4.24.3
Atom Craft
To allow for a few different options, we are going to implement three solutions for volume adjustments: setting by bus, Category, and AISAC. Setting by bus won’t require any additional setup for our purposes since we will be using use the default MasterOut bus. However, we could design our project so that Cues of certain types (such as SFX or dialog) are sent to specified busses and only summed in our Bus Map.
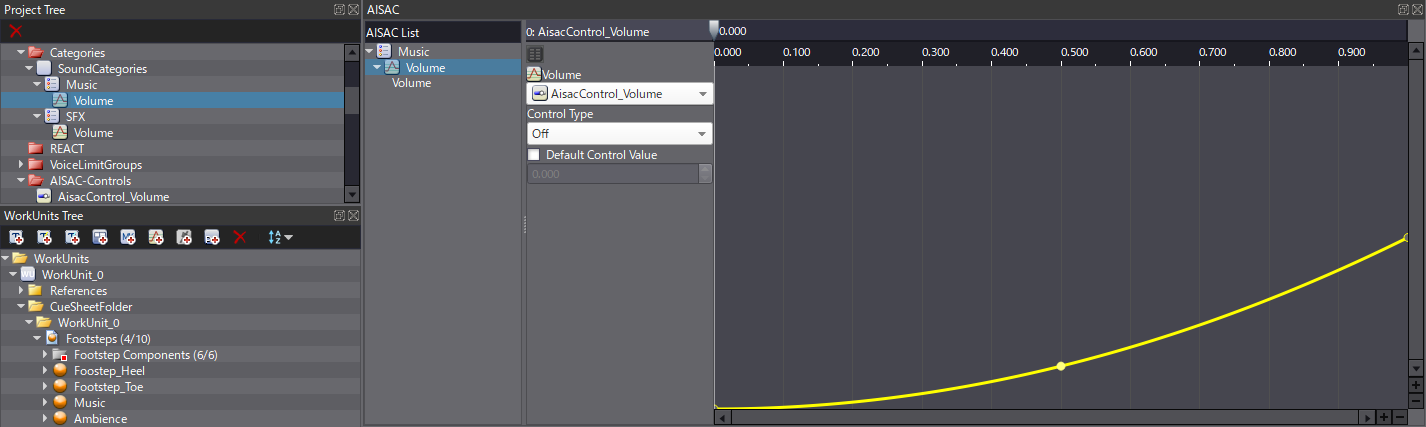
Another approach is to use the Categories feature. Here, we can define sound types, and drag our Cues onto these Categories. If we want to define a custom attenuation curve, we can also apply AISAC to our sounds. In the Project Tree, let’s:
- Under AISAC-Controls, rename AisacControl_00 to “AisacControl_Volume”
- Right-click Categories folder → New Object → Create CategoryGroup
- Name it “SoundCategories”
- Right-click this group and create two new Categories named “Music” and “SFX”
- On each, right-click and create new AISAC as follows:
- AISAC Name: Volume
- AISAC Control: AisacControl_Volume
- AISAC Graph: Volume
- For each, create a linear curve from 0 to 1, and set the last point’s Curve Type to Slow Change
UE4
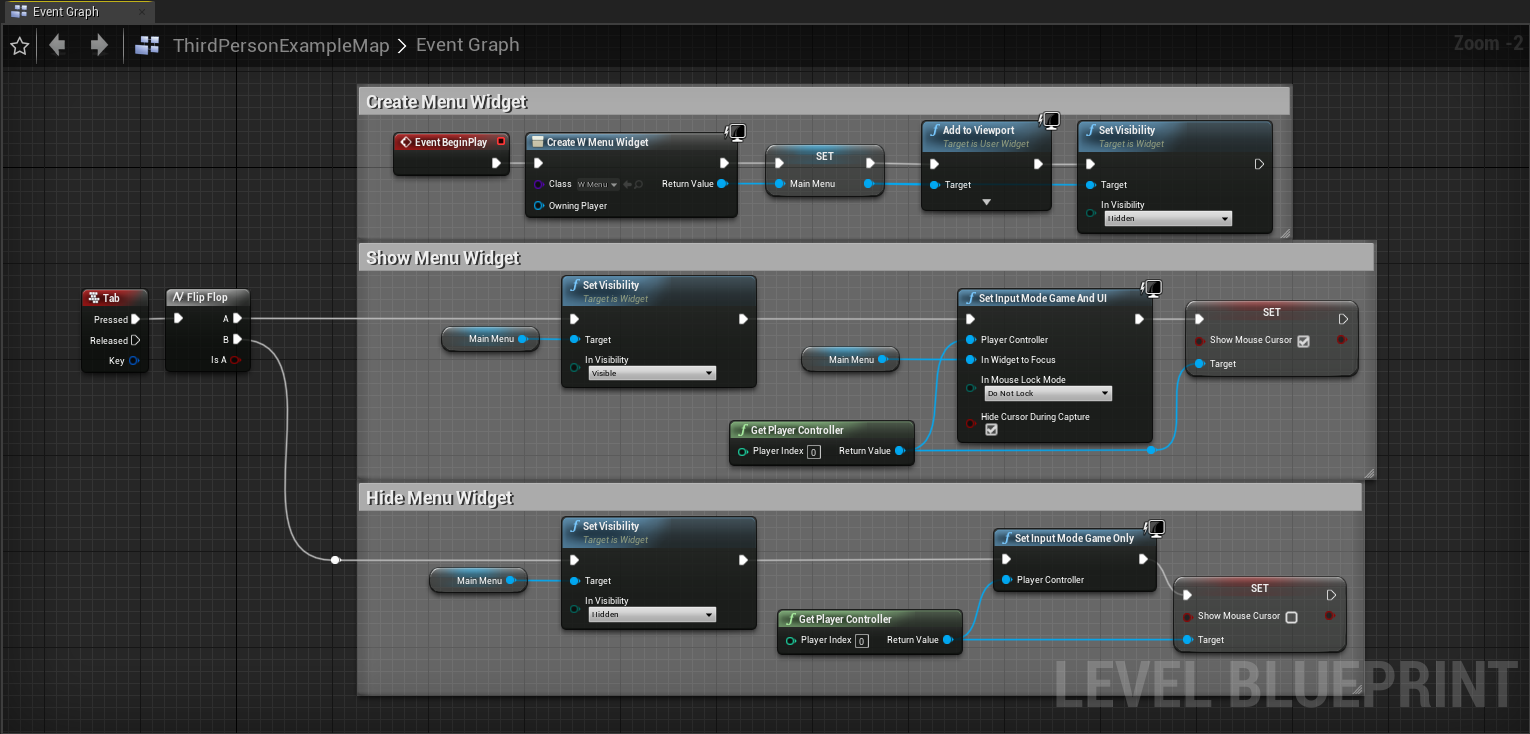
To control the audio levels in UE4, we will be using a simple Widget with sliders for our master, music, and SFX volume controls. The UE4 documentation covers the process of Widget creation and interaction in much more detail, but briefly, we are:
- Creating a Menu Widget on Begin Play
- Making it visible and showing the cursor when we push the Tab key
- Hiding the Widget and the cursor when we press the Tab key again
This setup isn’t an ideal implementation, but entirely usable for our testing purposes.
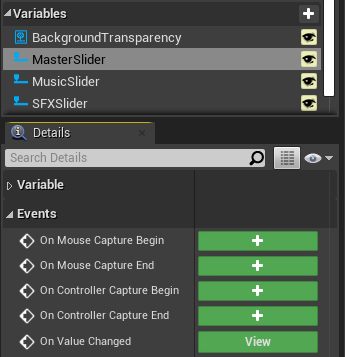
Next, we can drag-and-drop our Music and Ambience Cues into our scene, where ADX2 will take care of automatic playback for us. Finally, we can create the logic for our sliders. In the menu Widget, let’s create an On Value Changed event for each slider. We can quickly find these events in the Details tab when the relevant slider is selected.
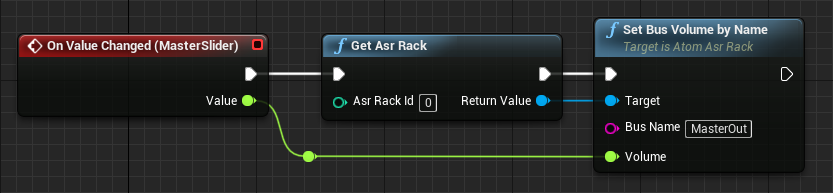
Since sliders in UE4 go from 0 to 1 by default, we don’t need to apply any scaling (ADX2 also uses this range by default). And so, to set our master volume, we need to Get Asr Rack and Set Bus Volume by Name, setting Bus Name to “MasterOut” (this is the default name for ADX2’s master bus).
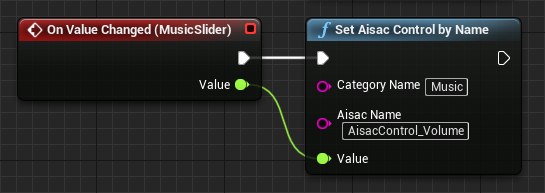
For our music, if we want to use our custom AISAC curve, we can Set Aisac Control by Name, setting Category name to “Music” and Aisac Name to “AisacControl_Volume.” These values are based on what we set in Atom Craft.
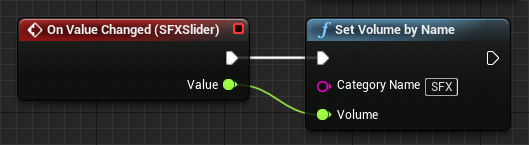
For our SFX, if all we want to do is directly set the volume, we can instead Set Volume by Name, setting Category Name to “SFX.”