
Time Dilation in UE4 using CRIWARE – UE4: Part 2
Introduction
In this month’s two-part blog, we investigate some straight-forward approaches for creating audio systems that adapt to a “time dilation effect.” In the first part, we created the framework for our audio system in Atom Craft. In this second part, we will continue with implementation and fine-tuning in an FPS-style game in UE4.
Created with CRIWARE UE4 SDK V1.27.11 and UE4 V4.24.3
Getting Started
To implement our audio, we can use the FPS Blueprints template that UE4 provides, stripping out the VR-related content. As usual, the documentation is the best place to start if you need help getting the CRIWARE SDK integrated, and the CueSheet Binary imported.
There are many different ways to reference and playback sounds, so let’s import our Gunshot and Ambience Cues directly onto our First Person Character Blueprint, and name them accordingly. This way, we can easily reference them later. It generally doesn’t make sense to place ambience on a player character, but this will make things easier for demonstration purposes. Also, the default behavior for Auto Activate is “true,” so it should playback without any further prompting.

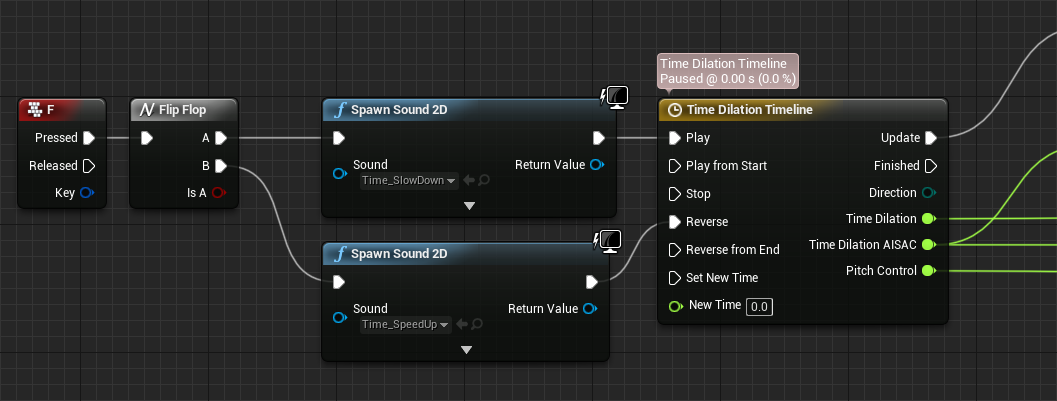
Time Control SFX
Next, let’s implement the Time_SlowDown and Time_SpeedUp SFX. Using the Keyboard Events – F action as the control key for our ability, we can toggle the ability on and off with a Flip Flop action. Since it is off by default, the A output will initiate the effect, and subsequent presses will toggle the ability off and on. The Spawn Sound 2D functions signify this, wherein we can set our Time_SlowDown and Time_SpeedUp Cues to be played.
Controlling AISAC & Pitch using UE4’s Timeline
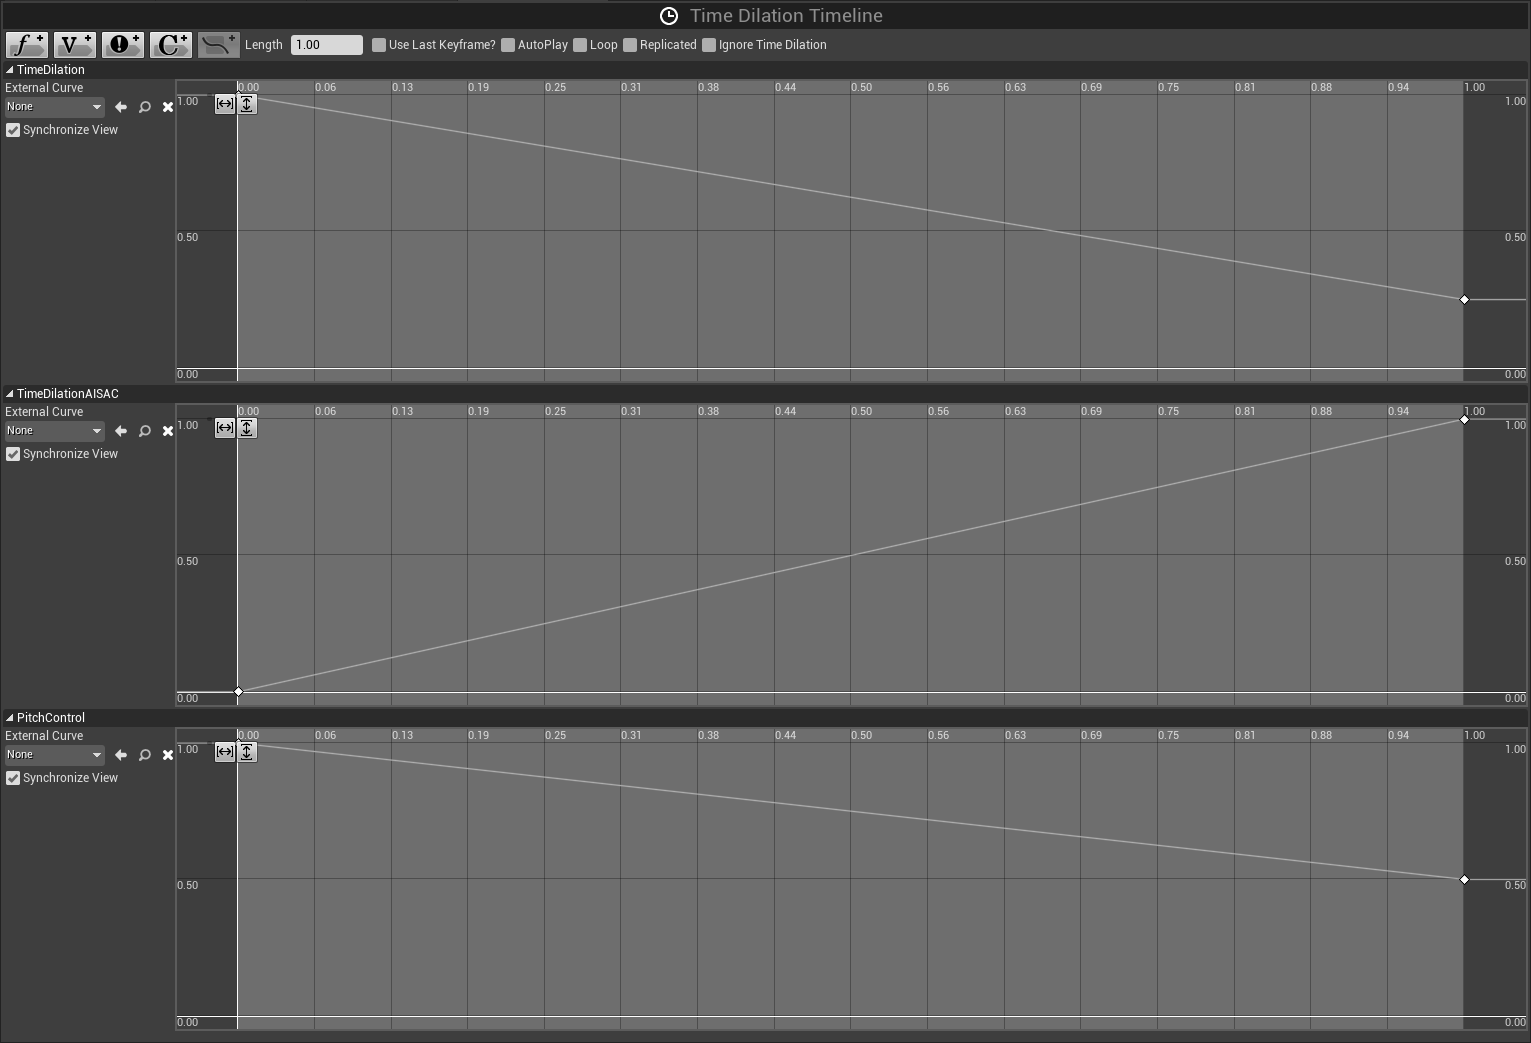
These toggle states then control the playback of our Timeline. A Timeline is a handy feature for smoothly transitioning between values over time (very similar to AISAC in ADX2!). By using the Play and Reverse inputs, we can control whether the Timeline reads forwards or backward. Since we need slightly different values for each use-case, we can create several Float tracks, which we should name accordingly.
The first controls the actual “Time Dilation” effect of our game, going from 1 (normal) to 0.25 (quarter speed). The second controls our “Time Dilation AISAC” curve, which corresponds to the curves we created in Atom Craft (this goes from 0 to 1). Our last curve, “Pitch Control,” controls the pitch of our footsteps’ playback. For this, we could use the same curve as our time dilation, but such low values are often a bit too extreme for pitch shifting. These all run for up to 1 second, which is set via the Length parameter.
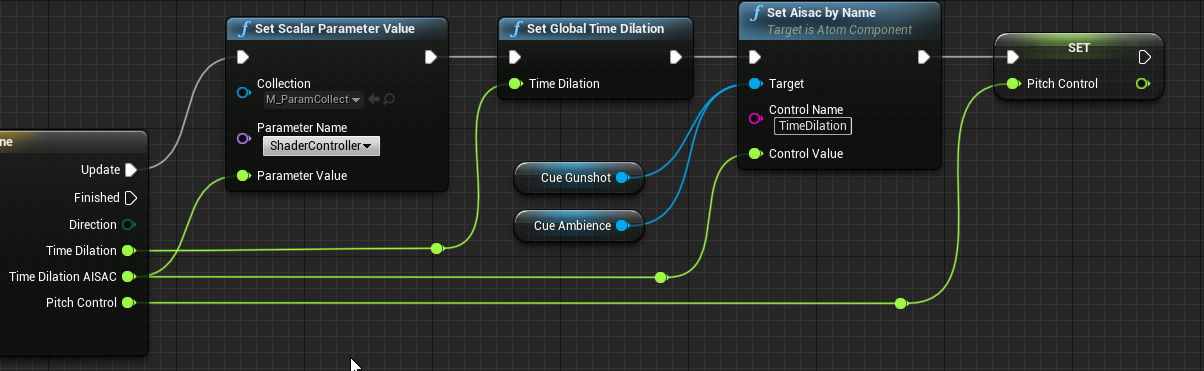
The Set Scalar Parameter and Set Global Time Dilation functions aren’t important for our audio purposes. However, to briefly summarize, the first controls the radial blur on the screen to give the player a visual cue, and the second is a simple yet powerful function that controls the overall game speed.
The Set Aisac by Name function is the important one for us. This function expects references to our Cues (Atom Components) as Targets, the name of our AISAC Control under Control Name (which we set in Atom Craft as “TimeDilation”), and a Control Value float to control our AISAC. The last action sets a float called “Pitch Control,” which we will access later when we implement our footsteps.
Gunshot
Since the logic for gunfire playback is already included in the template, we can switch out the UE4 playback with our CRI Atom playback, using the Cue_Gunshot component as the Target (this can be dragged from the Components tab). We just need to ensure that Auto Activate is disabled in the Details tab, or else the sound will trigger when the game starts.

Footsteps
To trigger our footsteps, we can open up the FirstPerson_Run animation, and create some Anim Notify events on the Notifies timeline. If we right-click this Timeline→Add Notify…→PlayAtomCue and set the Sound in our Details panel to Footsteps, we can quickly and easily trigger synchronous playback.
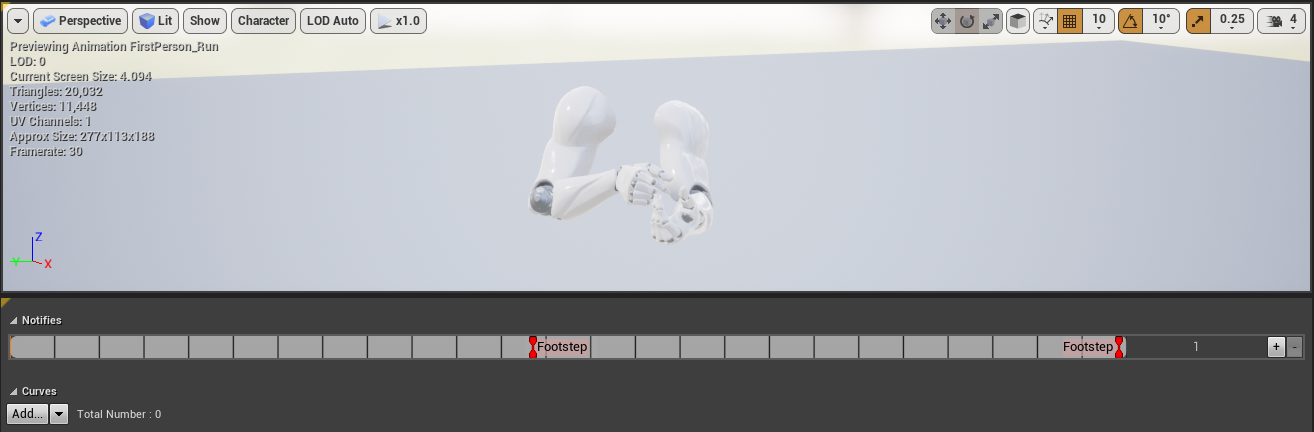
However, this won’t allow us to change the pitch based on the Pitch Control we set earlier. Instead, we can create our own Anim Notify! In the Content Browser, right-click→Create Basic Asset→Blueprint Class and search for Anim Notify under the All Classes tab. Name as appropriate, open it up, and in its Received_Notify function, create a Blueprint as below.

This Blueprint gets the Pitch Control float we previously set from our First Person Character and applies it to our Play Sound at Location function. From the dropdown next to Sound, we can select our Footsteps Cue to playback. Finally, by going back to our FirstPerson_Run animation, we can easily replace the Anim Notifies we previously created by right-clicking them and selecting Replace with Notify…
The result is a convincing prototype that offers the ability for further expansion. Using a mix of real-time audio manipulation tricks, we have created a dynamic and responsive system that gives the player auditory feedback for changes in game states.