Tips for Efficient Bouncing in Atom Craft
Following on from this month’s featured blog:
https://blog.criware.com/index.php/2018/12/17/granular-synthesis-in-adx-2/
Hardware limitations may prohibit the use of real-time granular synthesis, or may simply require extra voices that we would rather not spend. Fortunately, Atom Craft’s Bounce feature allows us to still harness the creative utility of granular playback, with the added benefit of allowing us to choose the best takes. To find out more about the specific details of how bouncing works in Atom Craft, check out one of our earlier blogs: https://blog.criware.com/index.php/2018/03/27/bouncing-cues-in-atomcraft/
Since the length of our Cue won’t match its audible length (as we have created our own custom envelope), we need to use a slightly different workflow to efficiently bounce our sounds out. This approach is also handy outside of granular synthesis, where you want to automatically render out many random variants, rather than manually bouncing Cues one-by-one.
So here is a quick workflow tip for batch rendering and easy editing:
- Set TimeBase to Bars/Beat, and leave it at default 120bpm 4/4
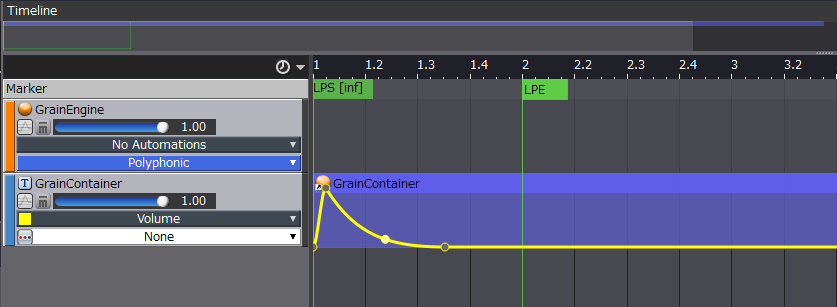
- Add loop markers to surround the audible part of the Cue, ending on a bar
- Select Bounce->Bounce Settings… from the toolbar, and untick “Use Cue Length”
- Set a desired “Max Bounce Time” (Bouncing can be stopped early, so feel free to set it high)
- With Cue selected, select Bounce->Cue Bounce from the toolbar
- Click “Stop” on the Bounce Settings window, when you feel you have enough takes, or let it continually bounce until the Max Bounce Time is reached.
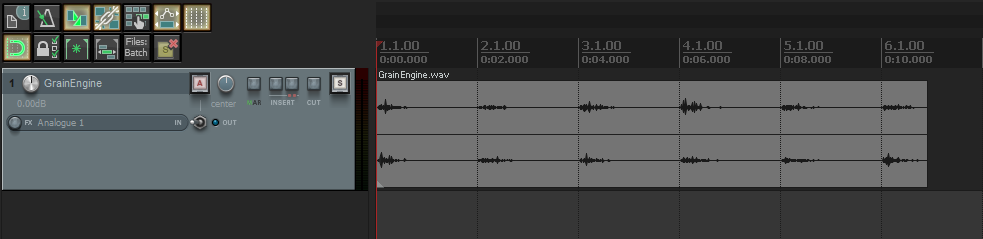
You should now have a .wav file with the same name as the Cue that you bounced. Drag it into your Audio Editor of choice, and if it defaults to 120bpm 4/4 as most do (which is also the default for Atom Craft), you should now have an audio track with individual sounds which line up perfectly with the beat.
If you are using Cockos Reaper, for example, there is an Action called “Item: Split items at timeline grid”, which makes the task of cutting it up even easier. You can then select all the items and render using the “Selected media items”, picking the best ones for use in your project. You could even reprocess the sounds using your own plugins and effects.