

Distance-based effects for voices [Part 2]
In the first part of this tutorial, we prepared an ADX Cue Sheet that includes both voice and noise Cues. In this second and final part, we will explore how to import it into Unreal Engine and implement distance-based effects using Blueprints.
Importing a Cue Sheet
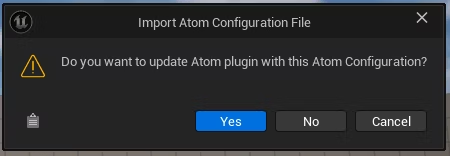
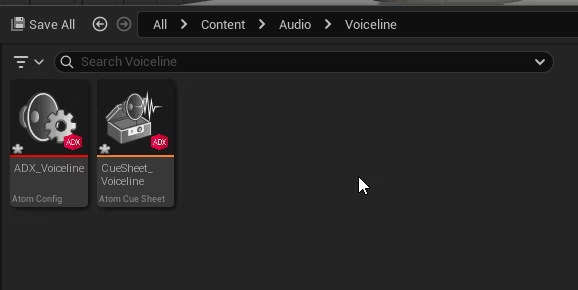
To add the binary Cue Sheet to your game project, import the .acb and .acf files that were built into the content drawer (content browser).
The .acf file contains all the Atom Craft project information. When importing, you will be asked if you want to update the Atom plug-in with the Atom Configuration contained in this file; press “Yes”.
You can easily verify that the Cue Sheet was successfully imported.
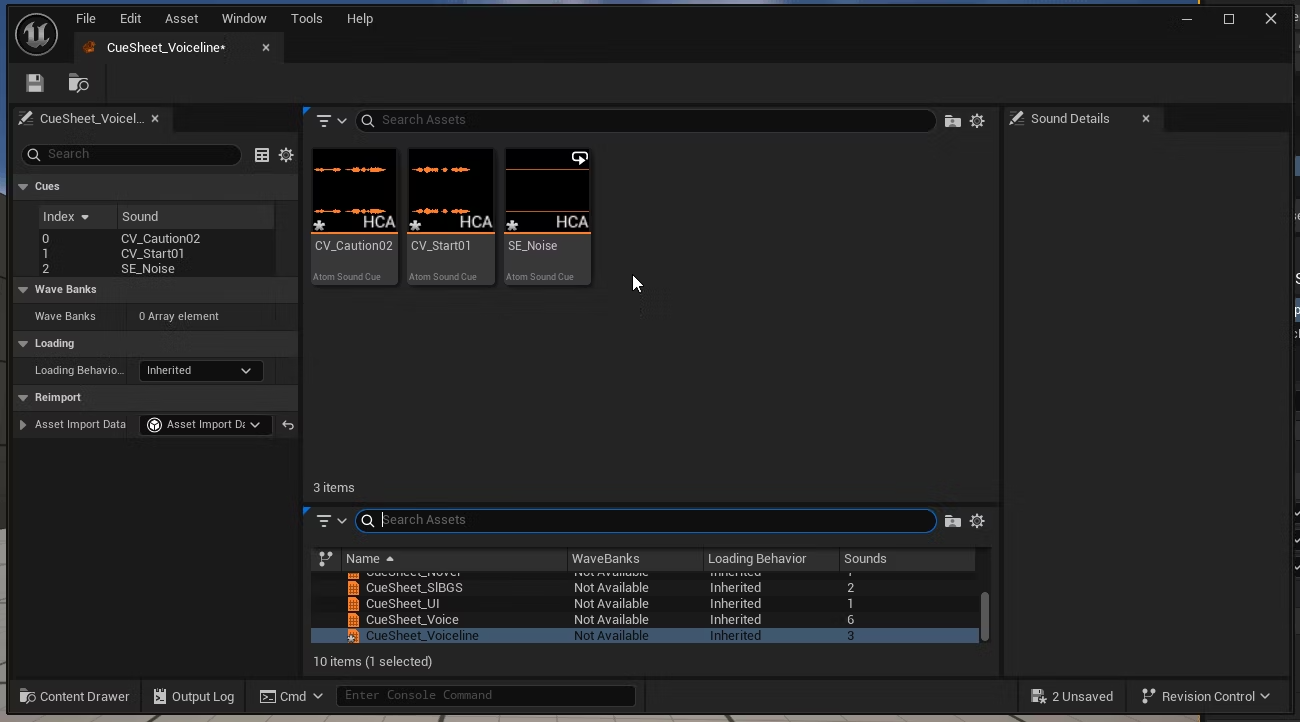
When you inspect the content of the Cue Sheet, you will see the 3 audio Materials we added in the previous post. (Note that if you didn’t change the settings, they will have been encoded using our proprietary audio codec (HCA)).
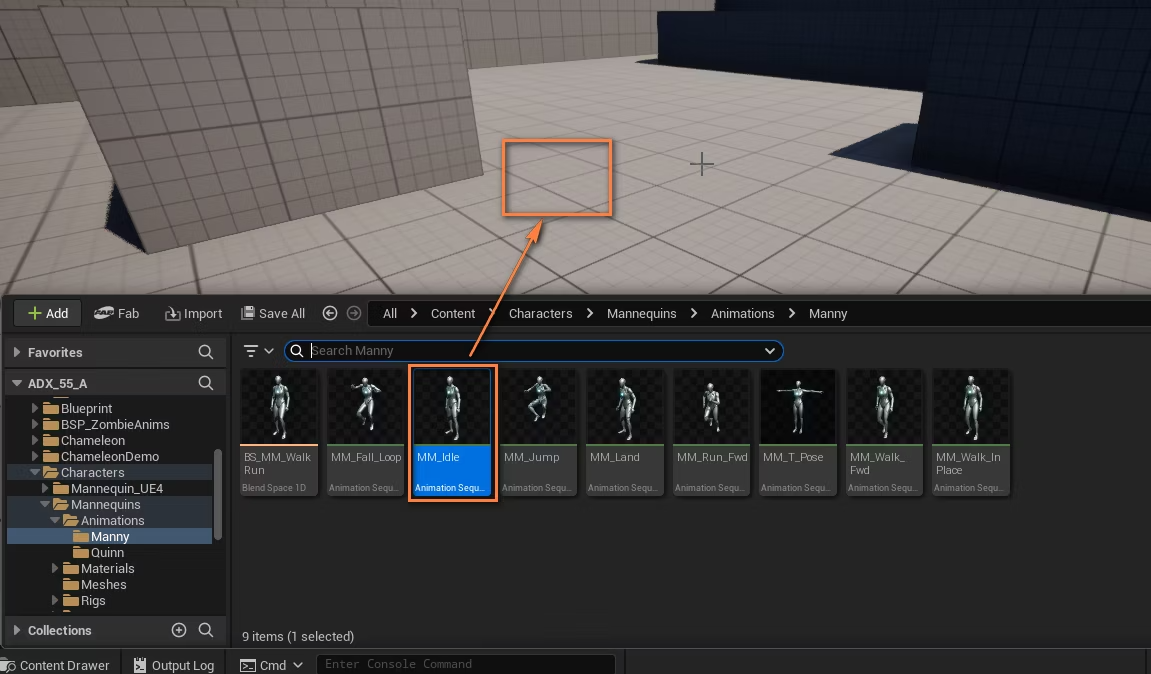
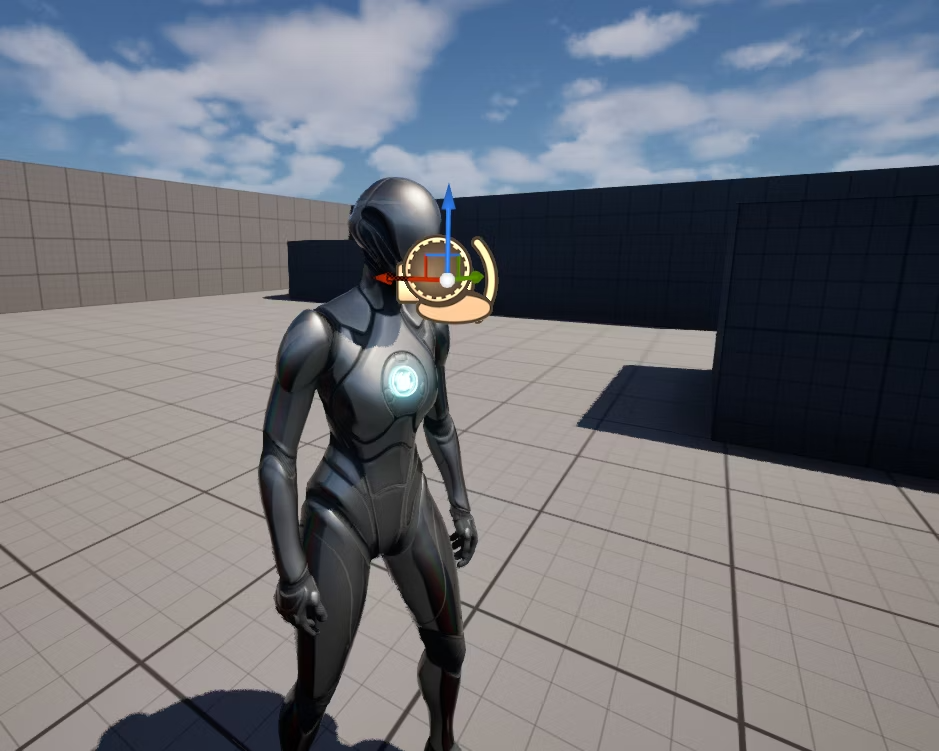
Now we need to add a test character. Place the mesh where you want in the level. This is where the audio dialog will be played from.
Preparing the Blueprint for the voice
Let’s create a simple Blueprint Actor to play the voice. To do that, right-click in the Content Browser and select “Blueprint Class”.
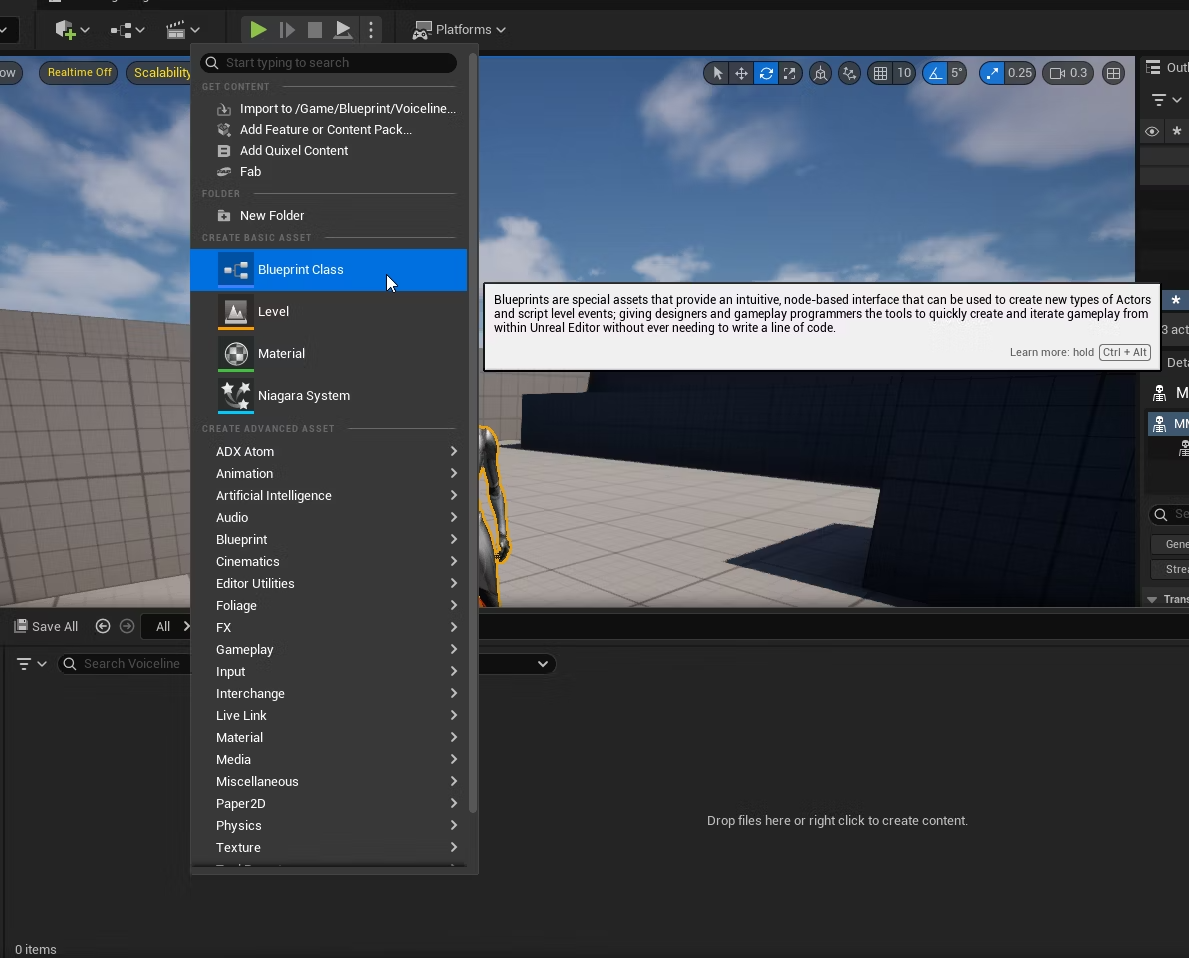
Set the parent class to “Actor”.

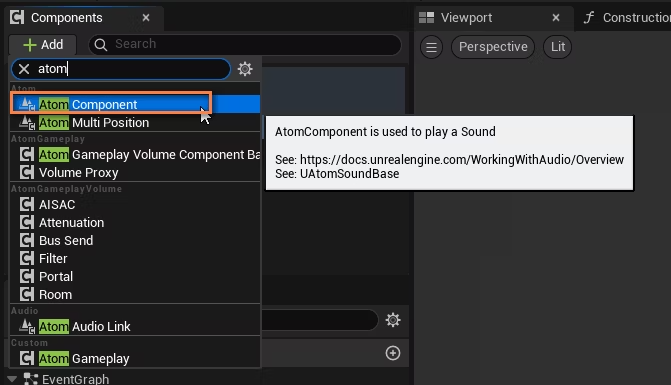
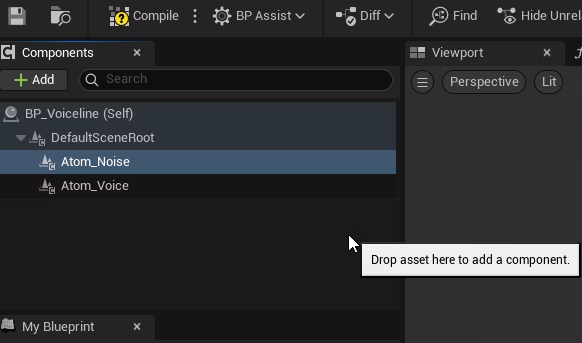
Open the actor and add an Atom component.
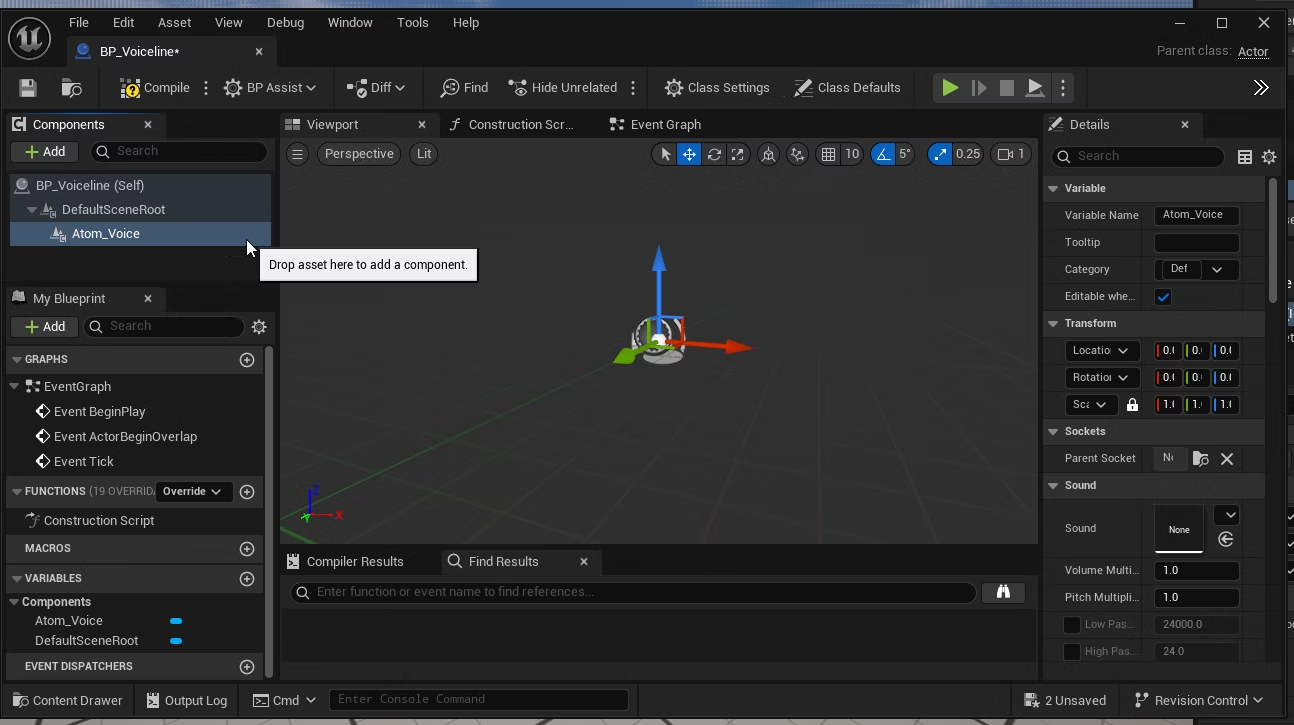
Specify the sound to be played: this is an initial value that can be changed at runtime.

For testing purposes, set the Loop Settings to “Loop” in the Details panel.
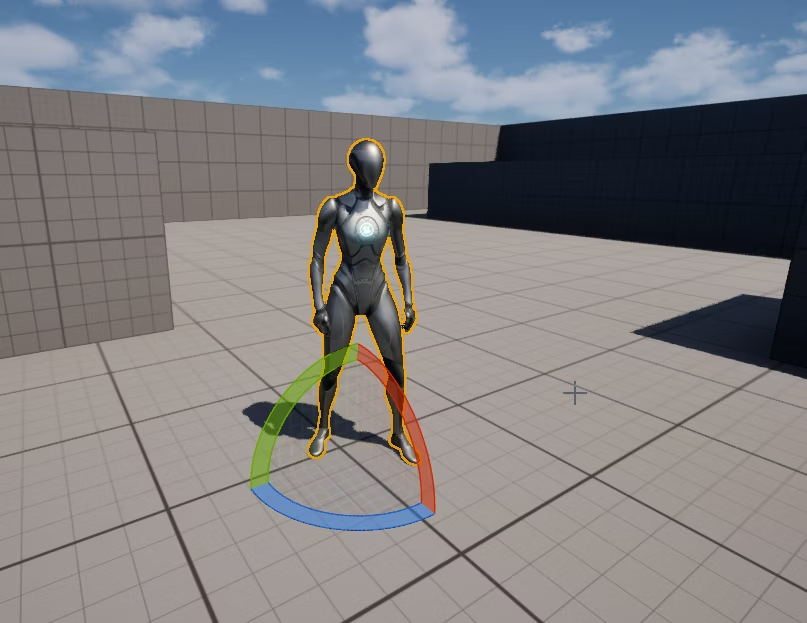
Now you can place the Actor in the level and position it over the character’s mouth.
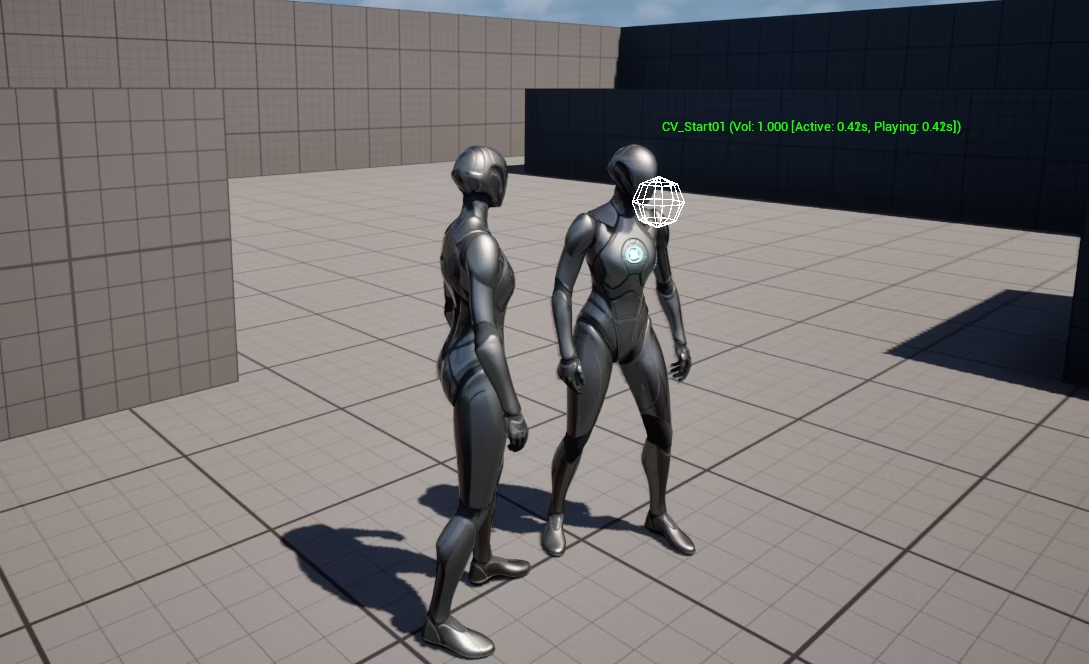
If you run the game at this point, you should be able to hear the character talking.
Setting the distance attenuation
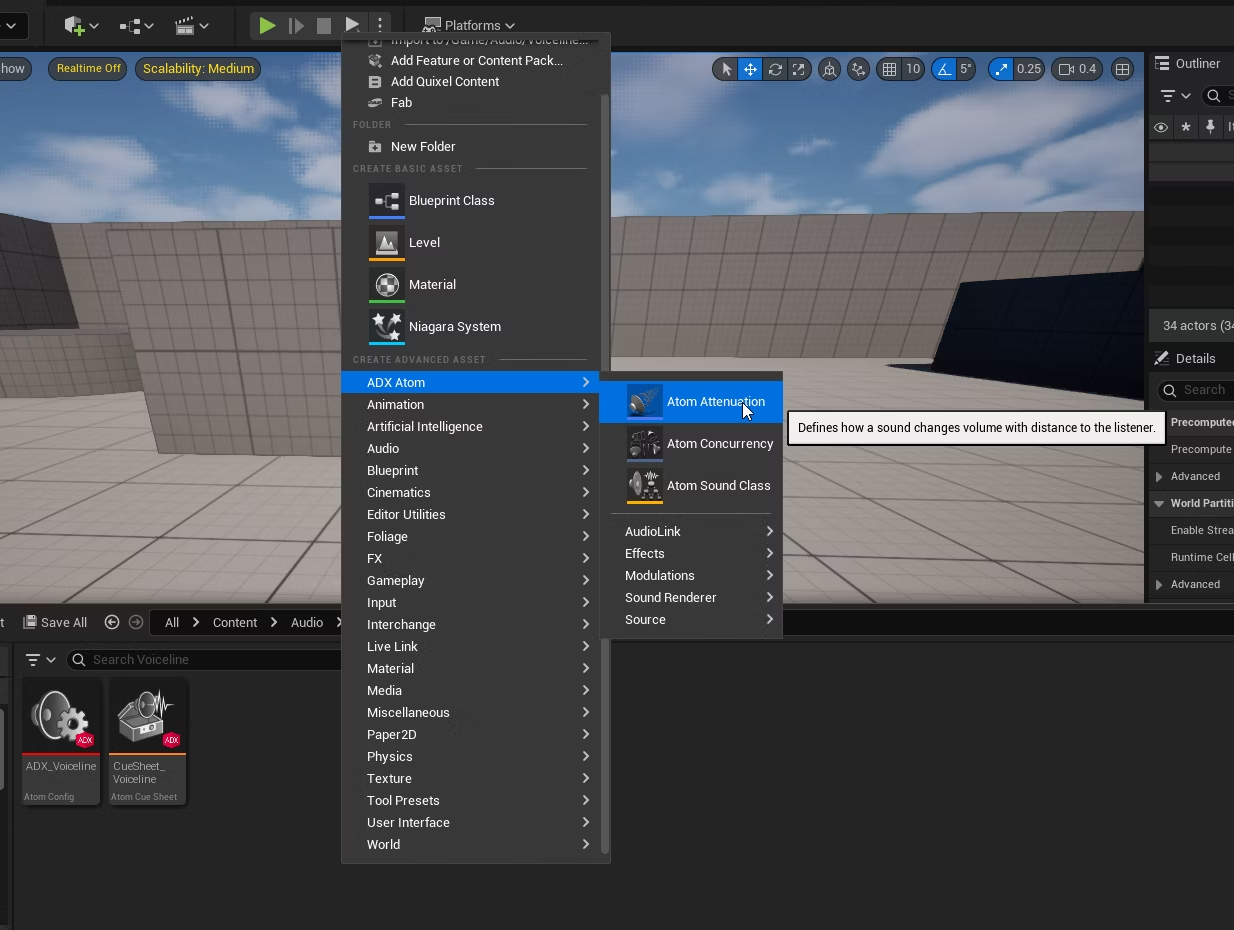
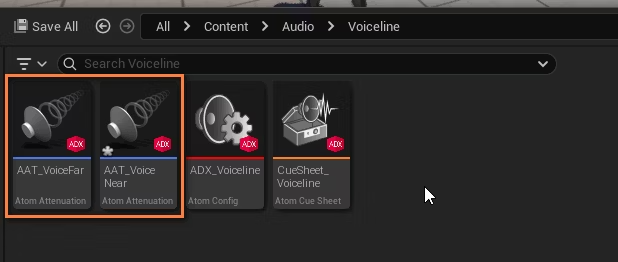
In order to apply distance attenuation to the sound, right-click in the Content Browser and select “ADX Atom” → “Atom Attenuation”. The attenuation curve that is created will determine how the volume of the sound source changes as a function of its distance from the listener.
Although you can create a custom distance attenuation curve tailored to your specific requirements, in this case, we will keep the default settings
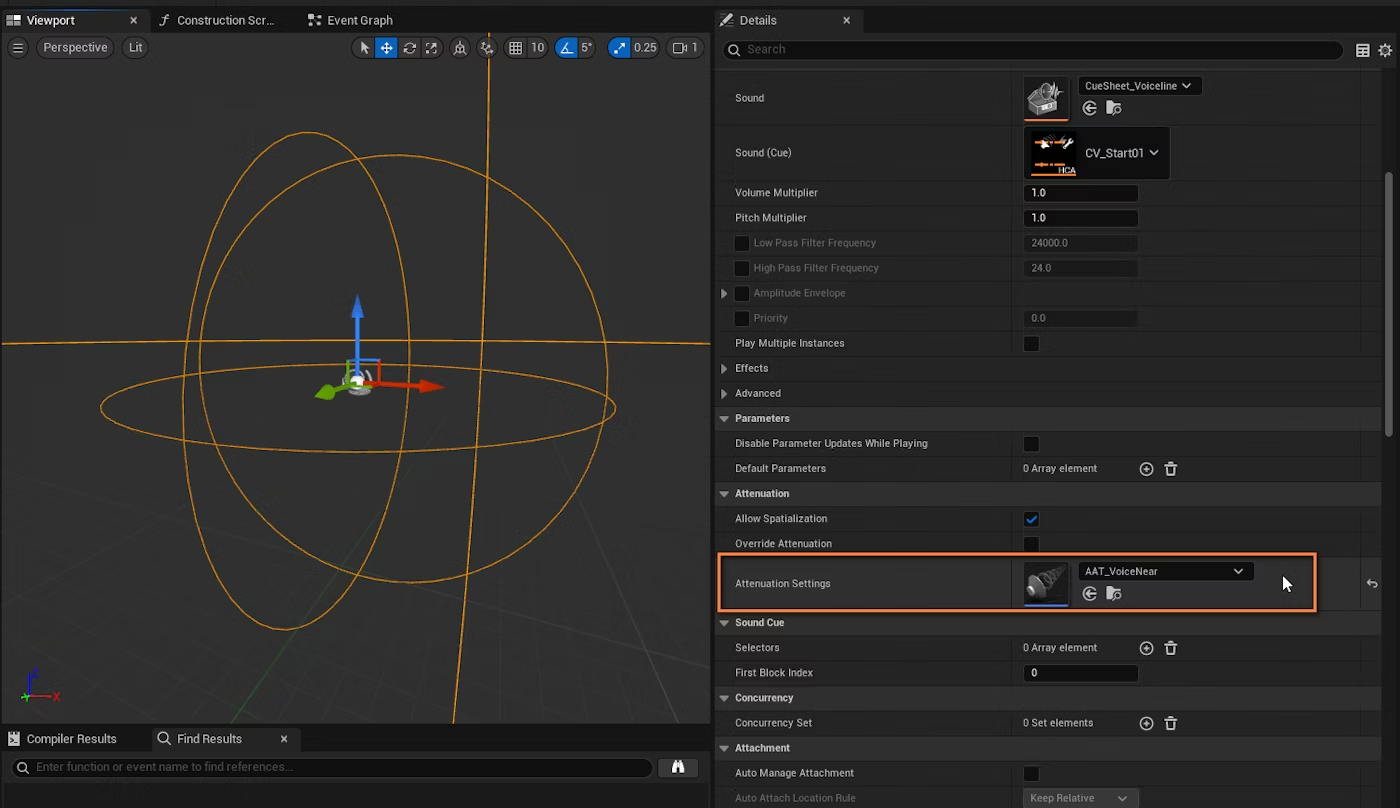
Next, you need to specify the newly created file in the Attenuation Settings of the Atom component.
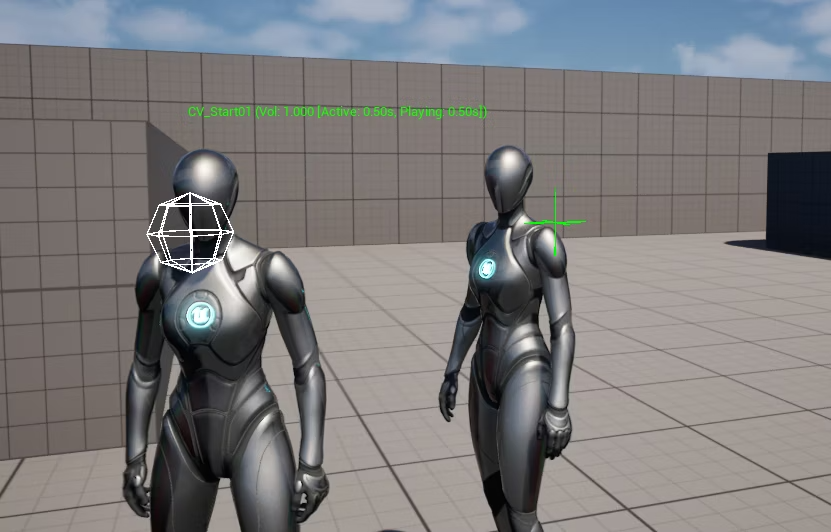
As you move around the character or move the camera, you will now notice the distance attenuation taking effect.
Adding noise over the threshold distance
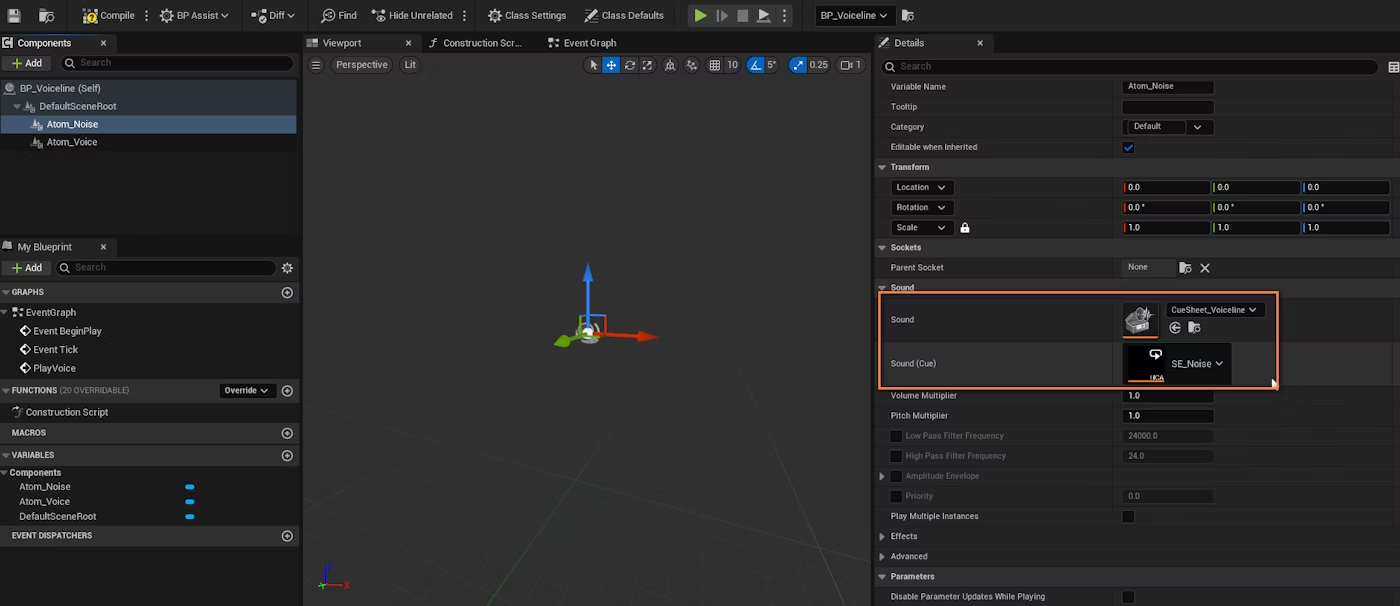
Next, we want to monitor the distance between characters, and when it reaches a given threshold, start playing some noise at the same time. To achieve this, let’s first add a new Atom component for the noise.
As expected, we specify the noise Cue.
We uncheck “Auto Activate” so it will not start playing automatically.

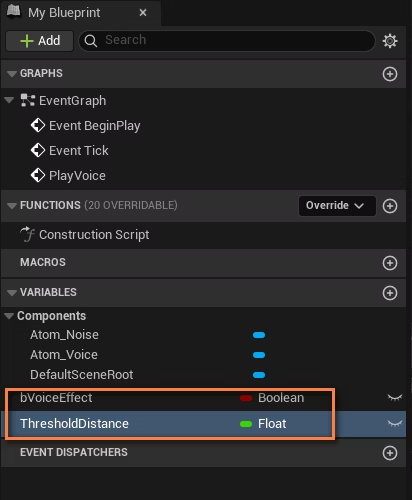
It is time to go to the Event Graph and add a couple of variables:
• ” bVoiceEffect “: Boolean type. It will determine whether we need to apply an effect.
• ” ThresholdDistance “: Float type. This value determines from what point the effect must be applied.
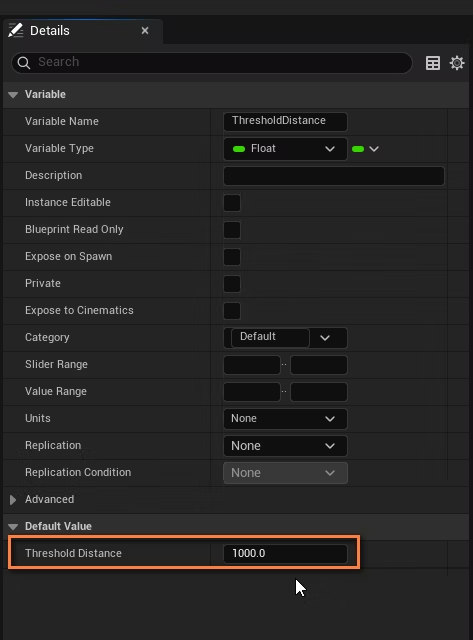
Compile and specify an initial value of 1000 for ” ThresholdDistance “, which corresponds to 1000 units (10 meters).
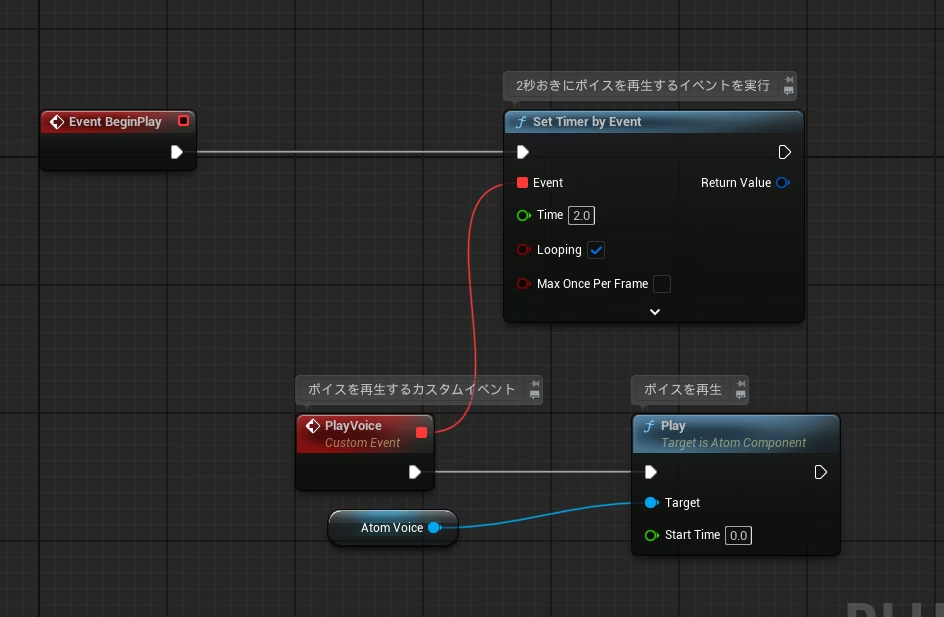
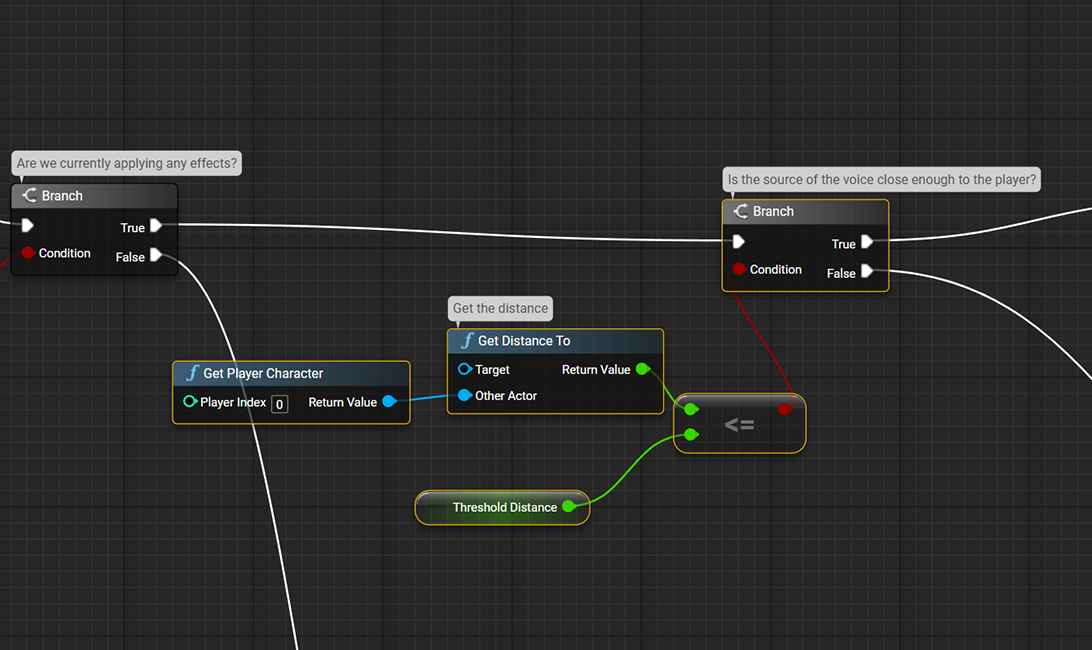
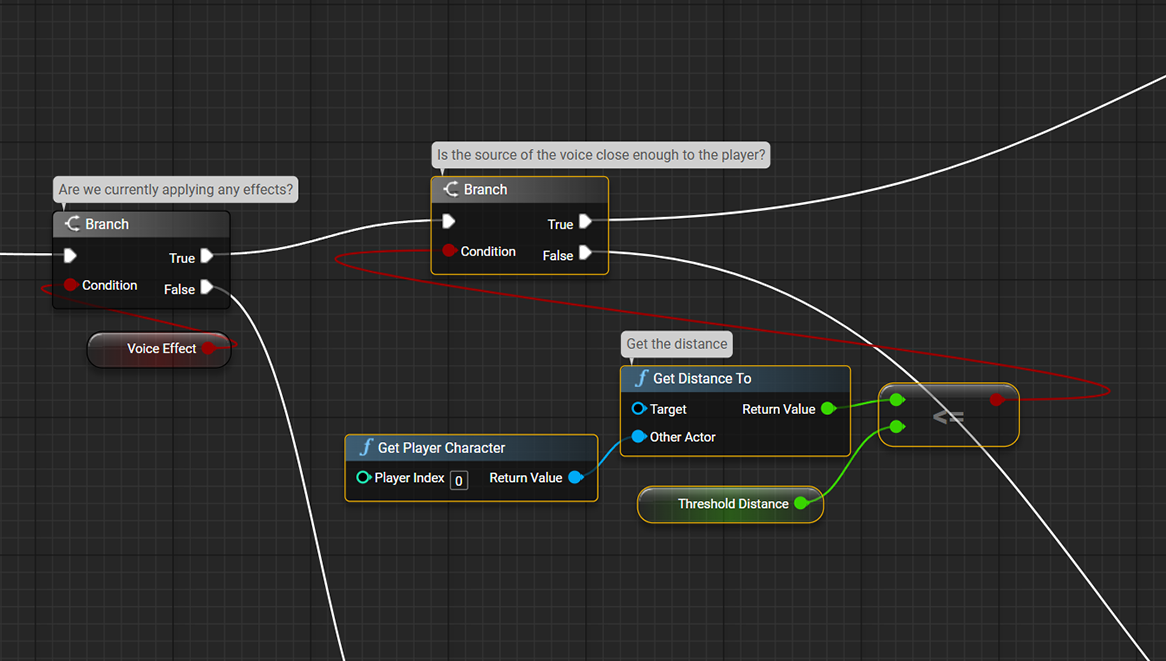
In the Blueprint, the processing begins from the Event Tick. First, the distance is branched depending on whether an effect is applied or not.
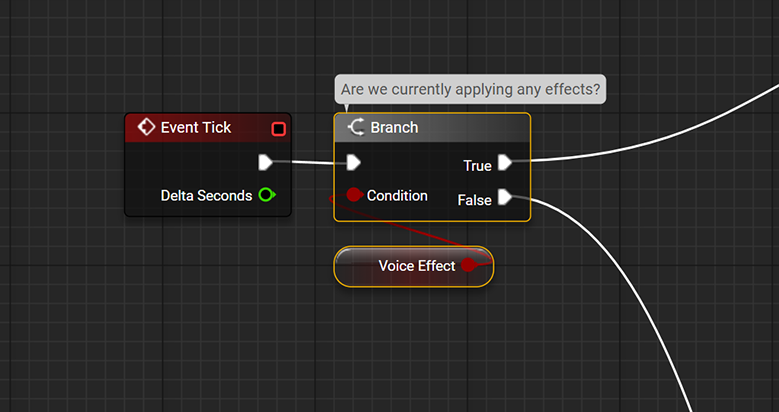
On the “False” side, we first determine whether the distance is greater than a certain amount.
If the distance is high, “bVoiceEffect” is set to True and the noise sound is played.
If “bVoiceEffect” is True, we check whether the distance is still long enough.
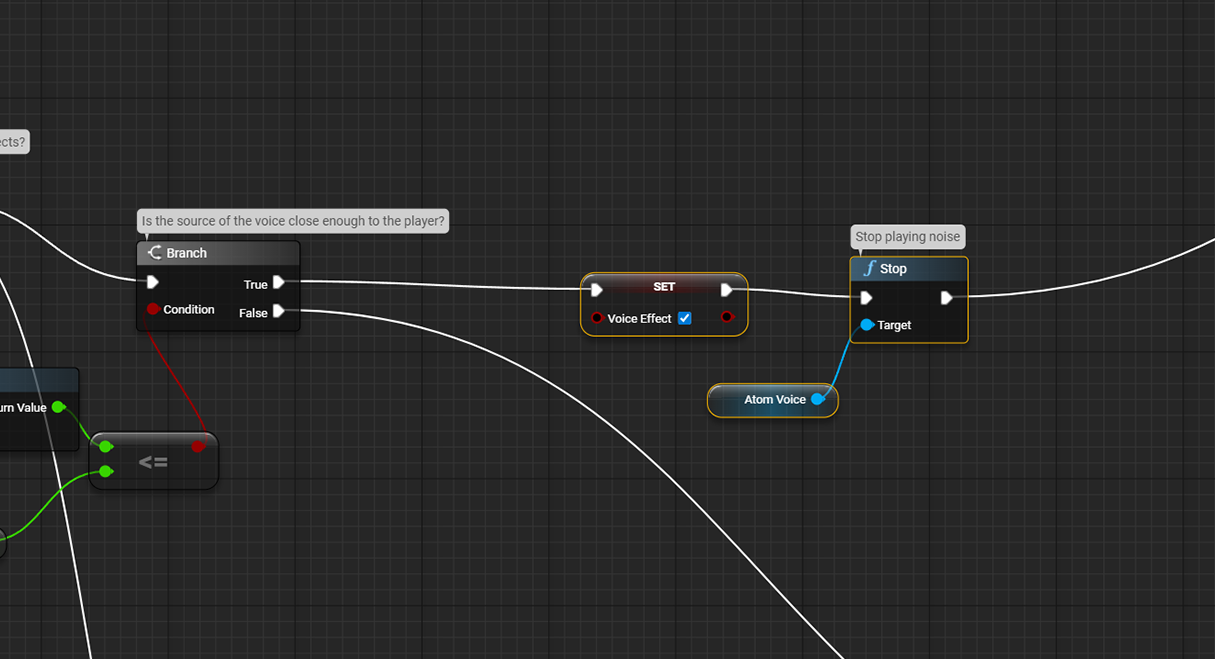
If this is a short distance, we set “bVoiceEffect” back to False and stop the noise.
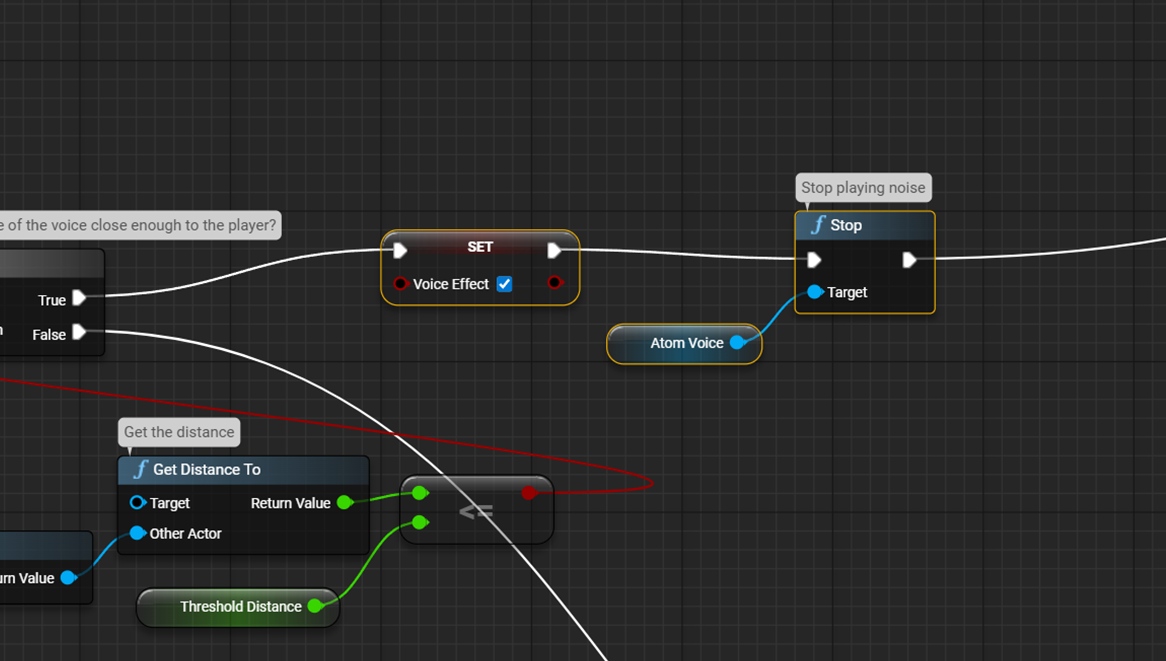
The overall event graph looks as depicted below.

If you play the game in this state, when the characters move away from each other, noise will be added to their voices. When they get closer, the noise will stop.
Applying an effect based on distance
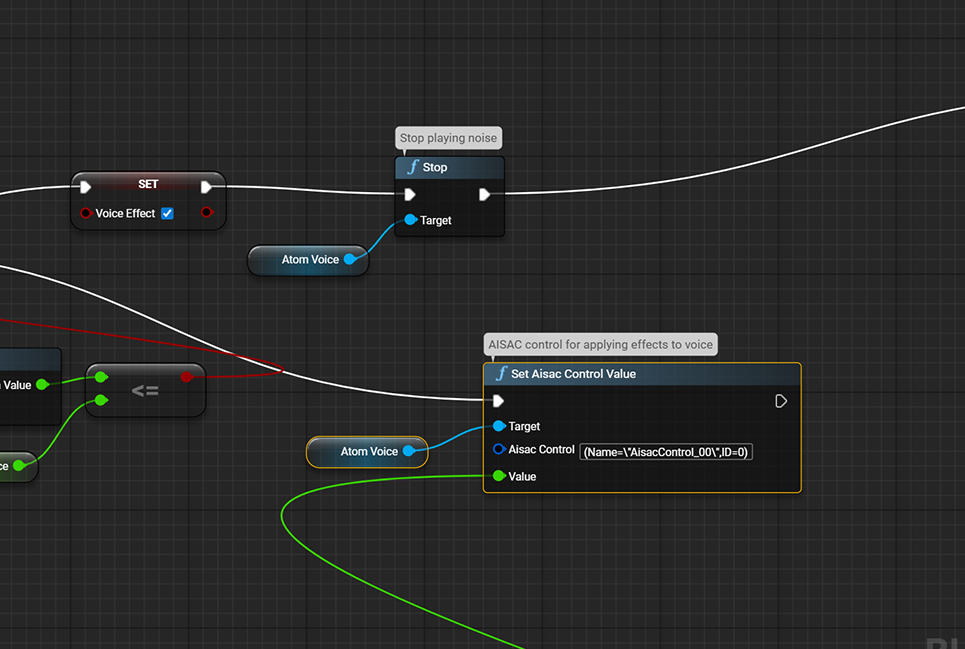
Using AISAC control, we can implement a system where the voice becomes gradually harder to hear as the distance increases.
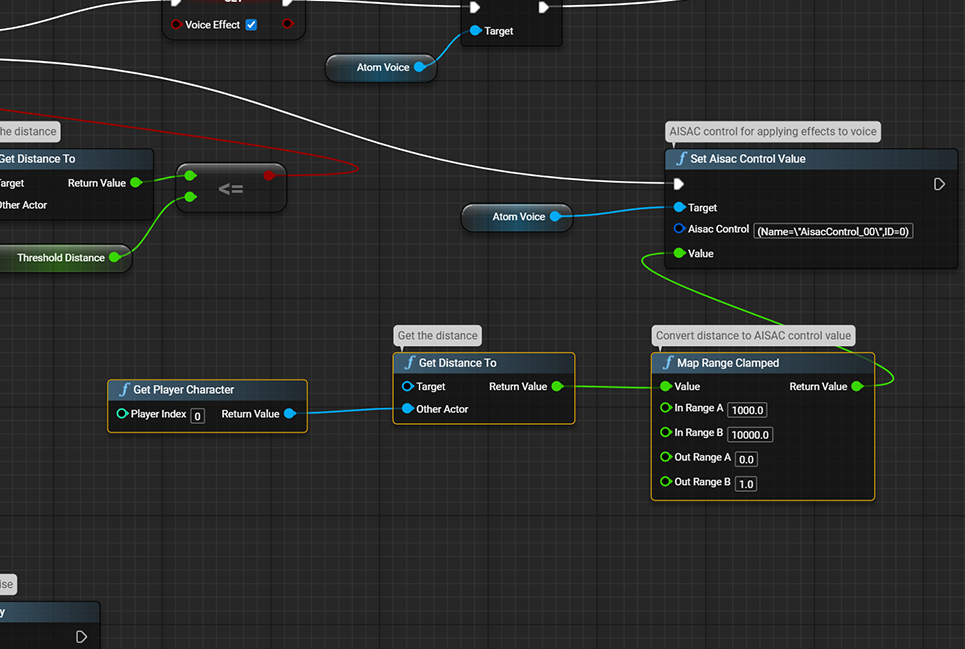
When “VoiceEffect” is True, meaning the characters are far apart, and the Branch node is False, meaning the distance remains far, we use the AISAC control (using Set Aisac Control by Name node).
We map the effect to the distance so that it is maximized when the distance exceeds 10,000 units. The Map Range Clamped node is
useful for converting a distance from 1000 to 10,000 units to an AISAC control value from 0.0 to 1.0. The value assigned to “Value” is returned as a numerical scale from “In RangeA to B” to “Out RangeA to B.” By connecting this value to the “Value” of the Set Aisac Control by Name node, we get an AISAC control value based on the distance.
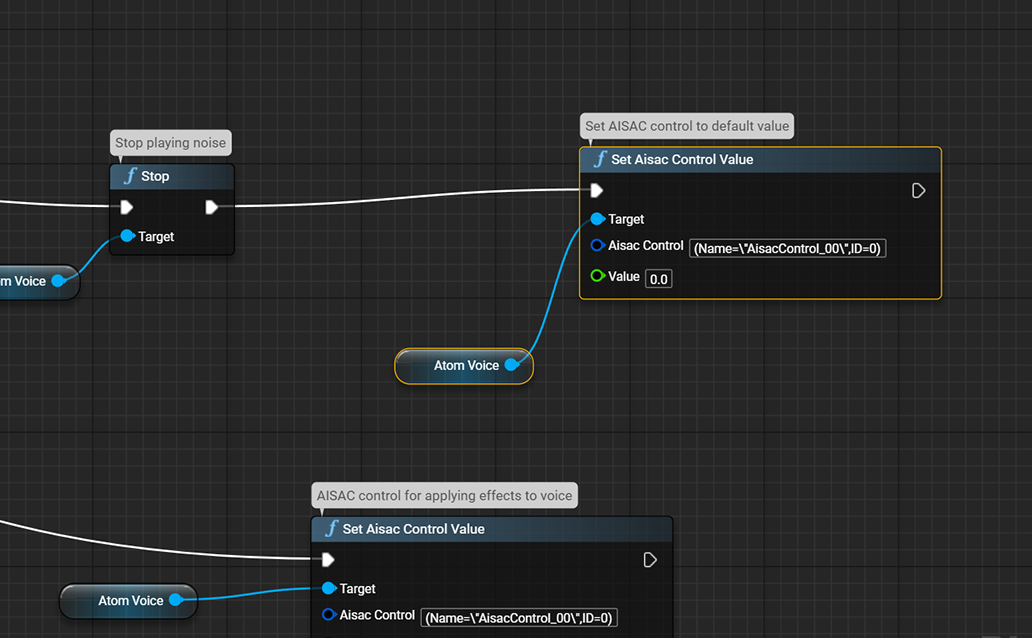
A good practice is to reset the AISAC control value of the voice effect to “0.0” when turning off the noise. (This time, the AISAC control value is fluctuating between “0.0 and 1.0”, but if the minimum value were different, we would definitely need to reset it).
Hearing voices without distance attenuation no matter where you are may feel unnatural, but it is sometimes necessary in a game. By adding some light audio effects and artifacts, the designer can make it clear to the player that the character speaking is actually transmitting, making it more natural.