

Cloth foley
Cloth Foley gives life to character movements in a game. In this post, we will design a dynamic Foley system in Atom Craft, in order to create sounds varying from subtle to powerful.
Assets Creation
In this example, we will create two types of sounds that can be layered or used individually. One will simulate a light cloth, while the other will sound coarser and heavier. Of course, you can make as many different layers as you need.
- Take the first cloth and record a slow and continuous movement.
- Then with the same cloth, record faster and more energetic movement.
- Take the second cloth and do the same.
- For each recording, edit several variations that last about 3 or 4 seconds.
Render the files and import them into Atom Craft’s Materials folder.
Implementation
We will start with the first Cue:
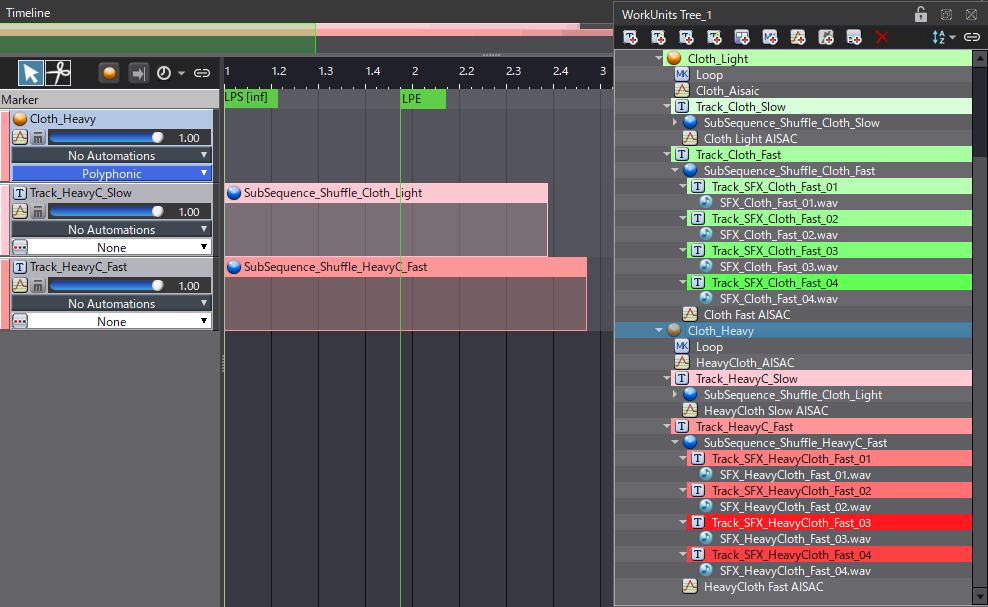
- Create a Polyphonic Cue.
- Set its Voice Behavior to Virtual Voice.
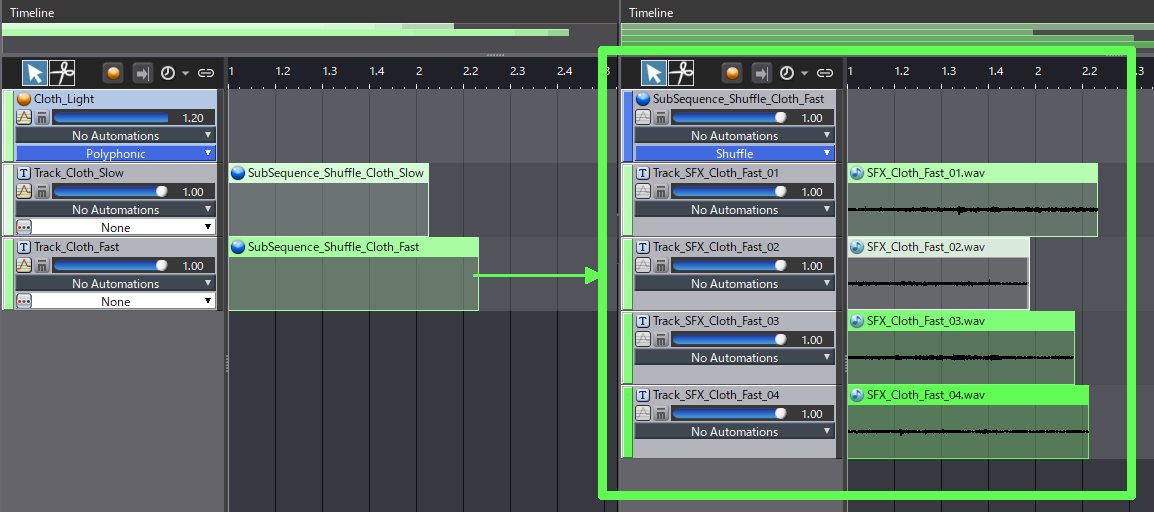
- Create two Tracks, each with a Shuffle Sub Sequence.
- Drag and drop the slower sounds onto the first Sub Sequence and the faster sounds onto the second.
If you trigger the Cue now, you will hear a one-shot sound, but we want to simulate a continuous movement. To achieve this:
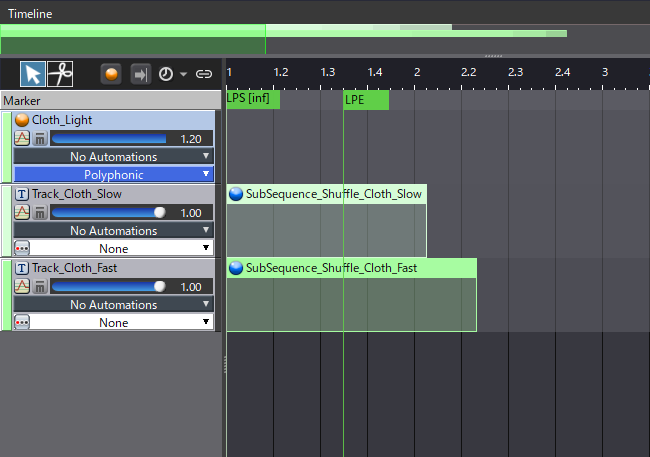
- On the Cue timeline, add a Sequence Loop Marker.
- Make it start at the beginning of the sequence, with the loop point set to about halfway through the shorter Sub Sequence.
The sound should now play continuously, but the loop’s transition must be improved:
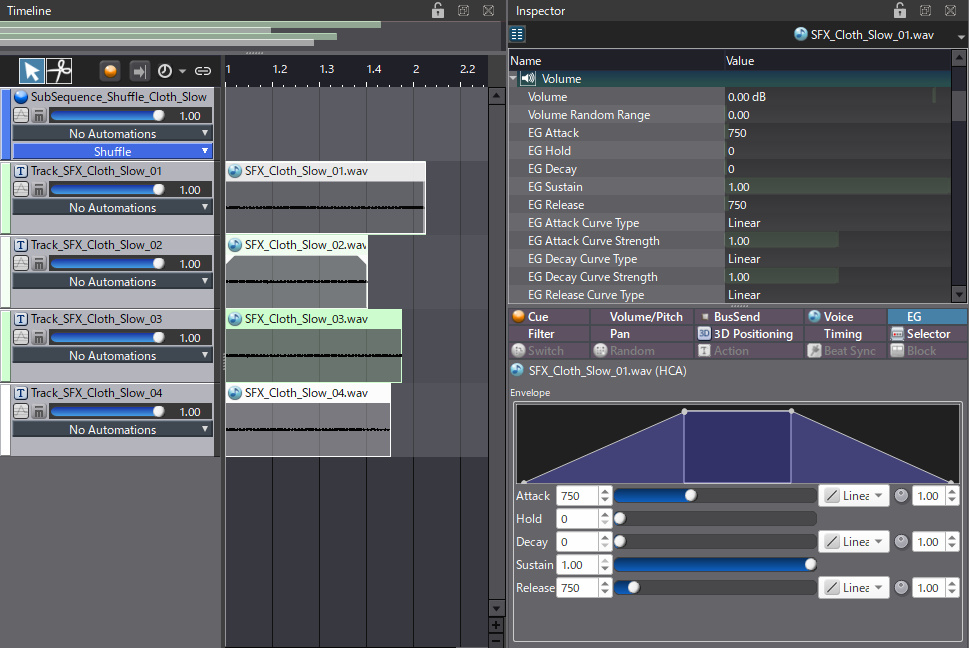
- Switch to the List Editor, and make sure all the Waveform Regions in the Cue are selected.
- Set the EG Attack and EG Release to 750 ms. This ensures that the Waveform Regions will crossfade as the Cue loops, creating smoother transitions.
Now that we have a smooth and continuous sound, we need to add a way to control the speed of the cloth movement by switching from the slow to the fast sounds. We will use an AISAC to do this:
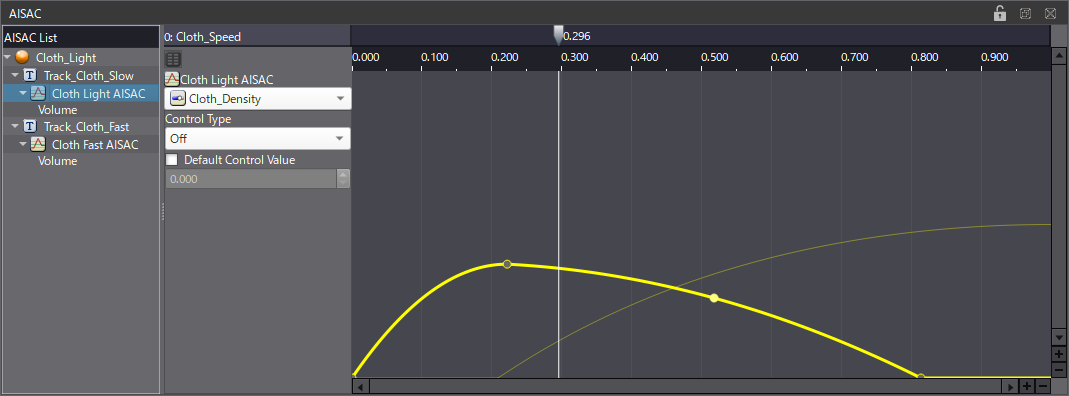
- Create an AISAC Control named “Cloth_Speed”.
- In the Cue, create an AISAC with a Volume graph on both the slow and fast Tracks. Crossfade between the two Tracks. The slow Track should also have a fade-in before it reaches its maximum volume.
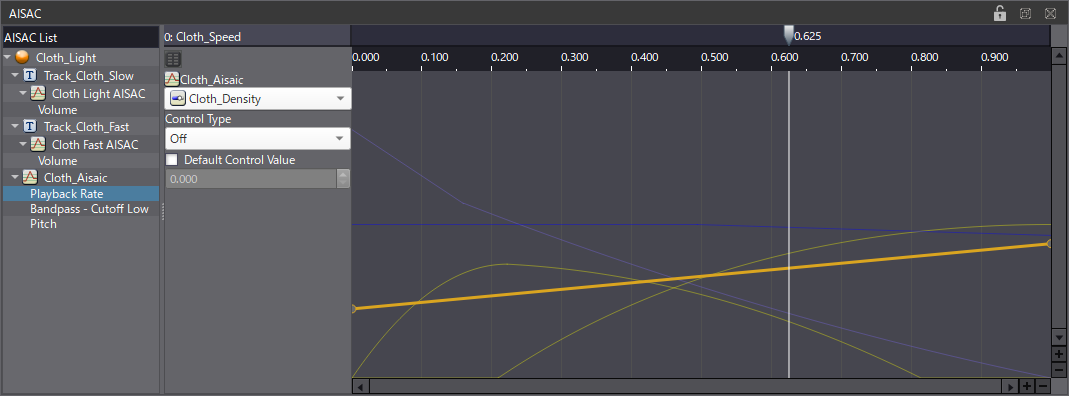
Finally, create another AISAC at the Cue’s level:
- Add Pitch, Bandpass Cutoff Low, and Playback Rate graphs.
- Lower the pitch slightly.
- Use the Bandpass to remove the low end of the slow sound.
- Then, use the Playback Rate to speed up the triggering of the sounds as the value of the AISAC increases.
By moving the AISAC cursor, you should now be able to create more dynamic and natural sounds.
For the second layer, simply duplicate the first Cue, and replace the Waveform Regions:
- Change the length of the Sequence Loop Marker to match the Sub Sequence duration.
- Also, adjust the EG Attack and EG Release of the Waveforms Region.
- Then, edit the AISAC slightly to make sure the transition between slow and fast sounds is still smooth.
- We used the same AISAC Control, but you can of course use a different one if you want to adjust the layers independently.
We just created a dynamic cloth Foley generator! Check out the demo session and try it out for yourself.
 AtomCraft_Project_ClothFoley.zip