

ADX Beginner’s Guide #10 – Categories
Following our introduction to spatialization in the latest post, we will examine how Categories can be used to organize and process groups of Cues.
What is a Category?
A category is a way to group multiple Cues together and control them all at once. Categories can be used to:
- Adjust the volume of all the Cues that belong to them.
- Limit the number of Cues that can play simultaneously within that category.
- Apply AISAC to control all the Cues belonging to a category.
- Use Actions to pause/resume/mute all the Cues in a category.
- Automatically drop the volume of a category when a Cue from another category is triggered (i.e., ducking).
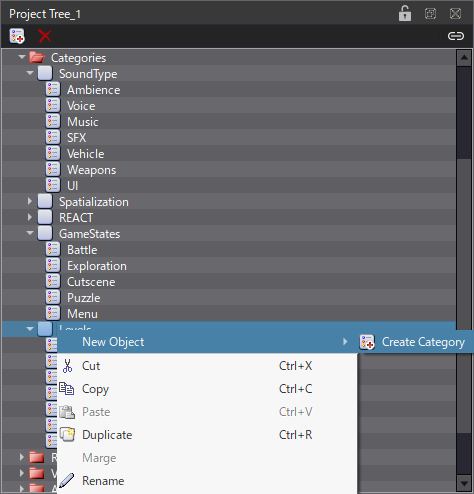
Categories are managed in the Project Tree and are organized into Category Groups (e.g., type of sounds, levels, states, etc.).
- Create a category group in the Categories folder.
- Select the group and create as many categories as you need.
Once the categories are created, you can assign them to Cues:
- Select a Cue.
- In the Inspector, click on the Category property to open the Edit Categories window.
- Tick the categories you want to assign. Only one category from a given category group can be assigned to a Cue.
- Alternatively, you can drag and drop the Cues from the Work Units tree directly onto a category to assign it to the Cues.
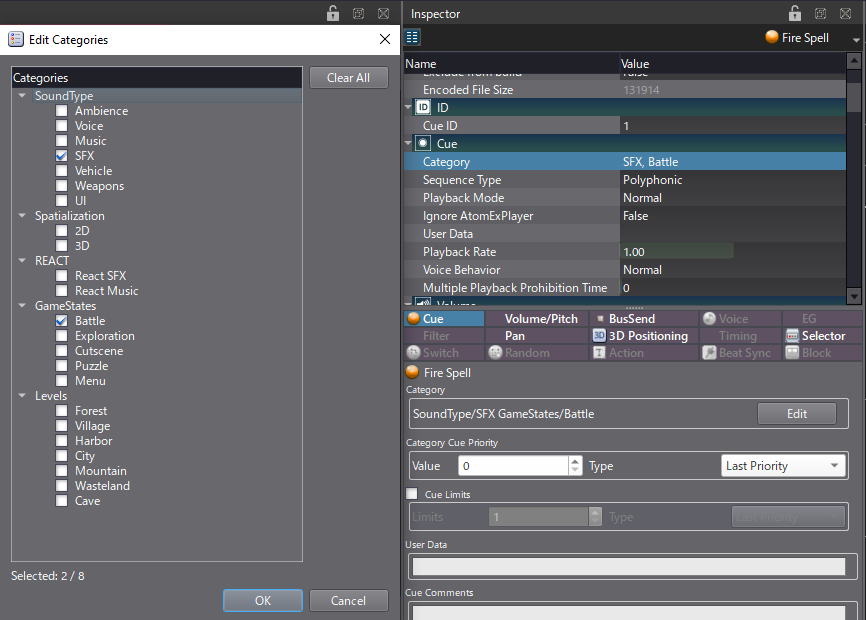
By default, only 4 categories can be assigned to a Cue. However, you can change that limit by editing the Max Number of Categories property of the Global Settings, and get up to 16 categories per Cue.
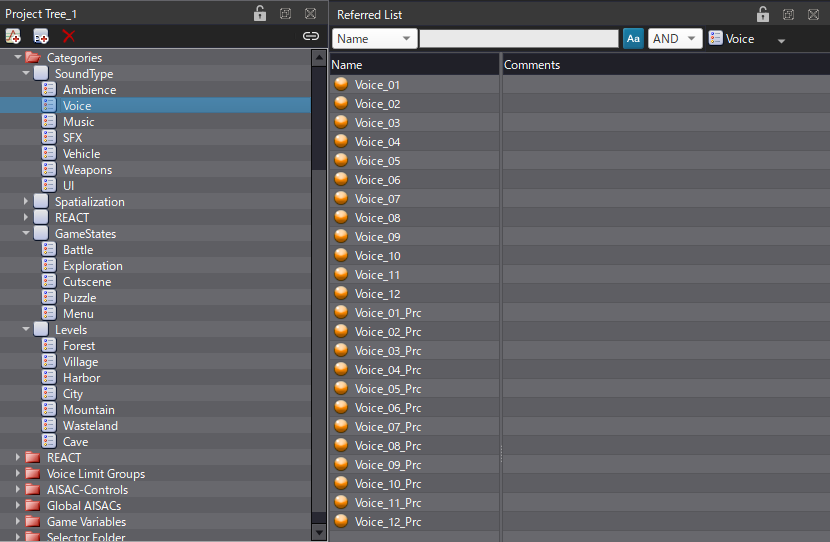
When a category is selected in the Project Tree, the Cues that belong to it are displayed in the Referred List panel.
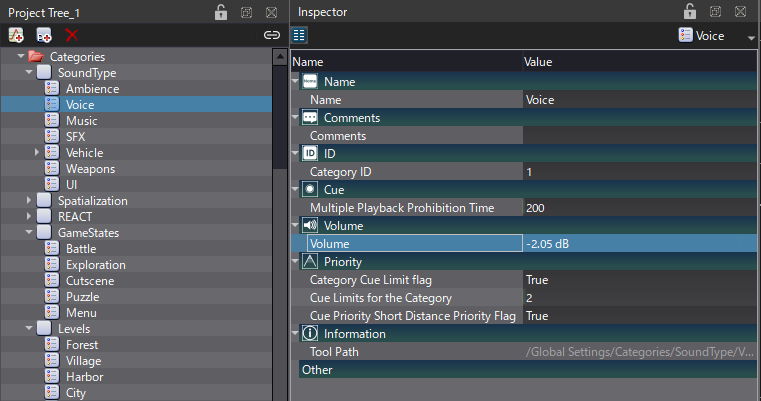
Category settings
As mentioned earlier, a category can be used to adjust the volume of a group of Cues at once. This is particularly useful to balance the volume between different types of sounds (ambiences, voices, music, etc.). As explained in our post dedicated to mixing, changing the volume of a category simply scales the volume of all Cues in that category, unlike using the faders of a DSP-Bus, which acts directly on the audio signal itself. If a Cue belongs to two or more categories, their volumes are multiplied to affect the Cue.
- Select a category.
- Adjust its Volume property in the Inspector.
A category can also be used to limit the number of Cues of a certain type that can be played simultaneously. For instance, if you have a “Music” category you can make sure that only one music Cue is played at any given time to avoid overlapping.
- Set the Category Cue Limit flag to True.
- Set the maximum number of Cues that can play simultaneously by setting the Cue Limits for the Category property.
- In addition, you can use the Multiple Playback Prohibition Time to prevent the Cue from being triggered within a given time window.
- Finally, when set to True, the Cue Priority Short Distance Priority flag will use the 3D positioning of a Cue to ensure that the closest Cue gets priority playback if the Cue Limit is reached.
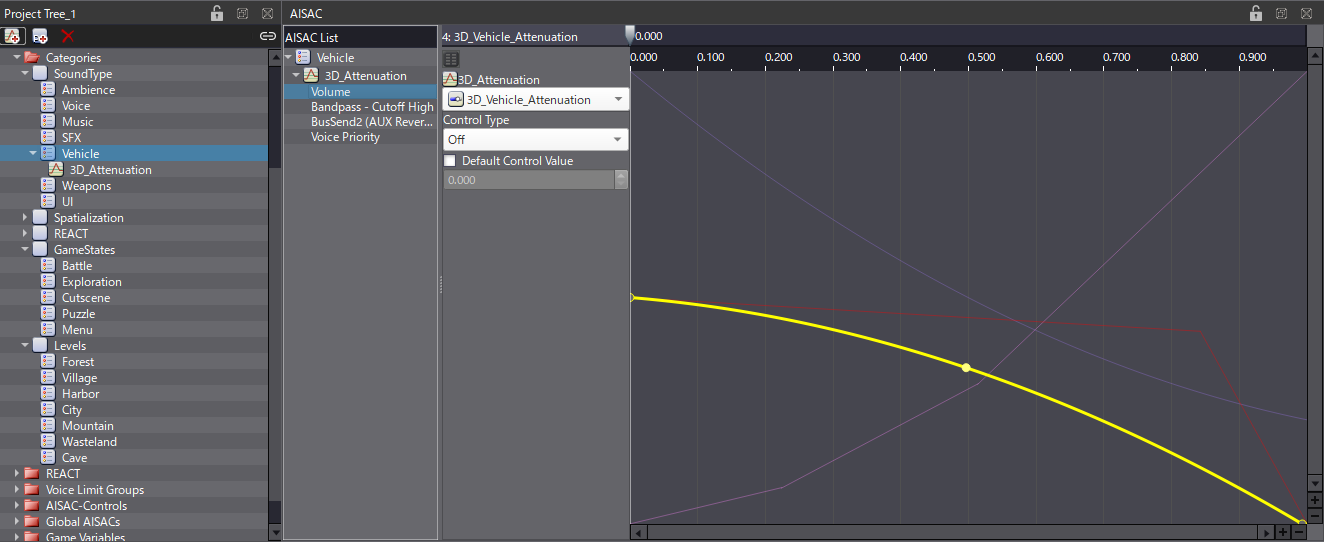
AISACs and Categories
AISACs can also be used with categories. In this case, it means that all Cues belonging to that category will be affected by the AISAC. This is especially useful if you want to apply the exact same attenuation curves (e.g., for 3D sounds) to a particular type of Cue, without duplicating the curves for each Cue. This is, of course, a huge time saver and will simplify your project.
- Select a Category.
- Create the AISAC and select the AISAC Control you want to use.
- Add the AISAC graphs and edit the curves.
As you can see, Categories are a powerful organizational and behavioural tool for groups of Cues. In the next post of this beginner guide, we will see how, used conjointly with the REACT system, they will allow us to adjust the parameters of a group of sounds when a sound from another group is played.