
Advanced Distance Attenuation
Distance attenuation of 3D sound sources plays has a big part in creating convincing soundscapes. While ADX can automatically manage attenuation of its Cues when they are set to 3D, using AISACs allows for the customization of the way the sounds will behave in the game.
Switching Sounds
One of the benefits of using an AISAC instead of the built-in attenuation is the ability to switch sounds based on the distance. This technique is especially useful for loud sounds (explosions, gunshots, vehicles…) as the acoustic properties can be modified over the long distance they travel. Switching sound makes it easier to achieve realistic results than simply adjusting volumes and lowpass filter cutoffs, for instance.
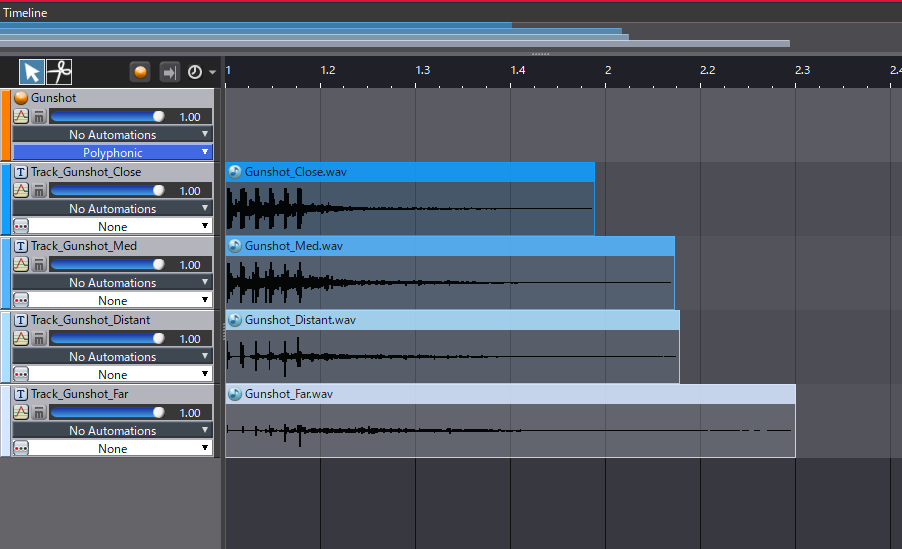
To demonstrate how it works, let’s create a gunshot Cue containing four samples, corresponding to the sounds perceived at increasing distance.
To implement this in Atom Craft:
- Import your four gunshot sounds in the Material folder
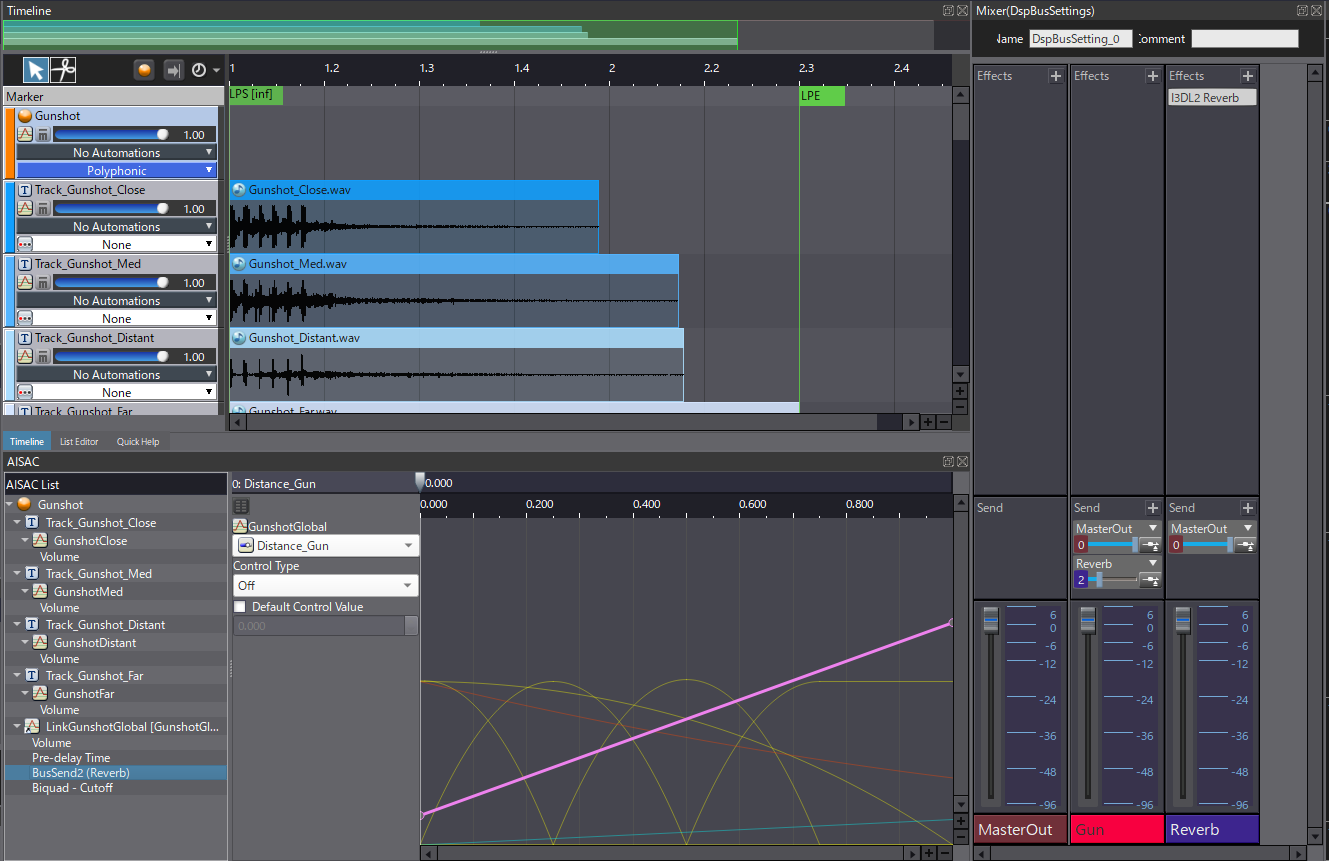
- Create a new Polyphonic Cue
- Create four tracks and drag & drop one gunshot sound per track
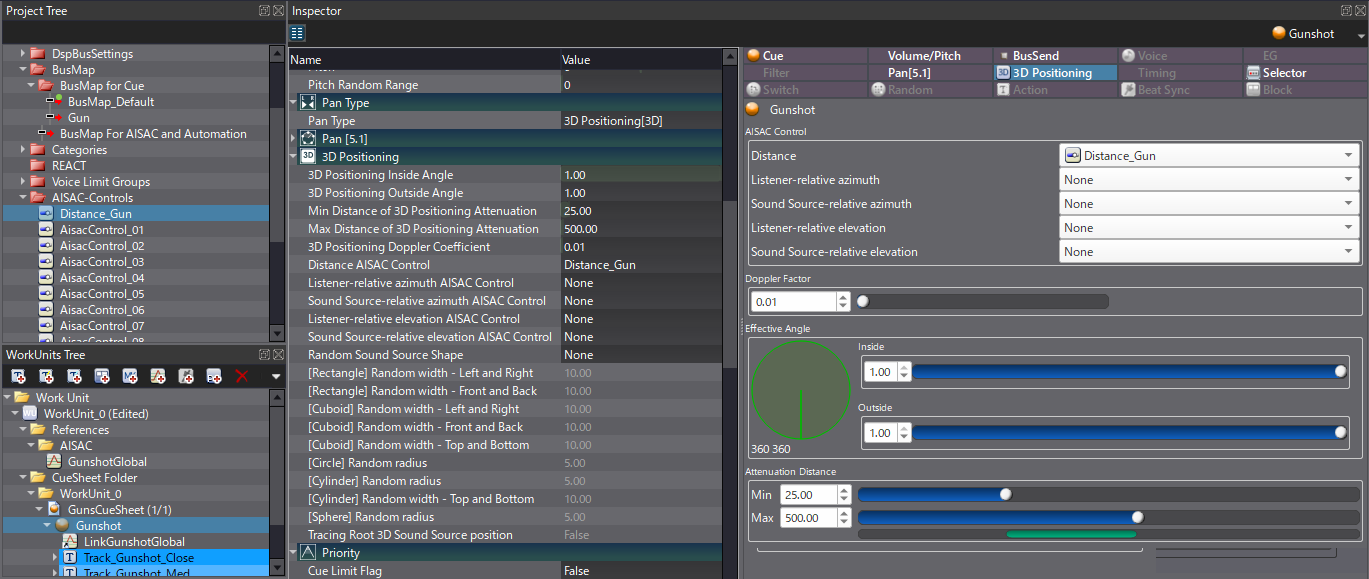
We now have to enable 3D positioning for our Cue and assign an AISAC to control its attenuation curve:
- First, in the Project Tree create an AISAC-Control called Distance_Gun
- Then, in the gunshot Cue’s Inspector tab, select 3D Positioning for the Pan Type.
- In the 3D Positioning, select the Distance_Gun AISAC for Distance AISAC Control
- Finally, set the Min and Max Distance of 3D Positioning Attenuation to 25 and 500 respectively
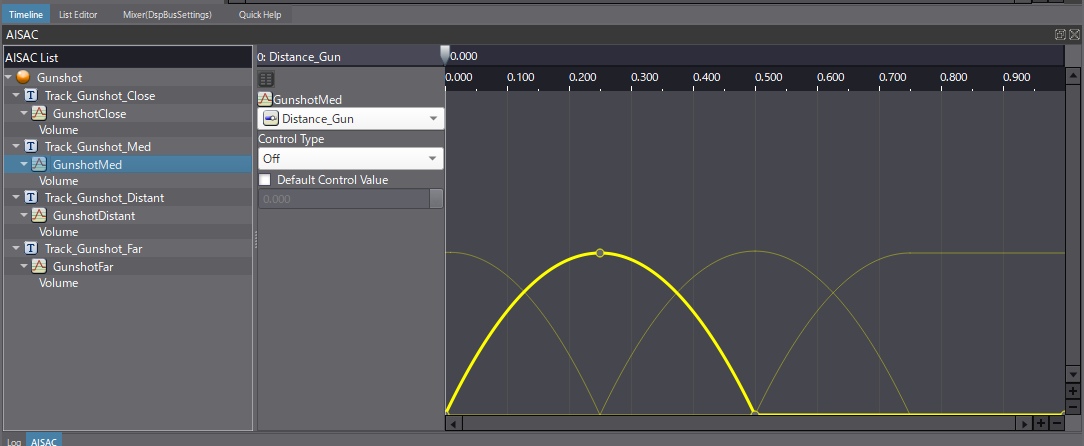
To play the right sound for a specific distance, Volume curves need to be created for each Track that will be controlled by the Distance_Gun AISAC.
- For the track of the closest sound, create a fade-out curve that starts from 0 and decreases until 0.25
- For the medium-distance sound, create a bell curve from 0 to 0.5
- For the distant sound, create a bell curve from 0.25 to 0.75
- For the farthest sound, create a fade-in curve that starts from 0.5 and goes all the way to 1
- Change the curve type to Fast change for the fade-ins and Slow change for the fade-outs to create nice crossfades between each sound
By adjusting the value of the AISAC, the sound will now change, simulating the distance.
It is also recommended to set the Voice behavior to Voice Stop or Vitual Voice so that when the volume of a sound reaches 0, the corresponding Voice is released, saving some resources.
Going Further
To achieve even better results, let’s control the sound at the Cue level. This will help glue the four tracks together, and make the sound feel more natural.
- At the Cue level, create two graphs controlled by the Distance_Gun AISAC: one for the Volume and one for the Biquad – Cutoff
- Make the Volume fade-out with a Slow change curve
- The Biquad – Cutoff will also fade-out, but not completely to avoid the sound from becoming totally muted
The roll-off is sounding much better now but it still possible to add more depth. Previously, we created a DSP Bus with a reverb as an auxiliary effect bus. Gunshot sounds have been routed to a dedicated Gun DSP bus with a send to the auxiliary reverb. It makes it possible to control the amount of reverb with the distance AISAC.
- In the Project Tree, add the Reverb bus to the BusMap For AISAC and Automation list
- At the Cue level, create a new graph for BusSend2 (Reverb)
- The curve should be a line from 0.10 to around 0.70 when the AISAC value goes from 0 to 1
- In addition, add a last graph for the Pre-delay Time, a line from 0 to 760 ms, that will simulate the delay induced by the propagation of the sound
As you can see, implementing distance attenuation with an AISAC can help you achieve more realistic and pleasing results. It is possible to dig even further by having dedicated AISACs for both the azimuth and the elevation. As this adds complexity, it is a good practice to create all these AISACs under the WorkUnit/References/AISAC folder, so that they can be reused on all relevant Cues.
 AtomCraft_Project_Advanced_Distance_attenuation.zip