Ambience Design Part 3
Introduction
In this series, we will be looking at designing powerful and efficient systems for ambient playback. We created one-click ambiance playback in our previous two installments and set up some dynamic reverb switching.
In this final part, we will add some location-based attenuation and implement everything into UE4.
 2021-02_AmbienceP3.zip
This project was created using CRI Atom Craft Ver.3.44.13
Dynamic Volume
ADX2 provides a host of different ways to manage the mix of our game. In many cases, we can combine several methods depending on what we are trying to achieve. The following example is simply one way in which we can achieve a dynamic state-based mix. The general idea is that we are creating custom mixes for the cave and forest snapshots that we created in part 2. This method will allow us to hear some of the forest ambience while in the cave and vice-versa.
- On DspBusSetting_0, create two new busses
- Name them “Inside” and “Outside”
- For each
- Add a Bandpass effect
- Set the send to MasterOut
- On the Cave snapshot
- Set Outside volume slider to -9dB
- For Bandpass effect on Outside bus
- Set Highest Cutoff = 1000

- On the Forest snapshot
- Set Inside volume slider to -9dB
- For Bandpass effect on Inside bus
- Set Highest Cutoff = 1000

- On BusMap_Default
- Set DspBusName2 to Inside
- Set DspBusName3 to Outside
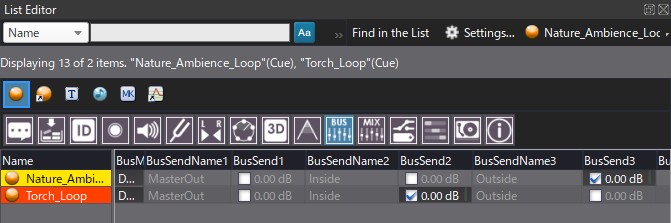
- For Torch_Loop Cue, in the Inspector
- Uncheck BusSend1
- Check BusSend2 (Inside)
- For Nature_Ambience_Loop, in the Inspector
- Uncheck BusSend1
- Check BusSend3 (Outside)
This set up reroutes the audio to separate busses, which then processes and attenuates the signal based on the player’s location.
UE4
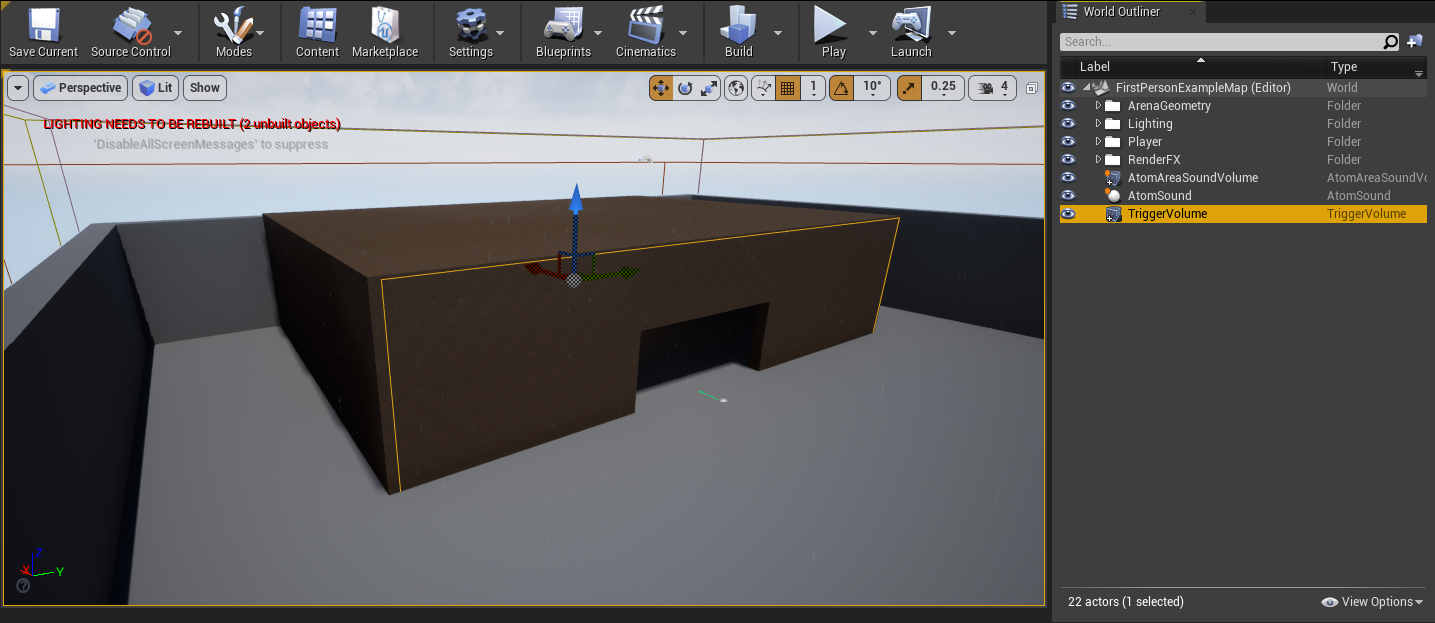
Since the heavy lifting was done inside Atom Craft, we don’t need to do much work to set up basic implementation in UE4. After following the documentation to integrate ADX2 into our project, we can load up the First Person Blueprints template project as a simple test. Our example has a makeshift cave set up using the Box Geometry tool that has been extruded using the Brush Editing tool.
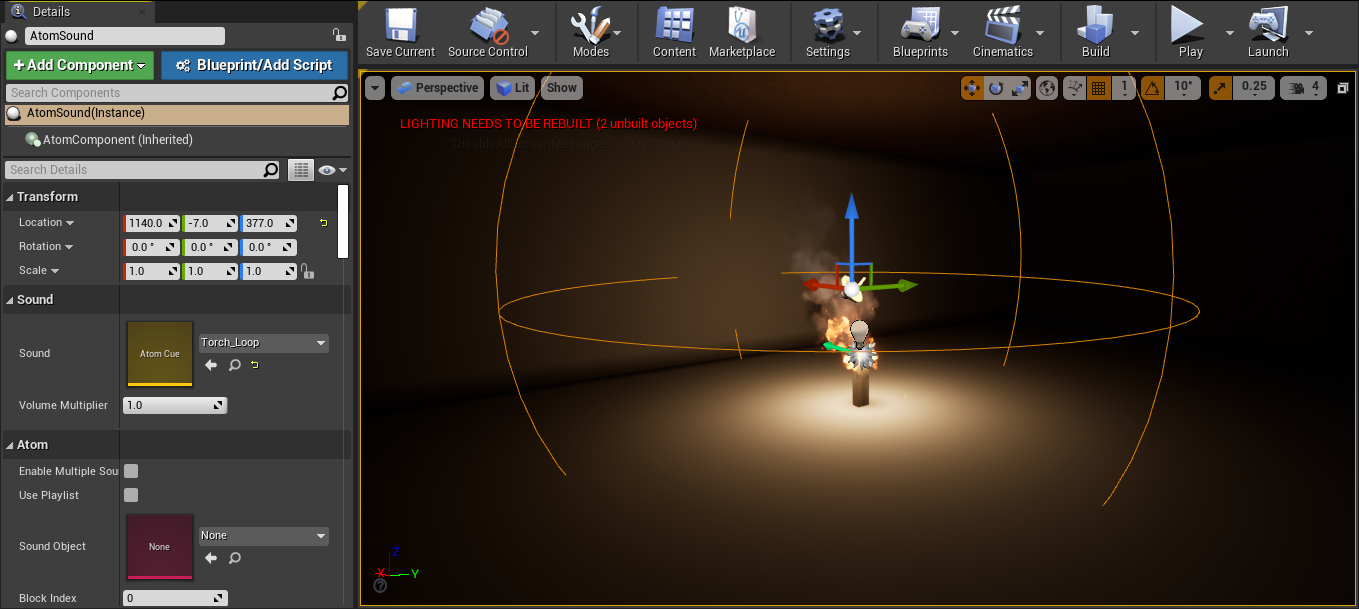
Atom Cue
We can drag-and-drop Atom Cues into our level from our Content Browser for sound sources that radiate outwards. This works well for spatialized sounds, such as our torch. Since we want to showcase discrete interior and exterior mixes, let’s also place the Torch_Loop Cue into our cave.
Atom Area Volume
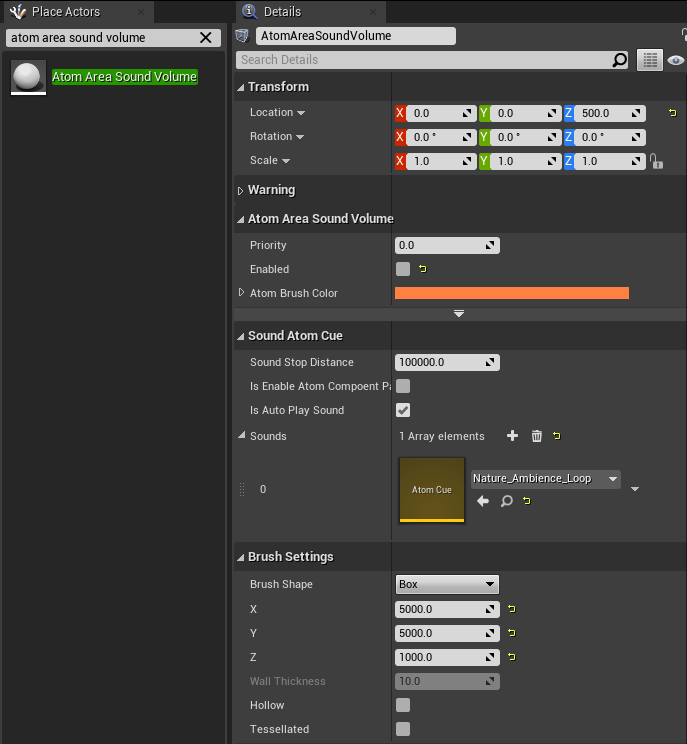
One of ADX2’s newer UE4 features – the Atom Area Sound Volume, allows us to define custom shapes to fit our level geometry. As long as the player is inside this volume, they will hear the sounds that we have added to it. Since our template level is cube-shaped, this feature isn’t essential, but it visually distinguishes our general ambience from our spatialized sound sources.
Search for “Atom Area Sound Volume” in the Place Actors panel, and adjust the size to fit the level by adjusting the coordinates under the Brush Settings heading in the Details panel. Then under Sound Atom Cue, add an Array element to Sounds and apply the Nature_Ambience_Loop Cue. Playback will trigger automatically by default, so nothing else needs to be done for this sound.
Interior/Exterior Switch
The last feature we need to implement is a switch for our DSP Snapshots. This will require a little bit of Scripting with Blueprints but is still very simple. First, we need to navigate the Place Actors tab and search for a Trigger Volume. This is a standard UE4 feature and works similarly to the Atom Area Sound Volume. We can drag-and-drop it into our level and adjust the coordinates under the Brush Settings heading, this time to fit snuggly inside our cave.
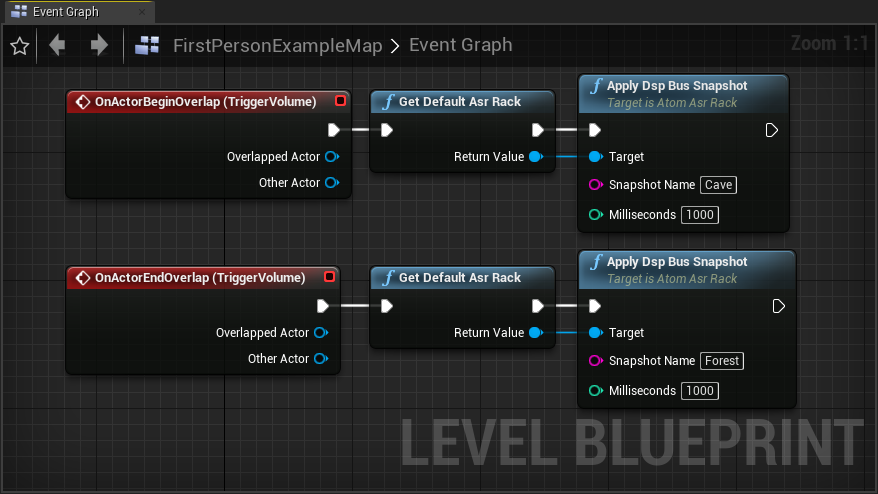
And to set up our logic, we can navigate to the Blueprints tab at the top and select Open Level Blueprint. If our Trigger Volume is still highlighted in the World Outliner, right-clicking in our Event Graph will quickly show some related Actions. Let’s add On Actor Begin Overlap and On Actor End Overlap Events for our Trigger Volume. We can then Get Default Asr Rack, send the returned value to an Apply Dsp Bus Snapshot action, and set the appropriate Snapshot Name. The result should look as follows: