
Creating Immersive 3D Audio with ADX2 and Unity
Introduction
ADX2 offers a variety of different methods for controlling the spatial playback of sounds. From simple monophonic playback to spatialized playback with distance-based high-frequency attenuation. In this month’s blog, we will dive into the world of 3D audio, looking at the different features available, and when you might use them. We will also hear what this sounds like inside a demo Unity scene.

1906_SpatialAudio.zip
This project was created using CRI Atom Craft V3.41.01 and Unity V2019.1.6f1
2D Sounds
2D refers to lateral panning of audio, and it is the default mode when setting up sounds in Atom Craft. This playback mode is likely the one you will want to stick with if you are working on a 2D game. If you are working on a 3D game, you might also decide to use 2D playback for non-diegetic sounds such as music and UI sounds, and certain diegetic sounds such as for stereo ambience.
To compare 2D vs 3D in context, we can create a Polyphonic Cue and drop in some ambient background noise and rename the Cue “roomtone”. Since 2D is the default playback state, we won’t need to do anything else for this sound.
3D Sounds
When interacting with a virtual 3D world, we generally expect sounds to propagate in a way that makes sense in the real world. To achieve this, we can the 3D processing features in ADX2.
To get started, we need to set a sound our sound up for 3D playback.
- Create a Polyphonic Cue named “boxhum”
- Drop the wav Material onto the boxhum Cue
- Select the Waveform Region on the Timeline window.
- Set Pan Type to 3D in the Inspector

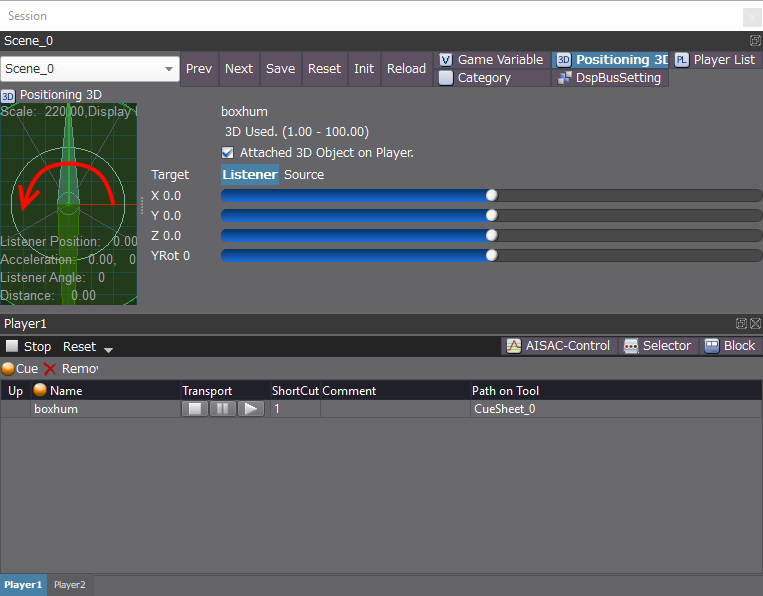
Without doing anything else, we can audition this effect in the Session Window. Open it up, drag in the boxhum Cue, select the Positioning 3D tab, and tick the Attached 3D Object on Player box. By clicking and dragging on the visual display, we can simulate the object moving around. We can also set whether it is the object or the player who is in motion, by highlighting the different Targets: Listener and Source.
Tweaking & Finishing Touches
3D Positioning by itself only offers spatial panning with simple distance-based volume attenuation. We can sell the effect better by introducing a high-frequency roll-off using an AISAC. Think of a distant rock concert, where only the lowest frequencies can be heard. We can also tweak a few other settings to create a more immersive effect.
- In the Project Tree, rename AisacControl_00 to “AISAC_Distance”
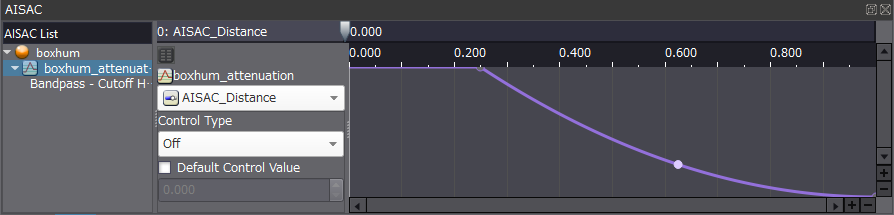
- Create AISAC on boxhum Cue, and set:
- Name = “boxhum_attenuation”
- AISAC Control = AISAC_Distance
- Graph Type = Bandpass – Cutoff High
- Create a graph roughly as below
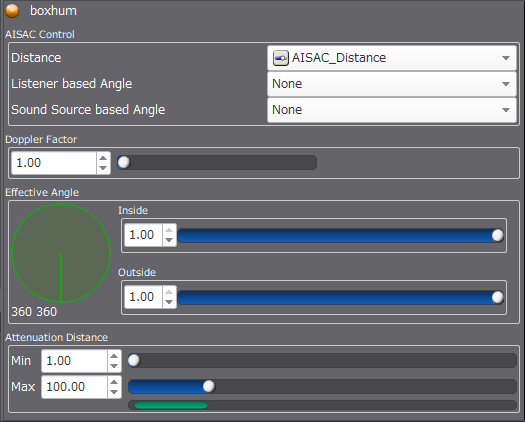
- With the boxhum Cue selected, go to the Inspector and open the Pan[3D] tab
- Set AISAC Control → Distance = AISAC_Distance
- Set Attenuation Distance → Max = 100.00
- Set Doppler Factor = 1.00
We can test the effect of these settings once again in the Session Window. Notice how you don’t have to travel as far to hear the effects of the audio quietening, and how the higher frequencies die out as the volume decreases. You should also be able to hear a pitch shifting effect the faster you move around relative to the sound source. If the pitch shifting sounds a bit unnatural, you can try values between 0.00 and 1.00 to find a value that works best.
Tips
The Effective Angle can be used to make sounds hyper-directional (only audible within a smaller cone). This feature can offer a handy way to tidy a mix, making sure the player only hears what is relevant.
The Attenuation Distance → Min controls the minimum distance before attenuation happens. Values higher than 1.00 remove the spatialization effect when you’re within that minimum range, which causes the sound to envelop you, rather than being discretely locatable.
Unity
Since ADX2 controls all our 3D audio, we need to do very little to demo this inside of Unity. Build the Project and do the necessary setup to get the CRIWARE plugin loaded in Unity (you can follow the manual for this). In Unity, I have created a default 3D template, loaded a script onto the camera which allows it to be controlled with the mouse and keyboard, and created a cube at the center of the scene. Now we can:
- Drop the roomtone Cue onto the scene, and in the Inspector under Cri Atom Source (Script):
- Check Play On Start
- Uncheck 3D Positioning
- Drop the boxhum Cue onto the Cube, and in the Inspector under Cri Atom Source (Script):
- Check Play On Start
- Check 3D Positioning
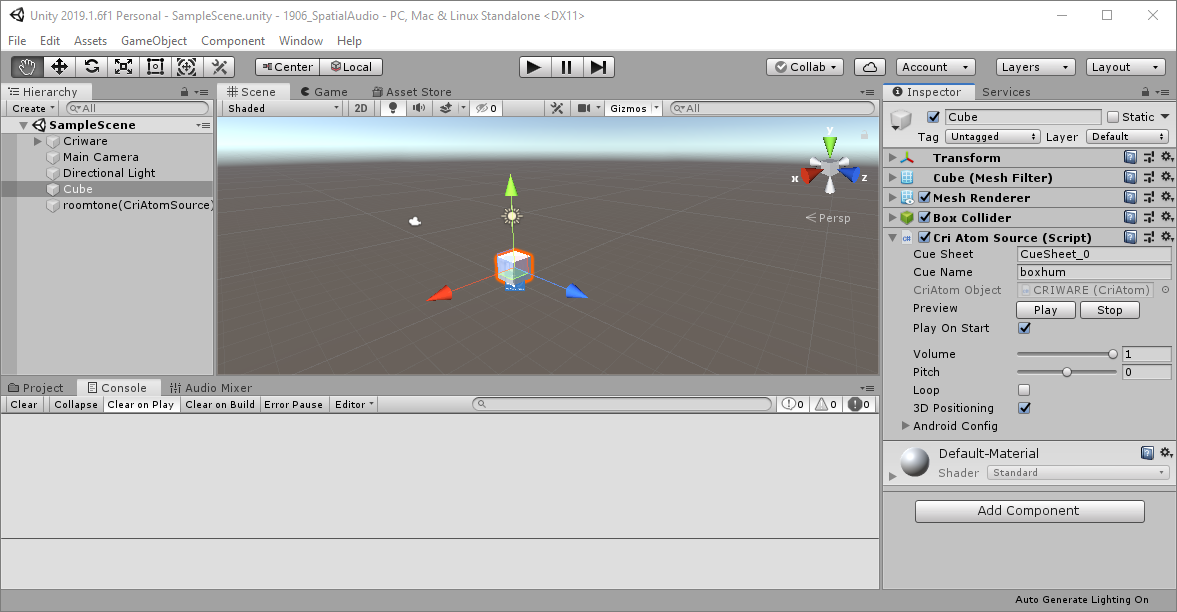
And we are done! The Unity scene should sound the same as when auditioned inside Atom Craft. Notice how the ambience is unaffected by our movement throughout the scene, but the boxhum sound is very dynamic, even though it’s just a short loop.
Conclusion
Thanks to the intuitive and fleshed out features of ADX2, we can create rich, interactive audio worlds right from within the Atom Craft tool. It can be useful to test how this all relates contextually to a real game, but we can get very far using only the tool.