

SpriteStudio 7.5 Released!
The new SpriteStudio 7.5 version was released a few weeks ago. In addition to the usual improvements and bug fixes, this new version brings some new features that will undoubtedly improve your workflow, such as templates to easily reuse animation data. It also introduces some long-requested functions, like the clipping mask. Let’s check it out!
Templates
With the templates, it is now possible to save the state of any part/key as a snapshot and recall/paste it anywhere you like.
For example, you can do the following:
• Copy the parts hierarchy between different SSAE files
• Reuse frequently used motions (keyframe information)
• Save and recall a snapshot of a specific frame
• Use it as a clipboard extension
The video below shows how to add jump, zoom, and rotation motions previously registered as templates to static parts.
Clipping Mask
SpriteStudio now supports clipping masks. This allows for the rendering of pictures within a mask pattern. You can think of it as the opposite of a regular mask pattern, which usually cuts images.
In the video below, you can see that the normal part (i.e., the star) is clipped within the outline of the apple-shaped mask part.
Mask Write Option
This feature allows you to render normal parts and mesh parts as usual, while also using their drawn opaque regions as a mask.
It is an option added to make data creation more efficient, with the use of clipping masks in mind.
In the video below, the cloud is a mesh part with the “Write to Mask” flag enabled, while the star is set with the “Draw Inside Mask” flag enabled, so it is drawn only within the opaque region of the cloud.
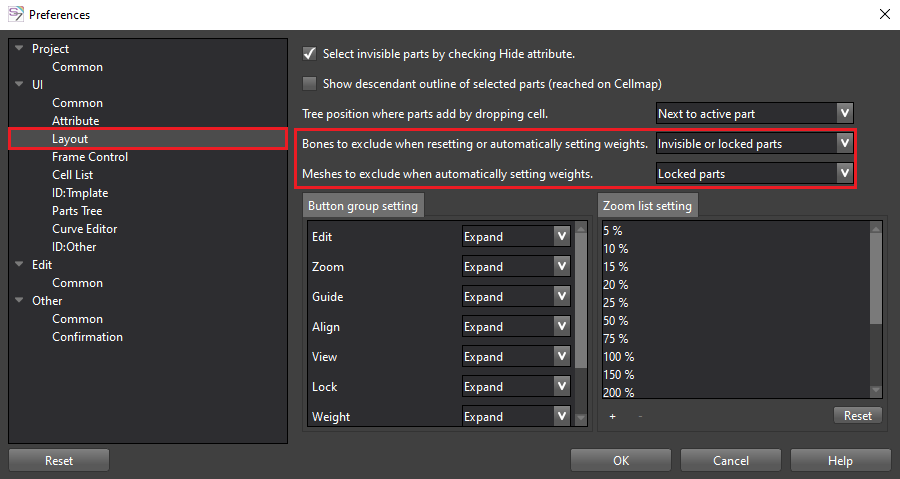
Bone & mesh exclusion from weighting
It is now possible to exclude bones that are locked or set to invisible from automatic weighting, and you can also prevent specified meshes from having their weights recalculated when bones are moved during automatic weighting.
This allows you to determine which meshes and bones are associated, even if there is only a single joint.
With Weight Editing, you could already specify, on a per-vertex basis, which bones affect a mesh. This new option, however, allows you to choose which parts will be influenced when using automatic weight assignment.
The options are available in the Layout page of the Preferences.
For all the other improvements and bug fixes, refer to the release notes and download the new version! We are looking forward to seeing the animations you will do with these new features!