

Making Music React to Gameplay [Part 1]
In this 2-part tutorial, we will explore how to automatically add sounds to background music at specific times during playback, based on the game context. To achieve this, we will set up Action Tracks and Game Variables in our ADX project and use a Blueprint in UE5 to control the implementation on the game side.
Adding sounds in sync with background music can be used to highlight a specific game situation. For example:
• We can keep playing the same music but add different melodies depending on the area of the game.
• We can change the initial impact a music will have by playing a different sound when it starts.
• We can add variations to the ending sequence when the music finishes after a battle scene.
In this first post, we will prepare the interactive audio data in Atom Craft, ADX’s authoring tool. In the next post, we will handle the implementation in Unreal Engine 5.6, using only a Blueprint (no code).
We will use the ADX LE UE SDK (version 2.04.02). If you are not familiar with it yet, ADX LE is the light edition of ADX, and the SDK can be downloaded for free here:
https://game.criware.jp/en/products/adx-le_en/
Importing the audio files
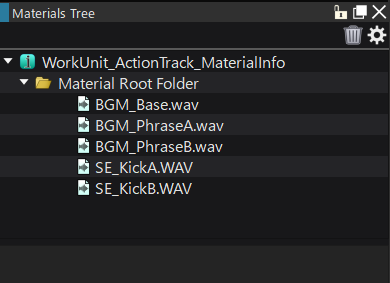
First, we need to prepare and import the background music (BGM_Base) and some additional files:
• Two different kick sounds that can be played at the start of the music (SE_KickA, B)
• Two musical phrases that can be played simultaneously to the main music (BGM_PhraseA, B)
Creating the Cues
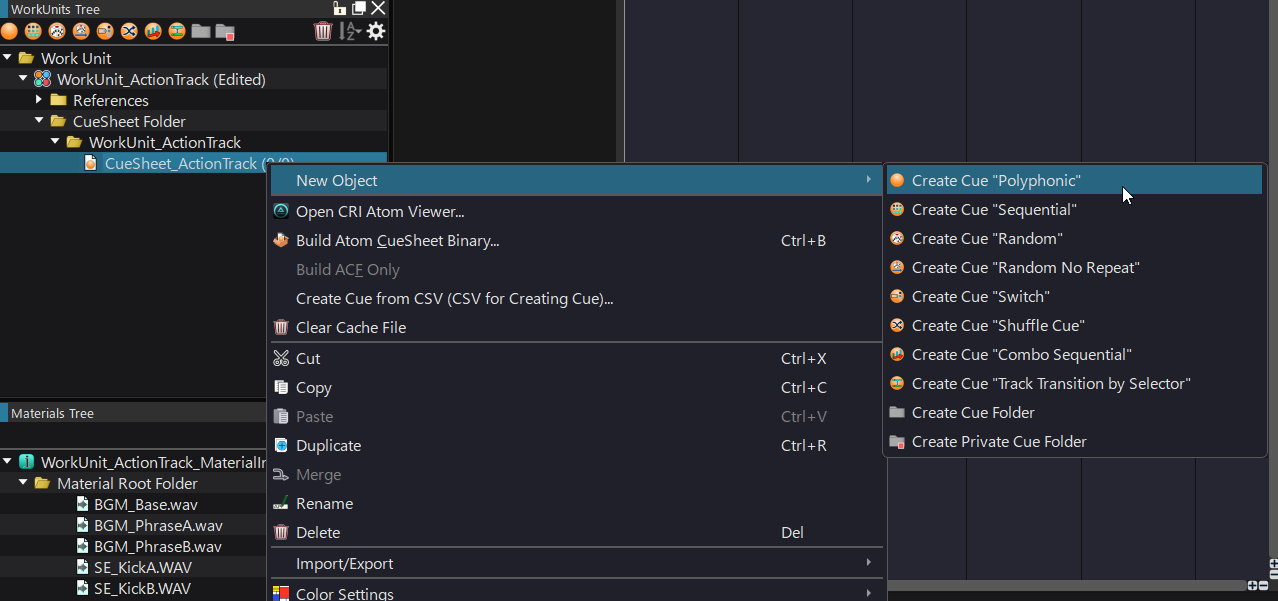
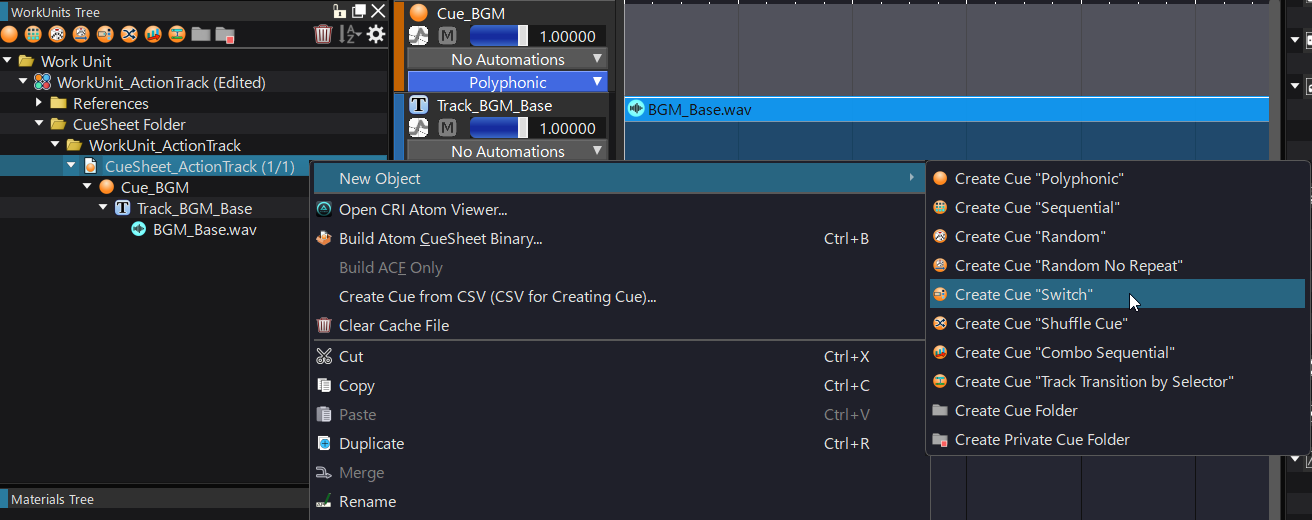
Let’s create the main music Cue. Right-click on the Cue Sheet, select “New Object” and then “Create Polyphonic Cue”.
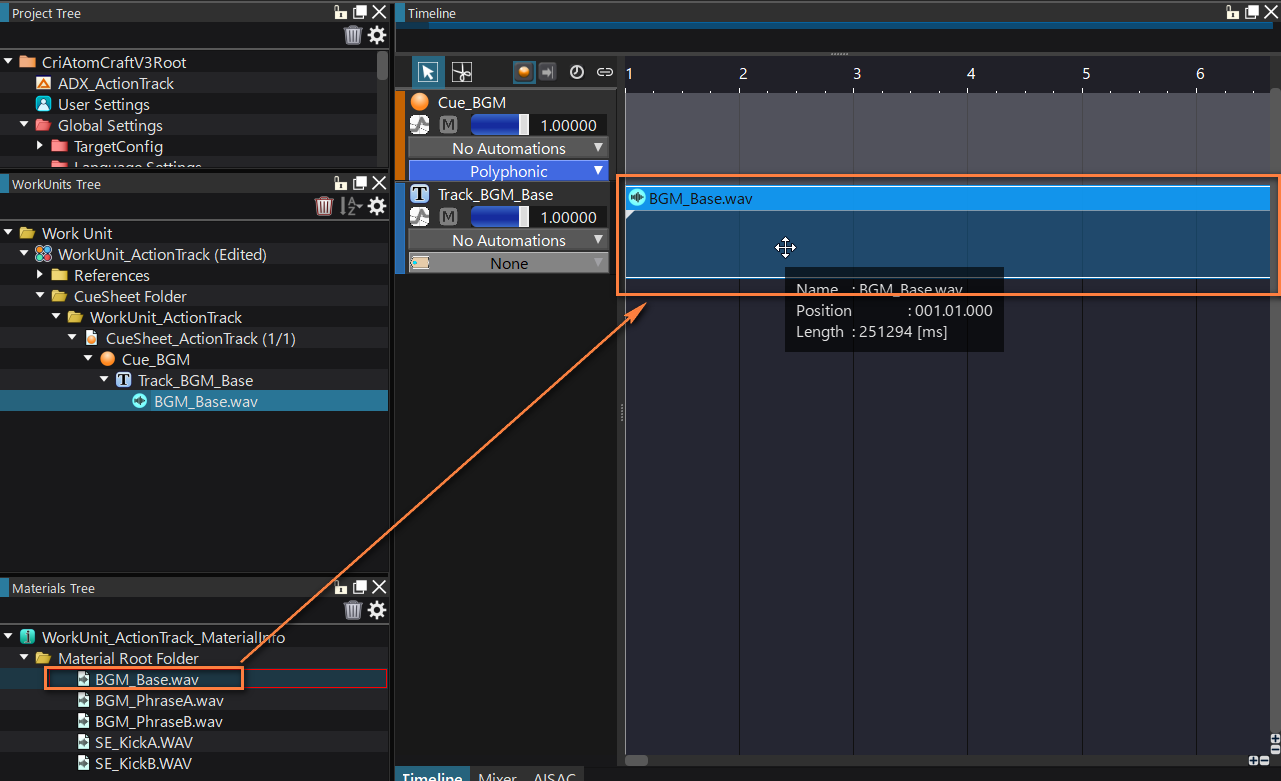
Name the Cue you just created, and drag the BGM_Base material onto it to create a track.
Next, let’s create the secondary Cues.
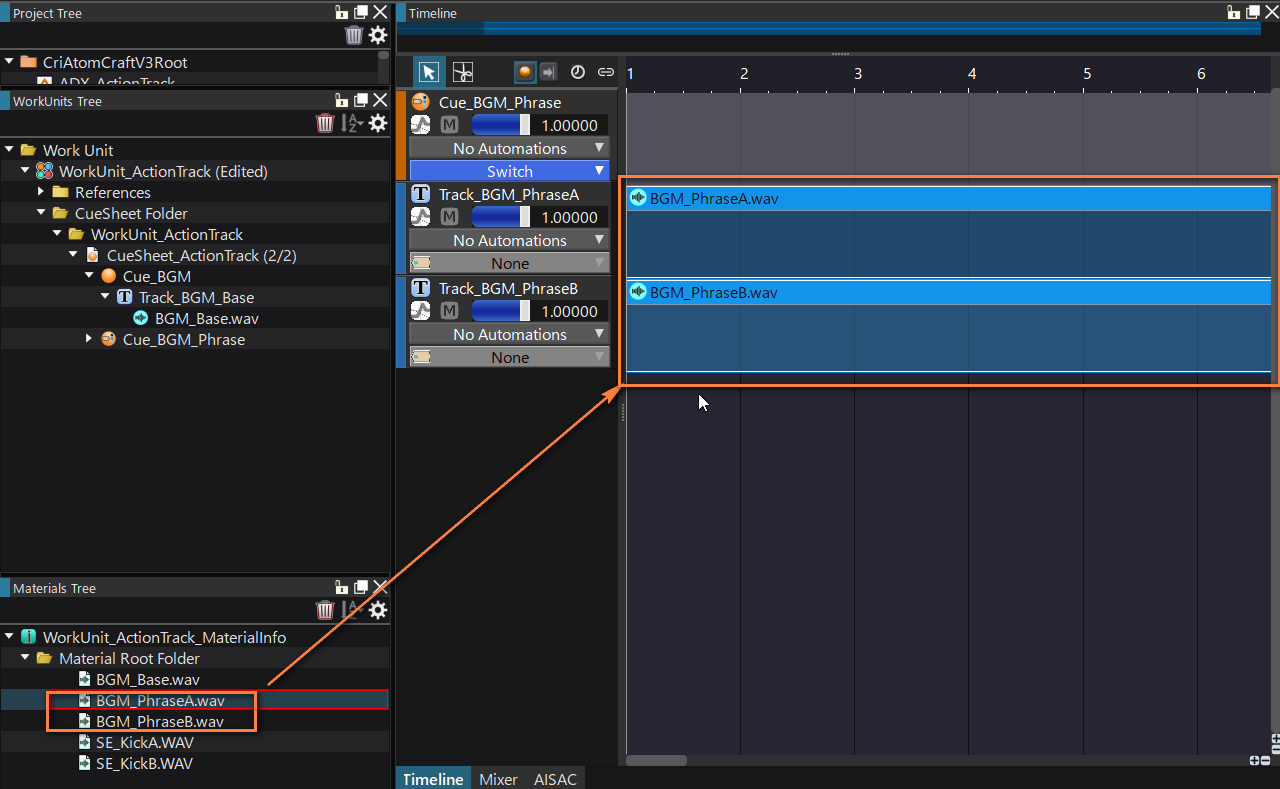
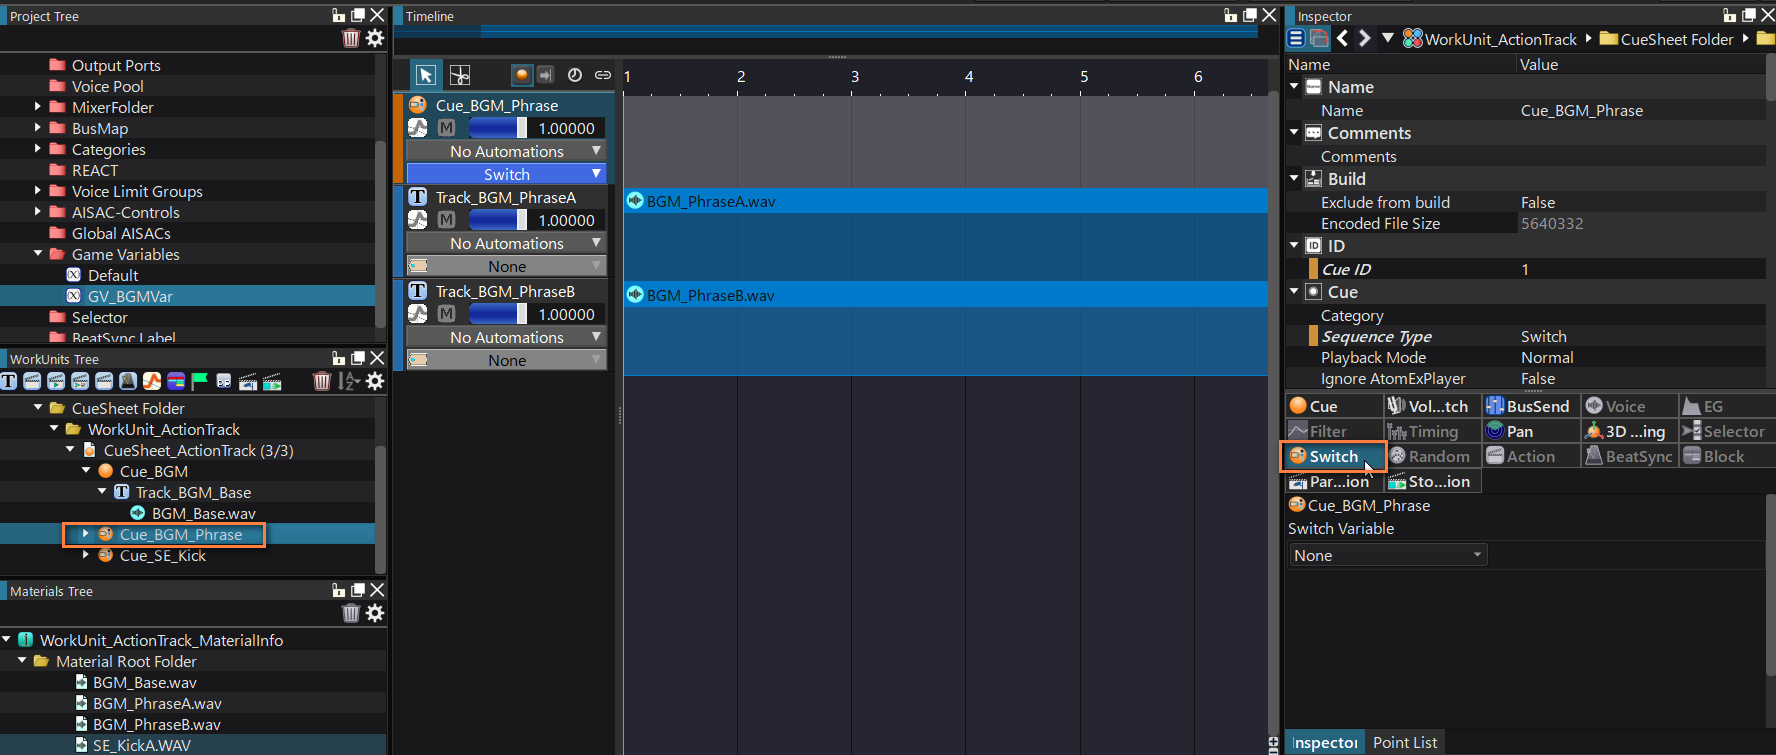
Right-click the Cue Sheet, select “New Object”, and this time choose “Create Switch Cue”.
Add 2 tracks to this new Cue, one for each additional phrase.
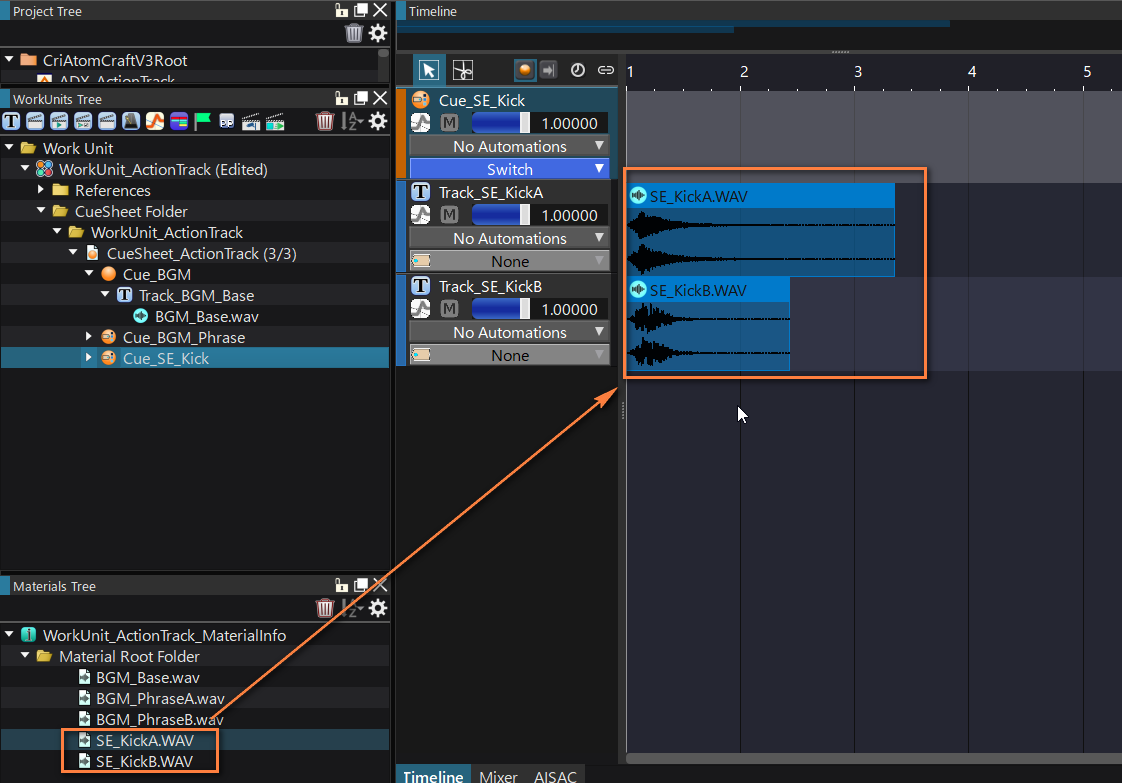
Create a similar Switch Cue for the kick sounds and add the corresponding materials as well.
Setting Up Game Variables
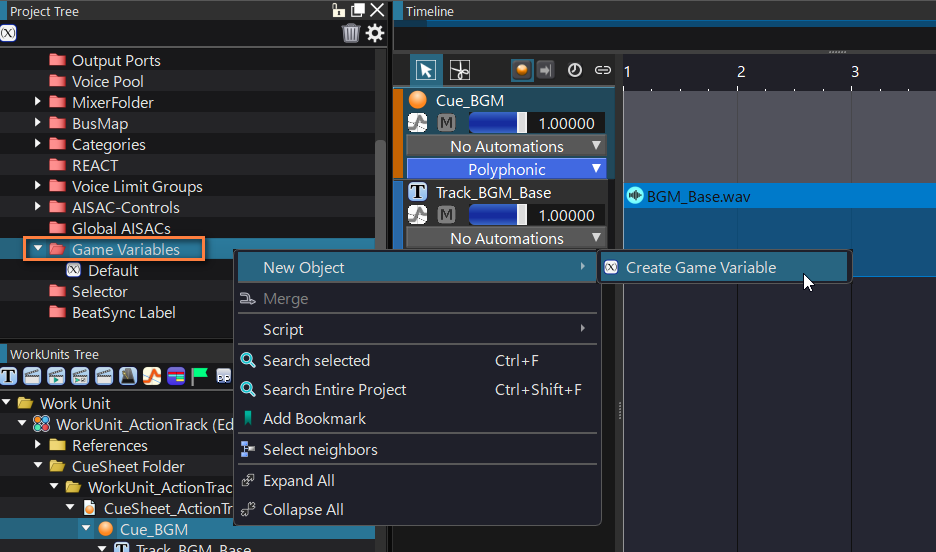
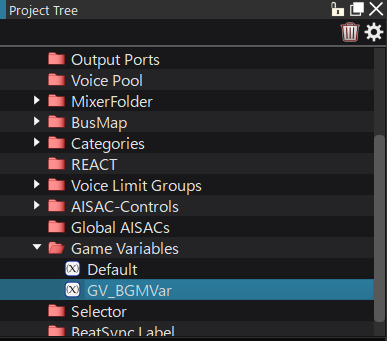
The next step is to create the Game Variables: right-click the Game Variables folder in the Project Tree, select “New Object” and then “Create Game Variable”.
Name the Game Variable appropriately for easy reference.
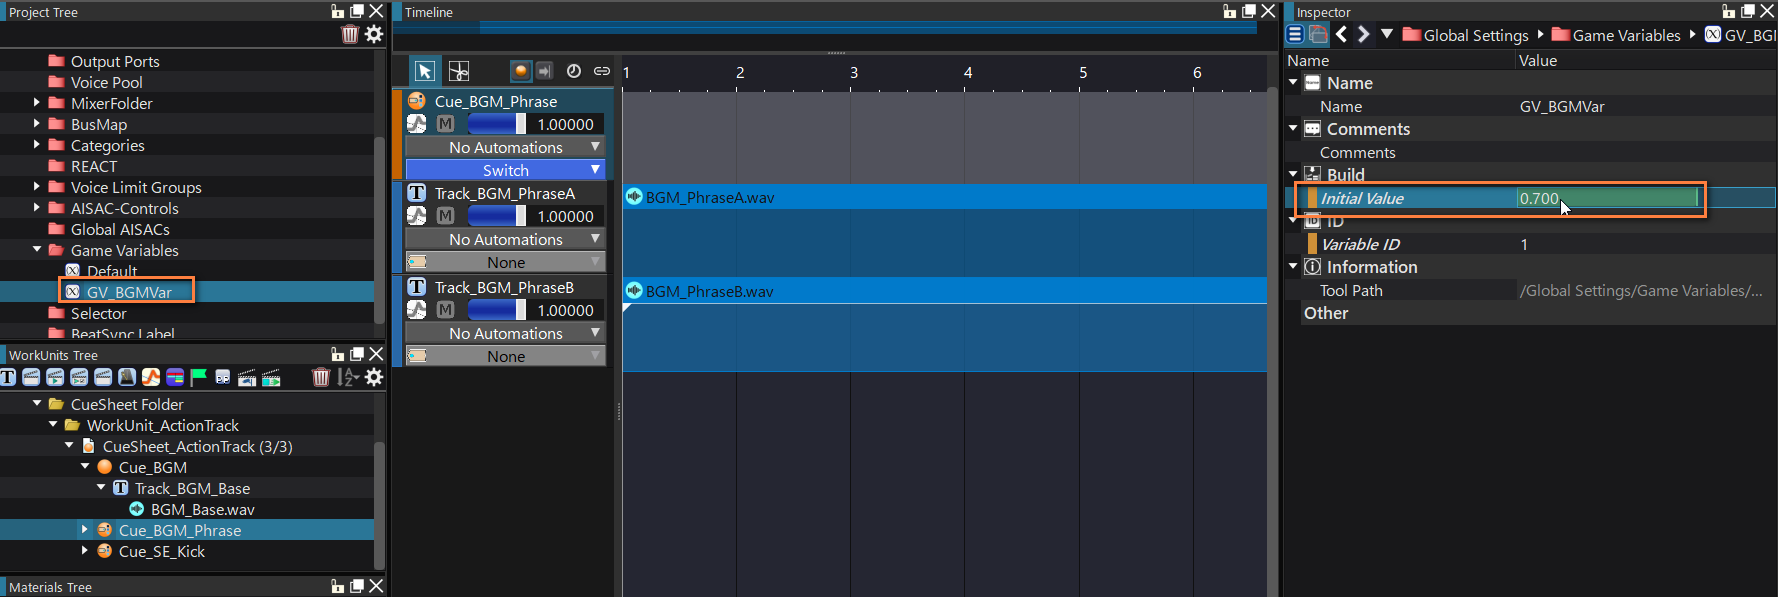
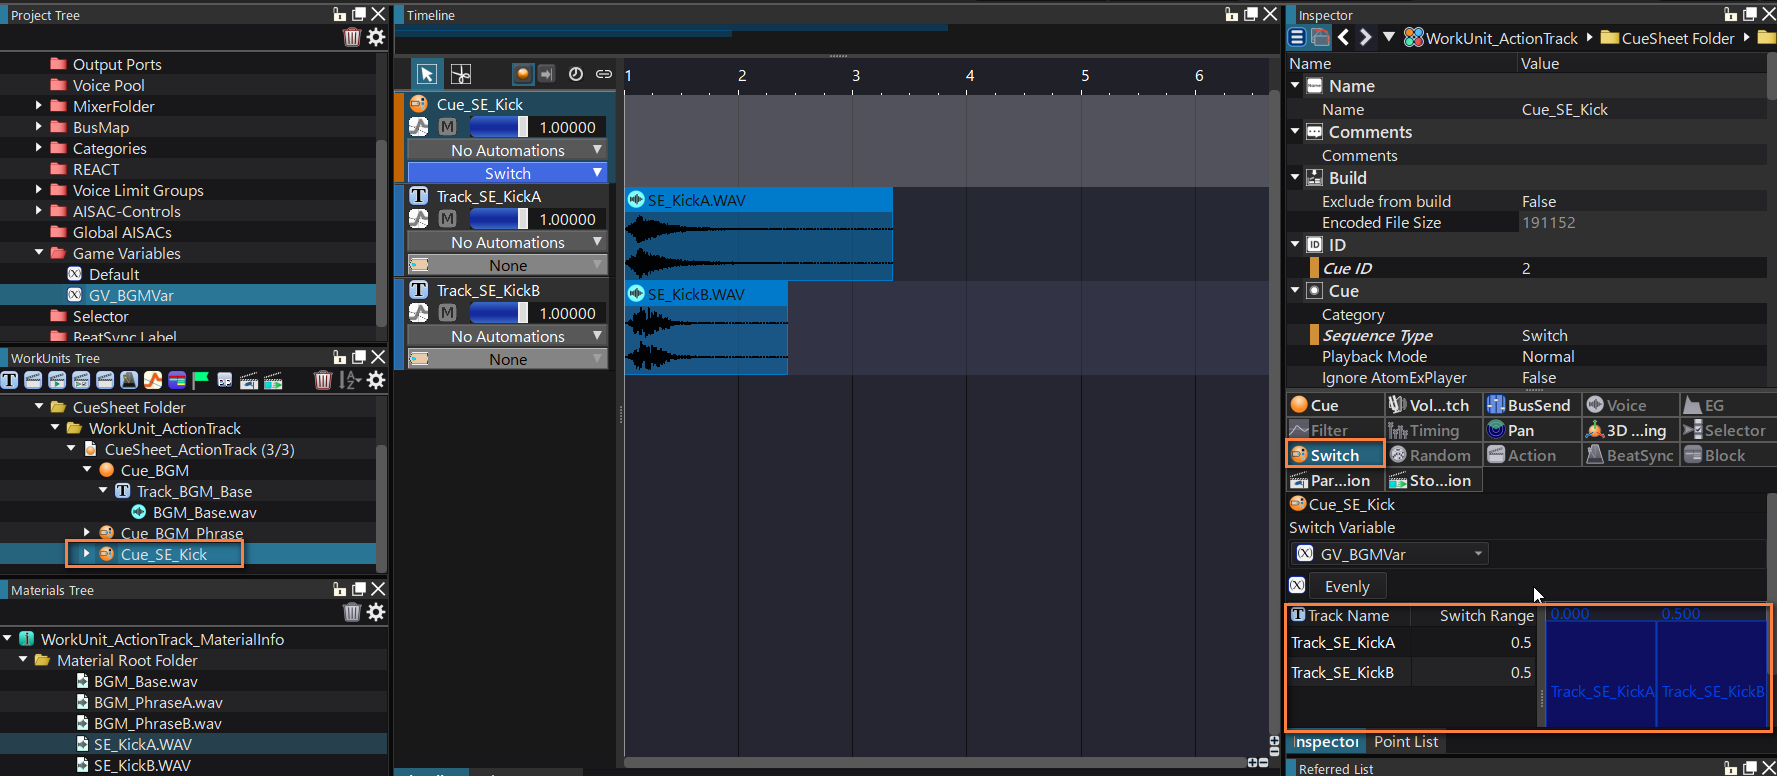
Select the Cue with the musical phrases in the Inspector, and press the Switch button to access the switching menu.
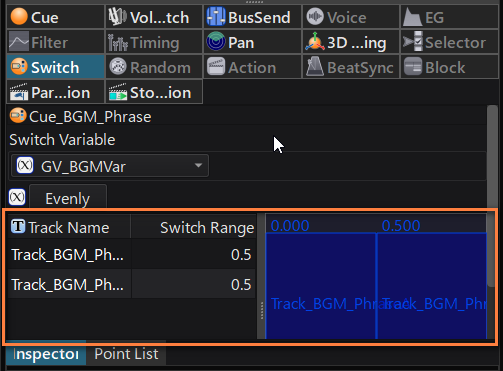
Assign the Game Variable to the Switch Variable.
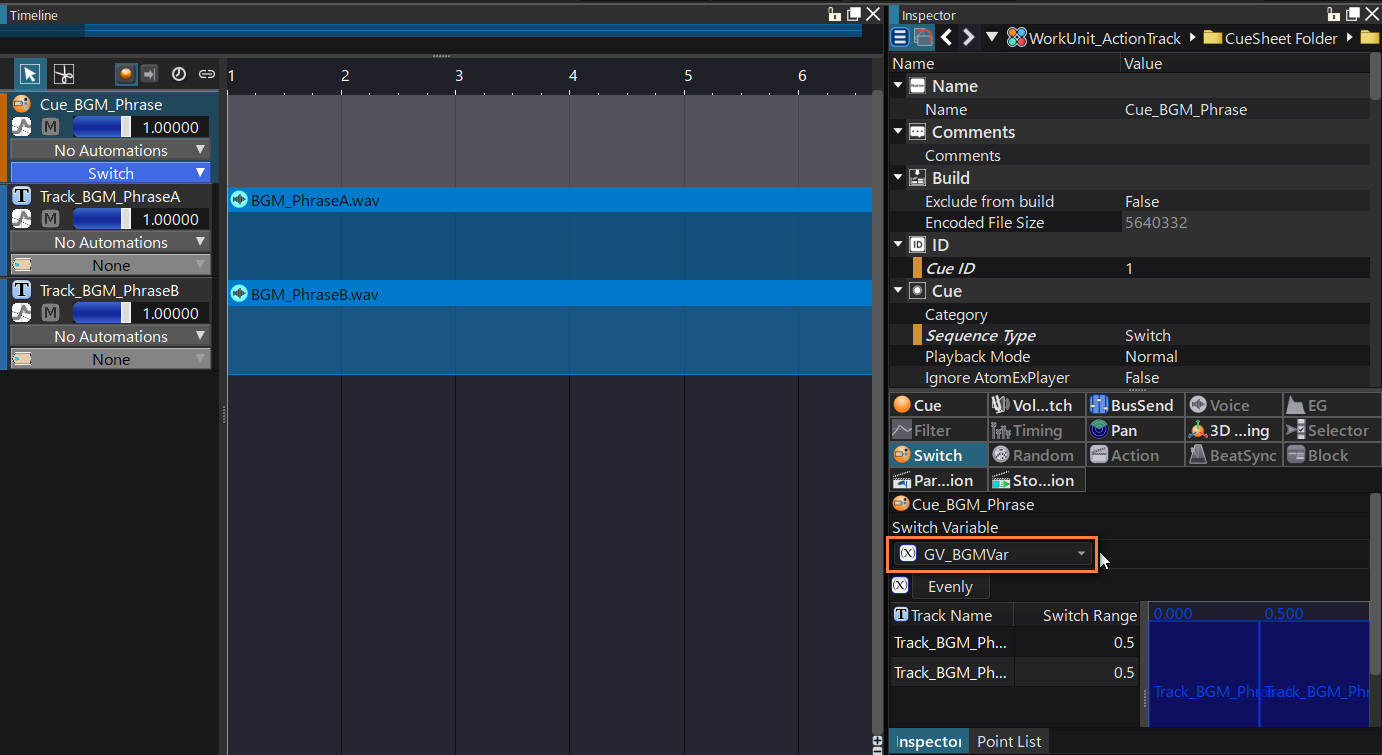
By default, the range of the variable will be equally divided between the tracks. In our case, with 2 potential tracks, values in the range [0…0.5] will trigger the first track, while values greater than 0.5 will trigger the second. It is possible to adjust the distribution as we want (total must stay equal to 1.0).
To test how different values affect the sound, select the Game Variable in the Project Tree and change its Initial Value in the Inspector.
Now you can repeat this setup for the Cue with the kicks.
Setting Up Actions
Adding Actions to the Timeline will allow us to trigger sounds at specific points during a Cue’s playback.
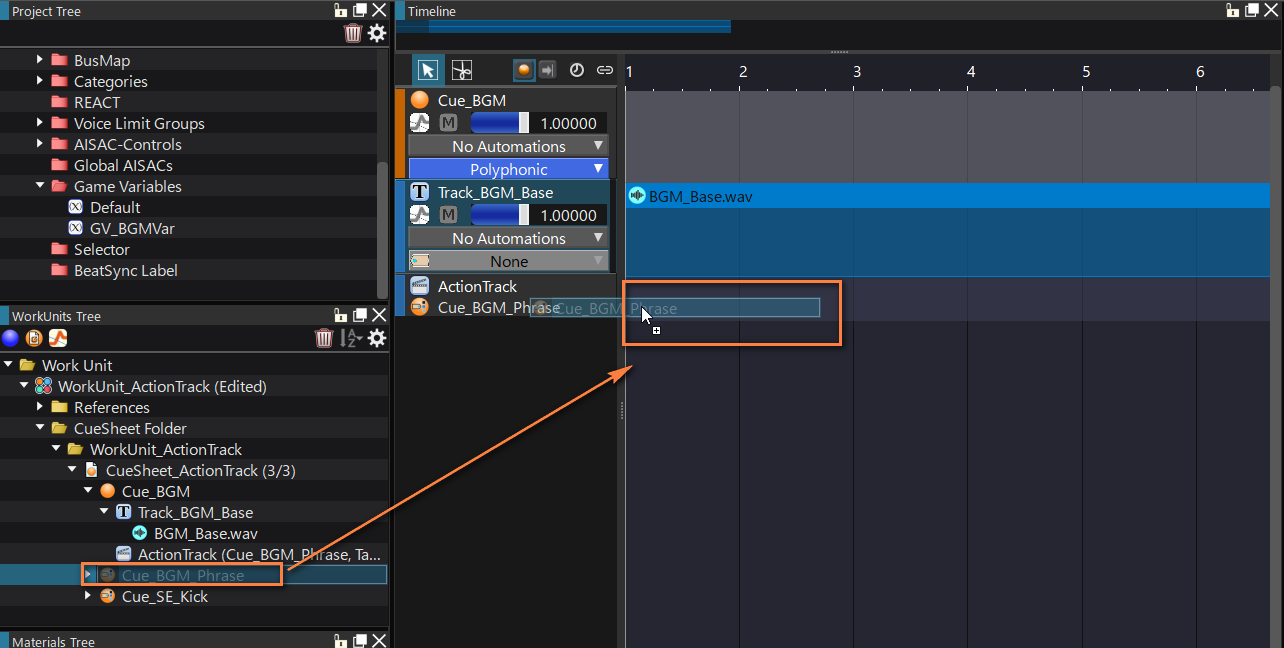
Actions are added to a special Action Track. To create one, select the main BGM Cue, right-click on an empty spot in the track list, then select “New Object” and finally “Create Action Track”.

Drag and drop the Cue with the musical phrases from the Work Unit Tree onto the new Action Track.
Create a second Action Track for the Cue with the kicks.
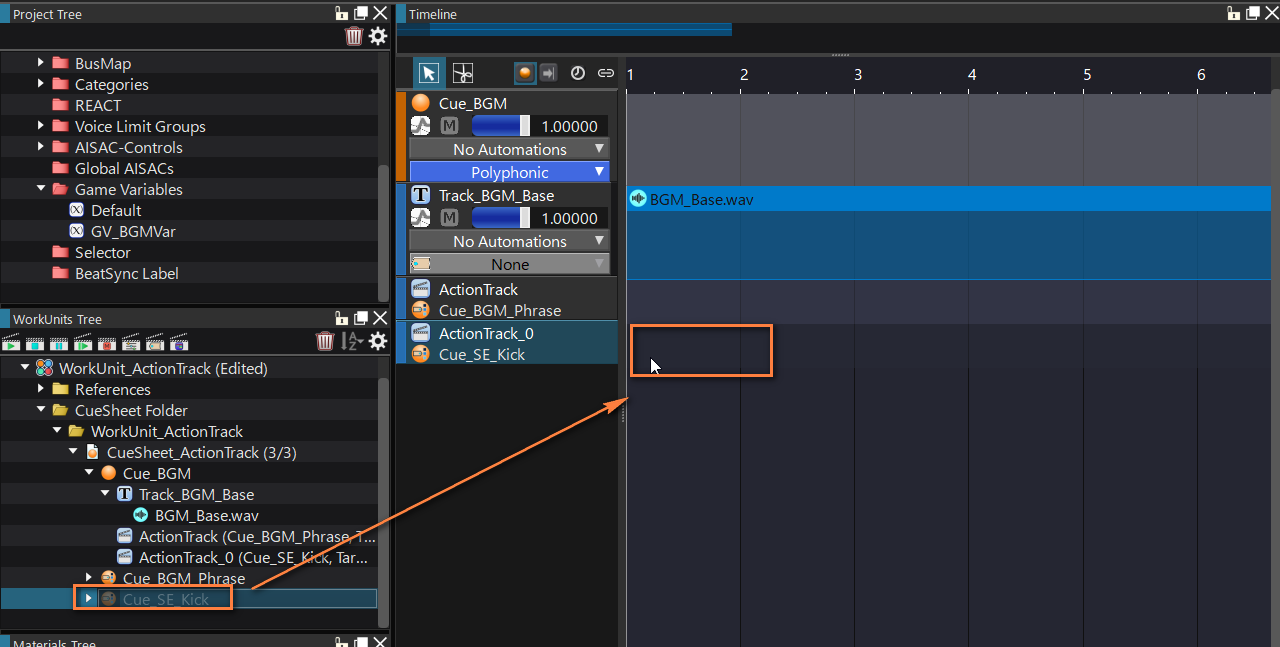
Name the tracks in the Inspector for easy identification.

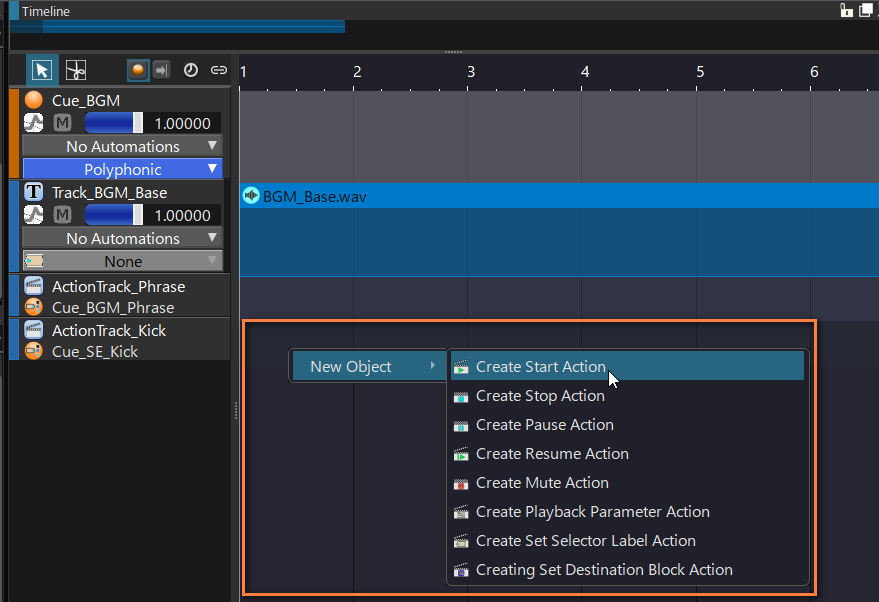
Right-click on the Action Track’s Timeline, select “New Object” and then “Create Start Action”.
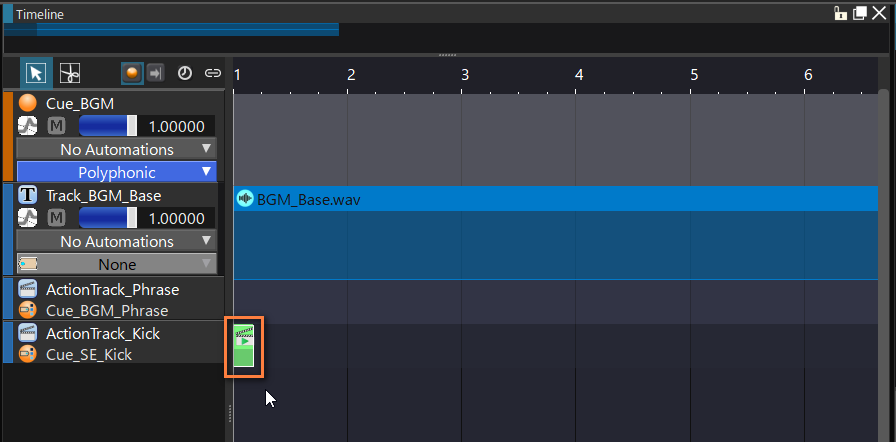
A marker appears that indicates the position at which the action will be triggered.
For the kicks, let’s move it to the beginning of the Timeline.
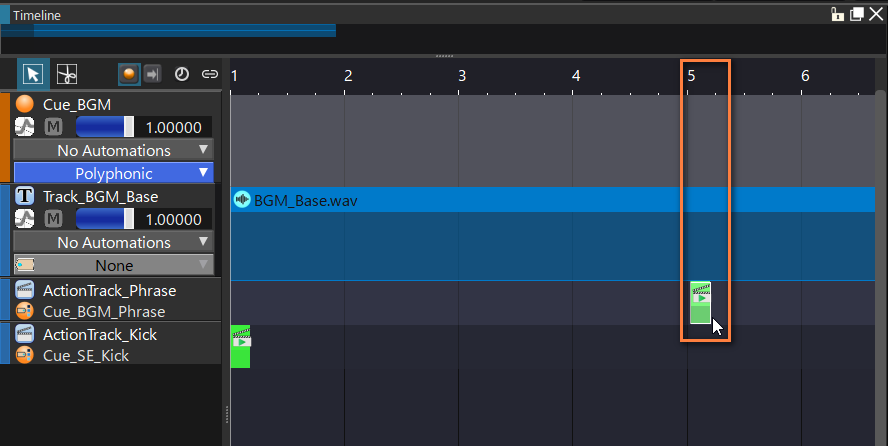
For the phrases that will be played in addition to the background music, let’s place it on measure 5.
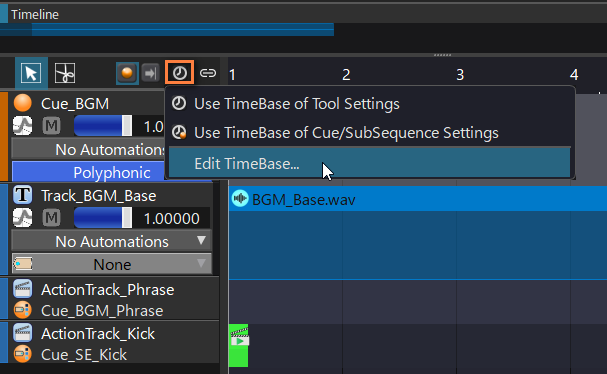
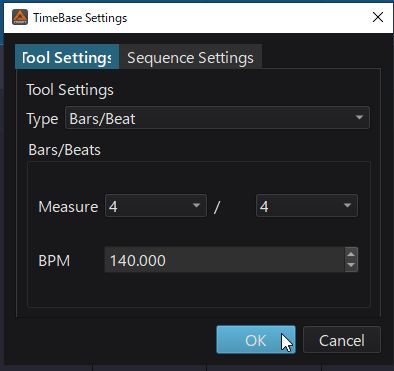
For better synchronization, we need to align these markers precisely with the music. Click the small clock button at the top of the Timeline and select TimeBase Settings. Here, you can set the time base to bars and beats. Make sure to enter a signature and BPM that match your music, and then adjust the position of your markers.
We can now test the results without leaving AtomCraft. Simply changing the initial value of the game variables will result in different sounds being played.
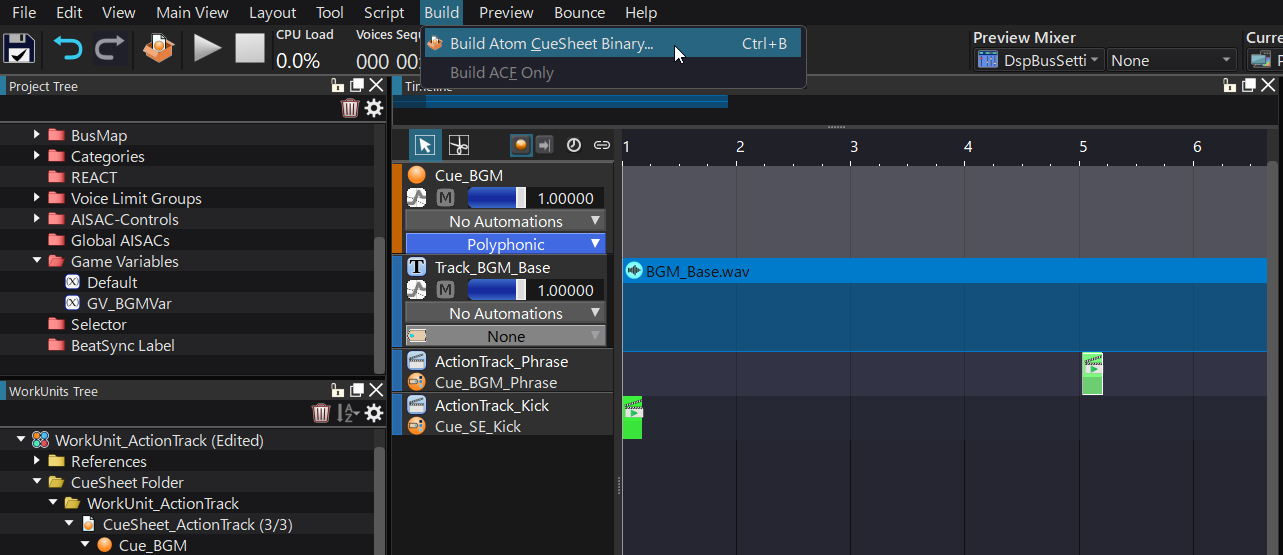
Building the Cue Sheet
It is time to export the Cue Sheet! Go to the Build menu and select “Build Atom CueSheet Binary”.
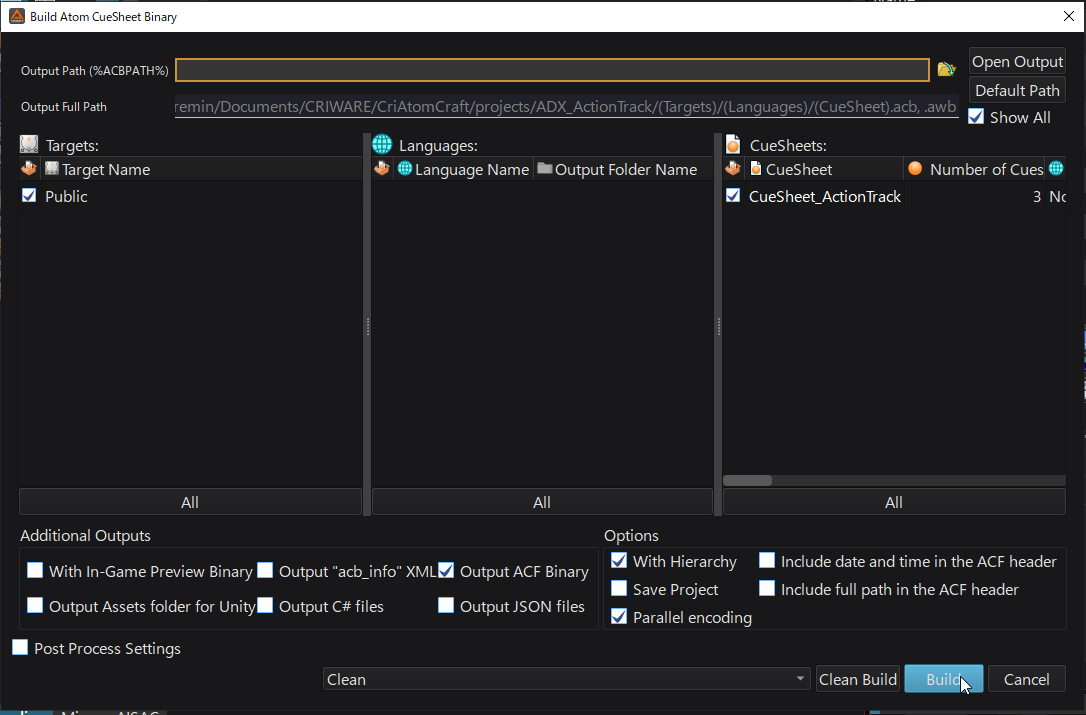
Select the options as shown below and press Build. A new ACB file will be generated.
In the second post of this tutorial, we will import the binary Cue Sheet we prepared in Unreal Engine and use Blueprints to implement this dynamic music system!