

Charging Weapon Sounds [Part 2]
In the previous post, we prepared an ADX Cue Sheet containing Cues for a charging weapon and for several shots based on the charging state. In this post, we will import the data authored in AtomCraft into Unreal Engine and implement it in the game using Blueprints.
Importing the Cue Sheet
To add the binary Cue Sheet to your game project, import the .acb and .acf files that were built into the content drawer (content browser).
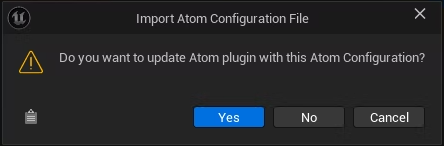
The .acf file contains all the Atom Craft project information. When importing, you will be asked if you want to update the Atom plug-in with the Atom Configuration contained in this file; press “Yes”.
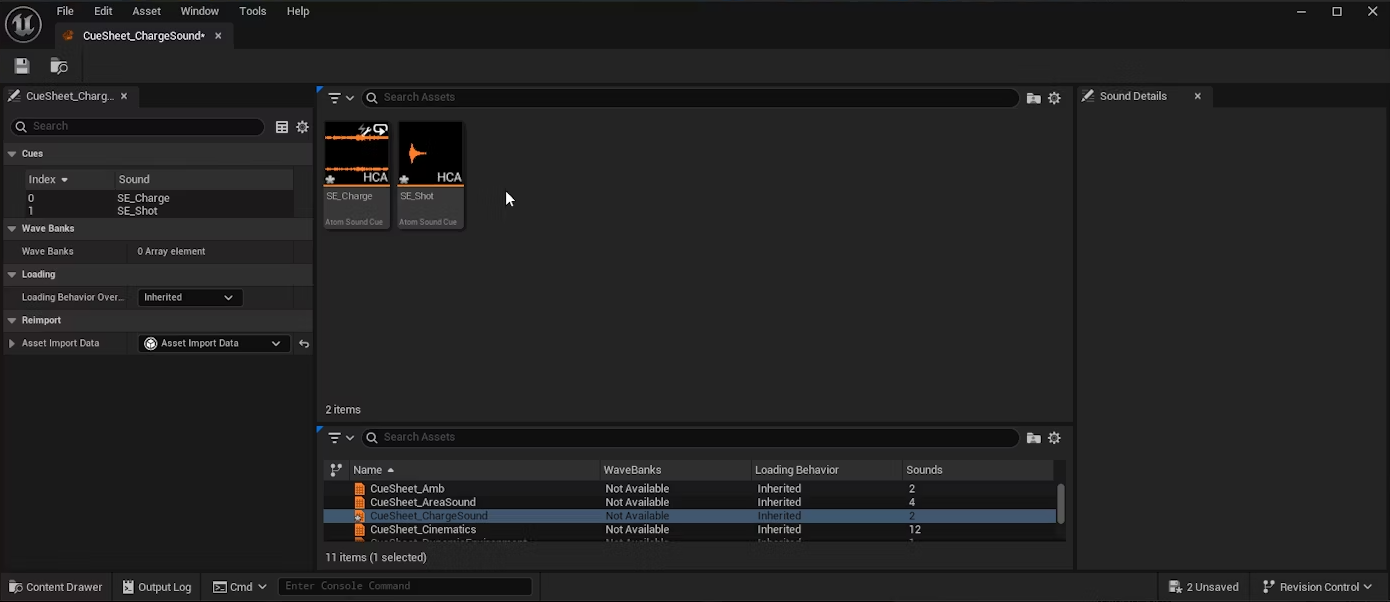
You can easily verify that the Cue Sheet was successfully imported. When you inspect its content, you should see the 2 Cues we created in the previous post, one for the charging weapon and one for that contains the 3 shots. (Note that if you didn’t change the settings, they will have been encoded using our proprietary audio codec (HCA)).
Input registration
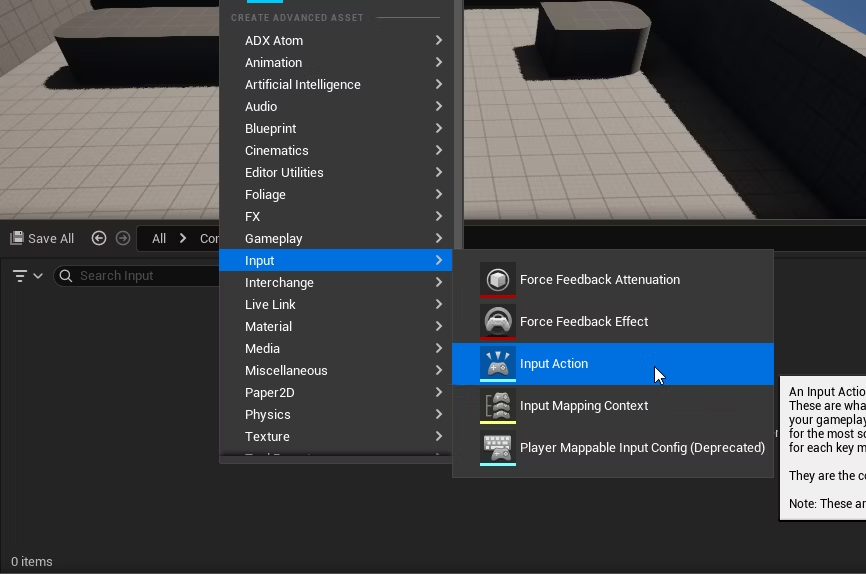
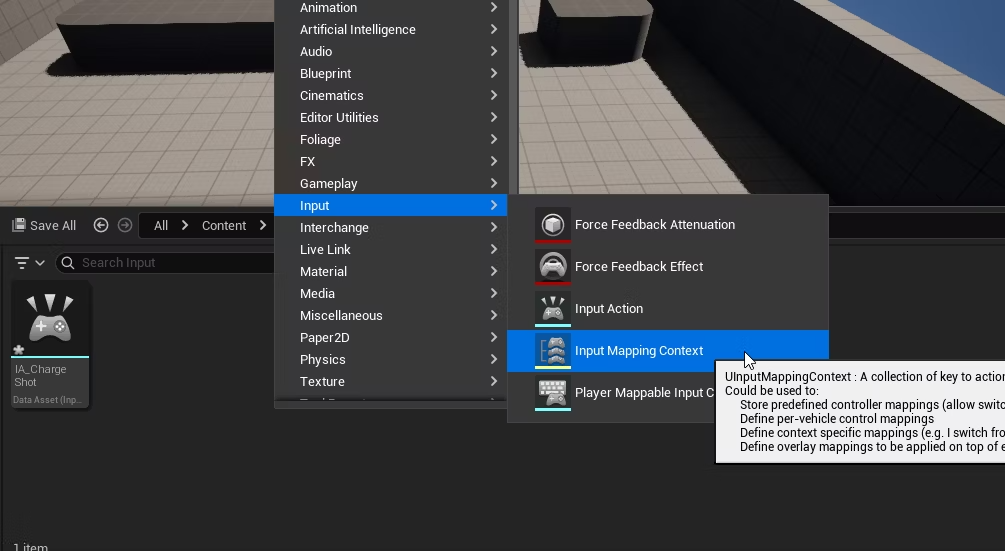
First, we need to register the input button that will be used to charge the weapon. Right-click anywhere in the content drawer (content browser) and select “Input” → “Input Action” to create an Input Action.
You will also need an “Input Mapping Context” that groups together the input buttons, so create one now.
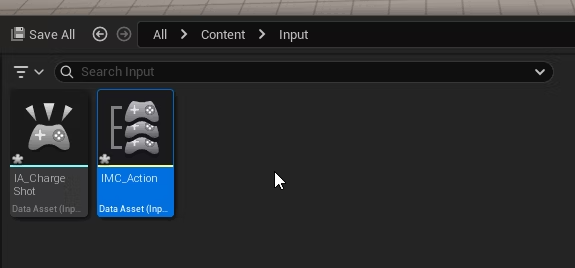
You can confirm that the two assets have indeed been created.
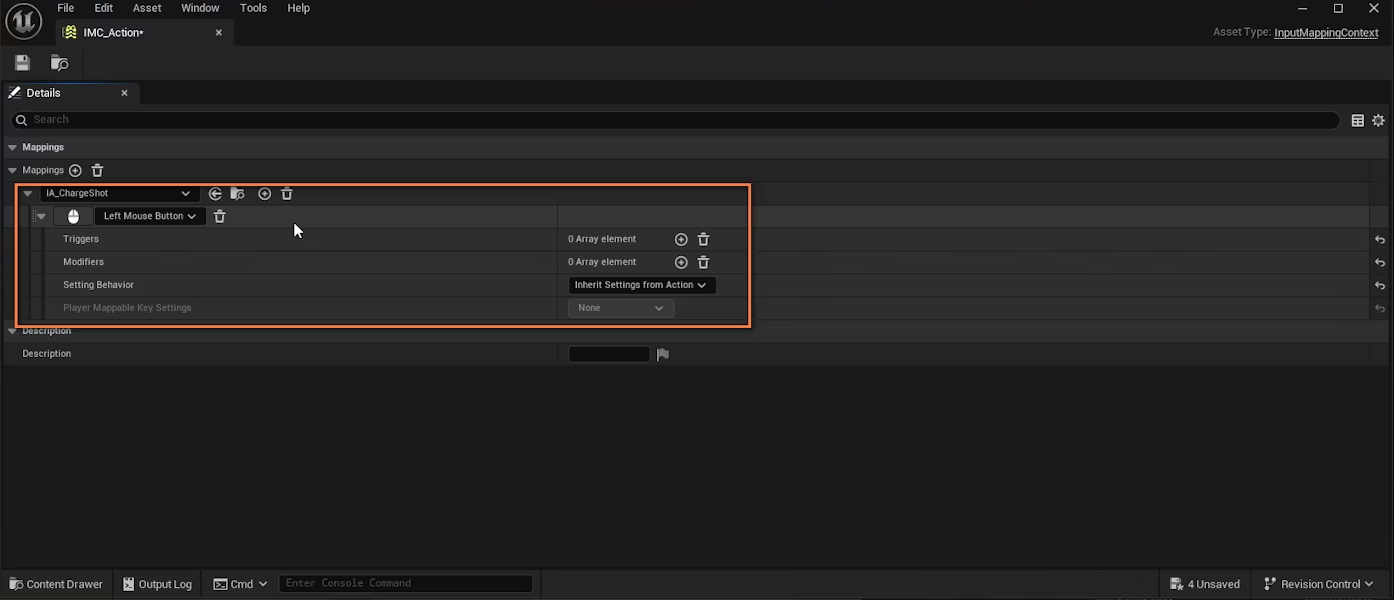
Open the Input Mapping Context and register the Input Action. In this example, we assigned the charging action to the left-click of the mouse.
Playing the sounds
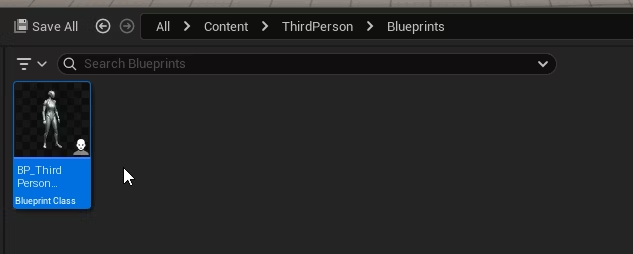
Fiest, let’s open the character’s Blueprint Actor.
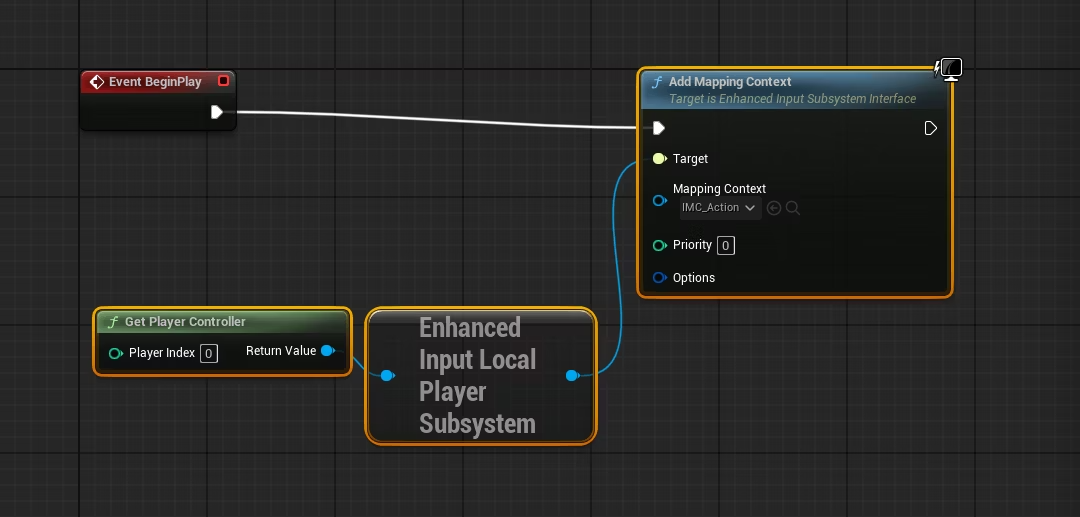
Register the Input Mapping Context for the Event Begin Play timing so that it can be used by this character.
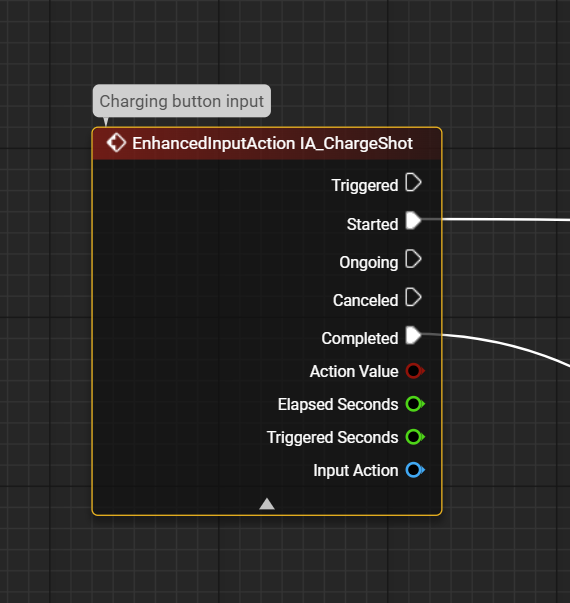
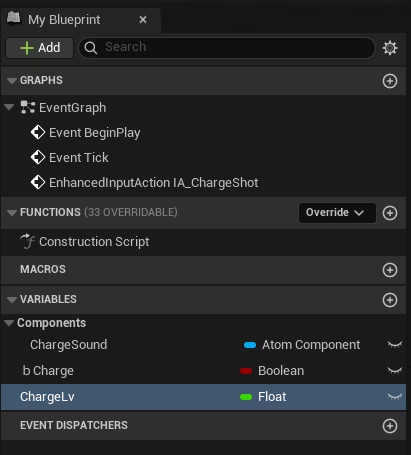
Add an event node EnhancedInputAction IA_ChargeShot that will handle the input we registered.
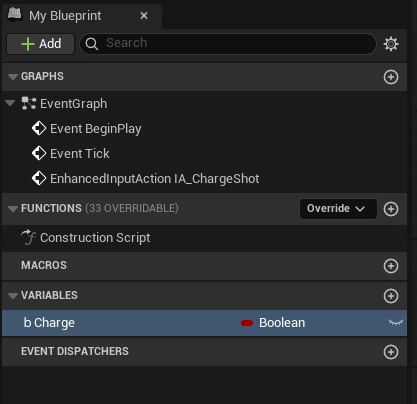
Let’s add a variable “bCharge” of type Boolean that will help us keep track of when the weapon is charging.
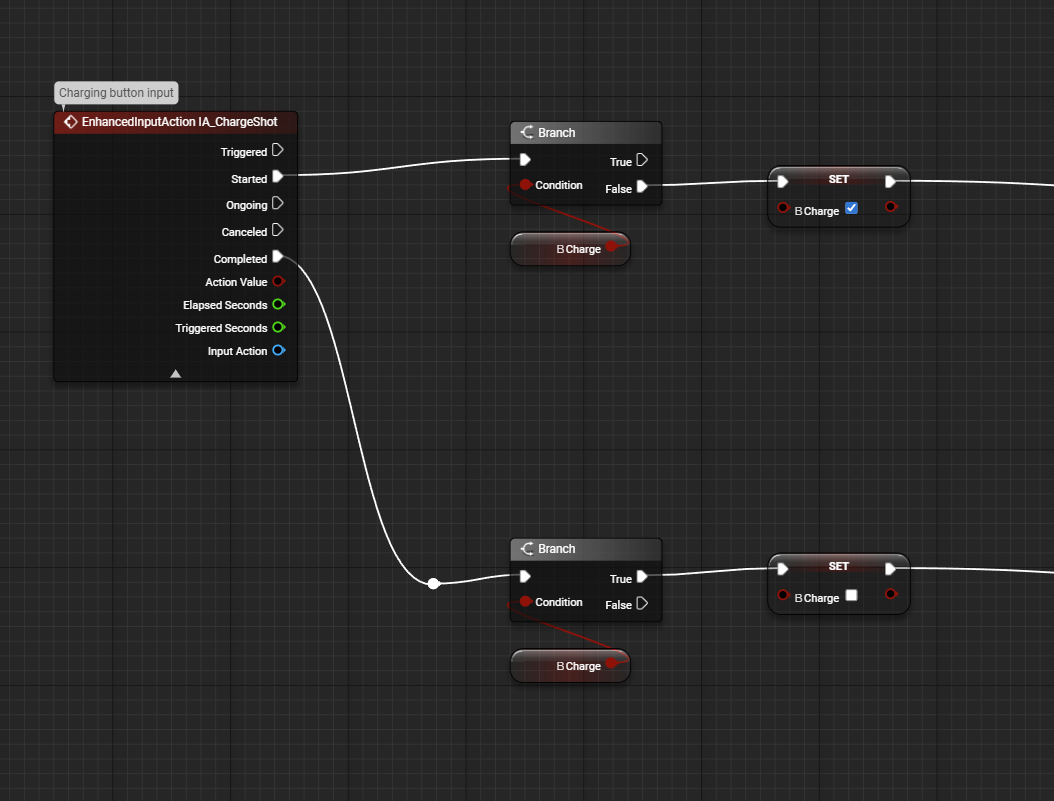
In the EnhancedInputAction IA_ChargeShot node, “Started” will be triggered when the button is pressed (“bCharge” will become True), and “Completed” will be triggered when the button is released (“bCharge” will become False).
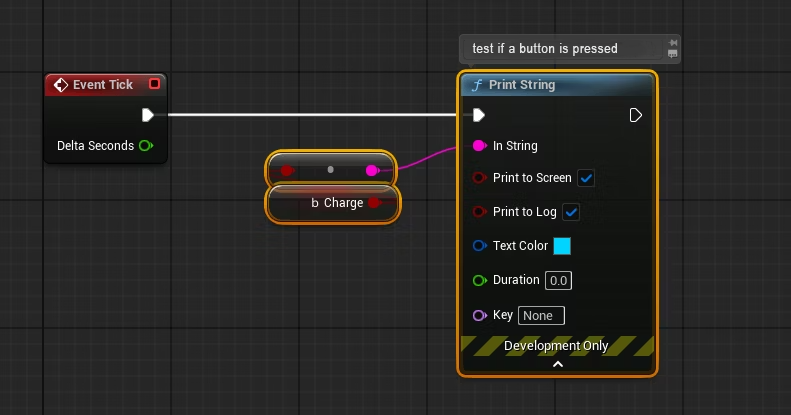
If you are unsure whether the input processing is correct, try displaying a simple test message with a Print String node. In this case, the current “bCharge” status will be displayed in the upper left corner of the screen.
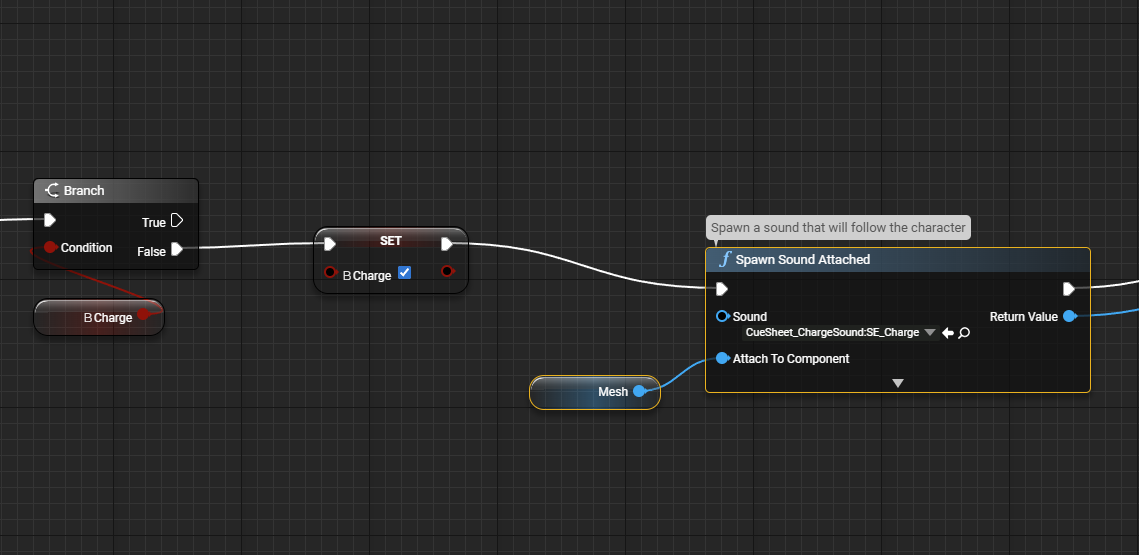
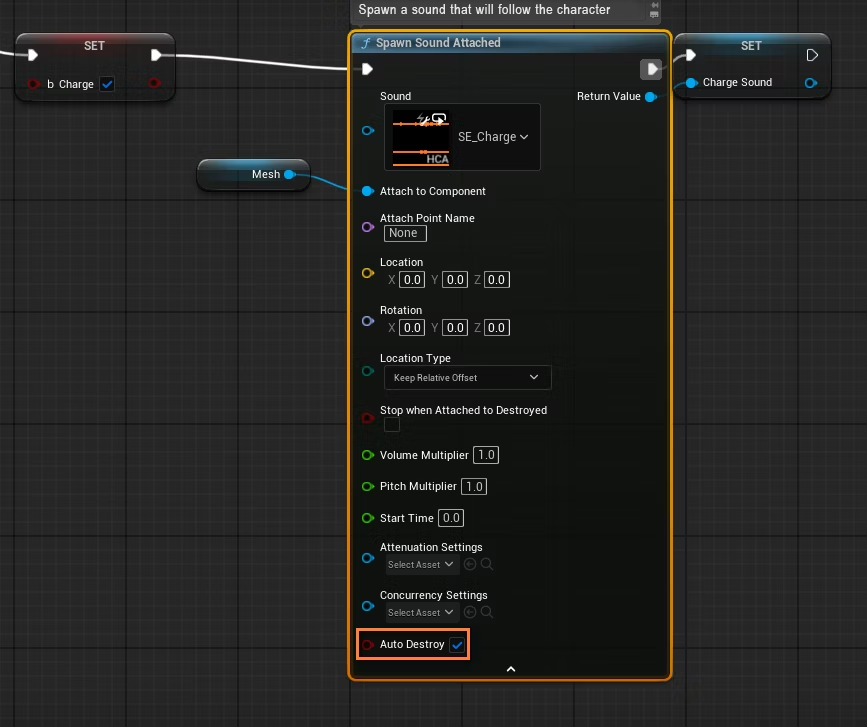
When “bCharge” becomes True, the charging sound will be started by the Spawn Sound Attached node. This node will cause the sound to follow the specified component as soon as it plays. The destination should be the character mesh or whatever is emitting the charging sound.
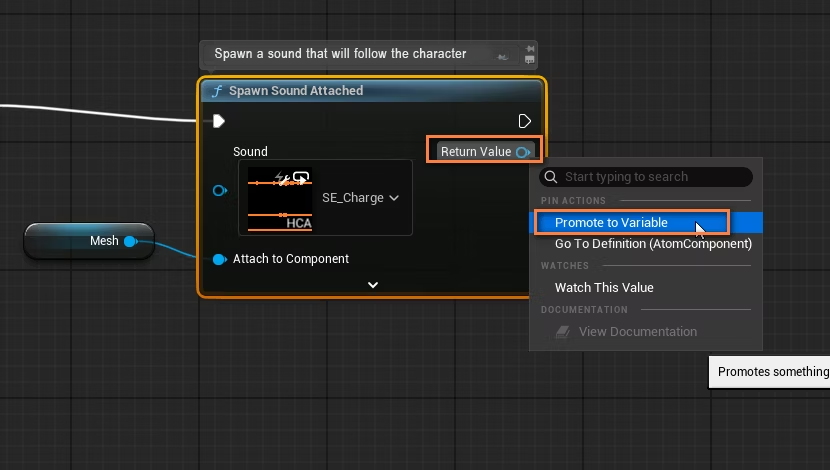
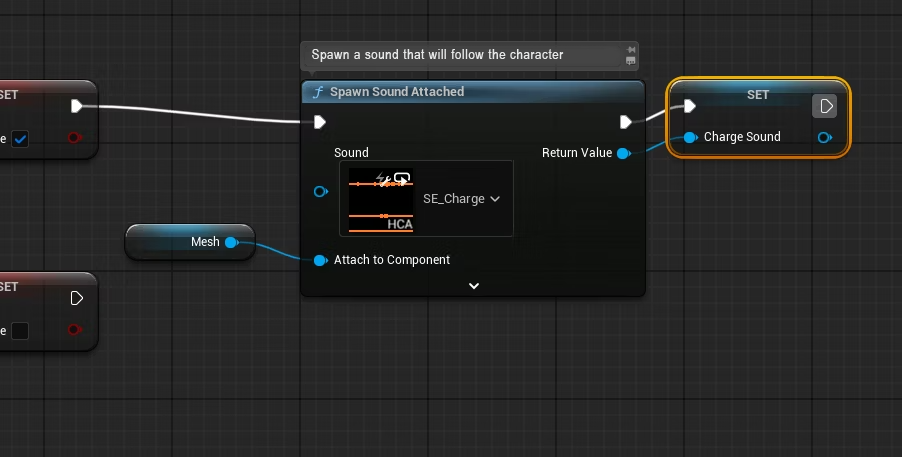
Right-click the blue output pin of the Spawn Sound Attached node and select “Promote to Variable” to make it a variable. This will allow us to easily access the sound later.
Here, we named it “Charge Sound”.
Also, check “Auto Destroy” to automatically destroy the component when the playback stops.
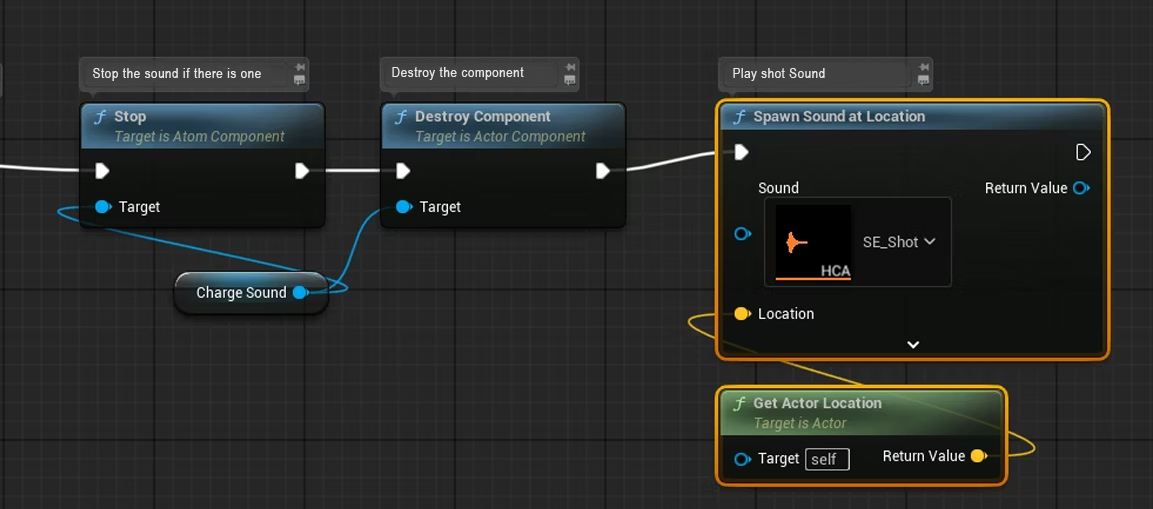
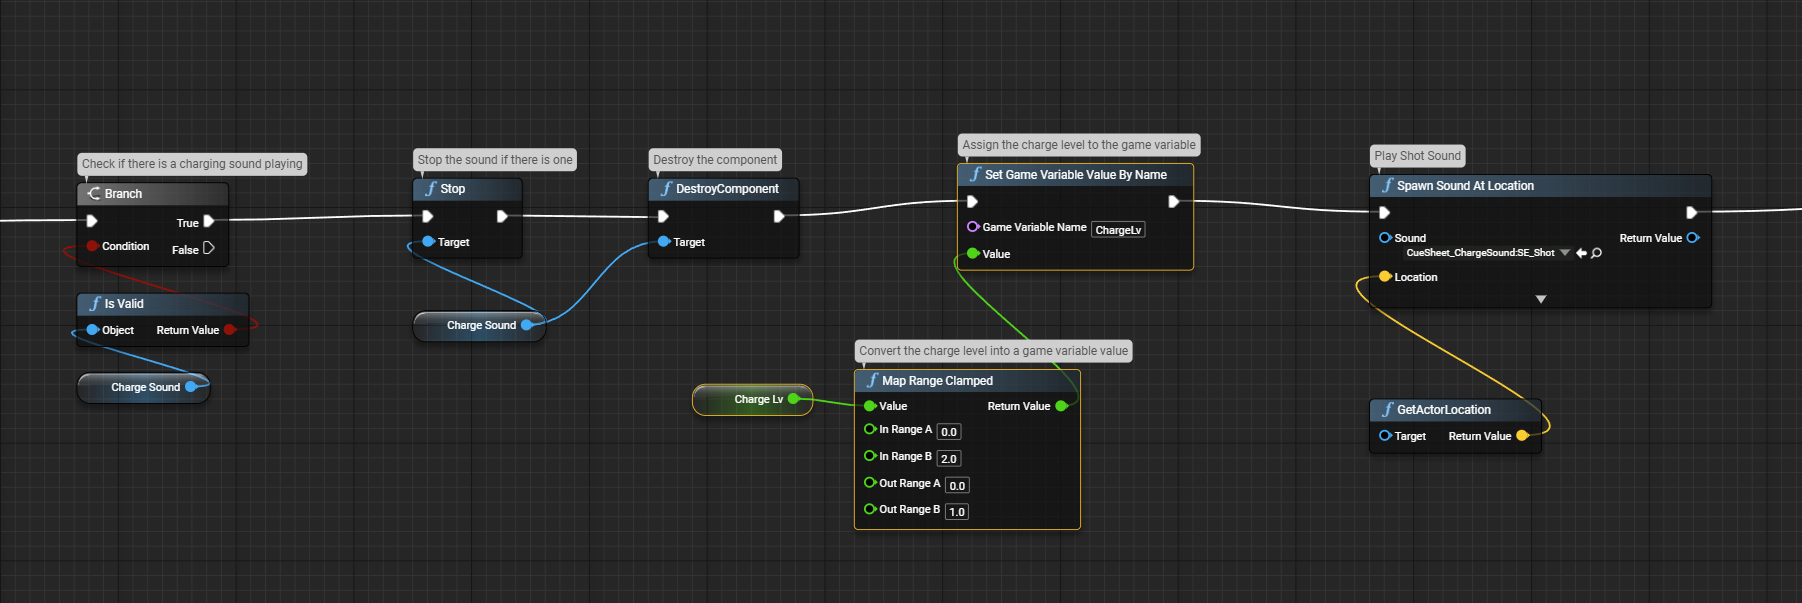
If we are charging the weapon and the input strength is lower than 0.1 (i.e., the button is released), the charging state is set back to False, and the playback of the charging sound is stopped using the Stop and Destroy Component nodes.
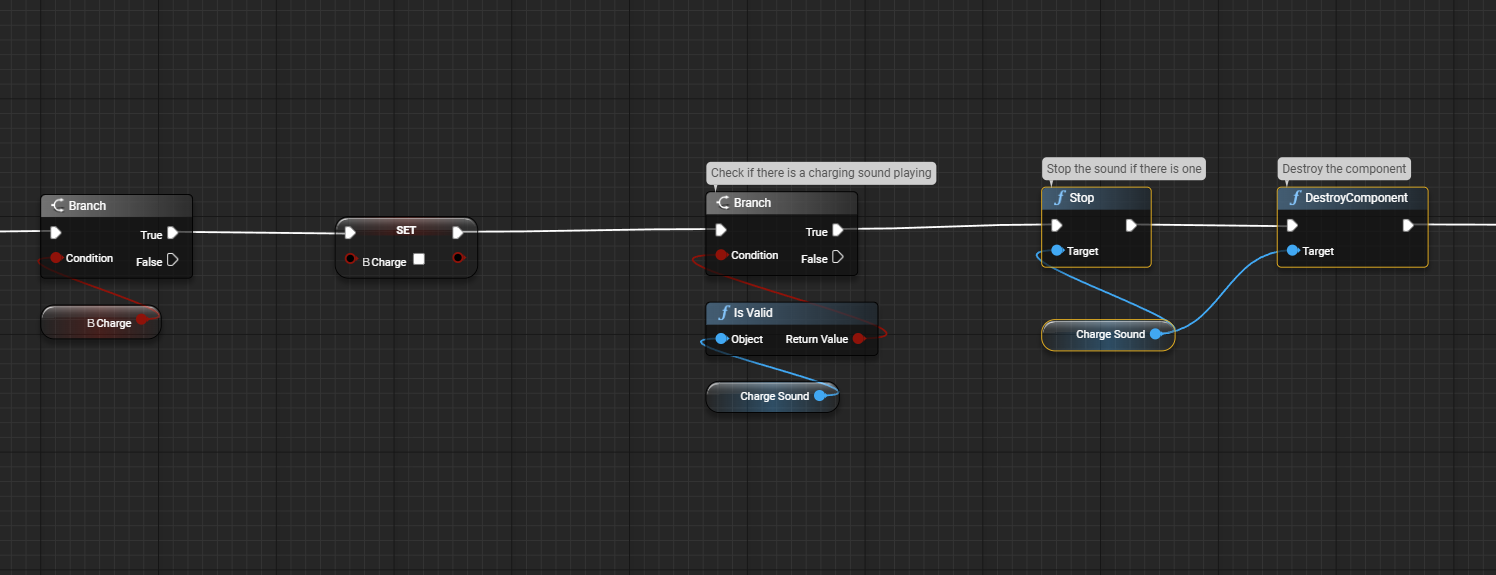
Then, we play the sound of the shot sound using the Spawn Sound at Location node.
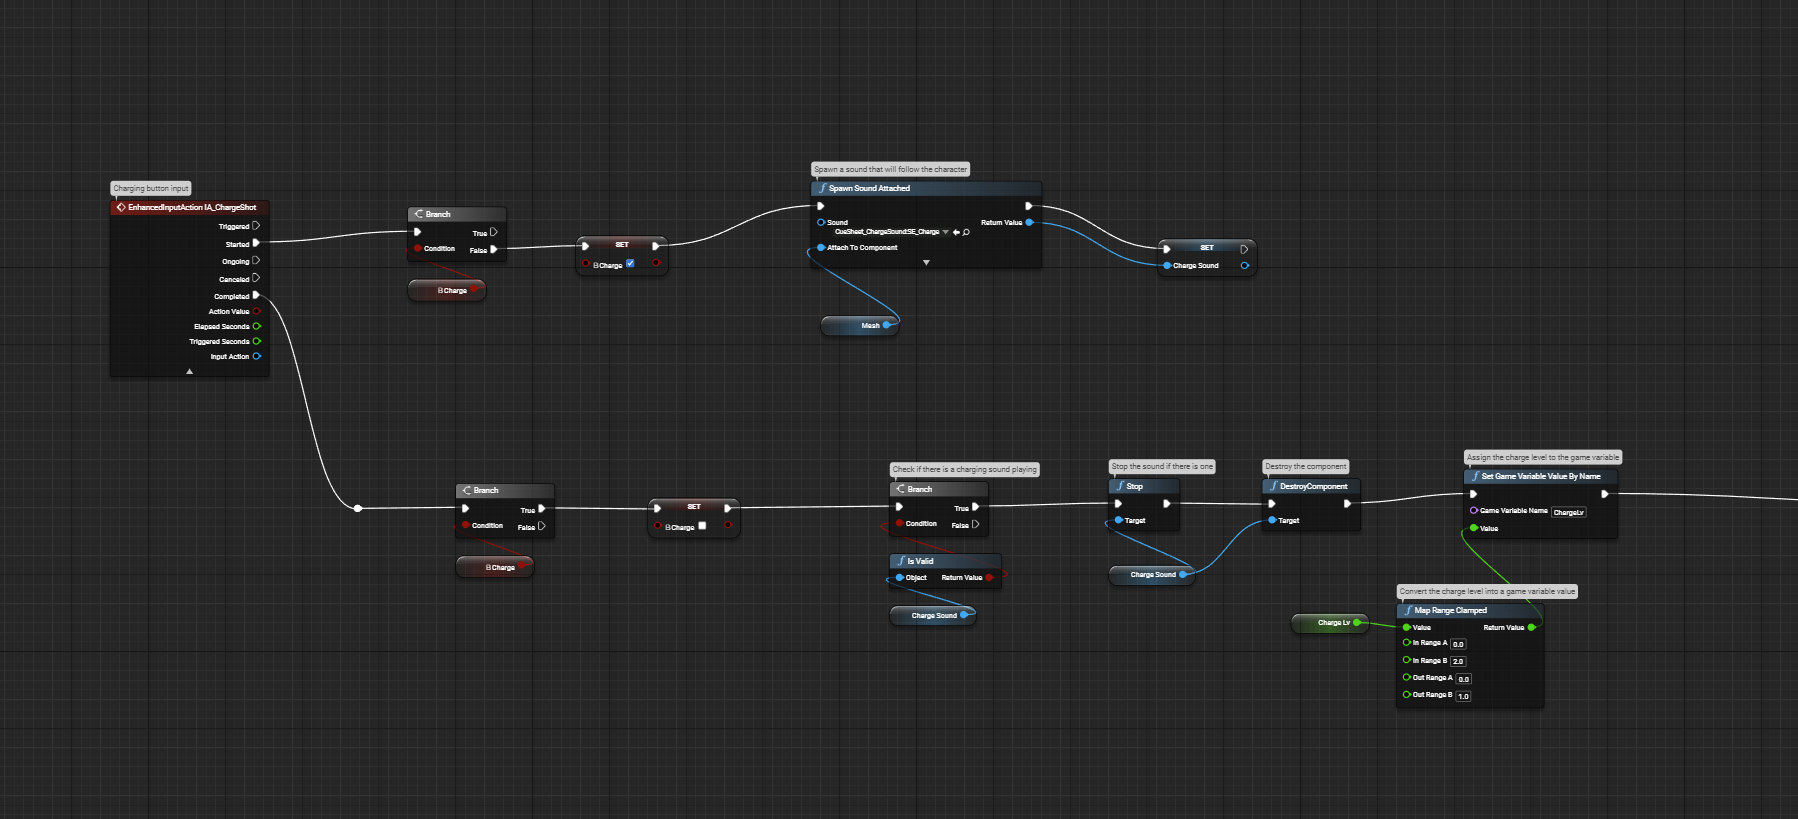
This is what the whole logic looks like at that point.
Now that the minimum functionality is implemented, let’s test it!
The charging sound should loop while the button is pressed, and stop when we release it, at which point the shot sound will play instead.
Updating the charging sound
We want the charging sound to progressively change over time as the weapon becomes more and more charged.
First, let’s add a variable of type Float called “ChargeLv” that will be used to store the charging level.
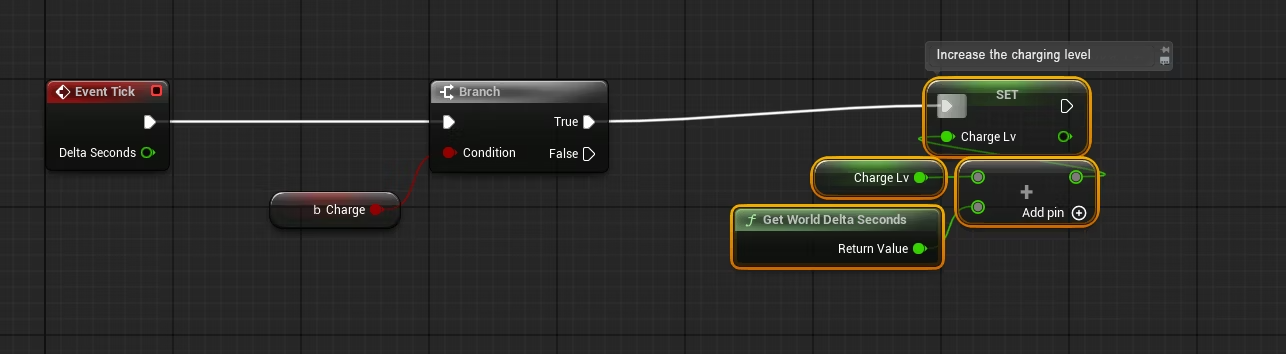
We want to progressively increase the charging level while the button stays pressed. To achieve this, we add a Get World Delta Seconds node and increase the charging level by 1.0 per second.
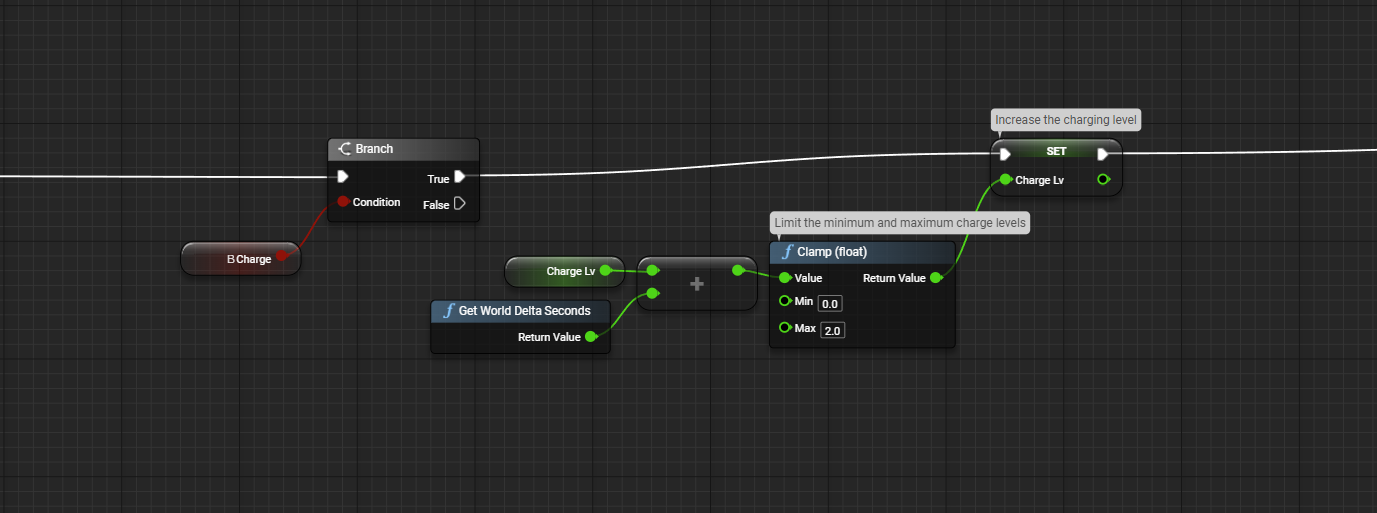
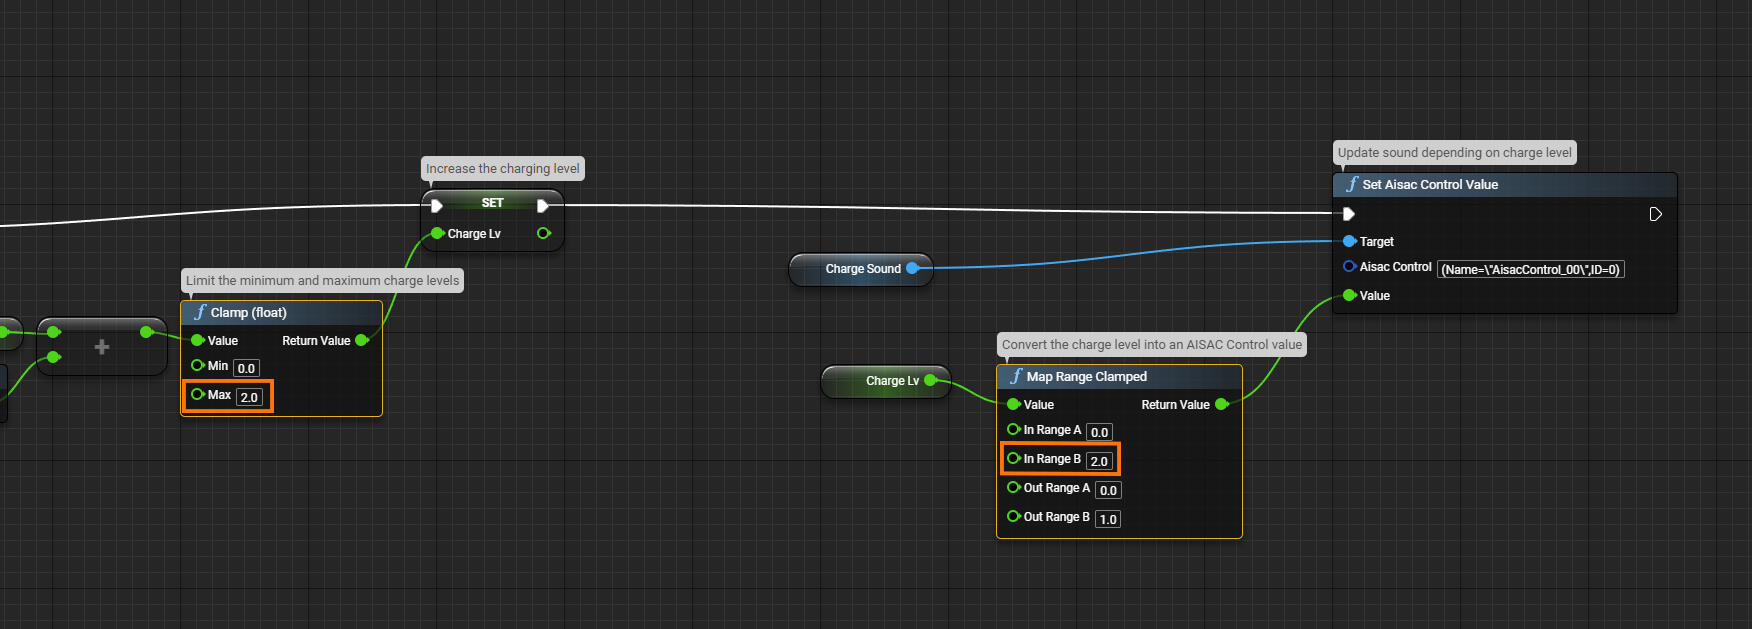
To prevent the charging level from increasing too much if we hold down the button for a long time, we add a Clamp node that will limit the maximum value it can reach.
Finally, we will use a Set Aisac by Name node to control the Cue’s pitch via its AISAC.
The value of the “ChargeLv” variable will be used.
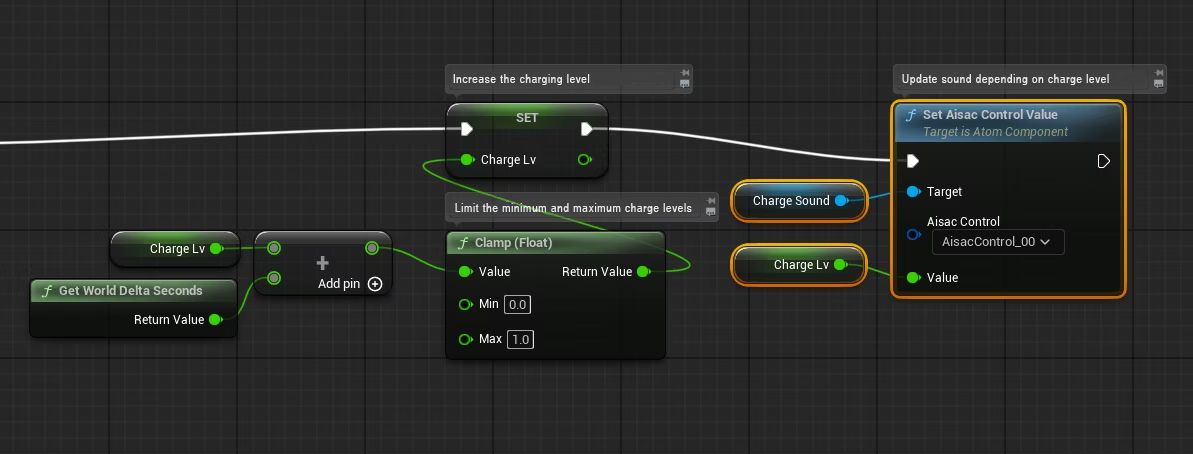
To force the value in the [0…1.0] range expected by the AISAC, we add a Map Range Clamped node. Enter the input range (minimum and maximum values of the charging level) into “In Range”, and the output range (minimum and maximum values of the AISAC control) into “Out Range”.
Playing the right shooting sound
Our last implementation point consists of triggering different shooting sounds based on the charging level.
The shooting sound will change automatically according to the game variable set on the AtomCraft side (see previous post), so all we need to do here is to assign the game variable with Set Atom Game Variable node.
Just like we did with the AISAC control, we process the value with a Map Range Clamped node and pass it to the game variable.
Of course, when a shot is fired, we also need to reset the charging level.
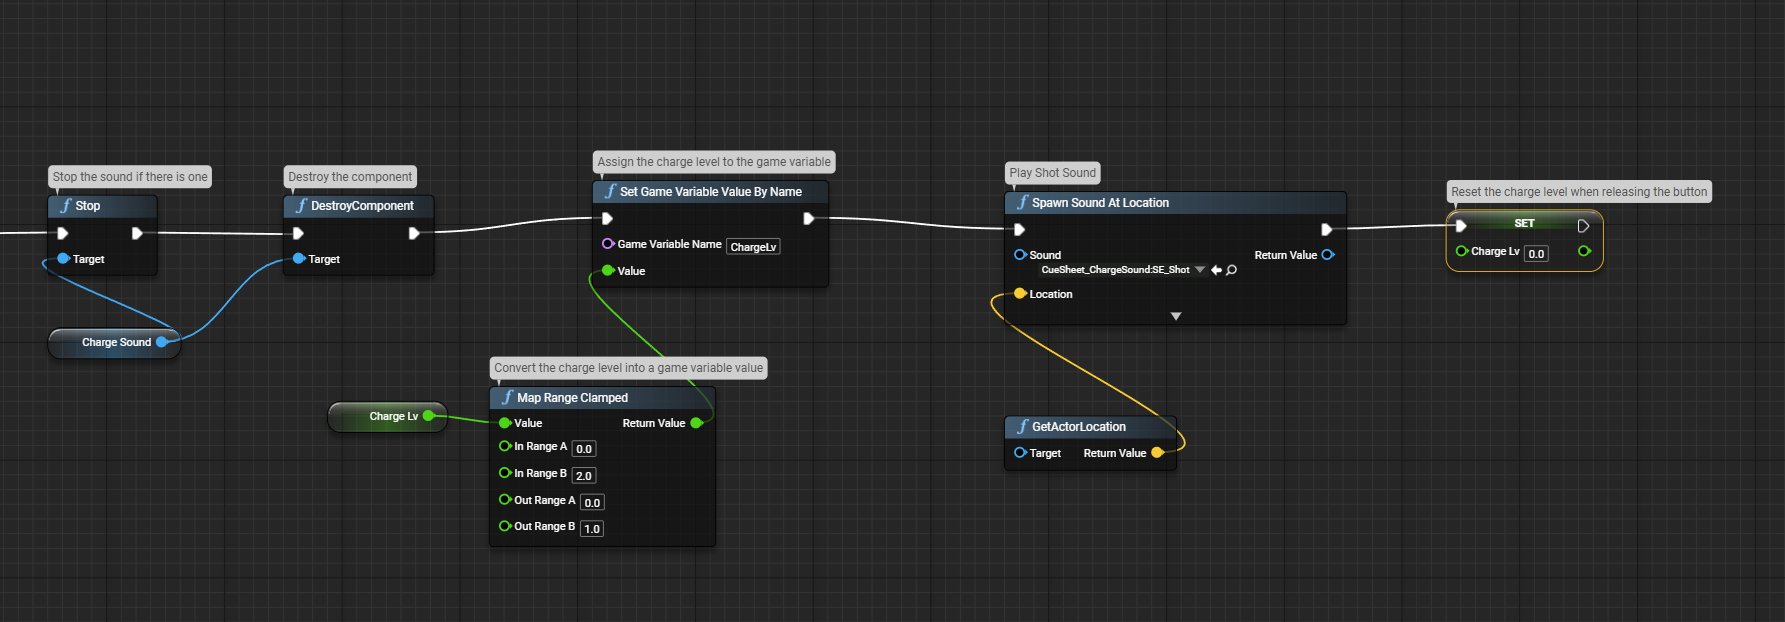
And that’s it! This simple game mechanic undoubtedly adds tension to a game, and now the sounds are a part of it too!