

ADX Beginner’s Guide #14 – Dialog and Localization
After tackling sound effects, we learned all about interactive music, finishing with Block Playback in the previous blog. The last type of sound in a game is dialog, and in this post, we will examine the many convenient features that come with ADX to manage and localize it.
Language Settings
ADX supports multi-language projects, making it easy to prepare sound materials for each localization language, and to create Cues that can automatically switch to the specified language.
The first thing to do is to configure the languages that will be used in the project:
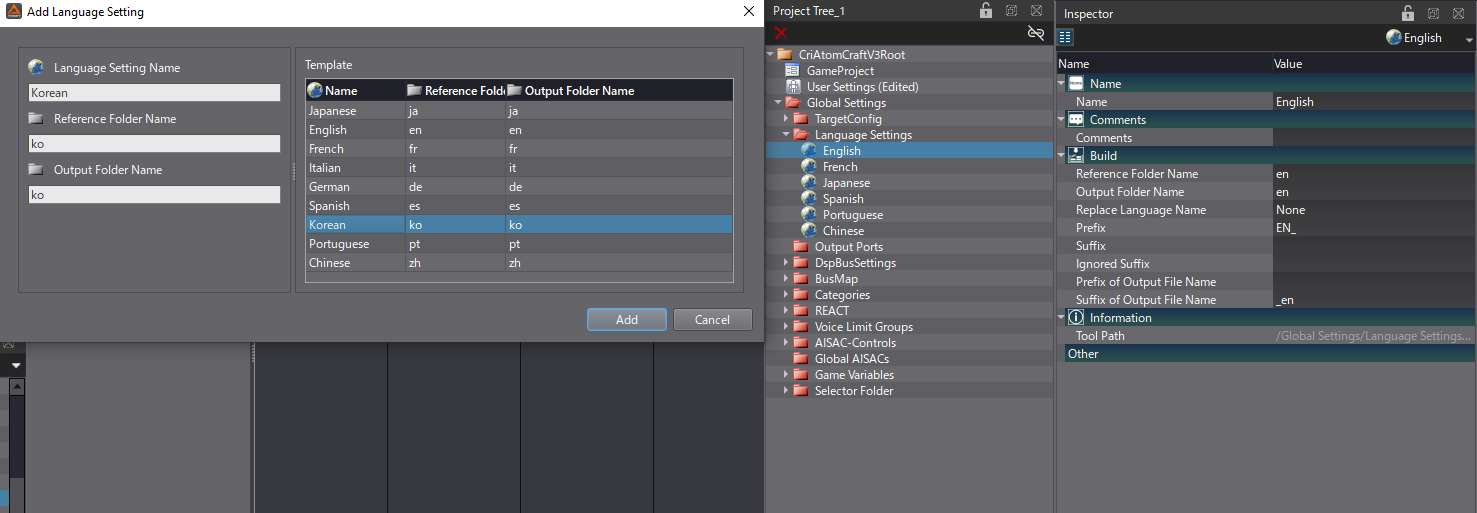
- In the Project Tree, create Language Settings for each language.
- The language creation window provides some presets for the most common languages.
- Select a language and edit its properties in the Inspector:
- Reference Folder Name: this is the name of the Material folder used for this language.
- Output Folder Name: this is the folder used to build the binaries for this language.
- Replace Language Name: This is the replacement language used when a Material referenced in a Cue is not available in this language. For example, if you didn’t receive the files in a specific language, you can temporarily replace them with the files from another language.
- Prefix and Suffix: These are the prefix and/or suffix used in the name of the Materials to avoid any confusion between languages. For example, if you use a prefix system of the form EN_Voice_01.wav, FR_Voice_01.wav, etc., you can tell ADX to take these prefixes into account to match the sound between each language. So, EN_Voice_01.wav and FR_Voice_01.wav will be considered as the same asset in different languages.
- Ignored Suffix: This specifies suffixes to exclude from the Material name. This is in case your nomenclature uses suffixes unrelated to localization after the language suffix.
- Prefix and Suffix of Output File Name: This allows for the addition of a prefix and/or suffix to the binaries built by ADX.
Material Folders for Localization
Once the languages have been configured in the project, the dialog files can be imported.
A special Material folder must be set up for ADX’s localization features to work properly:
- Select the Work Unit where you want to create your dialog Cues.
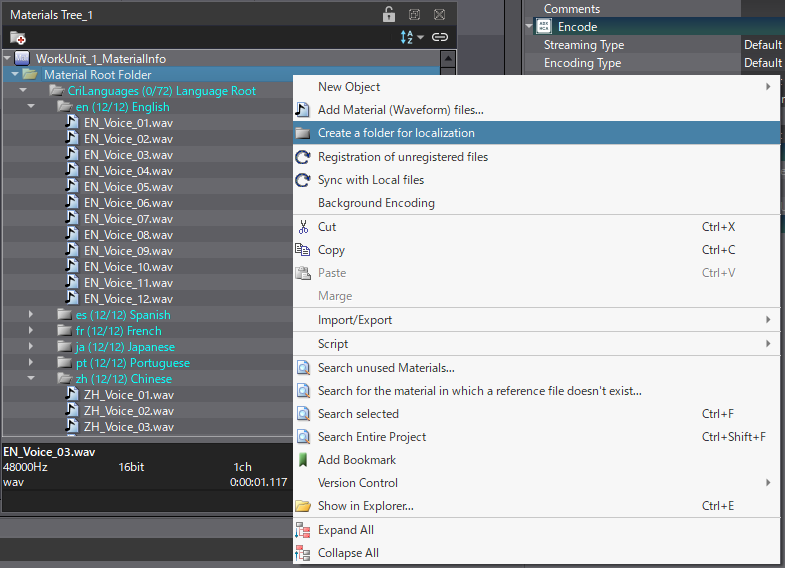
- In the Material Tree of this Work Unit, right-click on the Material Root Folder, and click on Create a folder for localization.
- This will automatically create a folder called “CriLanguages – Language Root” containing a subfolder for each language (named under the Reference Folder Name property set in the language settings).
- You can now drag and drop the dialog files for each language into their respective folders. The names of the files must respect the prefix and suffix properties of the language to be recognized by ADX.
- If a new language is added later during production, its folder can be automatically created by using Create a folder for localization again (after creating a Language Setting for it).
Switching Materials in Cues
You can now use the Materials in your dialog Cues. When the Material referenced by a Waveform Region comes from the Localization folder, the Waveform Region is considered as language-dependent.
A language-dependent Waveform Region automatically switches the referenced Material for the Material of the selected language.There is no need to create a different Cue for each language.
Setting such a Cue is simple:
- Create a Cue
- Drag and drop a Material from the Localization folder into the Cue.
- You will see a text on the Waveform Region indicating which language and Material it refers to.
- Note that the Cue will use the Material you dropped on the timeline to find the corresponding assets in the other languages. So make sure you always use the Materials of the same language as a reference when you create a Cue. This will ensure that you always have the same point of comparison if any assets are missing between languages.
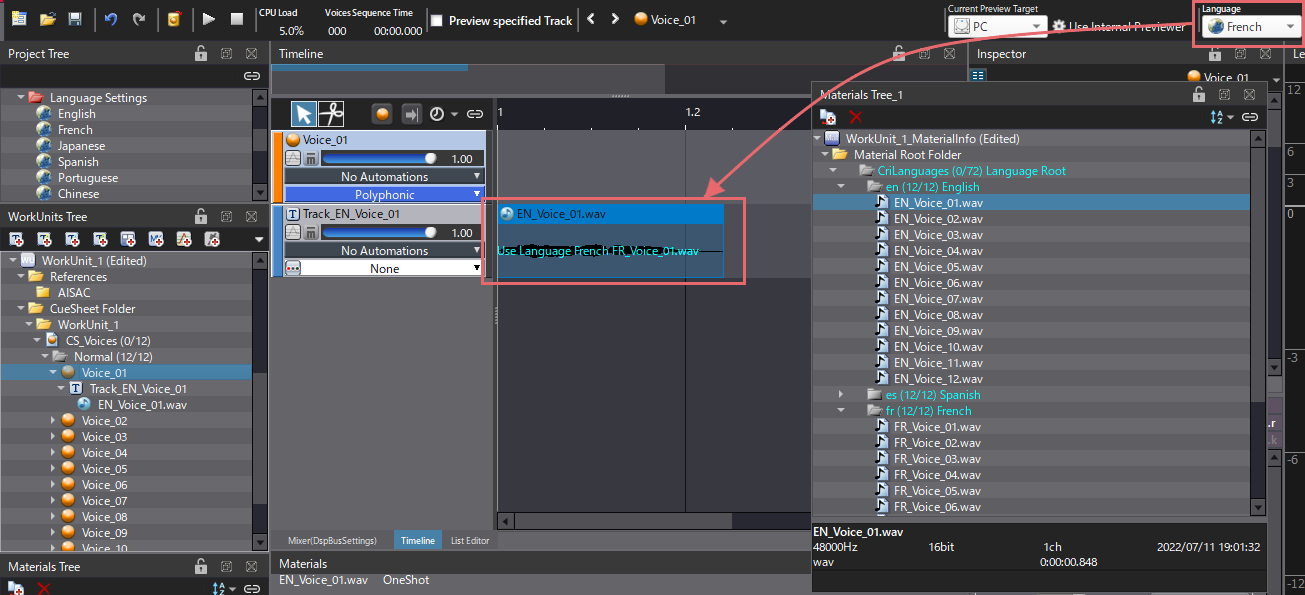
You can test your language-dependent Cue simply by switching the language in Atom Craft’s toolbar. The Waveform will be updated with the correct Material, and the Cue will play the sound in the chosen language.
Language-dependent Tracks
In addition to the Waveform Region, it is possible to assign a language to a Cue’s Track and make it language-dependent. If a track is language-dependent, it will only playback when the project is set to a specific language. This is especially useful when additional sounds need to be played in some languages, or if the playback timing is different between languages. Since the switch is made at the Track level, Materials outside the Localization folder can also be used to localize sound effects rather than dialog (such as localized ambience or crowd walla).
To make a Track language-dependent:
- Create or select a Track in a Cue
- In the Track section in the Inspector, click on the Apply Language property.
- In the next window, select one or several languages that will be assigned to the Track.
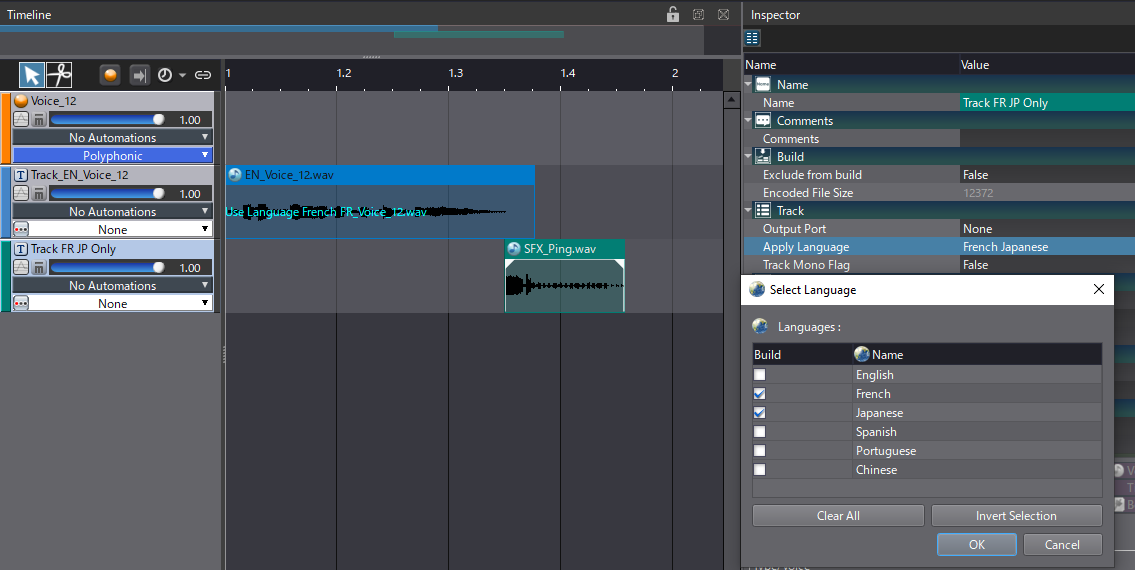
Now, the Track will play or not depending on the language selected.
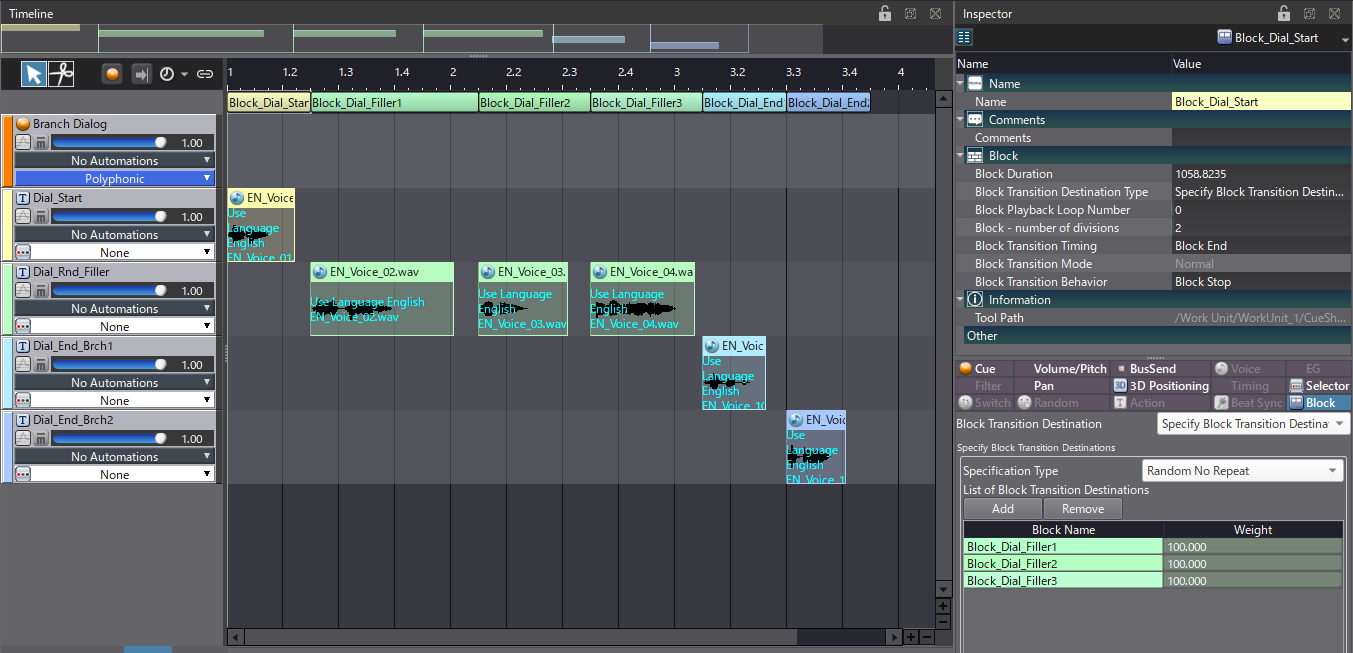
You should now be able to manage your dialog files with Atom Craft. Of course, everything you learned in the previous posts of this guide still applies to these sounds. For instance, the Block Playback feature we recently examined offers a convenient way to create a dynamic dialog system, like those used in sports games.
In the next post of this beginner’s guide, we will learn how to build the binary data that will actually be used by the game engine!