
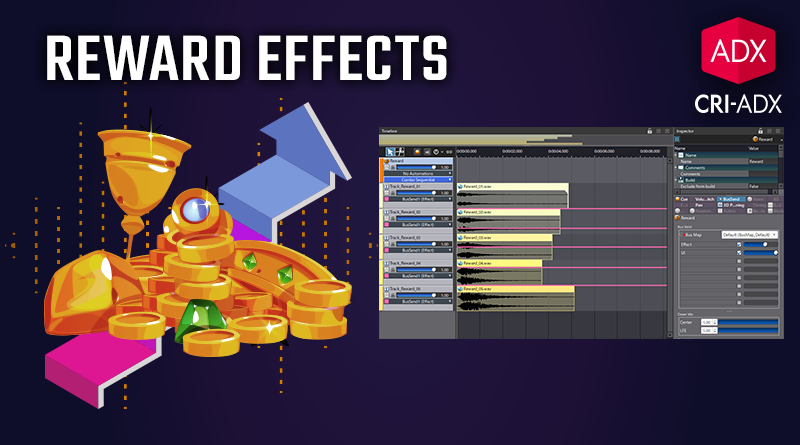
Reward Effects
Puzzle and arcade games often come with many rewards to unlock. As the score is calculated and increases, the rewards are progressively given. Atom Craft provides a special type of Cue to easily implement sounds for this type of situation, as we will see in this post.
Asset Creation
In this example, we designed 5 sounds that reflect a progression in the rewards. Here are a few ideas on how to do it:
- Use tonal sounds such as chimes or xylophone.
- Create a chord progression as the reward gets bigger.
- Progressively increase the number of layers with whooshes, fireworks, applause etc.
Once you have prepared your assets, import the five sounds in Atom Craft to register them as Materials.
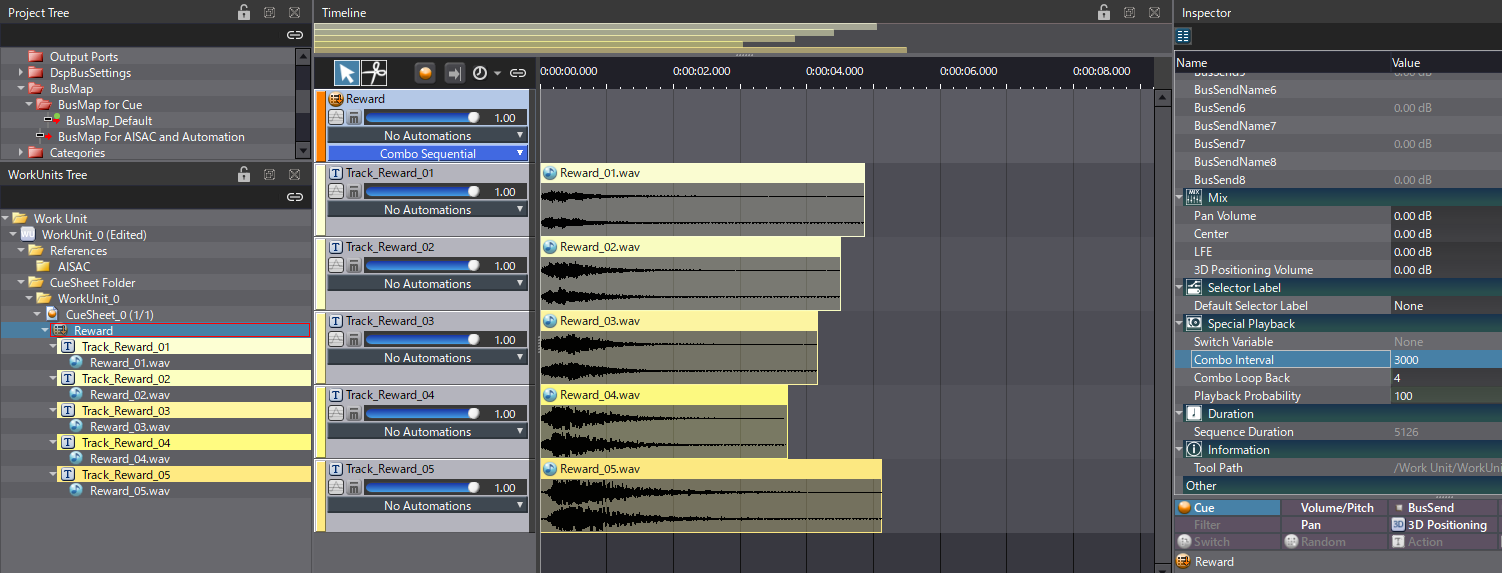
Combo Sequential Cue
Atom Craft provides a special type of Cue to implement the effect we are after: the Combo Sequential Cue. Each time this Cue is triggered within a predefined time interval, it will play the next Track. Otherwise, it will switch back to the first track.
- Create a new Cue and change its type to Combo Sequential.
- Drag and drop your five Materials on the Cue to create five new tracks and their respective Waveform Regions.
- If needed, reorder the tracks to match the progression.
- Select the Cue, open the Inspector and go to the Special Playback section.
- Set the Combo Interval between 3000 and 4000 ms, and the Combo Loop Back to 4.
The Combo Interval is the time after which the Combo effect will be reset. The Combo Loop Back defines which track should be played once we reached the last one. Here, we chose 4 to continue playing the last track until the sequence resets (note that the index is 0-based).
Effect Send
Playing the Cue several times – each time within the selected interval – will now create a progression. With the help of Track Automation, we can also add an effects layer that becomes gradually more pronounced.
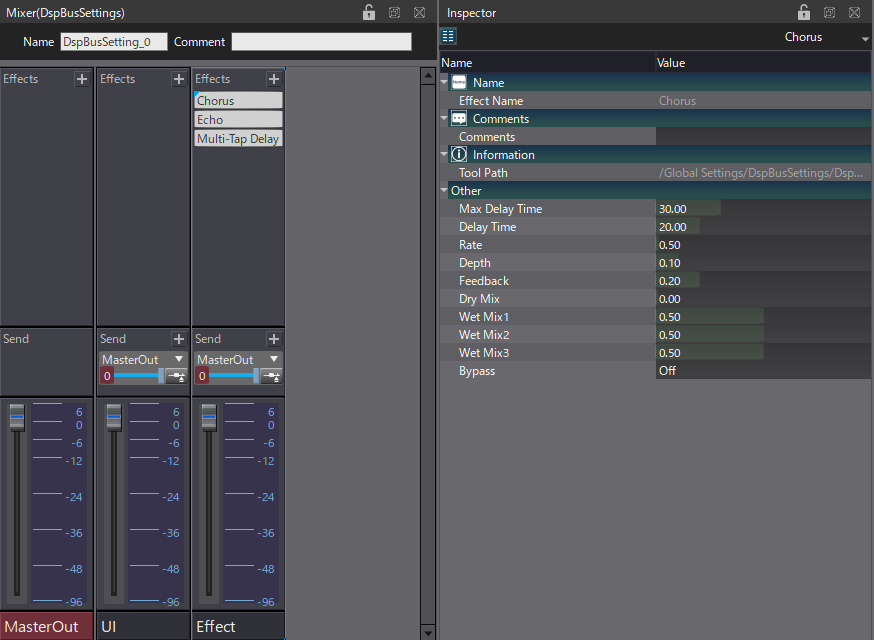
- Create two Busses, “UI” and “Effect”.
- On the Effect bus, add Chorus, Echo, and Multi-tap Delay effects. Set the Rate of the chorus at 0.5 and its Dry Mix at 0. The Delay Time of the Echo should be around 125. Finally, lower all the Tap Level parameters of the Multi-Tap Delay at 0.5.
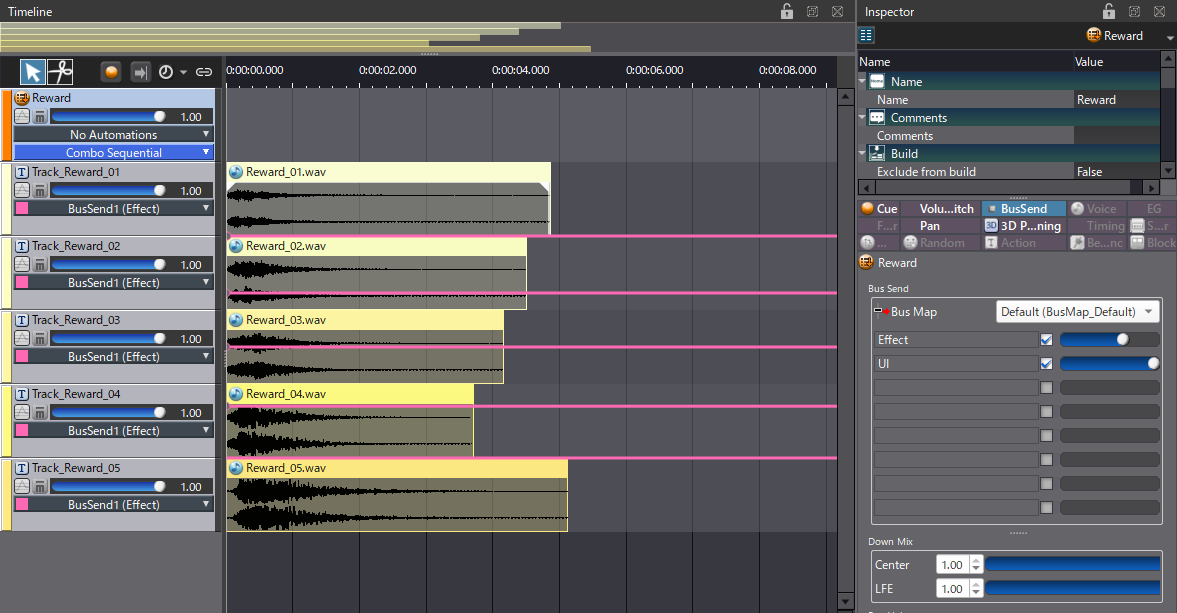
Now, route the Cue to the busses:
- In the Project Tree, create a new BusMap and add the UI and Effect bus to the list.
- Select Bus Map For AISAC and Automation, then replace the MasterOut with the Effect bus.
- Select the Cue and use the new BusMap instead of the default one.
- Activate both the UI and Effect busses in the Inspector, and lower the Effect send by 3dB.
Once the routing done, the automations can be added:
- On each track of the Cue, add a Bus Send Automation for the Effect bus.
- From top to bottom, progressively increase the value of the send, so that the effect become more intense.
That’s it! You can download the project below and try it with your own progression of sounds.
 AtomCraft_Project_Reward.zip