
3D Transceiver (Part 2)
In the previous post, we learned how the 3D Transceiver can be used to more accurately simulate sound sources emitted through a door, a window etc. by submixing them at the location of the opening in the level geometry. In this post, we will see how to implement this feature in an Unreal Engine project.
Defining the 3D Regions
First, 3D Regions must be defined in the CRIWARE Unreal Engine Plugin. They can be created from the Atom 3D Region Asset class.
- Right-click on the Content Browser
- Go to Sounds and select Atom 3D Region
- Create a 3D Region for the indoors, and another for the outdoors
Now assign the 3D Regions either directly in the Cue (in the Content Browser) or in the AtomComponent of an AtomSound (in the level editor). For instance:
- Select an AtomSound on the map
- In the Details panel, select the AtomComponent and go to the Transceiver section
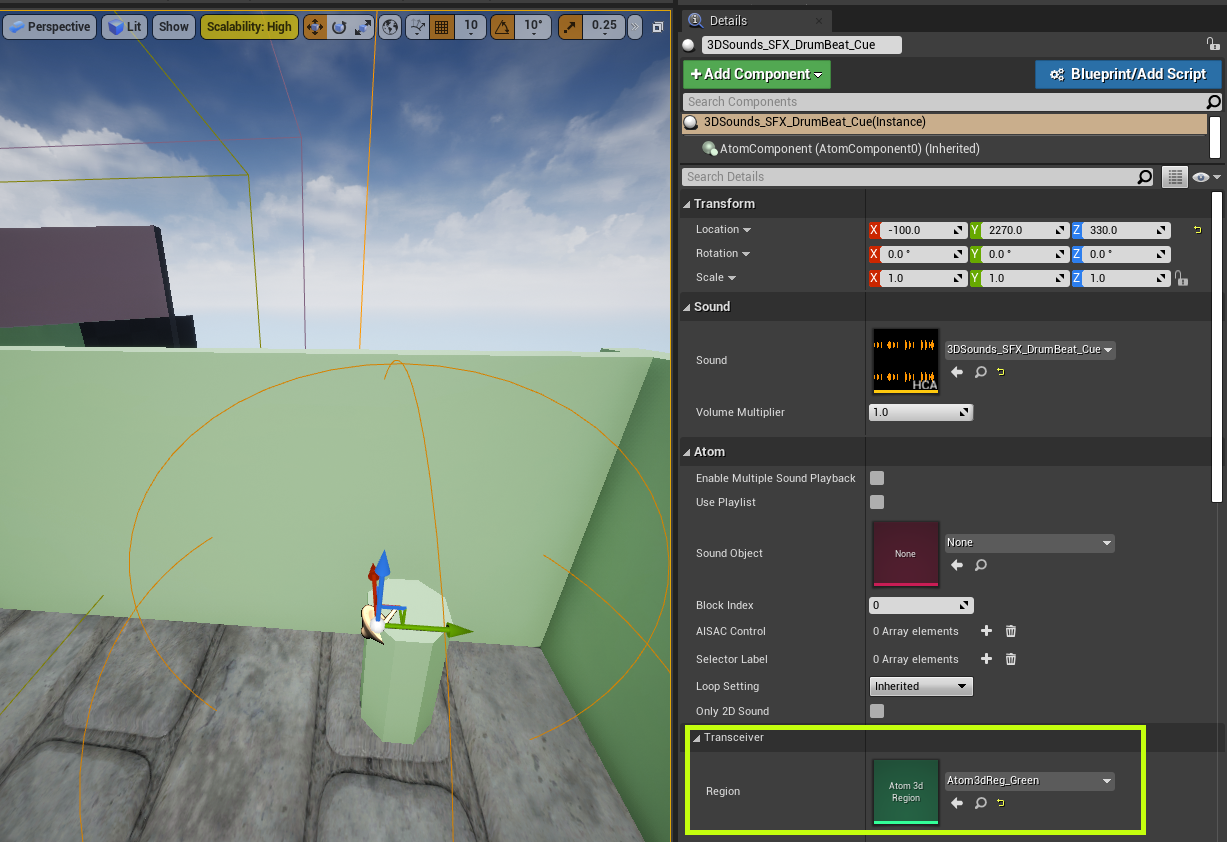
- Select the Atom 3D Region you want to assign to this 3D sound.
Setting up the 3D Transceiver
It is now possible to place a 3D Transceiver at the location which connects both regions. The Atom 3D Transceiver Component class gives access to the basic 3D Transceiver features. It can be attached to a target actor in the Unreal Editor to link the component to existing geometry, or to customize the way 3D Regions are assigned to the Transceiver and the listener.
- Select an actor in the level
- In the Details panel, select Add Component > Atom3DTransceiverComponent
The plugin also provides the Atom Transceiver Box, which is a Blueprint class that can be dropped directly on the map to use the 3D Transceiver feature without any programming required.
- In the Content Browser, select the CriWareContent folder
- Drag and drop an Atom Transceiver Box onto your level
- In the editor, the box will show a red arrow pointing to the forward direction of the 3D Transceiver, and a cyan arrow pointing upwards
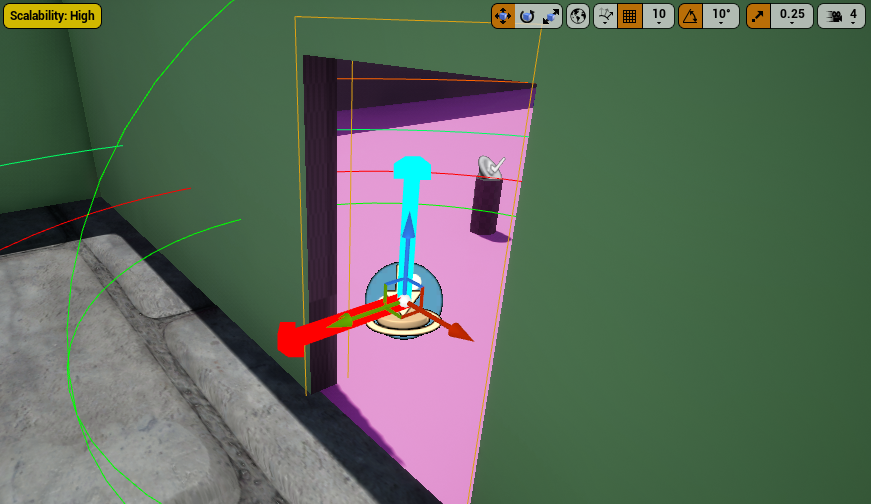
- Rotate the box so that the red arrow points to the indoor region
- Finally, set the Shape of the box so it fits the opening in the wall
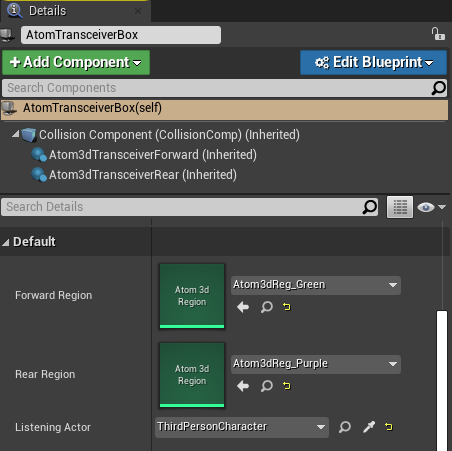
The 3D Regions must be set in the Atom Transceiver Box to allow it to switch between the two regions when the listener crosses the Transceiver. To do so:
- Select the Transceiver box
- In the Details panel, select the indoor Atom 3D Region as the Forward Region
- And select the outdoor region as the Rear Region
- Finally, select the actor containing the AtomListener
If the listener enters the Atom Transceiver Box and goes forward, the Forward Region will be set as the listener’s region. On the contrary, If the listener goes backwards, the “Rear Region” will be used instead. Note that the listener’s initial region must be set when the game starts. The Set Listener Region node can be used in the Blueprint for this purpose.
Setting attenuation, crossfade and pan
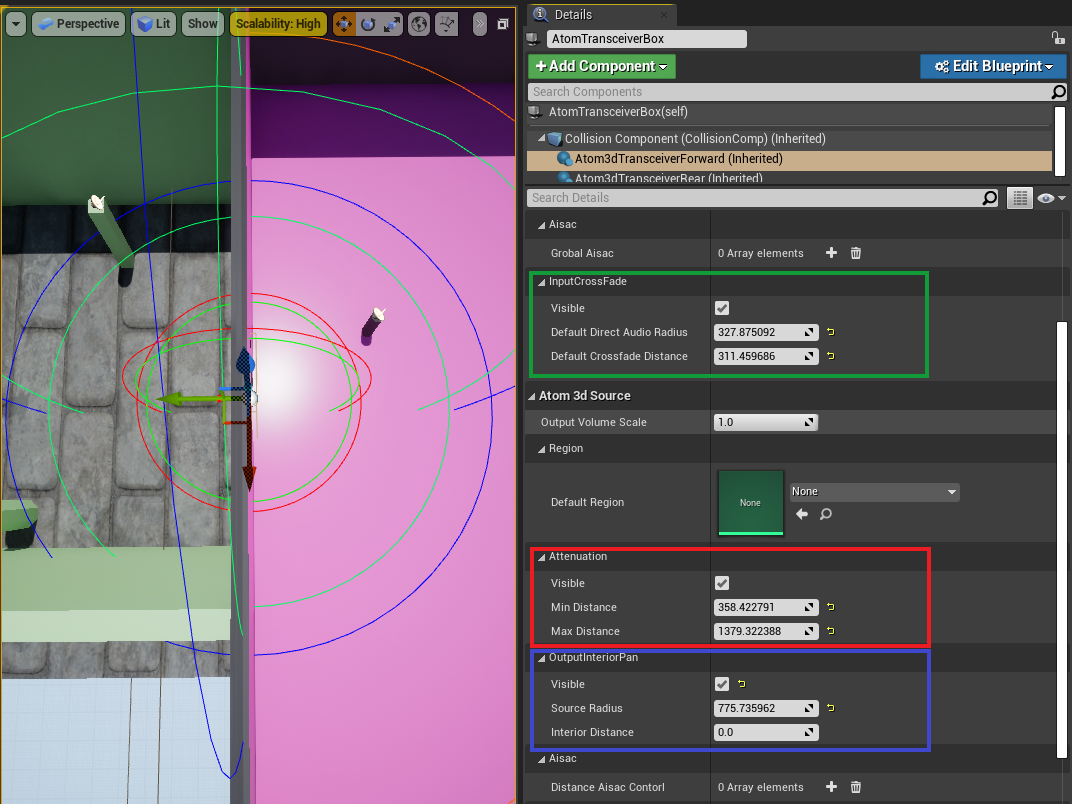
Finally, for the 3D sounds to be heard accurately through the 3D Transceiver, Attenuation Distance, Input Crossfade and Output Interior Pan (and potential AISAC controls) must be set separately for each region.
- Select the Atom Transceiver Box
- In the Details panel, two Atom 3D Transceiver Components are visible
- For both (Atom3DTransceiverForward and Atom3DTransceiverRear), set the properties related to the Attenuation Distance, Input Crossfade and Output Interior Pan
- Tick the Visible box to display the relevant sphere
It is now possible to change the way sounds on the other side of the Transceiver are attenuated, depending on the materials used or the size of the room, thus improving the sense of immersion.