


Integrating ADX2 with Unity – Part 1
Using the CRIWARE Unity plug-in, it is very easy to integrate ADX2 with your Unity game.
In this tutorial, we will learn how to install the CRIWARE plug-in, while upcoming tutorials will show how to actually use the different CRIWARE components.
- First, open your Unity project.
- Go to the [Assets] menu and select [Import Package].
- Click on the [Custom Package…] menu command.

- Browse to the CRIWARE plug-in package file located in the [CRIWARE\SDK\unity\plugin] folder.

- Select the package file and click on the [Open] button.
- The [Import Unity Package] window appears. Simply click on the [Import] button.

- The [CRI] menu appears in the Unity menu bar.

- Now we can use the CRIWARE components!
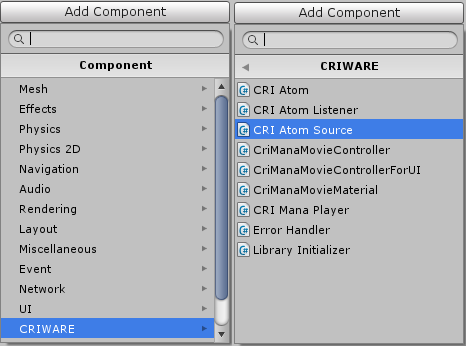
- The components in the [CRI Atom] group are related to sound playback (ADX2).
- The components in the [CRI Mana] group are related to video playback (Sofdec2).
- The [CRIWARE Library Initializer] component is used to configure CRIWARE.
- The [CRIWARE Error Handler] component enables the notification of the warnings and errors in Unity.
The components related to the sound system in the [CRI Atom] group are: CRI Atom, CRI Atom Source and CRI Atom Listener.
- The [CRI Atom] component controls the whole sound system.
It will be created automatically when adding your first [CRI Atom Source] to your project. - A [CRI Atom source] component is an audio trigger that you can add to any Unity game object.
- Finally, the [CRI Atom Listener] is used in conjunction with the [CRI Atom Source] components for 3D audio positioning.
We are all set for now and next time we will see how to add our ADX2 cues to Unity!